
Polaris VRX iQ+ Control Box Wall Mount
Obliczymy ostateczną cenę na podstawie wybranego pliku. Sprawdzisz ją i zaakceptujesz przed płatnością.
Wstępna wycena dla PETG
2,12 € – 2,59 € netto (bez VAT)
Dla pliku: ControlBoxWallMount_v1_0.bgcode
To wstępna wycena jednego pliku. Dokładną cenę poznasz przed zamówieniem.
Plik i założenia wyceny
Plik użyty do wyceny
Średnia wycena orientacyjna: 2,36 € netto (środek widełek).
- Masa podana przez autora
- 44 g
- Czas druku podany przez autora
- 1,8 godz.
- Materiał u źródła
- PET
- Materiał wyceny
- PETG
- Drukarka wyceny
- Bambu Lab P1S - 0.4 nozzle
- Proces wyceny
- 0.20mm Standard
Orientacyjna wycena wyłącznie wybranego pliku, oparta na masie i czasie druku podanych przez autora. Warianty plików nie są sumowane. Ostateczna cena zostanie obliczona po analizie pliku.
Zapisane na tym urządzeniu.

A wall mount for the Polaris VRX iQ+ Robotic Pool Cleaner.
- Ocena
- 5 / 5
- Polubienia
- 2
- Pobrania
- 43
- Wydruki
- 1
- Wyświetlenia
- 174
- Oceny
- 1
Aktualizacja u źródła:
Informacje o modelu
- Źródło
- Printables
- Kategoria
- Outdoor & Garden
- Licencja
- Creative Commons — Attribution — Noncommercial
Motivation
I recently purchased a Polaris VRX iQ+ Robotic Pool Cleaner. It comes with a large control box that has no mounting screw holes on the back and can only mount to the provided non‑detachable caddy. We do not use the caddy and tend to keep the vacuum in the pool. I contacted Polaris to inquire if they sold a wall mount. The following was their response:
“Regretfully, there is no way to mount the control box, and we are unable to give you a wall mount. We are unable to contact our engineering team to request a design because they are exclusively working on goods that are scheduled for release.”
So, basically, they had no @#$%’s to give.
Solution
I reverse‑engineered their ridiculous caddy mount and created my own wall mount to achieve the following objectives:
Securely mount the control box to the wall
Pry slots for removing the control box
Minimize filament use (pictures were taken before I made the cutout in the bottom part)
Fully parametric so that the screw holes can be modeled for any screws
Customization
Please let me know if you need different sized screw holes. Here are the parameters of the baseline design:
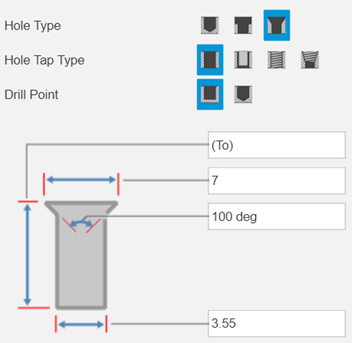
I designed and prototyped on a Prusa MK4.
Printing
See the attached .3mf for my settings including orientation, supports, and infill modifiers. I printed in Prusament Clear PETG. The top must be printed as oriented or the tabs will snap off at the layer lines (don’t bother trying…trust me!). Supports are required for the tabs on the top and the hook geometry on the bottom. The infill modifiers for those same areas force 100% integrated perimeters using concentric infill. Do not change this to 100% perimeters as those will not integrate with the rest of the print resulting in weak points.
Installation
I provided a mounting template (.dxf and .pdf) for screw placement. Laser cut or print (2D or 3D) at 1:1 and double‑check the geometry with the printed parts before drilling.
Similar to the Polaris caddy mount, the control box requires a little force to attach to the mount. This is by (derivative) design. You may need to rock the control box side‑to‑side a little as you snap it in.
Uninstallation
Also similar to the Polaris caddy mount, the control box detaches with a little force. I could have designed the tabs to be weaker for easier removable but wanted to optimize more for a secure mount with 3D printing considerations in mind. To account for this, there are pry slots where a flathead screwdriver can be inserted to help get one side out while pulling the other side away from the wall.
Questions
Please let me know if you have any questions (Messenger | Printables.com).
Shameless Plug
If this model helped you solve a problem, save some time, or in any way made your life a little easier then please consider clicking the Like button and posting your Makes! If it fell short after clicking on the title of the model, please let me know (Messenger | Printables.com). Either way, Thank you!