
1 / 1
Ender 3 V2 Neo linear rail alignment bracket
Zamów wydruk tego modelu
Obliczymy ostateczną cenę na podstawie wybranego pliku. Sprawdzisz ją i zaakceptujesz przed płatnością.
Zapisane na tym urządzeniu.

Since you can't use T-nuts on an Ender 3 V2 Neo to install a lineair rail it's required to drill the X-axis profile
- Ocena
- 0 / 5
- Polubienia
- 23
- Pobrania
- 70
- Wydruki
- 0
- Wyświetlenia
- 790
- Oceny
- 0
Aktualizacja u źródła:
Informacje o modelu
- Źródło
- Printables
- Kategoria
- Creality Parts & Upgrades
- Licencja
- Creative Commons — Attribution
SzczegółyPliki (1)Wydruki i komentarze (Wydruki: 0) (Komentarze: 1)Remiksy (0)Kolekcje (26)Powiązane
Since you can't use T-nuts on an Ender 3 V2 Neo to install a lineair rail it's required to drill the X-axis profile
This bracket centres the linear rail on the X-axis so it can be drilled correctly.
Required tools:
- hand drill
- 3.5mm drill bit
- 2.5mm drill bit
- M3 tap
- Tap wrench (or drill if you're careful)
- Clamps
- Alignment brackets
Steps:
- Before removing the X-axis gantry make a mark on both sides of the aluminium profile where the plastic covers are. This will allow you to centre your linear rail correctly in X direction and make sure you don't interfere with the plastic covers
- Remove the X-axis gantry
- Slide the alignment brackets over the aluminium profile. I used 3 so the linear rail is supported on the sides and in the middle
- Position the linear between the brackets and centre the rail between the marks you made in step 1
- Clamp the rail down on the aluminium profile

- While the linear rail is clamped to the aluminium extrusion use a 3.5mm drill bit to spot drill the holes you want to use. The drill bit is exactly the same size as the holes in the linear rail so your drill will be perfectly centred. Make sure you don't drill too deep, you just need a small dimple on the surface of the aluminium.
- Once all the holes are spot drilled remove the linear rail.
- Use the 2.5mm drill bit to drill the holes in the aluminium extrusion
- Use a tap wrench to make M3 thread. You can also use your drill but be careful you don't go too deep and reverse on time. Use the slowest setting if you use a drill
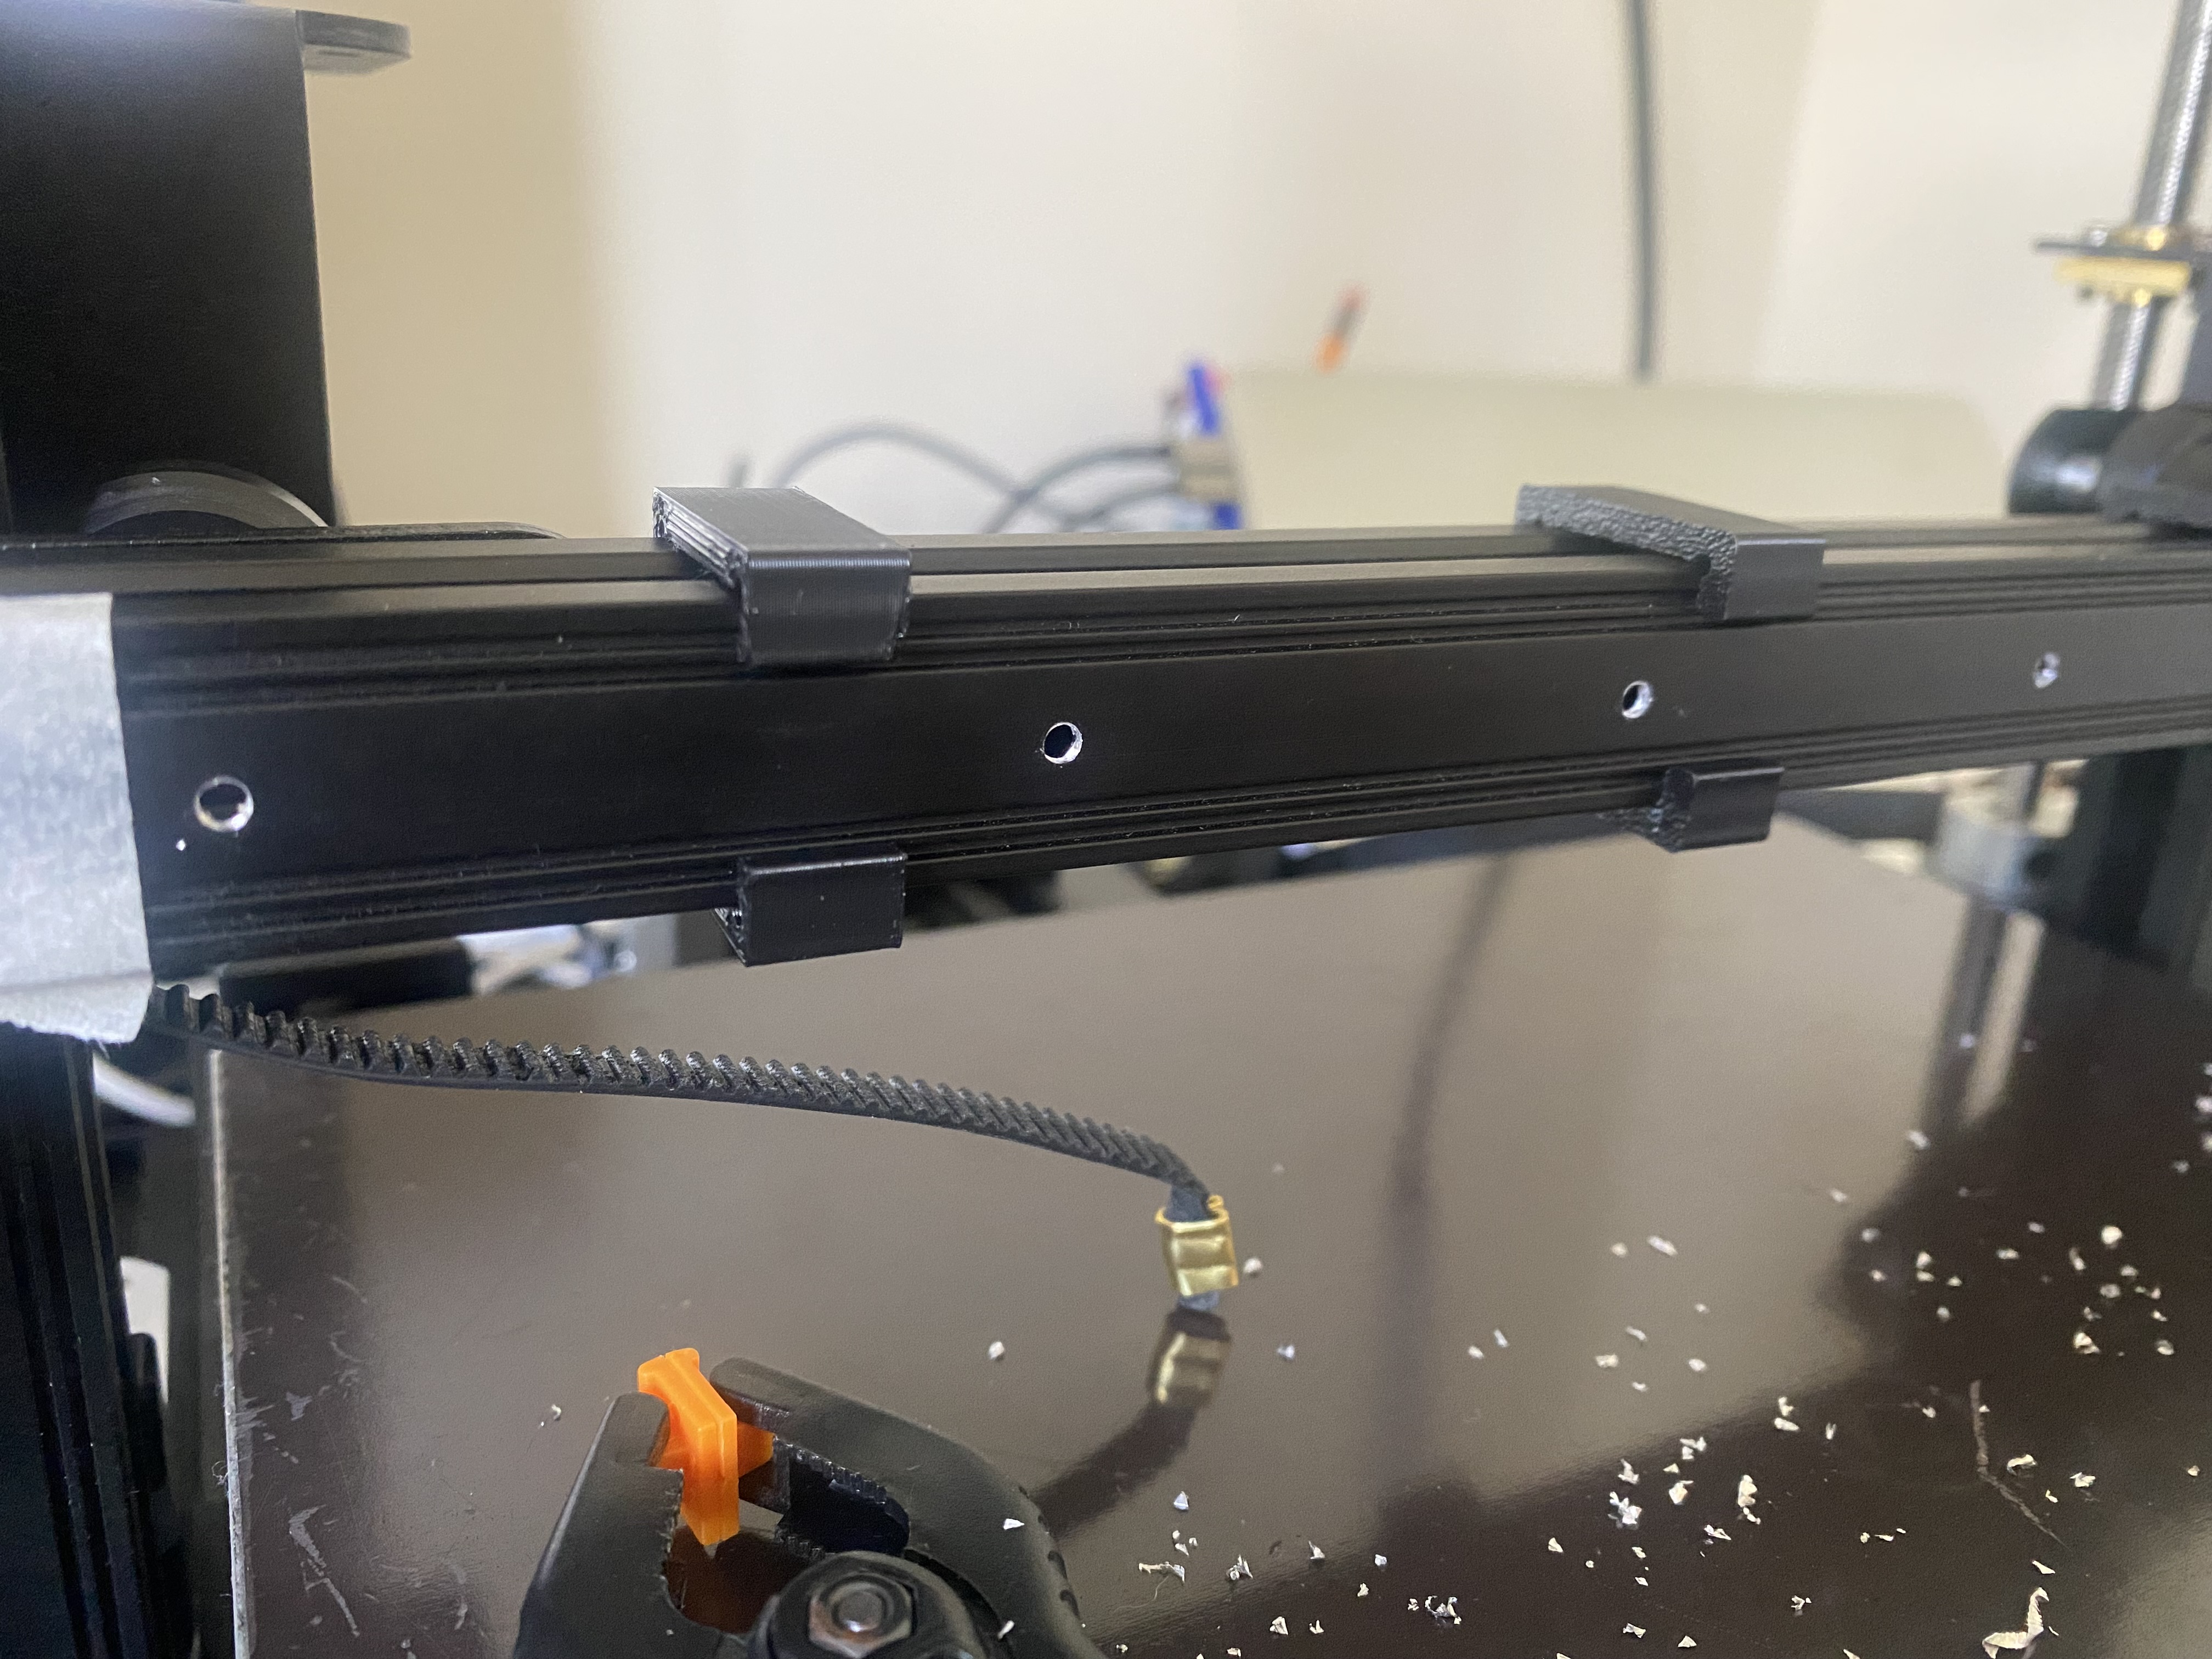
- Put the rail back on the aluminium extrusion and insert the bolts. Don't tighten them yet
- Make sure your linear rail is centred on the aluminium extrusion and tighten the bolts on the outsides of the rail. Don't tighten them too hard, the aluminium is quite thin and you could strip the thread.
- Tighten the remaining bolts from outside to inside
- You can visually verify if your rail is installed straight by looking to the grooves on the aluminium profile or you can measure with callipers if you have those available.
- install your X-axis gantry back on the machine.