
MODULAR ANT FARM/FORMICARIUM !UPDATE!
Obliczymy ostateczną cenę na podstawie wybranego pliku. Sprawdzisz ją i zaakceptujesz przed płatnością.
Zapisane na tym urządzeniu.

An easy-to-print modular ant farm/formicarium that can be expanded to house a growing colony. WITH IN-DEPTH INSTRUCTIONS
- Ocena
- 0 / 5
- Polubienia
- 25
- Pobrania
- 102
- Wydruki
- 1
- Wyświetlenia
- 1612
- Oceny
- 0
Aktualizacja u źródła:
Informacje o modelu
- Źródło
- Printables
- Kategoria
- Pets
- Licencja
- Creative Commons — Attribution — Noncommercial
Step 1: Print the files

You need 4 of part 4 and 1 of the water tower. If you are starting with one module, you need 3 plugs and 1 connector. (or no connector if you use vinyl tubing to connect to the outworld; if you are, use 10mm OD tubing. You will need connectors to expand the nest though) Tip: You can wrap some tape around the connectors and plugs to make them fit more snugly if they are loose.
Step 2: Clean up the parts

If you used the print settings, you will need to cut off the brim and will likely have to remove stringing and sand any faults in the print. (for the mold pattern and mold shell, you will need to have extra clean parts)
Step 3: Make the mold

To make the mold, simply place the mold pattern centered in the mold shell. I would also recommend putting a small amount of silicone glue on the bottom of the mold pattern.
Materials in this step:
Silicone glue
https://www.amazon.com/dp/B07SW927JM?ref=ppx_yo2ov_dt_b_fed_asin_title&th=1
Step 4: Pour the silicone

Follow the instructions for the silicone, mix equal parts A and B, and then pour. (I found that the volume of the mold was almost exactly 1 cup, so if you mix ½ cup A and ½ Cup B, you should have just the right amount of silicone)
Materials in this step:
BBDINO Silicone
https://www.amazon.com/dp/B09BFGQ37Q?ref=ppx_yo2ov_dt_b_fed_asin_title
Step 5: Finish the water tower

While the silicone is drying, complete the water tower by cutting a small square of window screen mesh and melting it to the rim of the water tower with a soldering iron or something that can melt the plastic in a controlled way.
Materials in this step: https://www.amazon.com/MSJSZP-Stainless-Screen-Material-31%C3%97100cm%EF%BC%89/dp/B0CRV8WBHZ/ref=sr_1_1_sspa?crid=X4VRSG1XXVJP&dib=eyJ2IjoiMSJ9.-5u-qyTHDA6UvClPSmjK8QAhAuym8ddLCtDCkd4Gn5CWys61_ZBqXeZJhzLB0YZZvyMOuLlzleEYmhgCfjJblFajn37a2r0QdB67LOjqWtbL_JW4WnBOMug0_PlZxy8AHQiVsruVhbCHN-q6bQbg6ixx0PNXvvuEC1mwOV6ea2o4QKCEVroPiI67kXb_7wHX2fbZzdsKcISFYfEObhJxD89M9L9LxSYEUTpckoFEmFp-iLxErUl0WWSx2mCD7MyUToyLH_m4wLtOq_4GW09N0zOQHKIreRdSwE9yDNH9l_s.rqF91wKQIlEP2l9sWr_OjYfzdPoBOshYUh4jUL6-hLg&dib_tag=se&keywords=120%2Bmetal%2Bwindow%2Bscreen%2Bmesh&qid=1729640672&s=industrial&sprefix=120%2Bmetal%2Bwindow%2Bscreen%2Bmesh%2Cindustrial%2C120&sr=1-1-spons&sp_csd=d2lkZ2V0TmFtZT1zcF9hdGY&th=1 (this is a different mesh then what I used, but it is the required mesh if you want this to work. The mesh in the pictures is a placeholder)
Step 6: Trim off the excess mesh

Trim off the excess window screen mesh using a pair of scissors. Try to get as close to the edge as possible.
Step 7: Remove the silicone

This step can be difficult, but it will be easier if you use the popsicle sticks provided in the silicone kit. (Warning: using the glue in step three is optional and may make it harder to remove the silicone, but it removes some of the danger of the mold shifting.)
Step 8: Finish the mold

Do this by removing any flashing/defects from the mold. (The silicone kit provided also includes a small knife to help with this process; you can also use a small craft knife)
Step 9: Prep for pouring

Place the water tower in the provided space and line the inlet up with the small divot on the side of the mold. (This will ensure that no leakage occurs through the inlet)
Step 10: Pour

Pour the ultracal into the mold after following the mixing instructions. To help with bubbles, use a toothpick as you pour to push bubbles out of any small spaces (if the base is lumpy, don't worry, just scrape off the high spots in the next step)
Materials in this step:
https://www.amazon.com/dp/B01EK5BRPW?ref=ppx_yo2ov_dt_b_fed_asin_title
Step 11: Remove the nest from the mold

Carefully take the nest out of the mold. If there are any defects, fix them now. (Tip: The small corner knife that comes with the silicone kit works well to remove defects)
Step 12: Place inside the 4-way-module
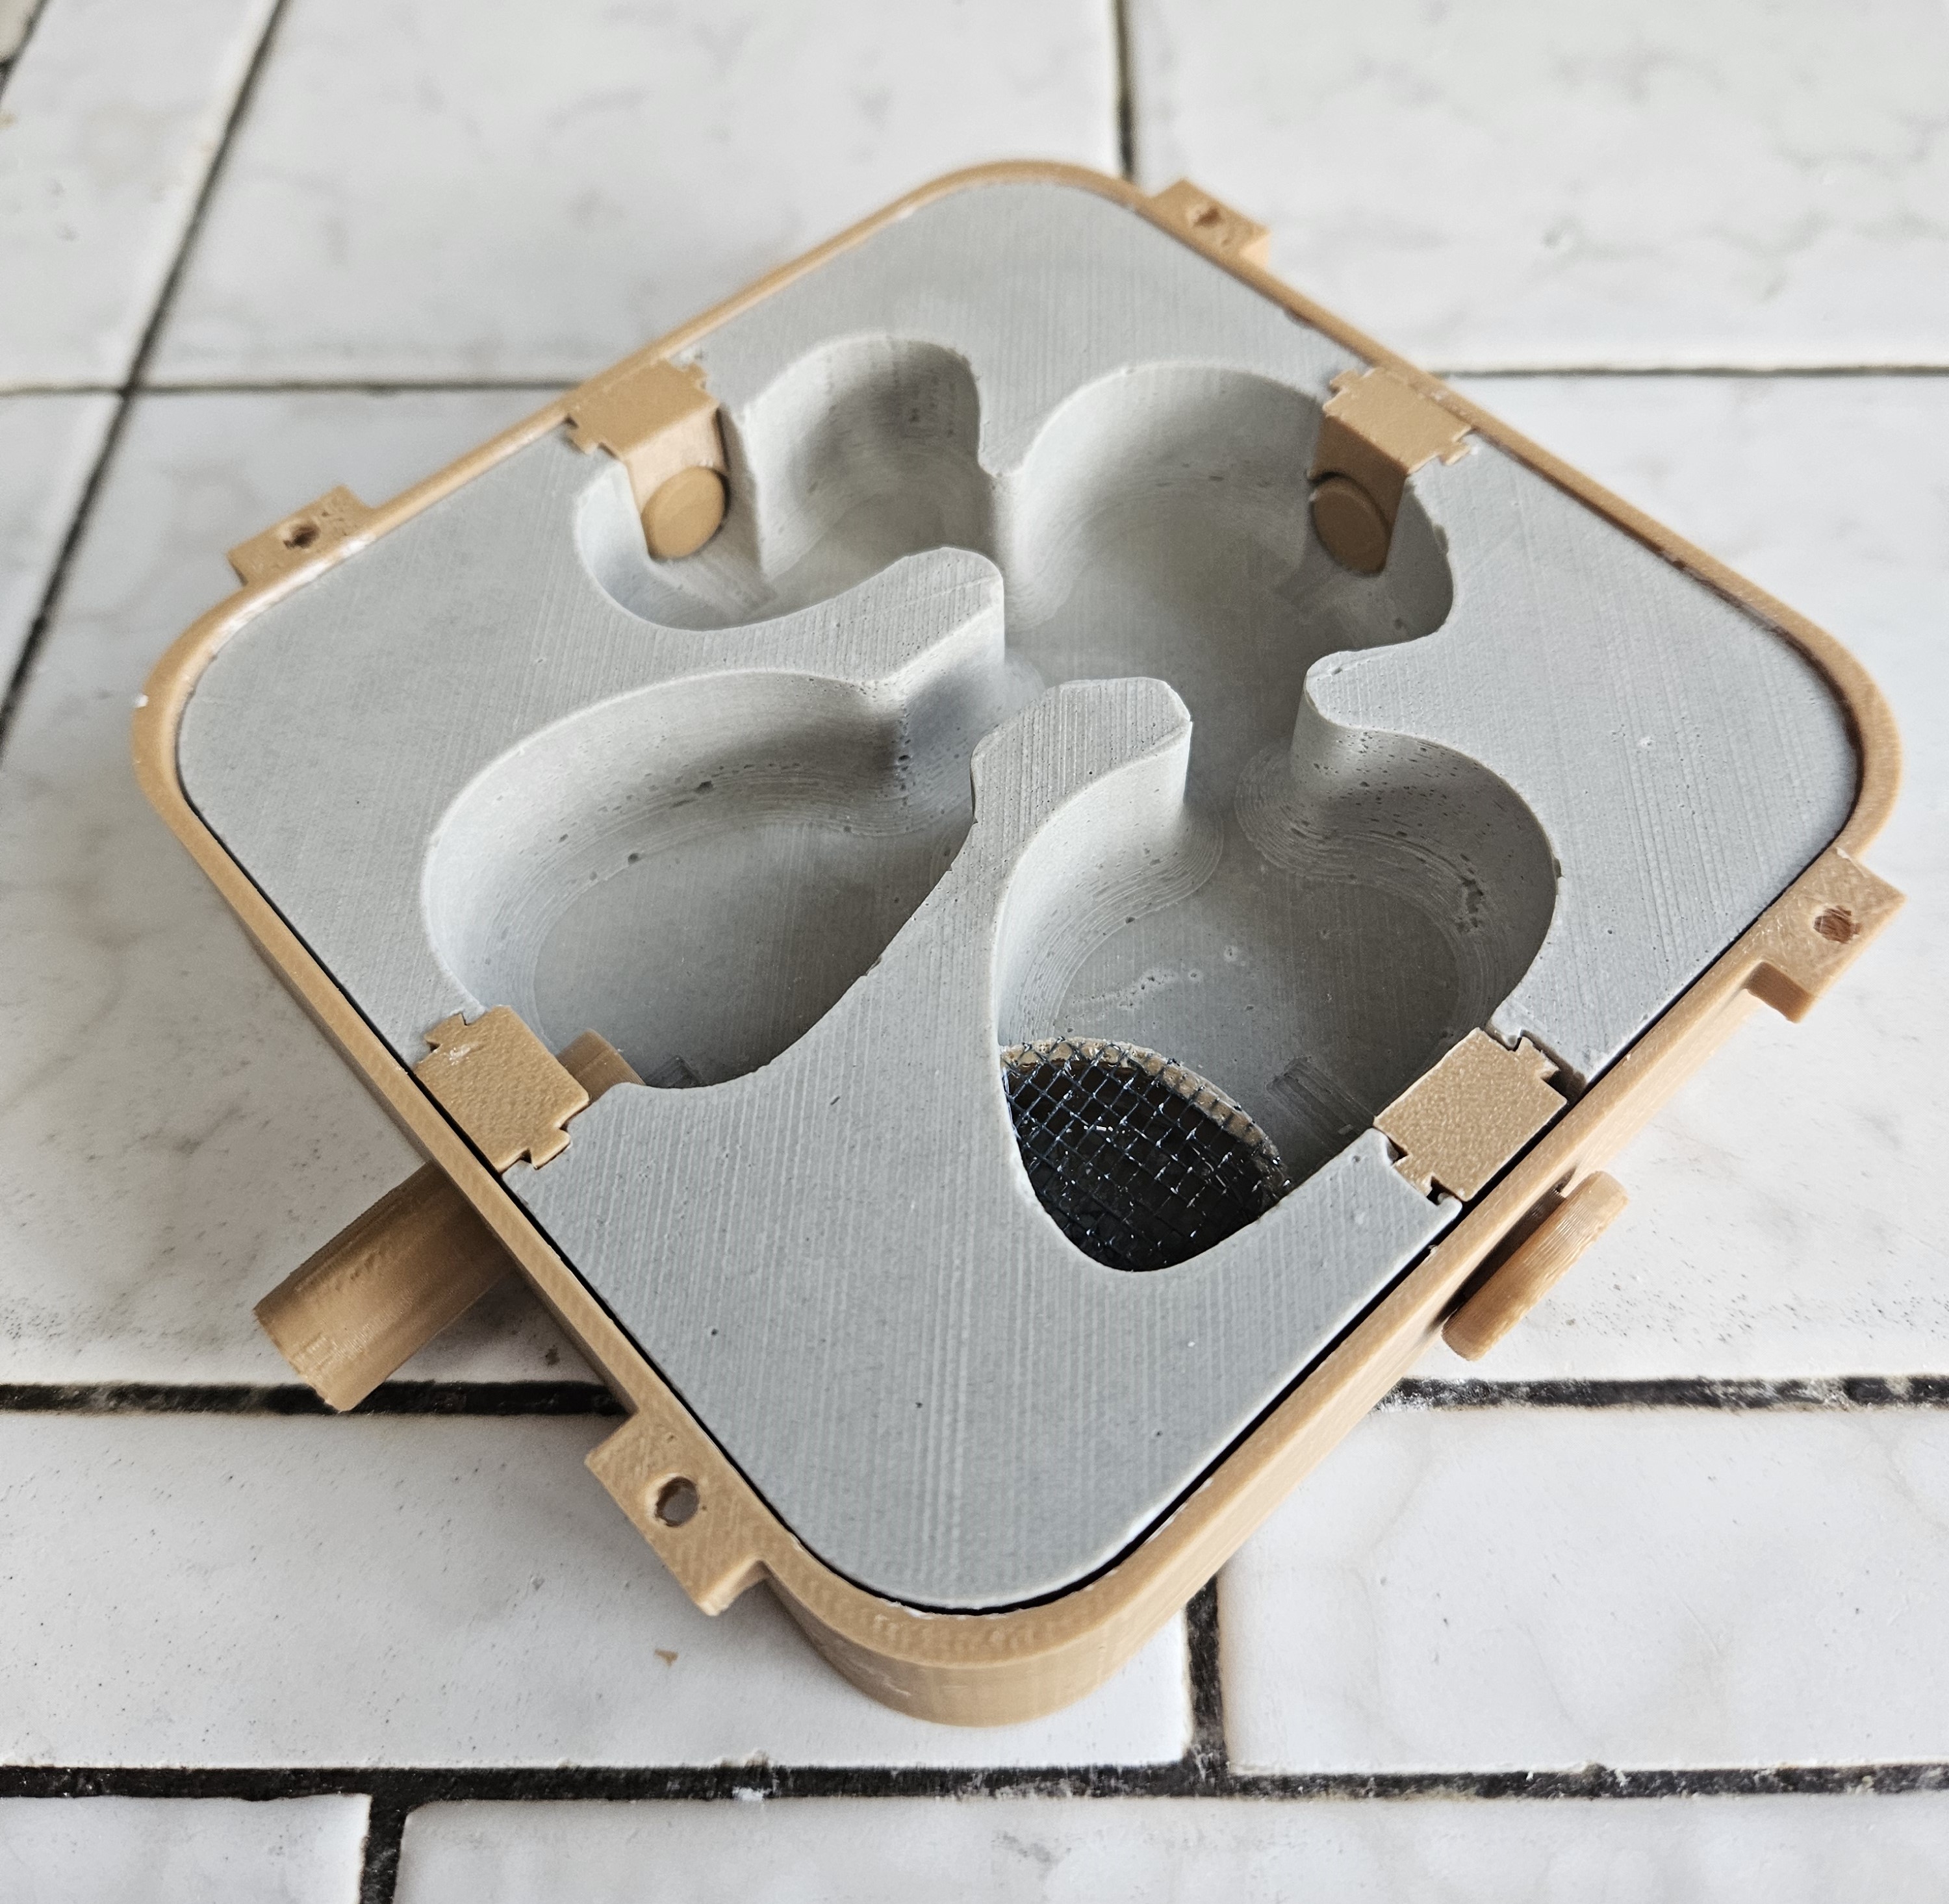
Slowly place the nest into the module shell, making sure to line up the water inlet with the hole in the shell. You can now add the other parts.
Step 13: Finish the lid

Finish the lid by cutting a square of acrylic and drilling holes to fit, then use 4 m3 bolts to fasten the acrylic between the shell and the lid bracket.
Materials used in this step:
acrylic: https://www.amazon.com/dp/B0BYQX3X4Y?ref=ppx_yo2ov_dt_b_fed_asin_title
Repeat steps for all other modules
Print settings:
Nozzle temp: 210c
Bed temp: 55c
Brim: yes
Supports: yes
Filament: Overture brown PLA
Printer: Ender 3 (Upgraded)
Any questions, suggestions, or issues, DM me on discord @GTM37