Modular 3D Printable Printer Enclosure
Obliczymy ostateczną cenę na podstawie wybranego pliku. Sprawdzisz ją i zaakceptujesz przed płatnością.
Zapisane na tym urządzeniu.

A modular design for making a 100% 3D printable enclosure.
- Ocena
- 0 / 5
- Polubienia
- 24
- Pobrania
- 34
- Wydruki
- 0
- Wyświetlenia
- 860
- Oceny
- 0
Aktualizacja u źródła:
Informacje o modelu
- Źródło
- Printables
- Kategoria
- Accessories
- Licencja
- Creative Commons — Attribution
Introduction
This design uses many kilograms of filament, has hundreds of parts, and takes hundreds of print hours for a normal sized enclosure. Do not print this if you are looking for a cheap or quick to build enclosure.
This modular enclosure design is fully 3D printable. With all required individual parts sized at ≤150mm and optional angled beams 182mm long, this project is printable on printers as small as the Prusa Mini. The included enclosure design will fit a Prusa i3 MK3S+, but the design can be easily changed to build smaller or larger enclosures. Spacing between connectors is 150mm for easy spacing on LED strips with 60LEDs/m or 100LEDs/m, although other LED spacings should work as well.
I made my enclosure almost entirely out of PETG, utilizing transparent PETG filament for the connectors and panels and TPE for the enclosure feet. I would not recommend making any of the load-bearing pieces out of PLA, as the heat inside the enclosure could cause the parts to creep over time. If I had to make a larger enclosure, I would try making the beams out of ASA so that the enclosure was more rigid.
For my LEDs, I used 600 WS2812 LEDs, an old desktop PSU to power them, and a microcontroller to control them. After realizing I had enough LEDs installed to actively heat the enclosure, I further installed a temperature sensor so I could set my own enclosure temperatures when needed.
This download includes .f3d, .step, .stl, and .3mf files so you can more easily 3D print or change the design to suit your needs better. Make your own remixes of this and show off your build in the comments!
If you sufficiently enjoyed and made use of the free 3D models and files I have provided, please consider buying me a coffee if you are able to: https://buy.stripe.com/bIY4i488N84rcCY3cc
Notable Features
- Modular design. Print and assemble as many parts as required to make as large or small of an enclosure as you like. Print more parts later and make the enclosure bigger if you upgrade to a larger printer.
- Open-source. Take and modify the files as you need if you want to create your own doors, panels, or whatever else you can think of to make this design fit your needs.
- Easy to print. Parts used for this design are almost entirely <150mm in size, so you should not have to worry about bed adhesion at the cooler edges of your build plate/internal warping.
- Aesthetic. Transparent filament may be used on the panels and connectors, and with the addition of LEDs, it can look pretty cool.
Notable Printing Considerations
- The enclosure is very large and will require more than 6kg of filament. It is recommended to use nozzles that are capable of flowing a high amount of volume.
- There are 493 parts to print for a standard Prusa i3 MK3S+ sized enclosure. This project can take over 400 hours of print time and many hours of assembly.
- Ensure that the connector parts are all printed with smaller layer heights, otherwise the screw profiles may be too rough and tightening the screws may not be very fun. If you are having difficult tightening the plastic screws, apply a lubricant such as white lithium grease.
- On my panels, I used a 1.0mm nozzle to get more visible perimeter lines and clearer panels, as well as speed up the printing process.
- It is recommended to print the beams out of a strong, stiff material such as ASA or ABS. I used PETG for my beams, but they would probably be too flexible for any larger of an enclosure.
- It is recommended to not print the beams or connector parts out of PLA, as they may heat creep being load-bearing parts.
- It is recommended to print the panels out of PETG so that the attachment clips are flexible enough to not snap very easily. However, PLA should be acceptable for the panels provided you are careful not to snap the attachment clips off and don't expect to uninstall the panels.
- I printed my feet out of TPE to prevent vibration between the enclosure and the surface it is sitting on. If you wish to print feet out of a non-flexible material, you will have to use a different design than I used or break some of the panel attachment clips off.
- You can drastically decrease print times with faster printer acceleration and speeds than provided for stock i3MK3S+ with normal 0.4mm nozzle and 1.0mm CHT nozzle if your printer is capable of doing so.
- You can drastically change the appearance of the panels by changing the infill patterns in your slicer's settings. Hilbert curve gives an interesting look at the expense of print time. Below is a picture of two layers of Hilbert curve(left) vs two layers of rectilinear at 90 degree angles from each other(right) giving a more frosted glass type look.

- Different front doors may be a worthwhile design improvement
- Different feet may be a worthwhile design improvement
Parts List for Prusa i3 MK3S+ Sized Enclosure
| Part Name | Qty | Print Hours | Mass [grams] | Material |
|---|---|---|---|---|
| 8 Beam Connector Screw | 74 | 0.39 | 4.53 | PETG |
| 8 Beam Connector Side 1 | 74 | 0.77 | 10.42 | PETG |
| 8 Beam Connector Side 2 | 74 | 0.74 | 9.83 | PETG |
| Short Beam 45 | 8 | 0.26 | 2.65 | PETG/ASA |
| 100mm Beam Lightened | 98 | 0.92 | 7.32 | PETG/ASA |
| 162.13mm Beam Lightened | 35 | 1.42 | 10.76 | PETG/ASA |
| 100mm Beam Corner Lightened | 28 | 1.09 | 12.48 | PETG/ASA |
| 50mm Foot (TPE) | 14 | 1.75 | 9.79 | TPE/TPU |
| Hinge Mount Front Door | 4 | 2.69 | 38.59 | PETG/ASA |
| Hinge Mount Top Door | 4 | 1.30 | 16.60 | PETG/ASA |
| Panel 150mm x 64mm x 1mm | 2 | 0.38 | 16.91 | PETG/PLA |
| Panel 150mm x 64mm x 1mm Hinge Mount Top Door Cut | 2 | 0.37 | 15.95 | PETG/PLA |
| Panel 150mm x 64mm x 1mm Hinge Mount Top Door Cut Flipped | 2 | 0.37 | 15.95 | PETG/PLA |
| Panel 150mm x 107.5mm x 1mm Front Door Cut | 1 | 0.57 | 24.74 | PETG/PLA |
| Panel 150mm x 107.5mm x 1mm Front Door Cut Flipped | 1 | 0.57 | 24.74 | PETG/PLA |
| Panel 150mm x 107.392mm x 1mm 45 Deg | 8 | 0.63 | 27.98 | PETG/PLA |
| Panel 150mm x 138mm x 1mm Corner Cut | 2 | 0.75 | 33.20 | PETG/PLA |
| Panel 150mm x 138mm x 1mm Corner Cut Flipped | 2 | 0.75 | 33.20 | PETG/PLA |
| Panel 150mm x 150mm x 1mm | 50 | 0.85 | 37.40 | PETG/PLA |
| Panel 150mm x 150mm x 1mm Corner Cut 1 | 2 | 1.03 | 44.76 | PETG/PLA |
| Panel 150mm x 150mm x 1mm Corner Cut Flipped | 2 | 1.03 | 44.75 | PETG/PLA |
| Top Left Door | 1 | 0.85 | 37.54 | PETG/PLA |
| Top Right Door | 1 | 0.85 | 37.54 | PETG/PLA |
| Front Door 1 | 1 | 1.2 | 52.53 | PETG/PLA |
| Front Door 2 | 1 | 1.22 | 53.43 | PETG/PLA |
| Front Door 3 | 1 | 1.18 | 50.89 | PETG/PLA |
| Front Door 4 | 1 | 1.18 | 51.81 | PETG/PLA |
| Part Name | Qty | Print Hours | Mass [grams] | Material |
| Total | 493 | 418.04 | 6,478.69 |
Dimensions - Connector Base Dimensions

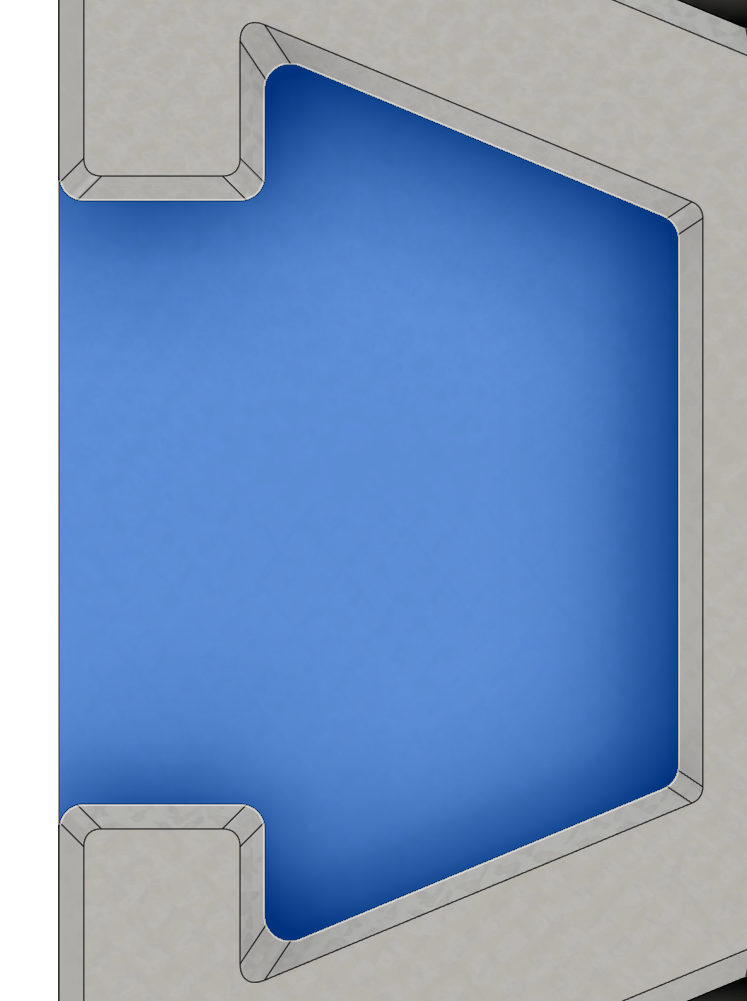
All corners are rounded with a 0.4mm fillet, and there is a small chamfer at the top of the connector to help guide the beam in during installation. The beam end has the same dimensions as the connector, but with a 0.1mm offset for a relatively firm fitment. The small fillets should help reduce ghosting issues you may have with your printer that might make such a small fitment difficult.