
FuseBox Build Guide - MK4S w/MMU3
Obliczymy ostateczną cenę na podstawie wybranego pliku. Sprawdzisz ją i zaakceptujesz przed płatnością.
Zapisane na tym urządzeniu.

A complete build guide featuring the MK4S, MMU3, Prusa Enclosure, Unoriginal Drybox, and Spool Autorewinder!
- Ocena
- 5 / 5
- Polubienia
- 327
- Pobrania
- 250
- Wydruki
- 9
- Wyświetlenia
- 8539
- Oceny
- 3
Aktualizacja u źródła:
Informacje o modelu
- Źródło
- Printables
- Kategoria
- Prusa Parts & Upgrades
- Licencja
- Creative Commons — Public Domain
Last Updated: 1/1/25
Hello all! I just spent the last few months building out my dream MK4S build, and I wanted to share my process so that others who wanted to make a similar build could have all the info they needed in one place. This build has what I consider the best Prusa MMU solution at the moment, which includes the Prusa Enclosure, Unoriginal Drybox, and the Spool Autorewinder. A collection of all the files used in this build, links to purchase all the parts required, and tips for the full assembly are contained in this guide.
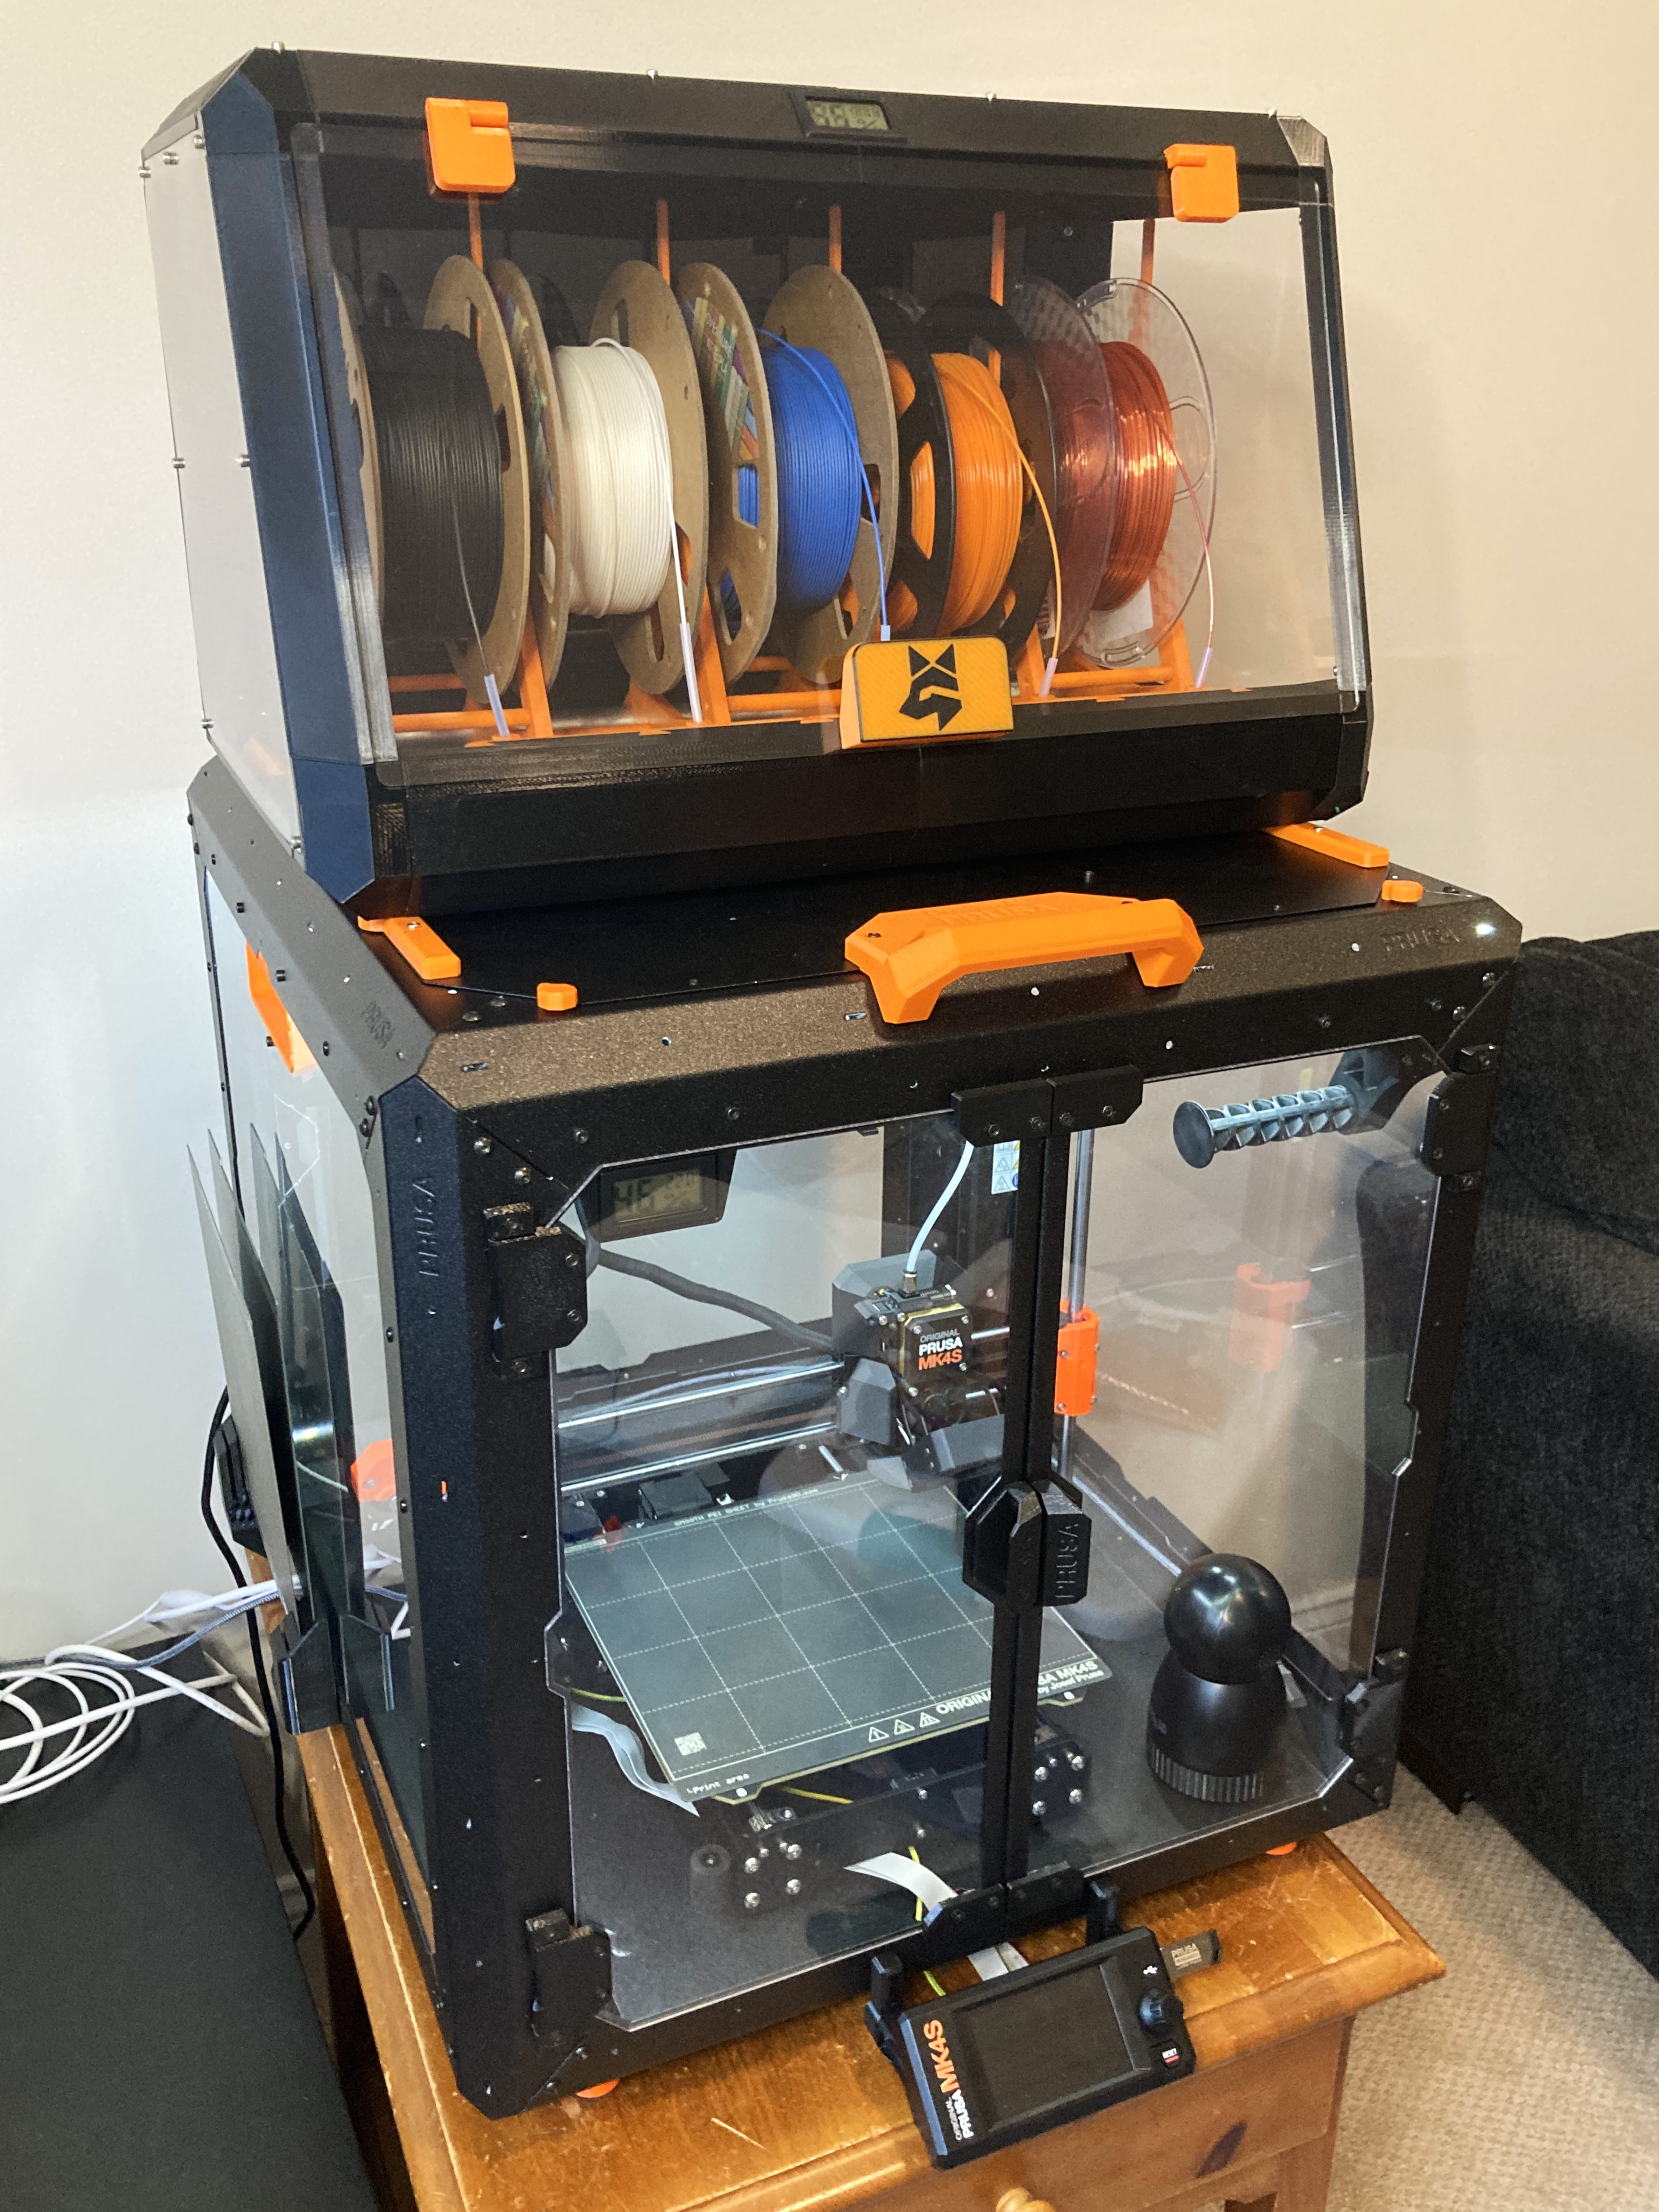
~Is this build right for you?~
- If you are new to 3D printing and just want a ready-to-go multi-color printer, you probably want a P1S from Bambu Labs. Just be aware that Bambu Labs printers produce significantly more waste for multicolor prints, and they won't be as modifiable.
- If you want the latest technology within the Prusa ecosystem, you’ll probably want to wait for a Prusa Core One once it becomes available in early 2025.
- If you already own a Prusa printer or enjoy the process of building out a machine yourself, this build may be for you! It is also the most proven MMU solution at the moment until we learn more about how the MMU3 will integrate with the Core One.
As someone that enjoys tinkering, this process was a lot of fun and the final product is sleek, incredibly user friendly, and infinitely customizable. All that said, this build is a significant amount of effort, so be aware of what you are getting yourself into. If you're ready to dive in, lets go over everything you will need!
Tools Required for the Build:
- Set of Allen wrenches (included in Prusa kits)
- Soldering iron for heat set inserts (required)
- PTFE Tube cutter (Recommended)
- Electrical tape (Optional, used for blocking light from LED strip)
- Set of spare M3 screws (Recommended)
- Most of the required screws will be the extras you receive as part of the Prusa build kits or come with your Blurolls order, but it's always handy to have extras lying around. There are many cheap kits on Amazon that will work just fine.
~STEP 1: Buying Parts from Prusa~
The MK4S Printer

Price at time of writing: $729 for the Kit, $999 Assembled
Any bedslinger printer from the MK3S+ onward will work for this build, but the MK4S is the latest and greatest. It's worth noting that while the Prusa Core One is definitely the future for printer technology, we don't yet know how the MMU3 will be integrated with it, so this build is the most proven MMU solution at the moment.
IMPORTANT NOTE for shipping the printer to the US: the US charges import duties on any order over $800, so you will save money on buying the kit if you place the printer in one order and all your extra accessories in another order. You will be paying shipping twice, but I found I still saved money in this way.
Original Prusa Enclosure

Link to buy the Prusa Enclosure
Price at time of writing: $349
While other enclosures can definitely give you the same print quality at a cheaper price, the Original Prusa Enclosure certainly gives the set up a premium build quality, and all the mounting points allow for creative mods to be built into it. This build can be done with a different enclosure, but you will need to print the standalone version of the Unoriginal Drybox and figure out how you will arrange everything yourself. In terms of add-ons for the Prusa Enclosure:
- The fire suppression system is only available in the EU, so it did not apply to me.
- The mechanical lock was not necessary for me but might make sense in a shared workspace environment.
- The PSU Cable Quick Release seems expensive for what it is. In my experience, if you install the hinged lid add-on to access the printer from above, the quick release isn’t necessary.
- The White LED strip is too expensive for what it is. This is because the LED strip and the Advanced Filtration system require the basic board add-on to draw power from the printer, which is additional $38. I opted to buy an LED strip from Amazon for $14 instead and it works great.
- I did not opt for the Advanced Filtration System. I only print in PLA / PETG, so instead I installed a Winix 5500-2 Air Purifier next to my printers and called it a day. If you plan to print in ABS / ASA or other more toxic materials, I encourage you do your own research into printer emissions and select a filtration system that keeps you safe.
MMU3

Price at time of writing: $299 without printed parts, $329 with printed parts.
The kit without printed parts comes with 400g of filament to print the parts yourself. I opted for the kit to save money. Printing out all the parts takes about 24 hours of total print time (at least 9 different print jobs) so an extra $30 for the printed parts isn’t a terrible deal if you want to save yourself the trouble.
Accessories
Texture Powder-coated Print Sheet – $39.99 – If you plan to do any printing with PETG (which you will be to make parts of this build) a textured sheet is almost a requirement. It solves a ton of adhesion issues, will prevent you from damaging your smooth sheet that comes with the printer, and also gives a much more professional surface finish in my opinion. Users online also recommend the Satin Powder-coated Print Sheet, so you can choose to go with that one instead. Having one of these two sheets in addition to the smooth sheet that comes with the printer is highly recommended.
Prusa Nextruder Silicone Sock – Set – $5.59 – Inexpensive and good to have backups for maintenance down the line.
Prusa Brass Nozzle Brush – $4.19 – Cheap and higher quality than other brass brushes I’ve used in the past, worth picking up a few of these for cleaning the nozzle between prints.
Extra Nozzles The MK4S kit will come with an 0.4 mm high flow brass nozzle, and the MMU3 will come with an 0.4 mm standard brass nozzle. Depending on your needs, it may be beneficial to pick up an extra nozzle in your order.
- If you want to print at a smaller or larger layer height, you can pick up the 0.25 mm nozzle or an 0.6 mm nozzle.
- If you want to print with abrasive materials (glow in the dark filaments, wood filaments, or anything else with additives) you can pick up an ObXidian nozzle. Note that these are expensive and not necessary for basic printing. I wouldn't suggest dropping the money on these yet if you are new to 3D printing.
- If you want to print with the MMU3 in multicolor, it is recommended to use a non-high flow nozzle to prevent excess waste. If you just want speed with a single material, high flow is the way to go. Think about what kind of projects you are planning to do and order the appropriate nozzles for your situation.
Buddy3D Camera – $39.99 – This is the current camera offering from Prusa. It is pretty bare-bones feature wise, only taking a static image every minute or so. Prusa states on their product listing that, “Remote position adjustment using integrated motors will be available in future firmware updates, along with the live stream feature.” At the time of writing before these updates are live, it is probably not worth the price. If you want to get a more feature rich camera, I have had a good experience using Miniton Beagle Cameras with my MK3S+. Feel free to look up other camera solutions as well.
~STEP 2: Building the (Un)original Drybox~
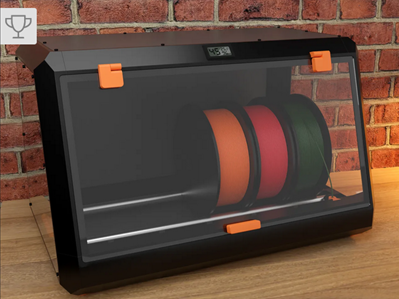
Link to the (Un)original Drybox Printables Page
The (Un)original Drybox is the main piece of equipment that is going to make the MMU experience way easier. Instead of mounting all the spool holders on the side of the enclosure like Prusa reccomends, they will sit in this drybox and be fed into the enclosure from above.
I built the Classic, Non-Heated (Un)original Prusa Drybox. I used this link to purchase the non-printed parts from Blurolls for $85. There is option to buy the kit with 3D printed parts included for $156 instead. If you want to print all the parts yourself, it will be about 2kg of PETG and several days of printing. Depending on how you value your time, it may be worth it to get the printed kit, with the caveat that you will need to reprint Beams A1 and A2 to be compatible with the auto-rewinder we will talk about next.
The full list of parts you will need to print for the version I built is:
- Beam A1 mod.stl and Beam A2 mod.stl (NOTE THAT THESE ARE NOT FROM THE UNORIGINAL DRY BOX PAGE, THEY ARE FROM THE AUTO-REWINDER PAGE)
- Beam A3 – x1
- Beam A4 – x1
- Beam B - x2
- Beam C1.stl – x1 (The regular version, not the 20mm or RB versions)
- Beam C2.stl – x1 (The regular version, not the 20mm or RB versions)
- Beam D – x2
- Beam E1 – x1
- Beam E2 – x1
- Beam F1 – x 1 (The basic version, not the standalone version)
- Beam F2 – x1 (The basic version, not the standalone version)
- Beam G1 Humidity – x1
- Beam G2 Humidity – x1
- Corner A x4
- Corner B1 x1
- Corner B2 x1
- Corner C1 x1
- Corner C2 x1
- Door Handle x1 (Can be swapped with my Unoriginal Drybox Logo Door Handle)
- Hinge Connect x2
- Hinge Left
- Hinge Right
- Passthrough Cover
- Silica Gel Base x2
- Silica Gel Cover x2
Please note that you will need a soldering iron or some other way to install heat set inserts!
For all the corners, I recommend you use the screw pulling technique to insert all the nuts you need to before you assemble the whole drybox: it will save lots of headaches in the later steps.
Finally, as a side note: save yourself from my embarrassment of printing Beams F1 and F2 in the wrong orientation 3 times like I did. Please print them in this orientation!

~STEP 3: Building the Autorewinder~
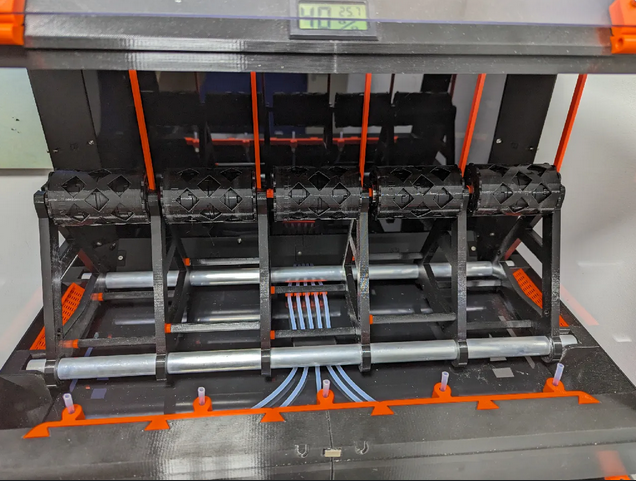
Link to the Autorewinder Printables Page
This is the true star of this build. The Autorewinder is a (nearly) fully 3D printed solution that removes the buffer system from the MMU. It is powered by mechanical springs that, once tension in the filament is released during unloading, will return to their original shape and wind the filament back into the roll. This drastically decreases the space the MMU takes up and allows us to load filament without inserting into the buffer every time. It makes the MMU way, way, WAY more user friendly.
The only hardware you will need is a set of bearings, which are included in your Bluerolls order if you order through them.
The files you need to print are:
- AXE DRY BOX.stl – x10
- Crossbean v5 (for 18mm rod).stl – x6
- EASY_AXLE_V3.stl x5
- axle-easy-clip.stl x5
- IntegratedRewinder_v5.6_75.stl - x5
- DRY BOX 5 SPOOL ADAPTER v3.stl
- PTFE connector v2.stl
- Beam A1 mod and Beam A2 mod if you hadn't already printed them as part of the Unoriginal Drybox build
Because no one made a real tutorial for how to assemble the autorewinder, here is mine:
Lay out all the pieces you will need for a single spool. These will be all the parts from one job of the IntegratedRewinder_v5.6_75.stl, one EASY_AXLE_V3, and two bearings. (Not pictured: one axle-easy-clip).

Insert the bearings into the drum and the cap pieces.

There will be 4 pairs of springs that will fit together, one of which has a special connector on the top for the axle at the end. Pair these springs together as shown.

Insert the gear-toothed spring into the bottom of the drum.

Stack the 4 spring pairs on top of one another.
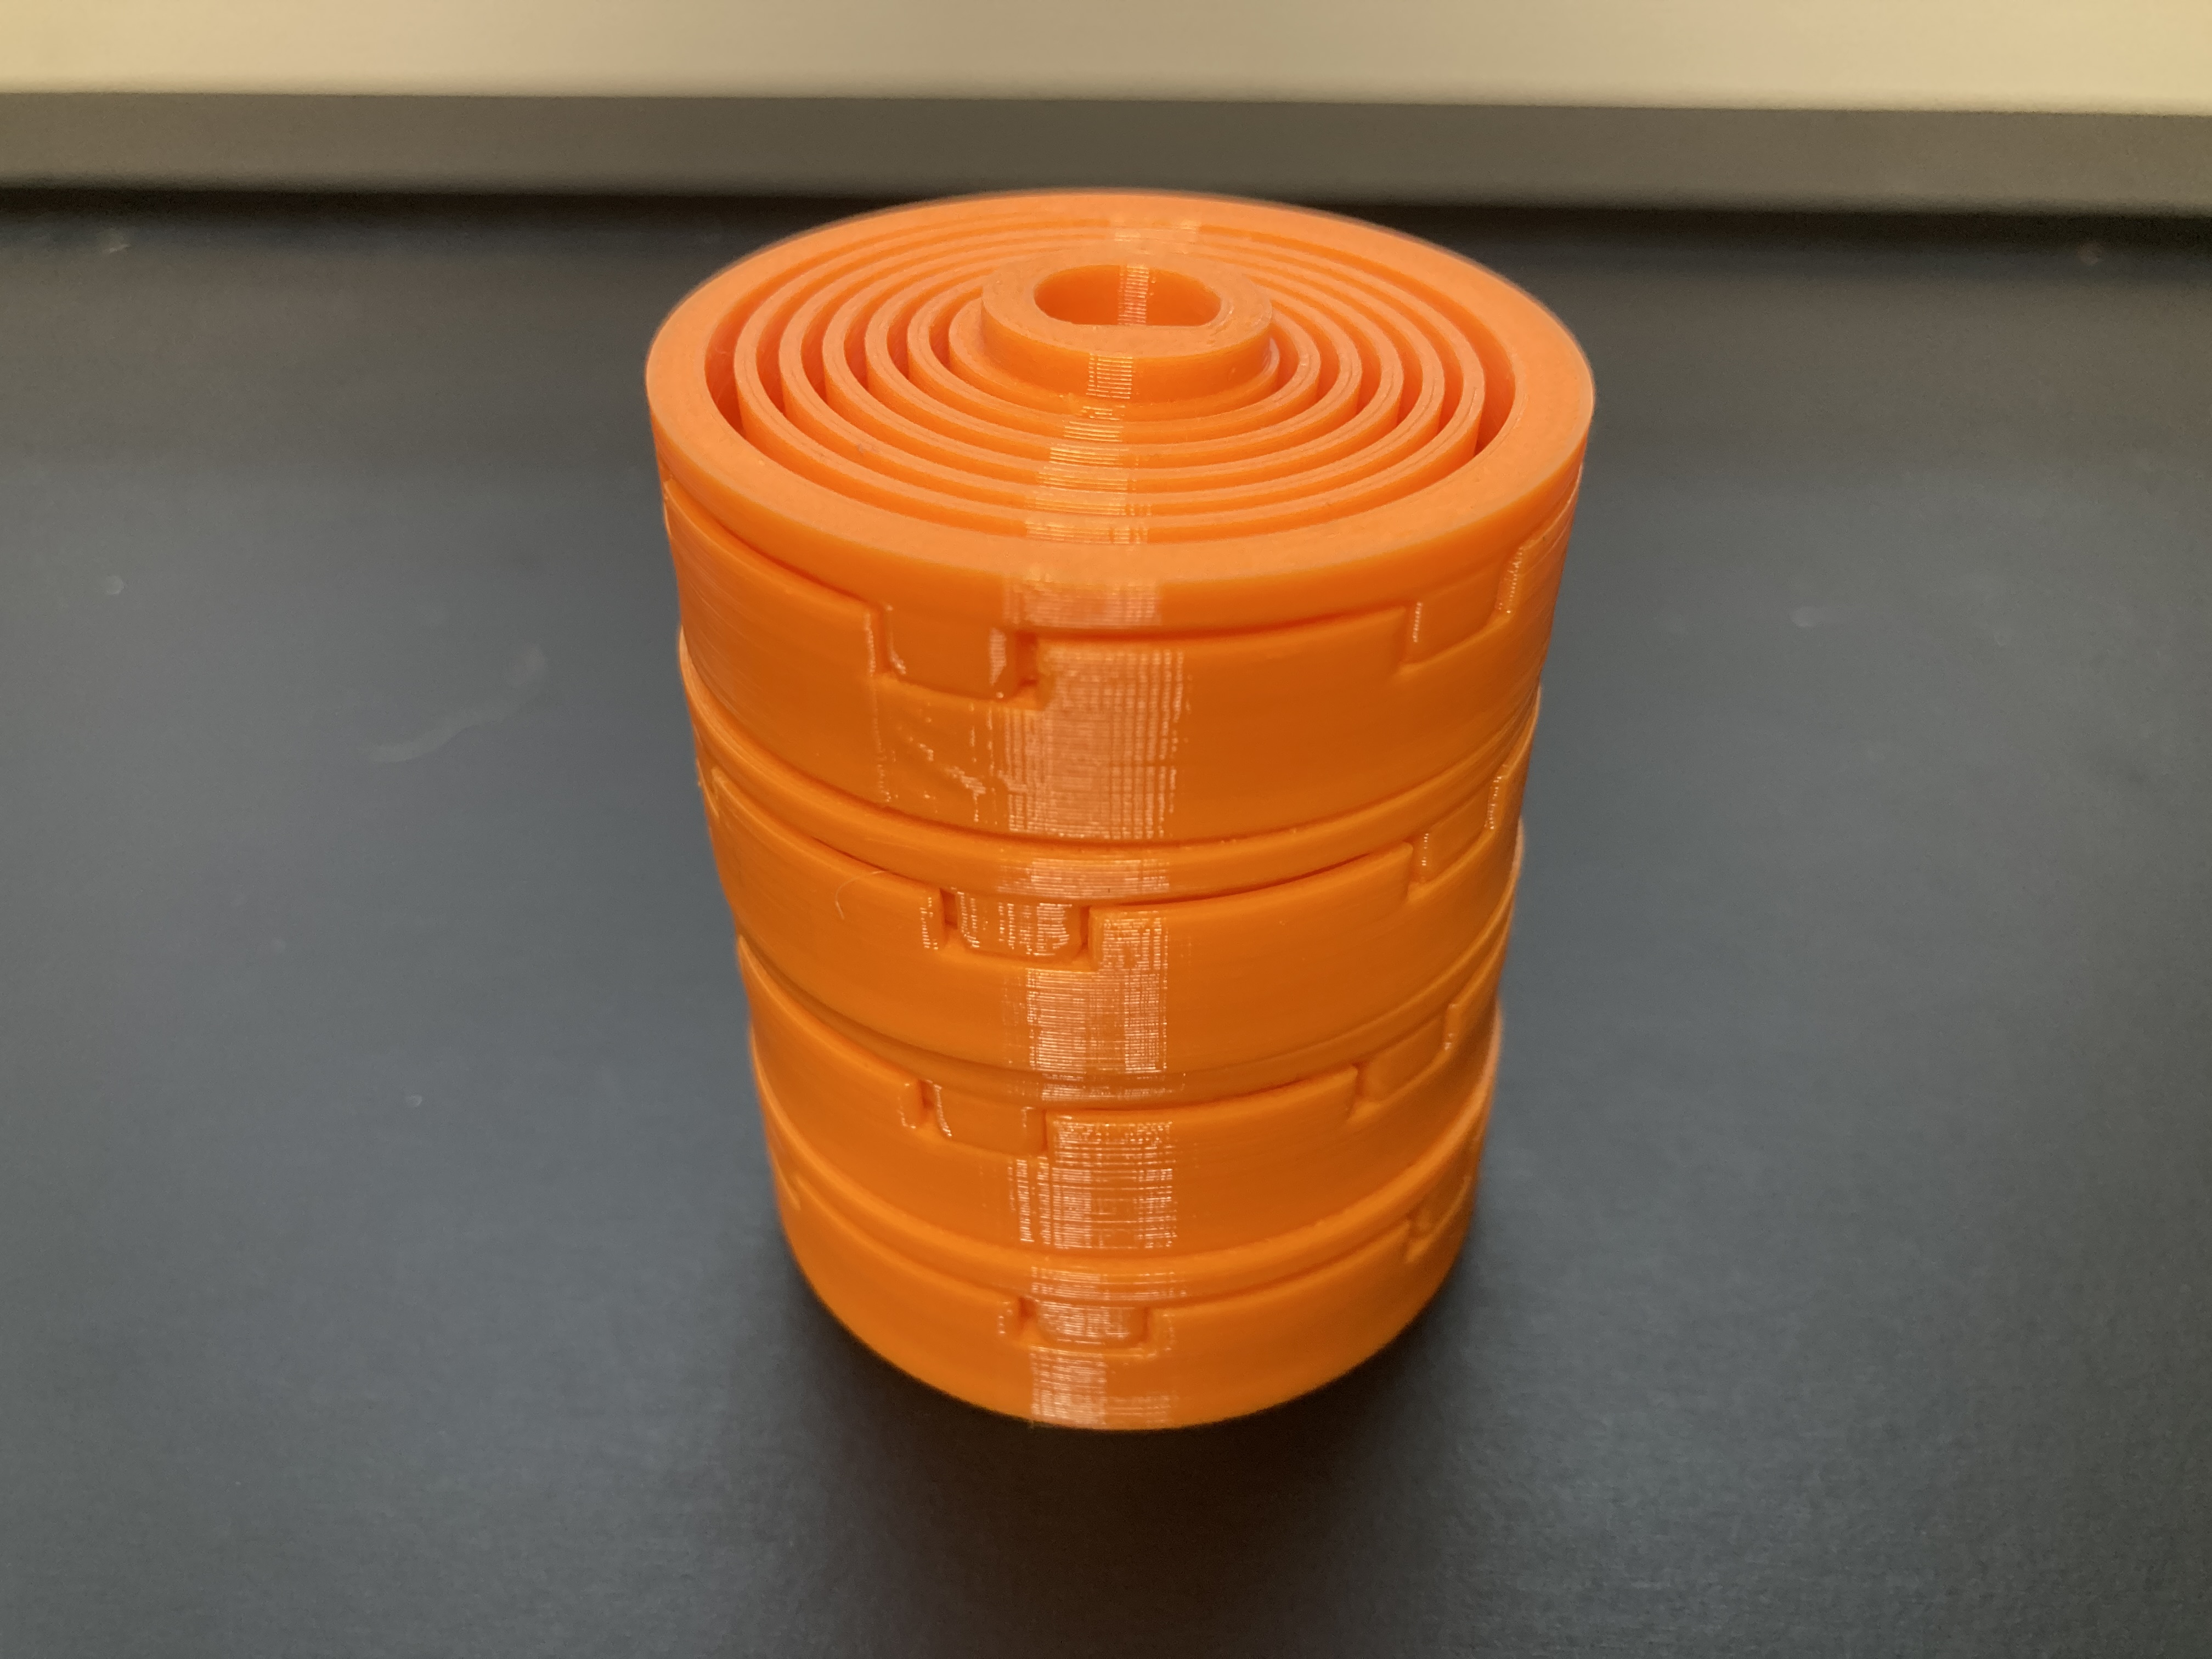
Place the stack of springs inside the drum, with the topmost spring pair being the one with the special outlet for the axle.

Screw the cap onto the top of the assembly.

Slide the easy axle through the assembly, entering from the bottom of the drum with the gear-toothed spring and exiting from the side with the screwed on cap.

Once the assembly is complete, slide one of the axle-easy-clips onto the end of the axle closest to the bearing. This will prevent the shaft from coming loose while printing. As a bonus tip, if you install the clip from the bottom instead of the top, you won't accidentally push it out when loading your filament into the dry box. (Thank you u/kbob!)

Take the 18mm rods and slide all 6 crossbeams onto it. Secure the AXE DRY BOX cylinders to the crossbeams with the M3x10 screws (screwing these in is a pain, you're not crazy).

Whenever you load one of the drums, you are placing the axle into HALF of the crossbeam's opening. The other half is used to hold the spring assembly next to it.
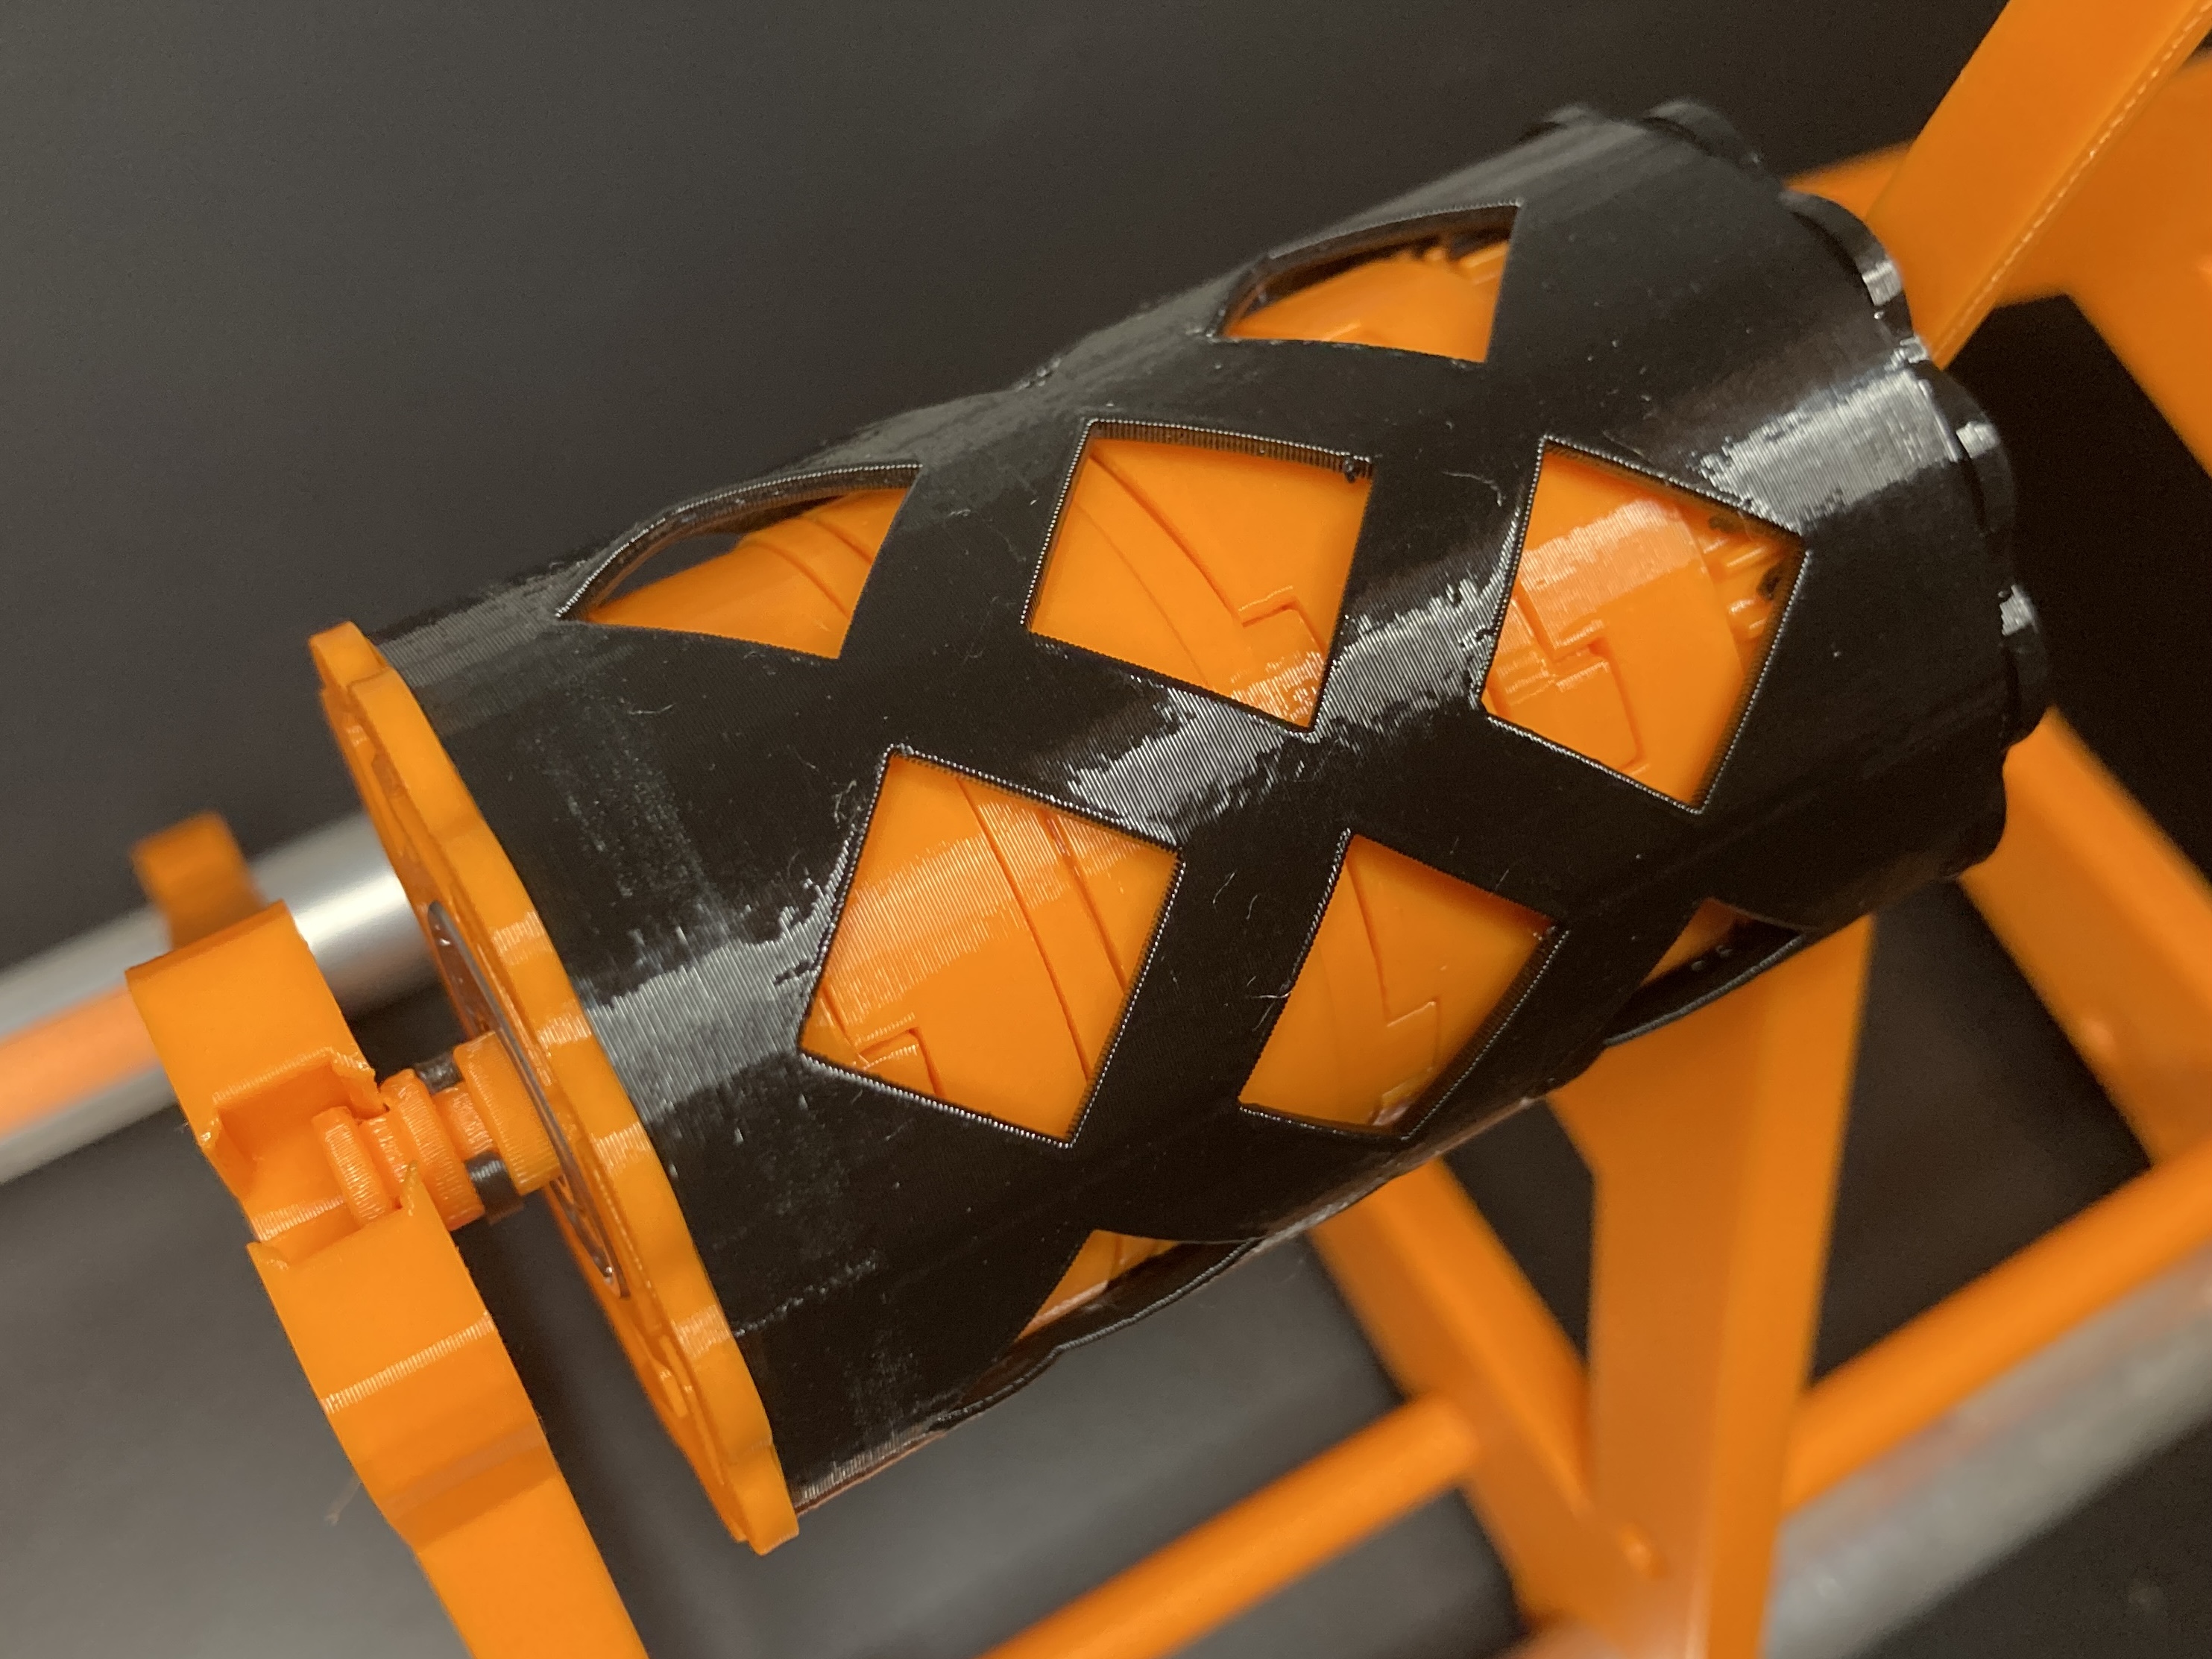
When its time to load the filament, you will position the drum in the middle of the spool, and then load it in like shown in the previous picture. Now just repeat for the 4 other spools and you're all set!

~STEP 4: PUTTING IT ALL TOGETHER~
Alright, the rest of this guide will be a mash-up of all the extras I printed and tips I have for assembling this beast. My recommended order of assembly would be:
- Build the MK4S Printer and verify it works
- Build the MMU3 and test it with the MK4S
- Build the Prusa Enclosure (without installing the printer inside yet)
- Install all the enclosure add-ons, lights, etc
- Prep and install the MK4S / MMU3 into the enclosure (note that you will be removing the buffer from the MMU3 as a part of this step)
- Build the Unoriginal Drybox
- Build the Spool Auto-rewinder
- Install the Drybox and Auto-rewinder onto the enclosure
To start, if you don't have the transport handles or the hinged lid installed in your enclosure, do that now before you install anything else. Maintaining your printer without these will be infinitely more frustrating and you will regret skipping these if you don't make them now.


This part is optional, but I printed out this print sheet holder to mount on the side of my enclosure. Makes it easy to swap between smooth / textured sheets on the fly.

Before you install the drybox on top of the enclosure, be sure to install the LED lights. The LED lights I used from Amazon are linked here. They are a white, 6.5 ft, 5V led strip. I routed them like so and covered the lights along the side with electrical tape to block them out so they don't blind me when looking in from the side. The remote allows me to set a timer and dim them up or down. Far more affordable and in my opinion has better features than Prusa’s light bar offering.


The cleats that secure the drybox to the hinged lid must be assembled as shown in the picture below. The holes will line up with protrusions on the hinged lid, so it should feel obvious when it's is lined up correctly.

I bought this desiccant from Amazon to load into the cartridges on the side of the drybox. It can be reused by defrosting it in the microwave for 10 minutes. This version of the drybox I built was not the heated version, so I haven't observed any real decrease in humidity of the drybox by using these. Your millage may vary with how effective it is in keeping moisture out: I see it more as a box to feed the filament than to keep it dry.


When assembling the drybox, you will need to cut the PTFE tubes that come with your MMU unit. You will have more than enough extra tubing if you mess up a cut, so don’t worry about getting it exactly right the first time. It is helpful to have a dedicated PTFE cutter, but scissors should work otherwise. I also recommend printing extra PTFE-clip-R4.stl from the MMU3 parts list, as they are handy to keep the tubes straight in extra places.

Many builds have an adapter that will plug this hole in the back of the enclosure where the PTFE tubes feed down. I find that if you ever want to use the hinged lid to access the printer in the future, this adapter will pinch the tubes and damage them. I am leaving it open for now.
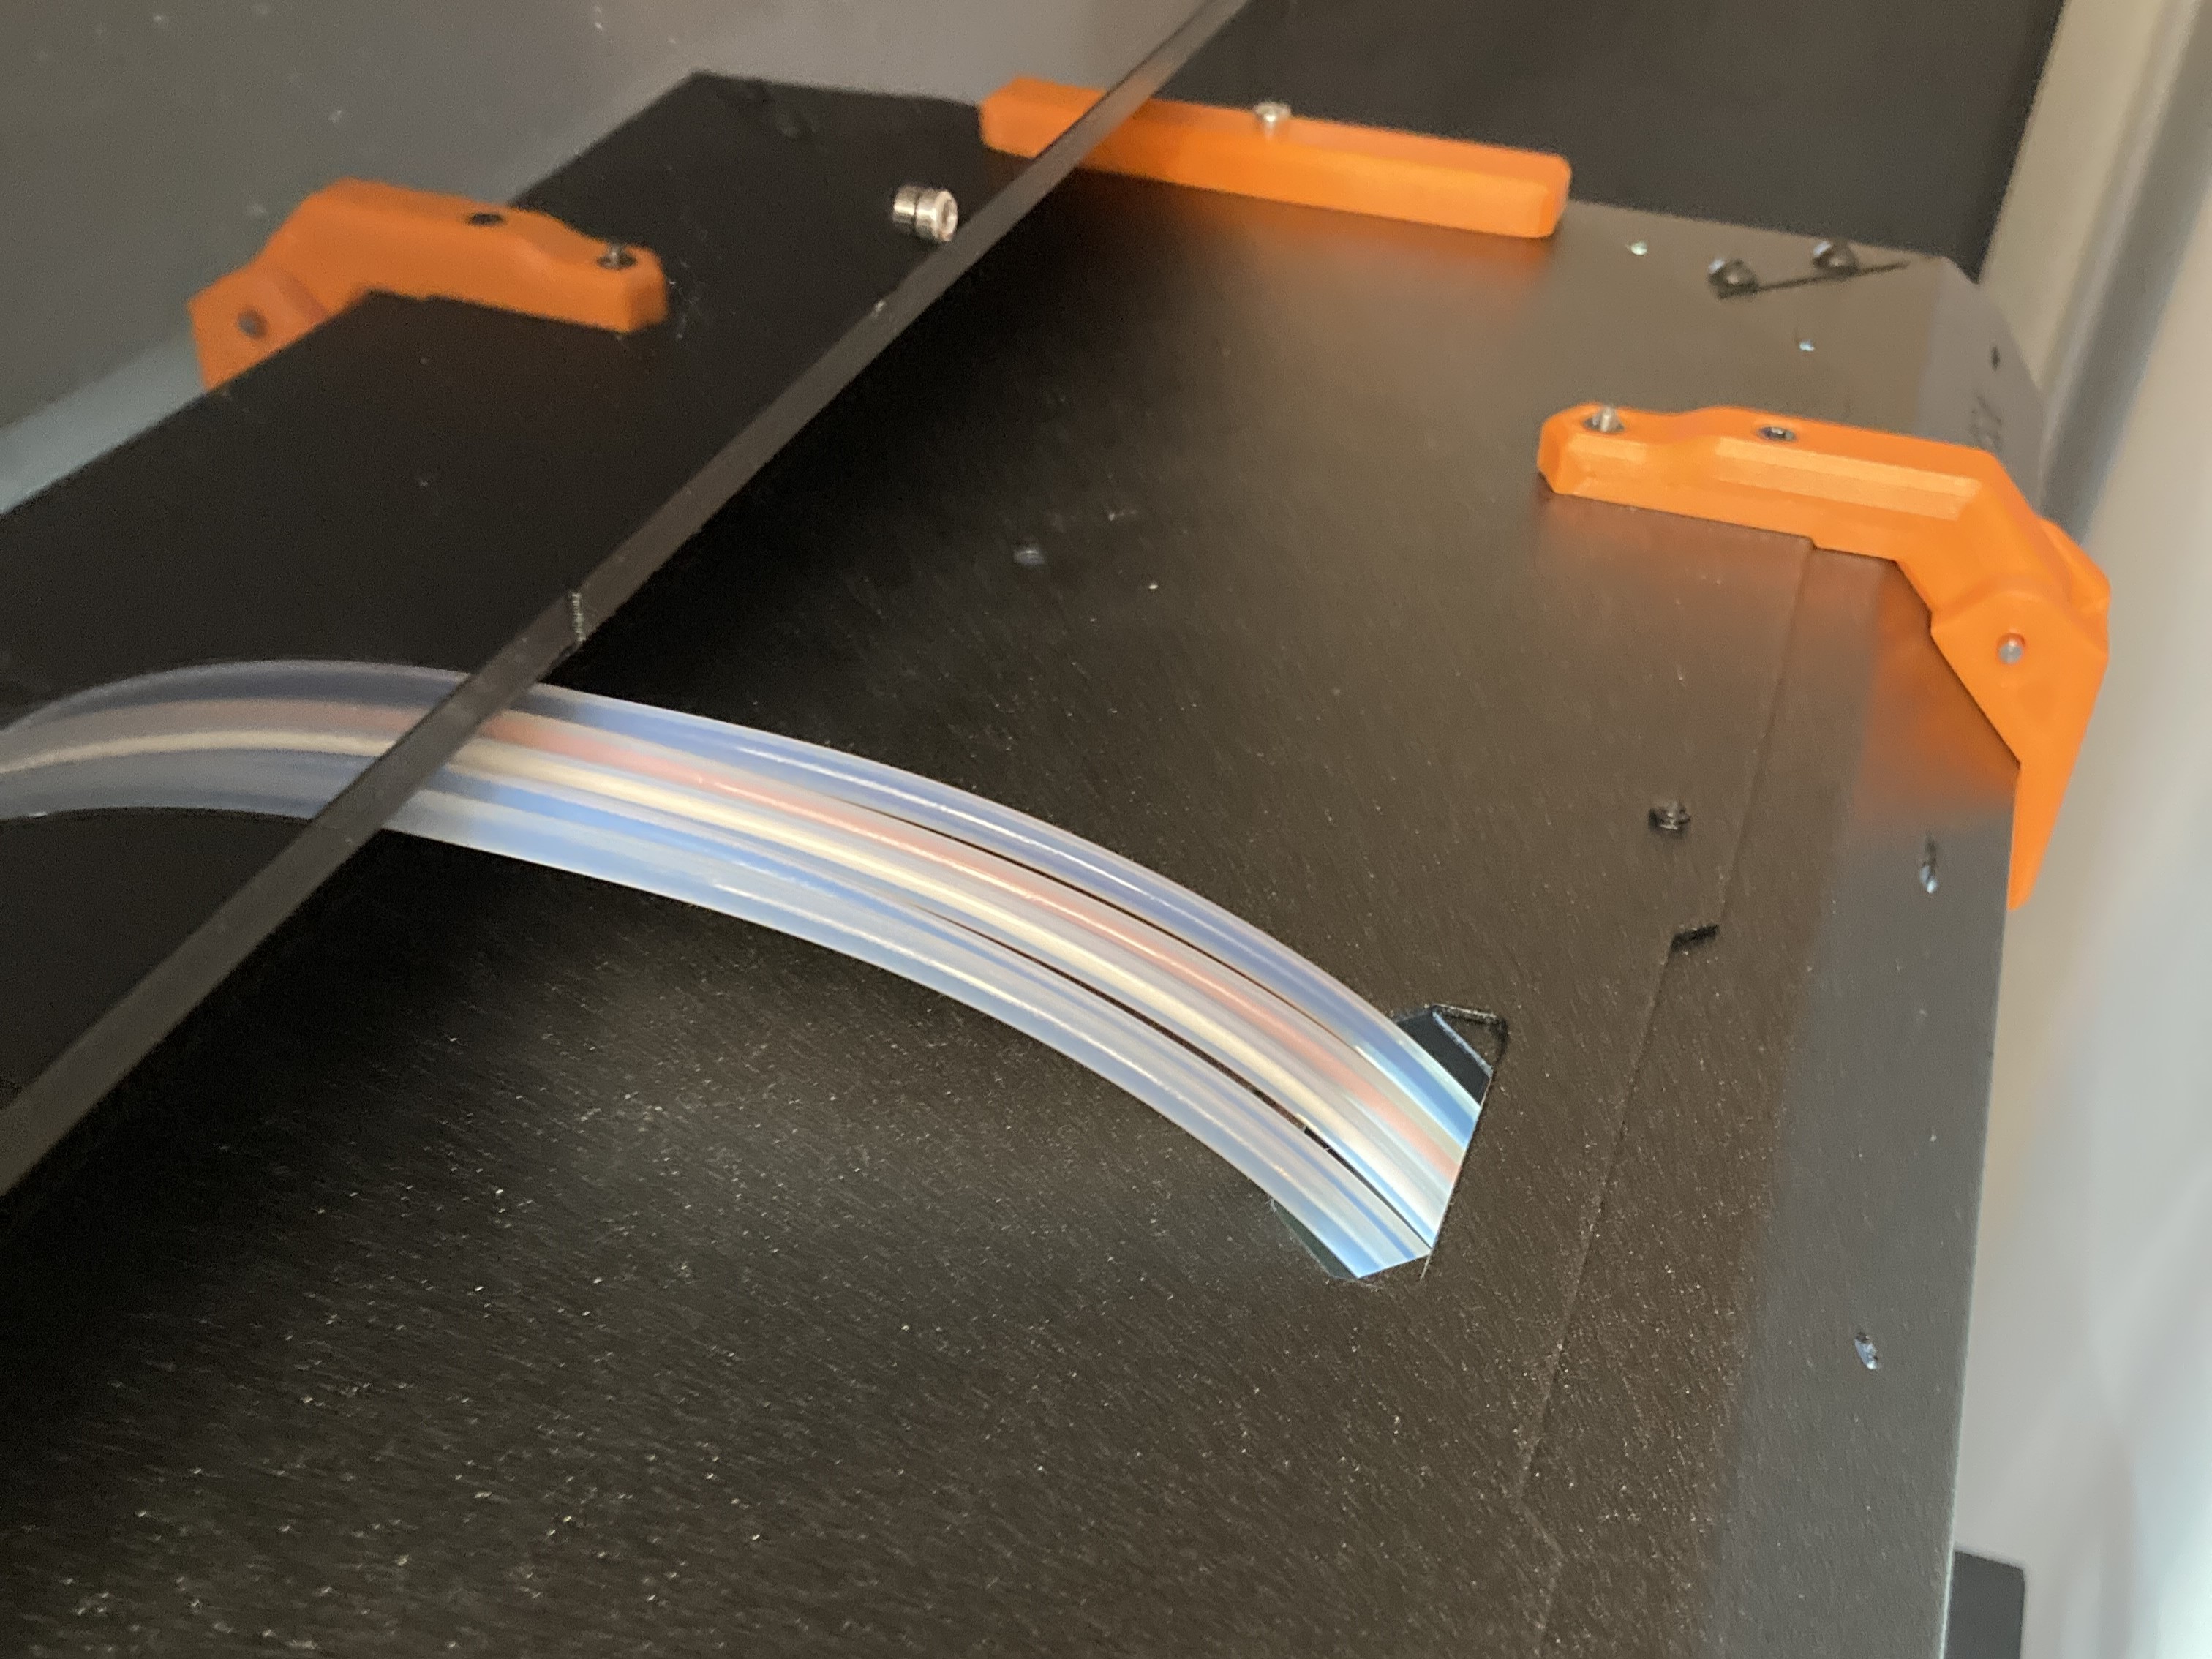


My current mount for the Buddy3D camera is Prusa's design. It positions the camera level with the build plate, which allows me to see if the first layer is sticking. As the camera’s features get updated, I may upgrade this mount to something that mounts on the side wall of the enclosure.

One of the best perks of this build is that if you ever have trouble using the MMU and don’t want to deal with it, you can swap back to stock MK4S operation in under a minute! Using the PTFE Parking Clip I designed, you can unscrew the MMU Bowden and replace it with the original Prusa Enclosure bowden in a snap. Just make sure to disable the MMU from the printer's LCD and you're good to go.

And that's it! You now have a fully built MK4S and MMU3 that is super user friendly and will be adaptable to any other upgrades you want to make next! I hope all or parts of this guide are helpful for your own build, and if you have any tips from your own experience to add please leave them in the comments. Happy printing!
