
PZB / LZB Input Panel for Railsimmers
Obliczymy ostateczną cenę na podstawie wybranego pliku. Sprawdzisz ją i zaakceptujesz przed płatnością.
Zapisane na tym urządzeniu.

input panel for German train control systems PZB / LZB, featuring momentary switches for "Befehl", "Frei" and "Wachsam".
- Ocena
- 0 / 5
- Polubienia
- 1
- Pobrania
- 73
- Wydruki
- 0
- Wyświetlenia
- 472
- Oceny
- 0
Aktualizacja u źródła:
Informacje o modelu
- Źródło
- Printables
- Kategoria
- Video Games
- Licencja
- Creative Commons — Attribution — Share Alike
I designed this PZB input panel to use in a railsim / driver's console environmant. Switches are based on readily available components and the appearance is pretty close to what you can find in many driver's cabs of locomotives / EMUs / DMUs registered for use in Germany.
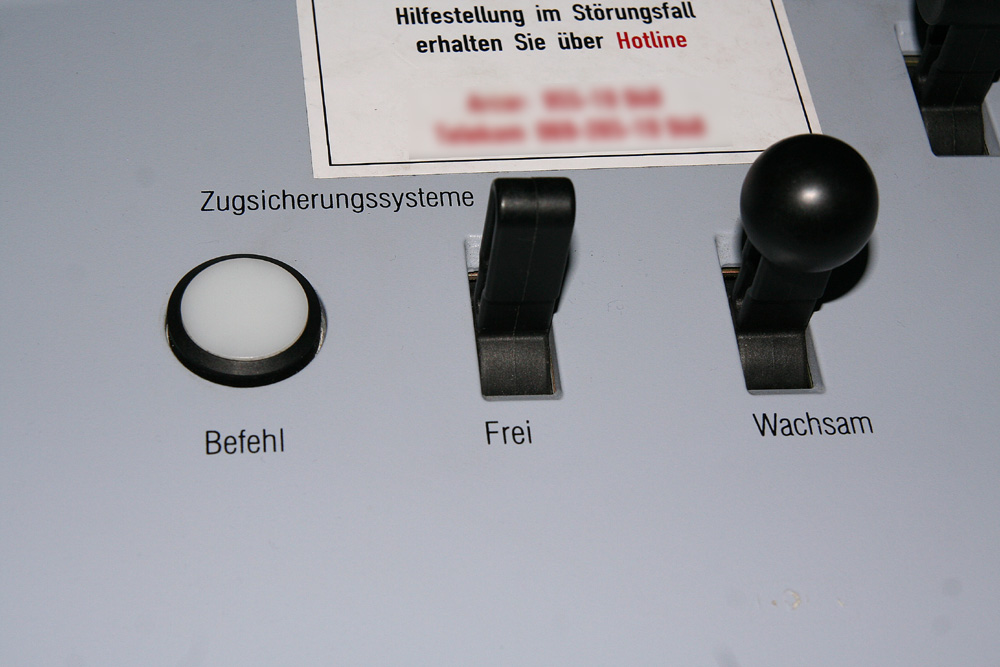
Switch components are this arcade button for “Befehl” (any arcade button for a 27mm mounting hole should work) and this APEM 600 series momentary switch (12mm mounting hole).
You will find two stl files and the scad-file if you want to play with that.
Printing:
Use support for all prints and max. 0.2mm layers to get nice, rounded shapes. The parts are in the recommended print orientations already.
Assembly:
The panel and the holding bracket for the two APEM switches are printed separately and need to be glued together (use 2K adhesive). The front panel has matching recesses on the back so positioning the bracket is easy.
Make shure to insert the switch lever extentions before you glue the bracket since they will not fit later!
Also, glue on the “ball” for “Wachsam” last (same reason).
Use some electrical tape to fine-tune the fit of the lever extentions over the original levers to reduce wobble.
---
Dieses kleine Panel habe ich entworfen als PZB/LZB Bedienfeld für einen Simulatorstand. Die Taster / Schalter sind kommerziell problemlos verfügbar und die Optik sollte einem realen Fahrstand eines in Deutschland laufenden TFZ recht nahe kommen..
Ich benutze diesen Arcade-Taster für “Befehl”: (klick) (jeder 27mm Arcadetaster sollte gehen). Außerdem nutze ich den APEM 600 Kipptaster für “Wachsam” und “Befehl”: (klick) - der Taster hat eine 12mm Befestigung.
Beigefügt sind die stl-Dateien und die OpsnSCAD-Datei.
Druck:
Bitte Supports für alle Teile verwenden und max. 0.2mm Schichten, damit die Formen gut aufgelöst werden. Die Teile sind bereits korrekt orientiert für den Druck.
Montage:
Der Haltebügel für die APEM-Taster wird separat gedruckt und dann mit 2k-Kleber montiert - Vertiefungen dafür auf der Rückseite der Frontplatte sind vorgesehen.
Bitte erst die Kipphebel aufstecken und dann den Haltebügel ankleben - die umgekehrte Reihenfolge funktioniert nicht.
Die Kugel für “wachsam” wird zuletzt aufgeklebt - aus ähnlichem Grund.
Wenn die Kipphebel zu lose auf den APEM-Kippschaltern sitzen, diese bitte mit etwas Isolierband auffüttern, damit sie später nicht wackeln.