
Case for dew point ventilation with seeed xiao esp32c6 and DHT22
Obliczymy ostateczną cenę na podstawie wybranego pliku. Sprawdzisz ją i zaakceptujesz przed płatnością.
Zapisane na tym urządzeniu.

This is a case for the seeed xiao esp32c6 + xiao expansion board + DHT22 and connection for external sensor.
- Ocena
- 4 / 5
- Polubienia
- 11
- Pobrania
- 125
- Wydruki
- 1
- Wyświetlenia
- 1150
- Oceny
- 1
Aktualizacja u źródła:
Informacje o modelu
- Źródło
- Printables
- Kategoria
- Other House Equipment
- Licencja
- Creative Commons — Attribution
Dew Point Ventilation
This is a case for another approach of dew point ventilation. Dew point ventilation means that you measure the temperature and humidity inside and outside. To decide whether ventilation is useful or not, you calculate the absolute (!) humidity. Therefore, the dew point is calculated from the relative humidity and the temperature.
See more about this in this german Make article, FAQ, or this video or in english this wikipedia page about the dew point.
New approach with Zigbee Plug instead of 230V relay
I build the system once in the classic fashion with a relay switching 230V for a usual bathroom ventilation fan. The poor wiring inside the case led to some hick ups in the software: The logging on the SD card sometimes broke, when the fan switched on or off. Therefore, I was searching for a more robust approach, where I'm not handling mains power within my control case.
I found the relatively new ESP32 C6 modules, which bring Zigbee connectivity. Therefore, this is an approach to swap the complexity of mains power against Zigbee wireless communication problems… ;)
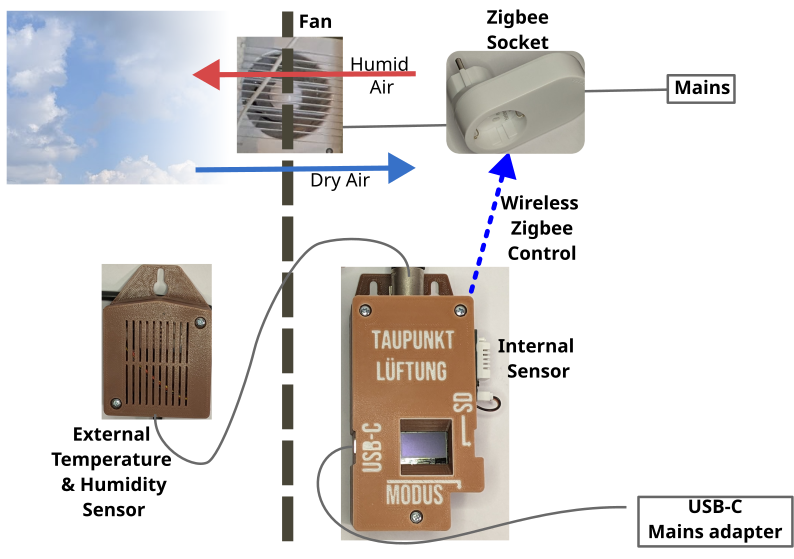
As you can see in this picture, the main controller is connected to an usual USB-C supply, an external sensor, an internal sensor and a wireless connection to a zigbee plug.
The main controller
I chose the Seeed XIAO ESP32C6 module combined with the XIAO expansion board, because they already bring everything I need:
- Zigbee connection
- Connection for two DHT22 sensors.
- Small display for informations
- Button to change the control mode (On, Off, Auto)
- Micro-SD card for logging
- Real time clock for timestamps in the log incl. battery slot
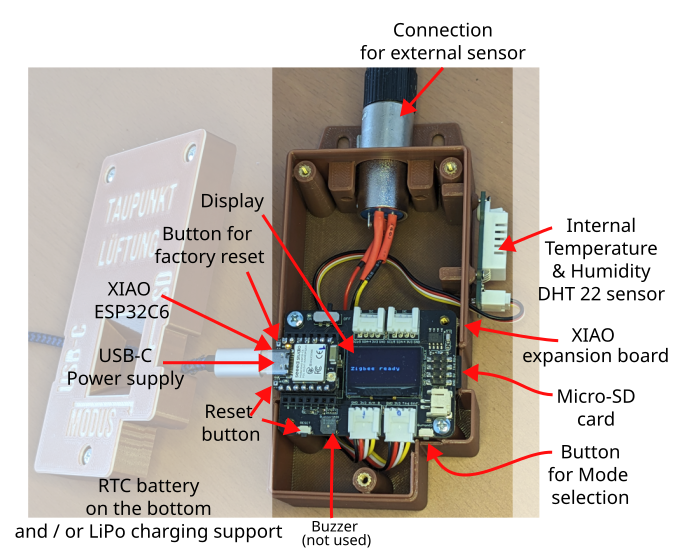
I made a small sketch how to get to every accessory on this small expansion board:

My first approach led to the first housing, which you can find here: case-for-the-seeed-studio-xiao-expansion-board

The next iteration of the housing includes the following additions:
- Added mounting for seeed grove dht22 sensor
- Added XLR socket for external sensor.
- Added labeling to the top
- Added hook
I'm pleased with the result:

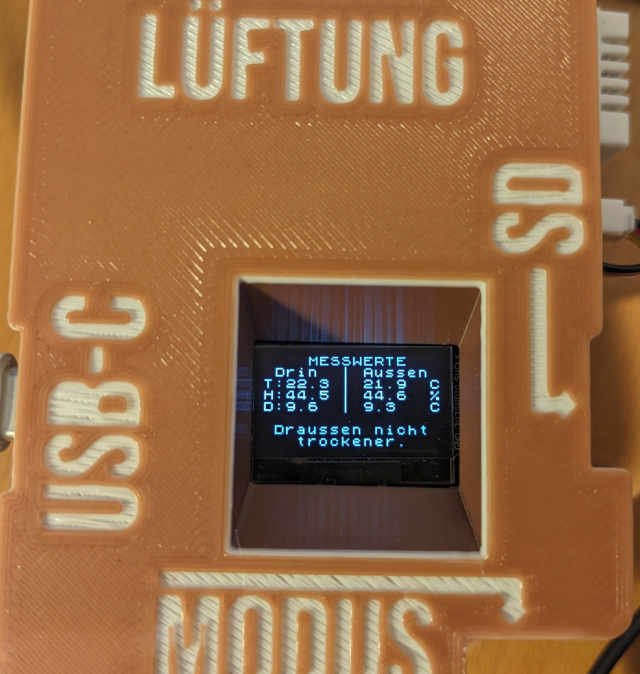
Here a picture of the final controller with two color changes on the first layers to make the labeling pop. Version with embossed letters:
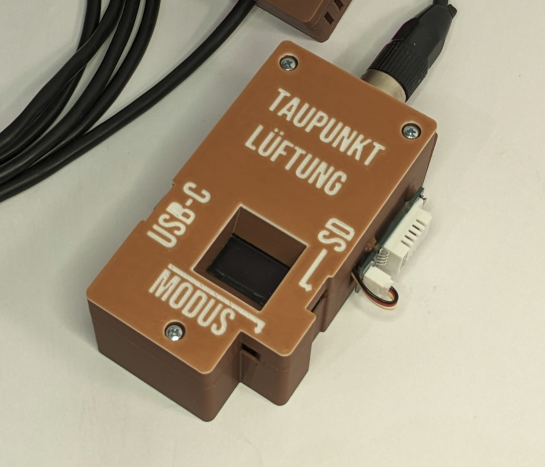
Here another picture with a multicolor print (see print instructions):

The controller on the inside:
Necessary Parts
- Two colors of PLA for the housing and the contrast for labeling. I used recyclingfabrik.com: Fallendes Laub (brown) resp.
Flaches Gewässer (blue) PLA and some white PLA. - ESP32-C6 by Seeed Studio
- XIAO Expansion Board
- 2x DHT22 Sensors
- XLR Socket and 2x M3x5 countersunk head screws
- 9x M3 threaded inserts (4 for the expansion board, 3 for the top, 2 for the XLR socket)
Other parts for the whole project:
- Micro SD card,
- CR1220 battery
- Zigbee plug,
- the ventilator itself,
- USB-C supply
Print Instructions
Print all parts on their big plain surfaces.
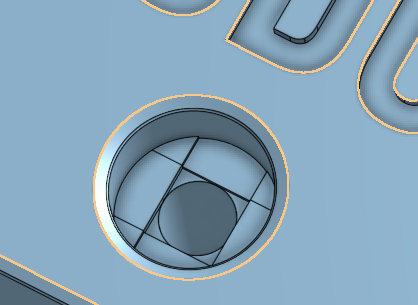
The holes for the counterbores are modified with the “Bridge Counterbore” feature script and should print without support, if printed with a layer height of 0.20 mm!
Color change: Use your slicer to introduce a color change to make the labeling pop
Multi-Color Single-Extrude printing
You can also print multi color with a single extruder machine, when you change the filament three times:

Basically you have to go into Printer Settings-General and set the number of extruders to the total colors your are using. Then in Custom Gcode tab you add the following to the Tool Change Gcode section: {if layer_num > -1}M600{endif}
Then go into Print Settings-Multiple Extruders and uncheck Prime all printing extruders.
You can disable the Prime tower.
See https://forum.prusa3d.com/forum/postid/671614/ for more examples.
Assembly Instructions
Use your soldering iron and insert the threaded inserts at ~ 250°C.

Use five M3 x 15 screws for the expansion board and the cover.
Use three M2 x 10 mm screws to secure the sensor.

The internal sensor can be directly connected with the groove interface to the left port, shown here in the picture.
The cable for the second sensor is cut in half: The first half is connecting the XLR socket here with the right port. The other half will be used in the case, see the following paragraph.
Housing for the external sensor
Please check the case for the Grove DHT22 here.
Software
The software for the esp32c6 can be found here on my github: https://github.com/AndunHH/Dew-Point-Ventilation-Zigbee
Remix welcome
Here is it the link to the onshape document.