
Longhorn - XYL Unicorn Magazine Extension
Obliczymy ostateczną cenę na podstawie wybranego pliku. Sprawdzisz ją i zaakceptujesz przed płatnością.
Zapisane na tym urządzeniu.

Magazine extenders for the XYL Unicorn mags. Replaces standard baseplate and floorplate, increasing capacity by up to 3.
- Ocena
- 5 / 5
- Polubienia
- 22
- Pobrania
- 69
- Wydruki
- 5
- Wyświetlenia
- 446
- Oceny
- 5
Aktualizacja u źródła:
Informacje o modelu
- Źródło
- Printables
- Kategoria
- Other Toys & Games
- Licencja
- Creative Commons — Attribution — Noncommercial — Share Alike
This is Longhorn, the magazine extender for XYL Unicorn foam dart magazines.
The XYL Unicorn/aftermarket XYL magazines have an strong magazine spring and are robustly constructed, making them an ideal candidate for extension. Longhorn is designed to take advantage of their spring strength by extending the magazine further to allow increased capacity, while still retaining positive spring pressure, even on the last dart. It is also designed to be easy to install or replace, and sturdy enough to withstand rough use.
These parts are designed to replace the stock baseplate and floorplate of the XYL magazine with a two part baseplate and replacement floorplate. The provided files respectively add a nominal capacity of + 1-3 darts. Loading the magazine with more darts than this was feasible in beta testing, but may impact performance as darts begin to be compressed, so overload them at your own caution.
Update 5/13/2025:
- Added a “Tall” variant of the Floorplate. Based on user feedback, this is intended to improve last dart retention by compressing the spring slightly more. Users who find the standard floorplate to provide insufficent compression, especially users who have used the stock floorplate as a spacer, are encouraged to try this new piece to reduce the number of loose parts in the magazine. The Tall variant is 2.5mm thicker/taller than the standard floorplate.
- I have uploaded the STEP files for the extenders! While you can use the STEP files for printing as well, they are not pre-oriented (or at least Bambu/Orca slicer won't treat them as such T-T) so you'll have to re-orient them as per the pictures below. I hope this helps anyone who wants to build further on the system or make their own modifications and markings. Happy CADing!
Printing:
The STLS are pre-aligned for printing. They should be oriented as shown below.
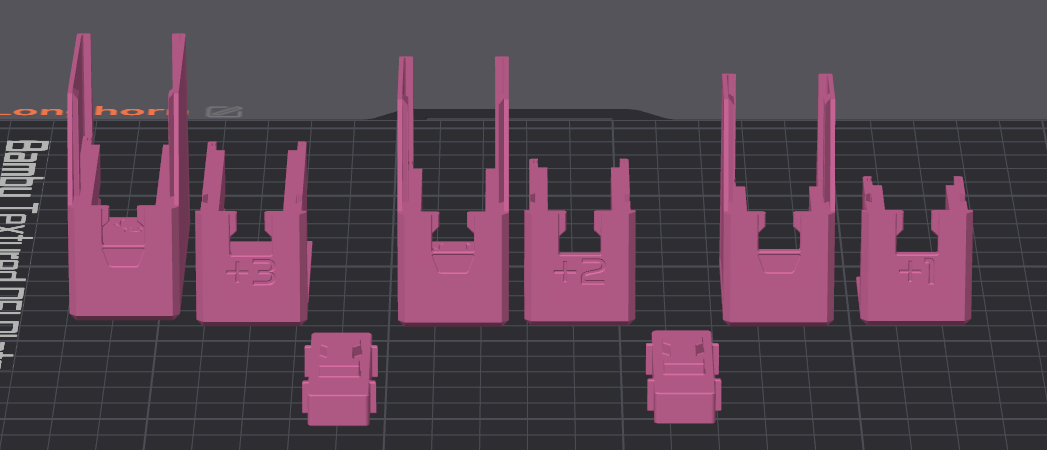
These have been tested in both PLA and PETG. No brims or supports are necessary. No unusual printing profiles are required, but I suggest printing them with high wall count/all walls, which should not be hard using most nozzles considering how thin they are.
For 95% of users I suggest the standard floorplate. If you find that your printer tollerances do not allow you to use the standard floorplate as it gets stuck in either the extension or the magazine body, there is a looser floorplate with increased clearances.
Assembly:
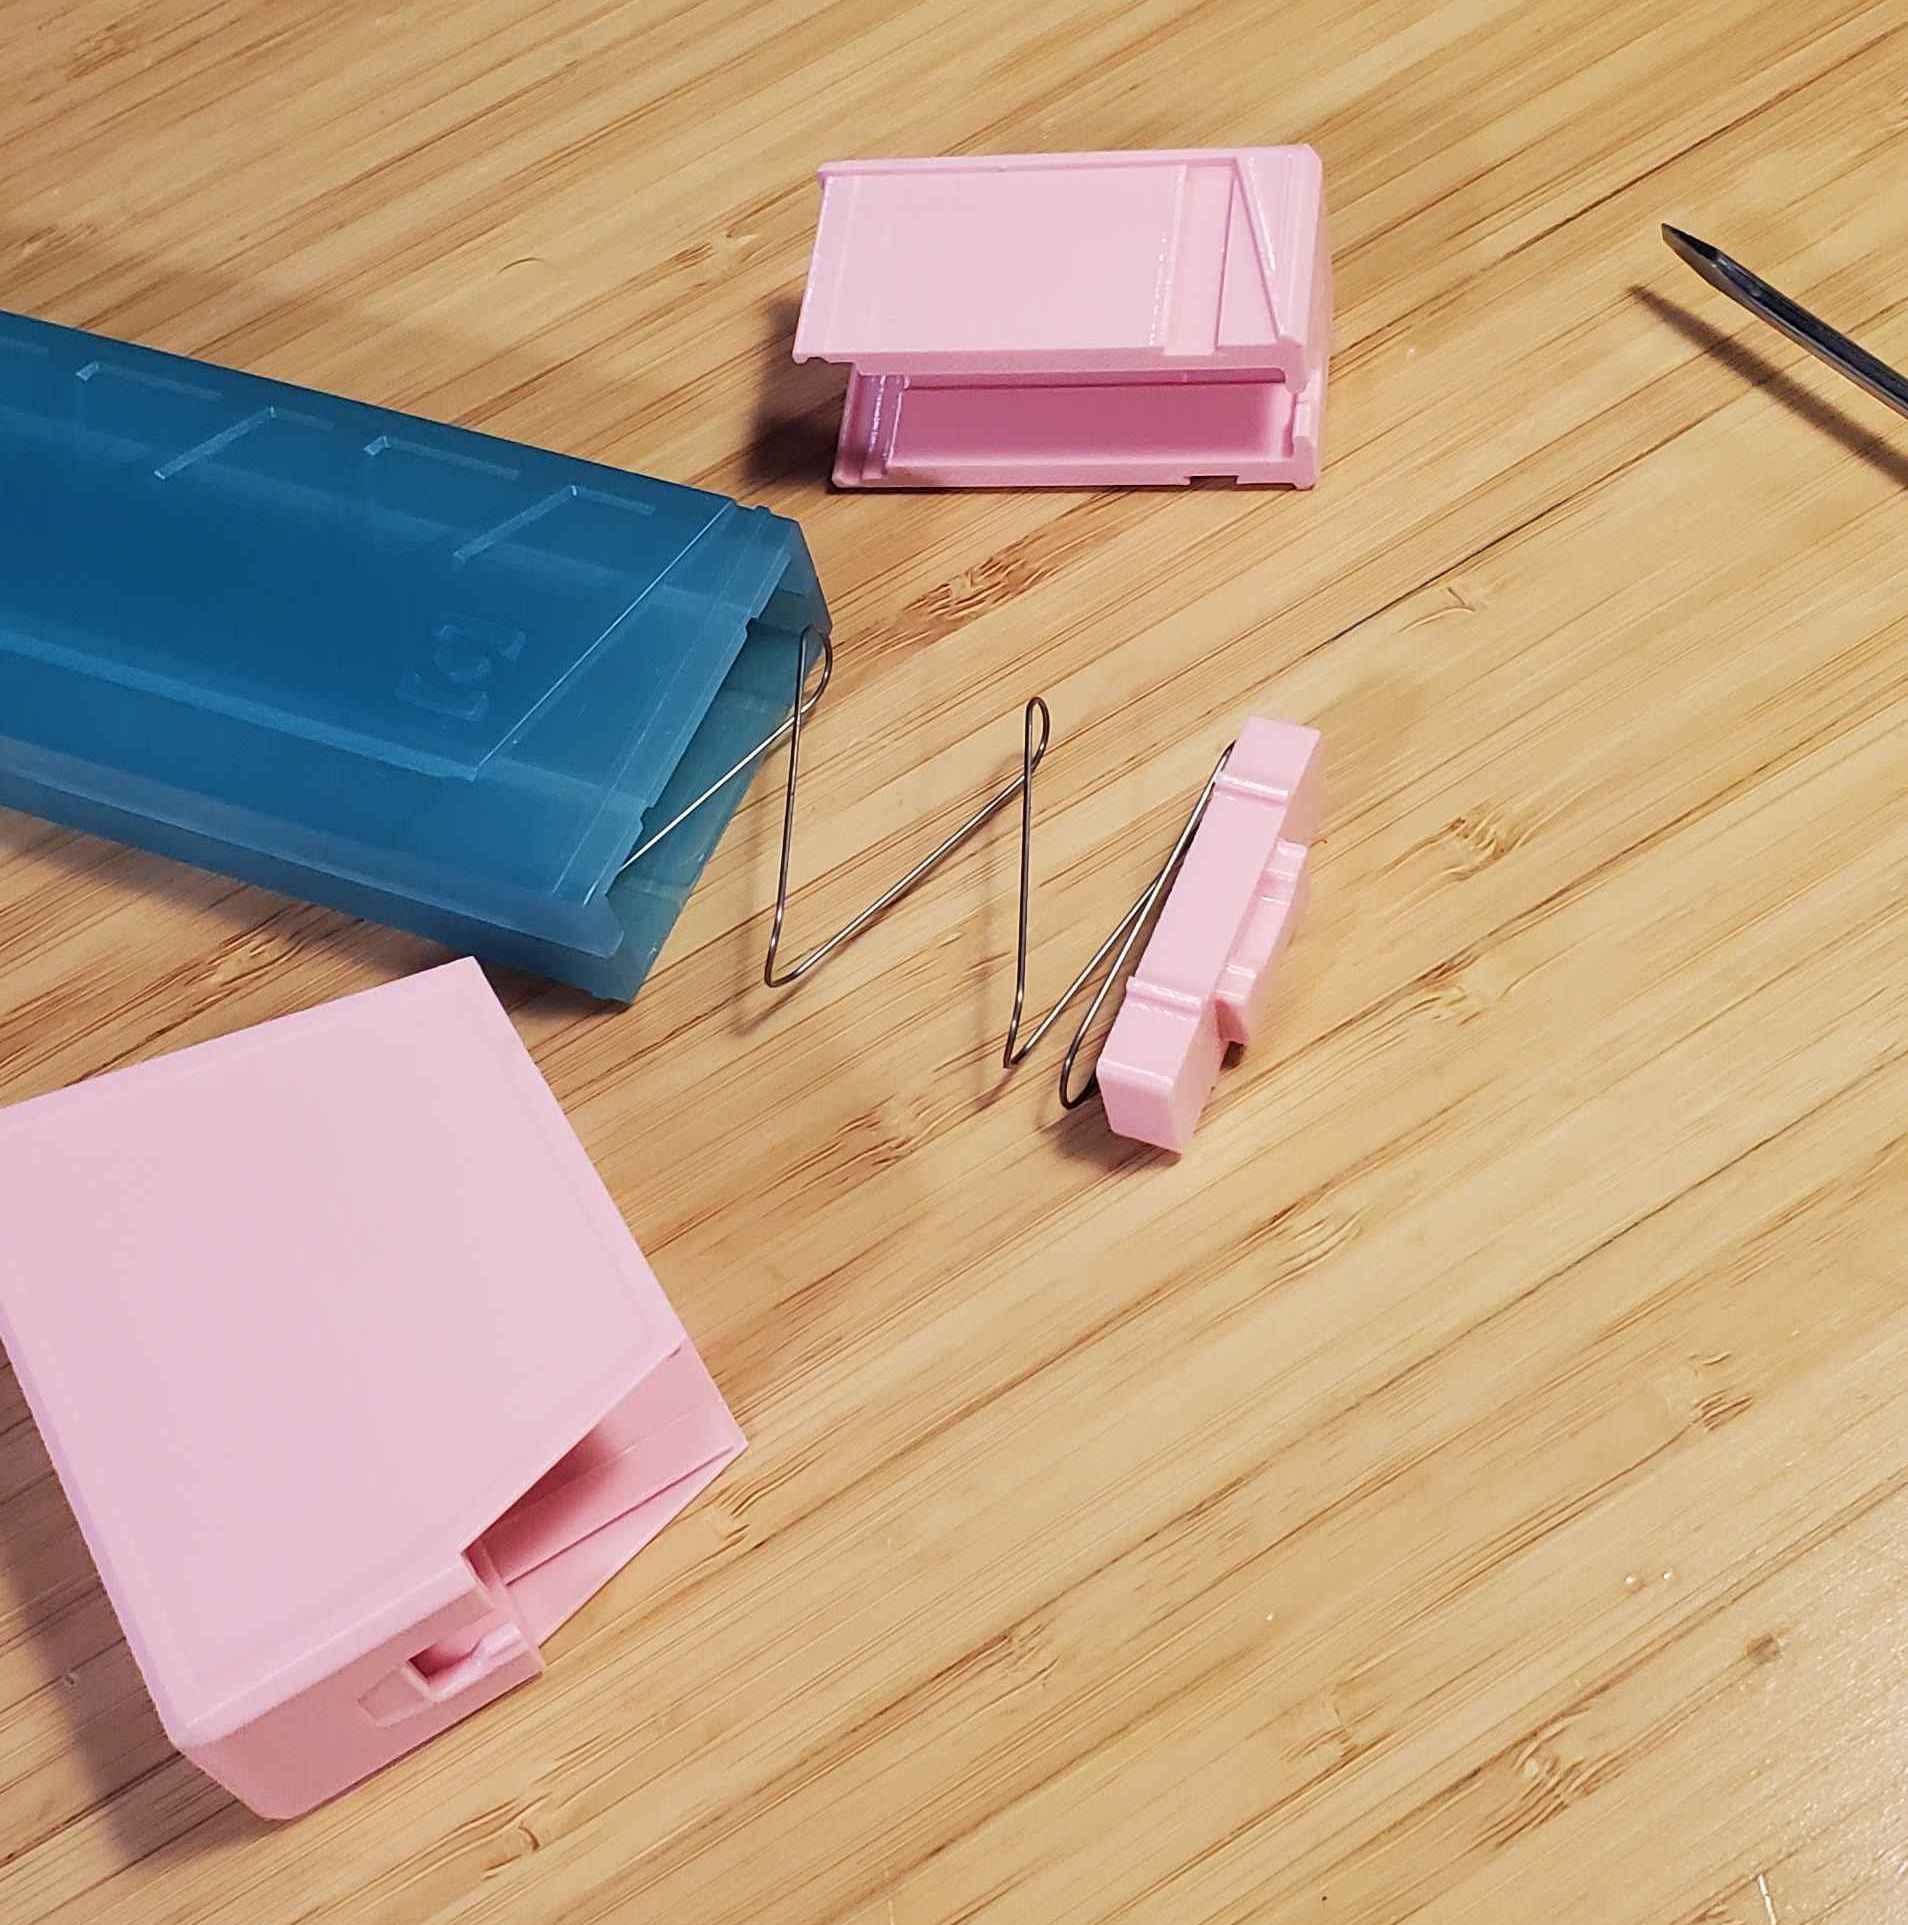
To install the extension, first remove the stock triangular baseplate from the XYL magazine.
Press in on the oval button in the center of the baseplate to depress the stock floorplate into the magazine.


Then slide the stock baseplate off to the front of the magazine, and remove the stock floorplate.


Insert the replacement floorplate, with the dog bone shaped feature toward the bottom of the magazine. The floorplate may stick slightly into the magazine, which is fine.

The front baseplate is larger, and has a the dart head icon, indicating the direction of dart loading.

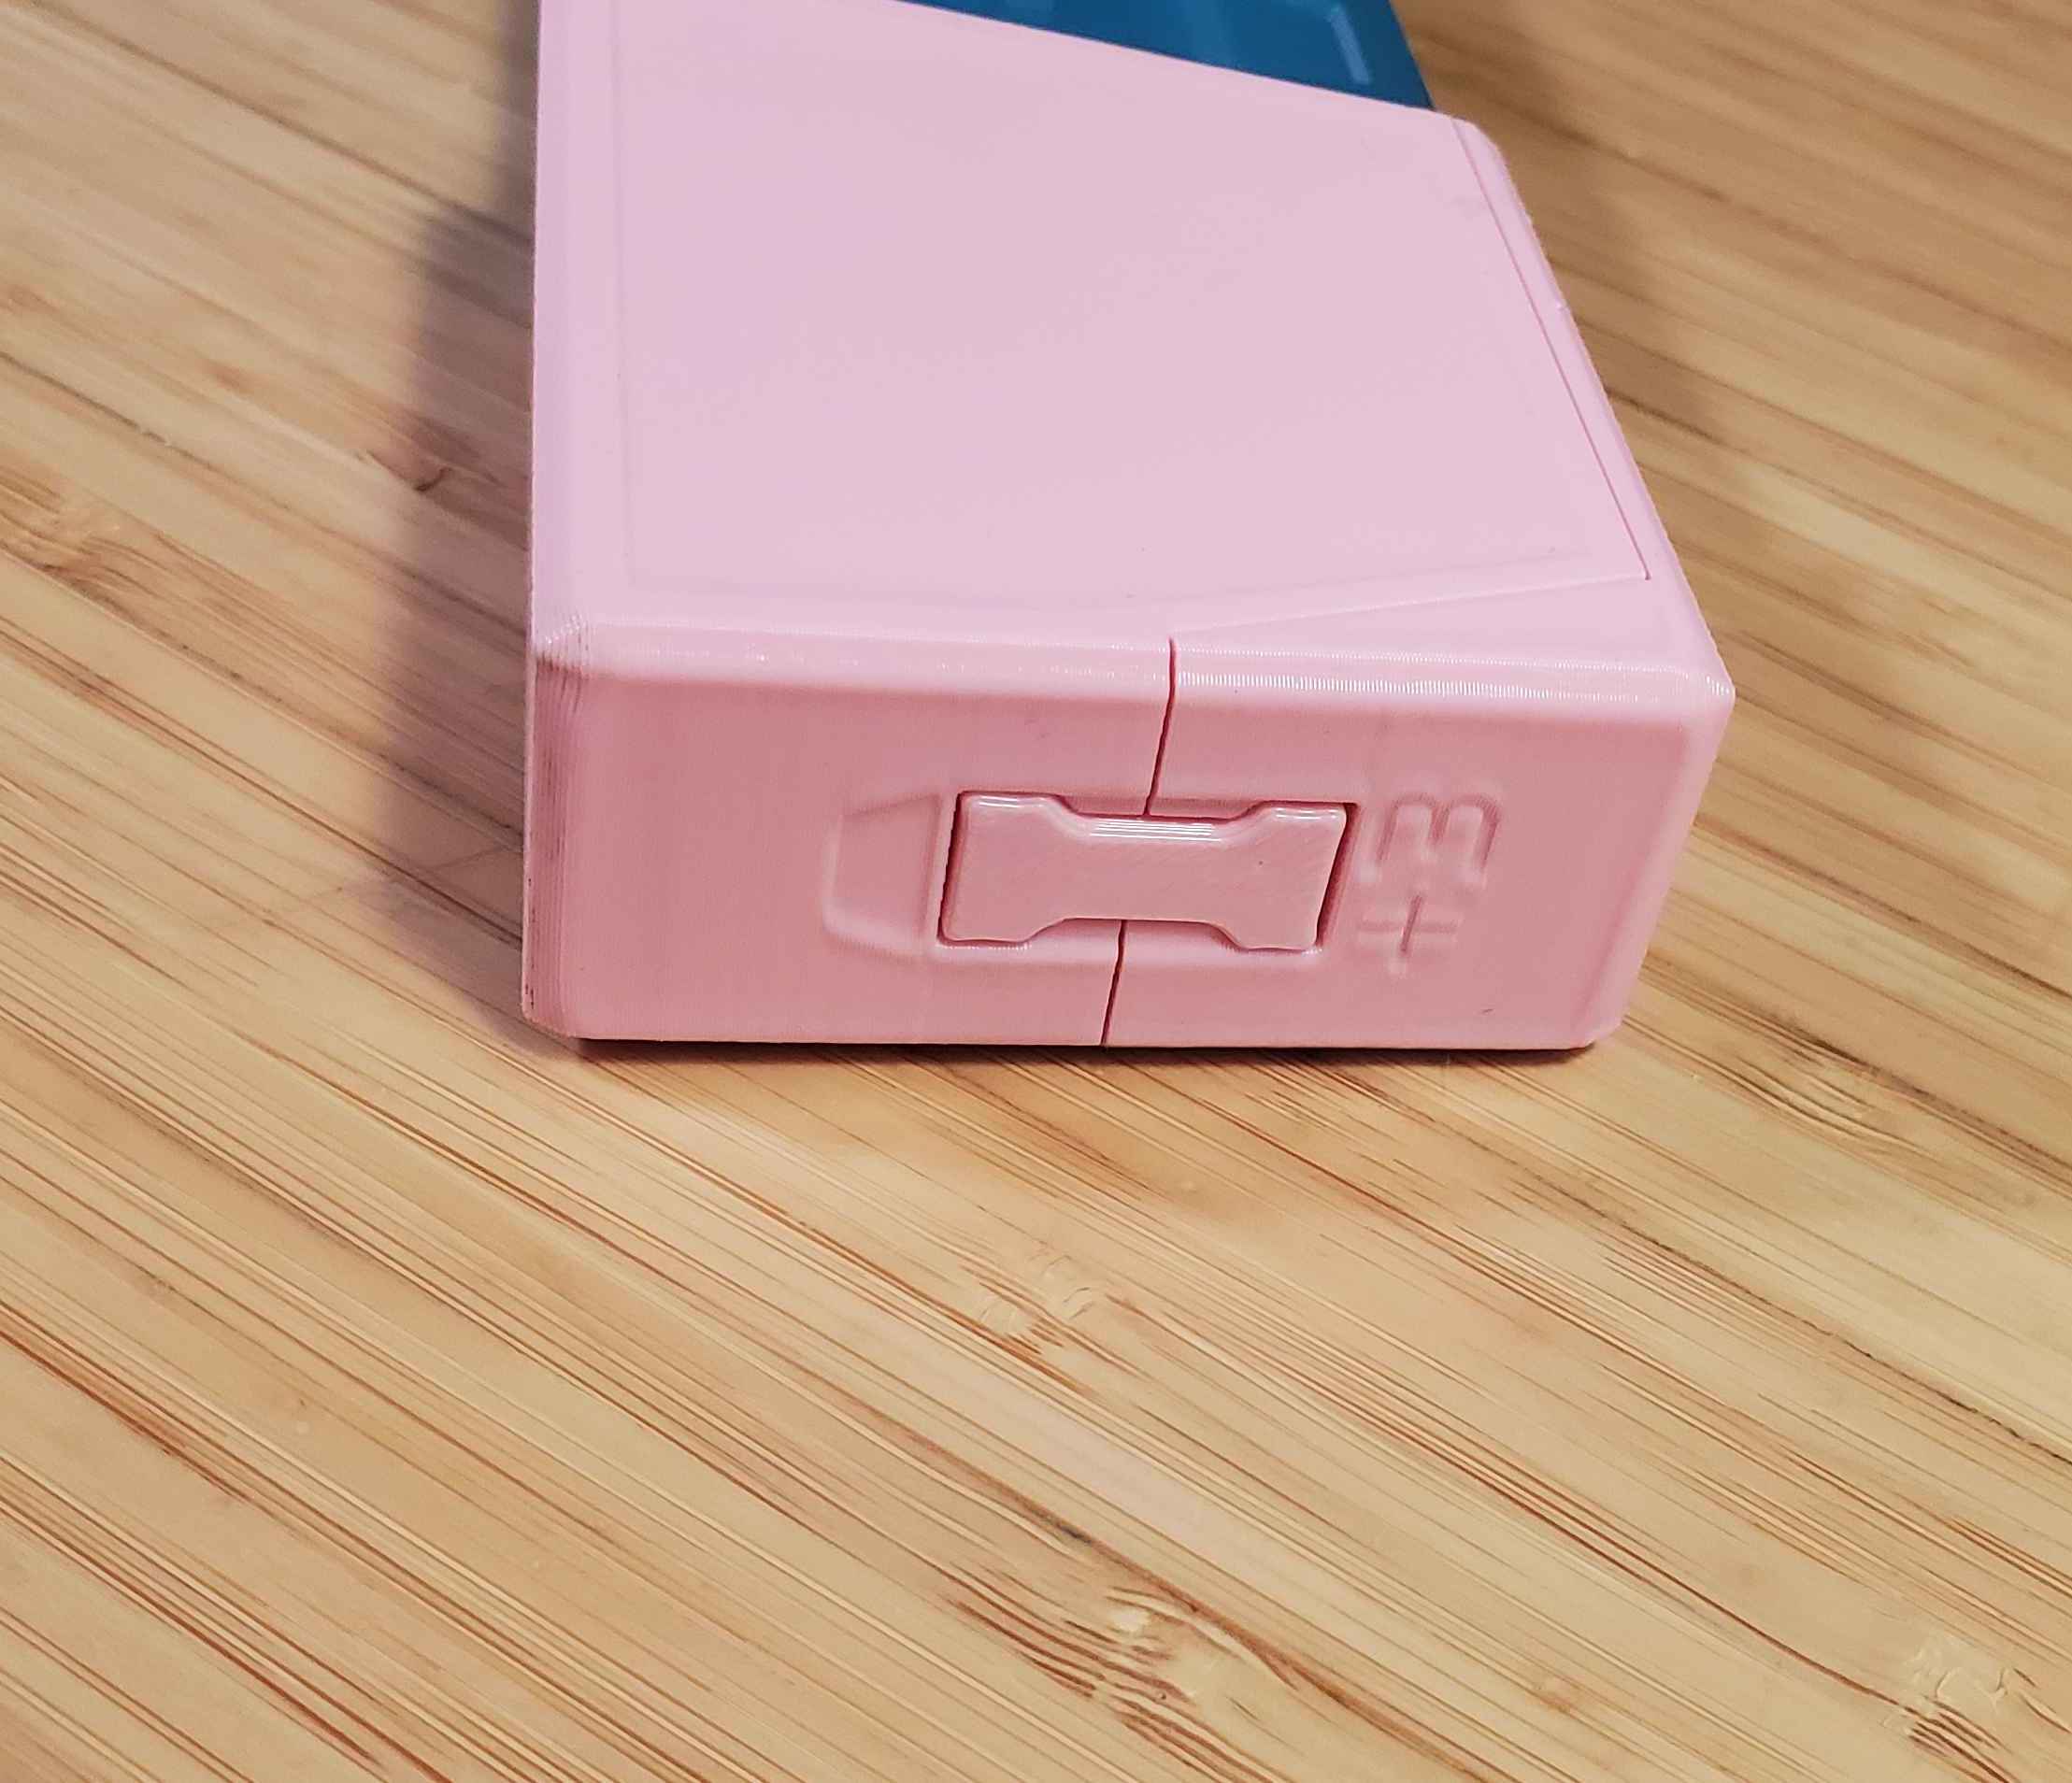
The back baseplate is a smaller piece with +# extension size text label.

While keeping the replacement floorplate in the magazine body, completely inside, slide the two baseplate pieces onto the rail on the magazine body.


When the baseplate sides are joined, with no gap between them, the floorplate is free to travel into the extension. If it does not do so automatically, gently squeeze the front and back of the magazine together at the base of the magazine body/top of the extension. This should free the floorplate to travel into the extension. The raised dog bone feature of the floorplate should end up in the cutout in the two baseplate halves, roughly flush with the bottom of the magazine.

The extension is now installed.
To remove the extension, simply repeat the process in reverse. Push the floorplate out of the extension and into the magazine body with a rod. Separate the front and back of the extension and slide them off the magazine. This allows you to replace the extension, or service the magazine.


I would like to thank my beta testers, Flibbby404, Pocky, Bird!, Jacob Cartoon, and Donutcat for their time, filament, and feedback, this would have been much harder to do without good testing.
These files are provided for all noncommercial uses. Should you wish to use or produce them commercially please contact me to arrange details.
These files are not to be used or sold by Frontline Foam, by downloading these files, you agree that you are not Frontline Foam and/or related to Frontline Foam or Derrikk Sun.