
Whale Tape Dispenser and Pencil Holder
Obliczymy ostateczną cenę na podstawie wybranego pliku. Sprawdzisz ją i zaakceptujesz przed płatnością.
Zapisane na tym urządzeniu.
Ever wanted a cute whale themed tape dispenser that also holds pencils in its mouth? Look no further and print one now!
- Ocena
- 0 / 5
- Polubienia
- 11
- Pobrania
- 25
- Wydruki
- 0
- Wyświetlenia
- 132
- Oceny
- 0
Aktualizacja u źródła:
Informacje o modelu
- Źródło
- Printables
- Kategoria
- Office
- Licencja
- Creative Commons — Attribution
Description
Background
Over the years, I had heard about creating a whale tape dispenser, and I finally got the chance to make one!
Parts List:
- Whale (15.5 cm long, 5.8 cm wide, 6 cm high)
- Left side pole with a peg
- Right side pole with a peg
- [2x] Connector
- Center thing that spins
Required Materials:
- An extra tape dispenser you are willing to destroy
- A Phillips head screwdriver
- Super glue
- Sandpaper
Printing Tips:
Tip: use the screwdriver to remove all supports.
Tip 2: Print the whale on its side or it will end up like this (there are a lot less supports when printed on its side and they are easier to remove) |  |
Design Process
The Design Process was surprisingly difficult. I originally based my project on:
https://www.printables.com/model/192218-whale-themed-tape-dispenser
| Mine | Idea |
 | 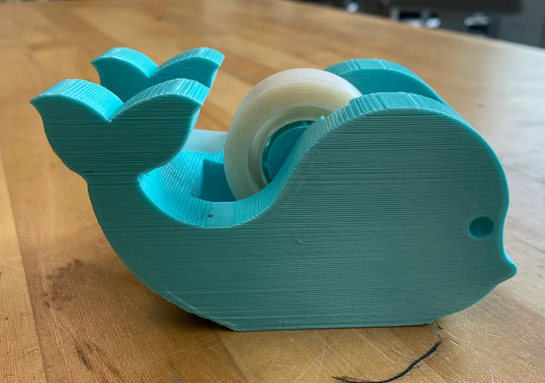 |
 | 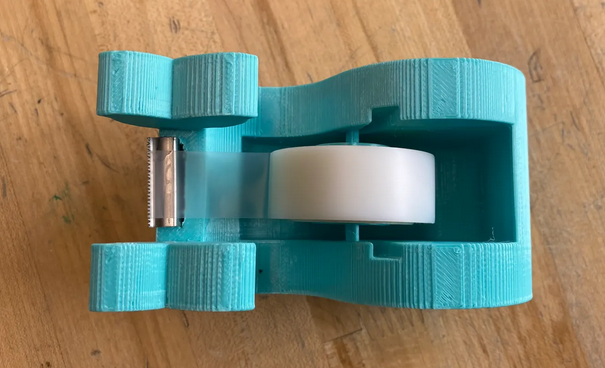 |
This is what my final whale design looked like. It took 10 different tries for me to resize the whale to make it look nice and capable of holding a pencil and some sticky notes. Below is the version of the model online.

I needed an insert to make the part for the tape. There are 5 parts: a left side pole with a peg, a right side pole with a peg, 2 connectors, and the center thing that spins and holds the tape.
The image below shows the right pole with a peg, the connector, and the center thing that spins.

To add this to the whale, follow the directions with photos below!
Note: The sides of the poles with pegs may be too big to fit into the whale. Use sandpaper and sand them down so they fit snugly!
| Direction | Part Photo | Inserted Part | ||
| Insert both the left and right poles with a peg into the whale shell |  |  | ||
| Add one connector to each pole with a peg |  |  | ||
| Lastly, add tape to center thing that spins and connect it in |
|  |


Lastly, the sharp metal thing must be removed from a different tape dispenser and inserted into the back slot on the whale.

Put super glue in the slot and quickly add the metal cutter into the slot.

Now you are done!!

P.S. Adding a pencil and sticky notes is highly recommended!