
Network extension cord on a spool of filament or welding wire (15 kg)
Obliczymy ostateczną cenę na podstawie wybranego pliku. Sprawdzisz ją i zaakceptujesz przed płatnością.
Zapisane na tym urządzeniu.

Network filter from a used spool of filament (Ukrainian brand 3d plast) or welding wire (15 kg)
- Ocena
- 0 / 5
- Polubienia
- 64
- Pobrania
- 155
- Wydruki
- 0
- Wyświetlenia
- 1693
- Oceny
- 0
Aktualizacja u źródła:
Informacje o modelu
- Źródło
- Printables
- Kategoria
- Tools
- Licencja
- Creative Commons — Attribution — Noncommercial
This model will be useful for those who have empty filament spools and don't know what to do with them :)
Before you start, you need to buy some parts, presented in Table 1.
Table 1
| Buy this position | ||||
| Position | Named | Quantity of pieces | Ukrainian store | Aliexpress |
| 1 | Bearing 6201 RS CX (12х32х10mm) | 2 | Click | Click |
| 2 | Threaded rod DIN 975 M12x1.75x1000mm-8.8 or A2 | 1 | Click | |
| 3 | Washer DIN 125 - 13 - 140 HV - 8.8 | 3 | Click | Click |
| 4 | Hexagon nut ISO 4032/DIN 934 M10x1.75 - 8 | 3 | Click | |
| 5 | Hexagon socket head cap screw DIN 912 M3x35-A2 | 8 | Click | Click |
| 6 | Hexagon socket head cap screw DIN 912 M3x10-A2 | 2 | Click | Click |
| 7 | Hexagon socket countersunk head cap screw ISO 10642 M3x16-A2 | 16 | Click | Click |
| 8 | Hexagon socket countersunk head cap screw ISO 10642 M3x40-A2 | 1 | Click | Click |
| 9 | Washer DIN 125 - 3.2 - 140 HV - A2 | 16 | Click | Click |
| 10 | Hexagon nut ISO 4032/DIN 934 M3 - A2 | 16 | Click | Click |
| 11 | Nut with knurled thread M3x5x4.2 | 12 | Click | |
| 12* | Thermal switch overload protector push button and cap, 16 A | 1 | Click | |
| 13 | Industrial Waterproof EU Socket | 4 | Click | Click |
Items with "*" will be purchased later. We will inform you separately.
ASSEMBLY
Follow these steps to assemble “Network extension cable on a spool of 3D PLAST filament”. This assembly guide is also available in PDF form in the files section.
NOTES
All operations where your hands touch the pin are best done with protective gloves :)
1. Preparatory operations
- Cut the hairpin into pieces of the length indicated in the illustration.

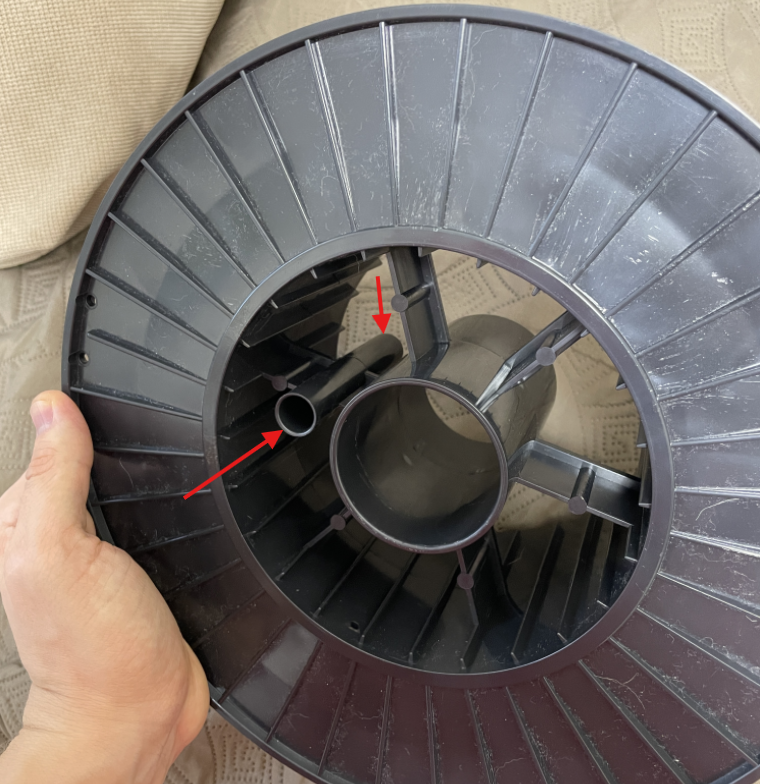
- Cut 5 mm of the specified tube on the plastic spool
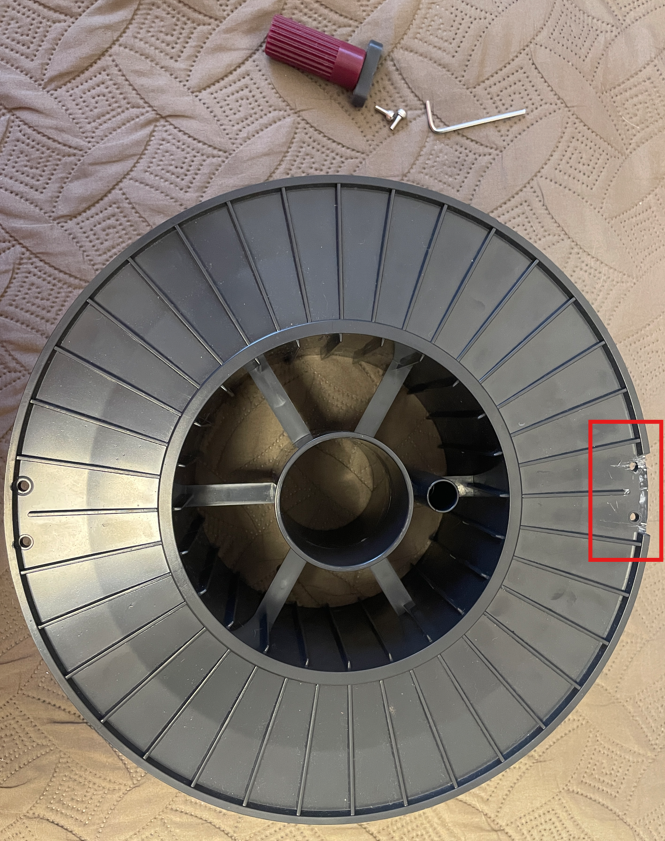
- Cut off part of the rib for mounting the RUCHKA
- Solder the embedded parts (table 1, position 11) for PART2, RUCHKA_1S and RUCHKA_ 3S
 |  |
- Insert bearing for part 1 and part 2
 |  |
2.Assembly operations
Further operations will be presented in video format.
Assembly in the software complex Inventor
Manual assembly
3. Electrical Section
This section will be added later.
It is strictly forbidden to assemble electrical devices and circuits without the appropriate knowledge and skills!
Print Settings
This model was modeled for printing with a 0.4 nozzle.
I recommend using PETG filament for printing.
Settings for each part can be seen in the 3mf file, orcaslicer. Printing was performed on a bambulab P1S 3D printer.
If you print to a different printer, you will likely need to make some adjustments to the print settings.
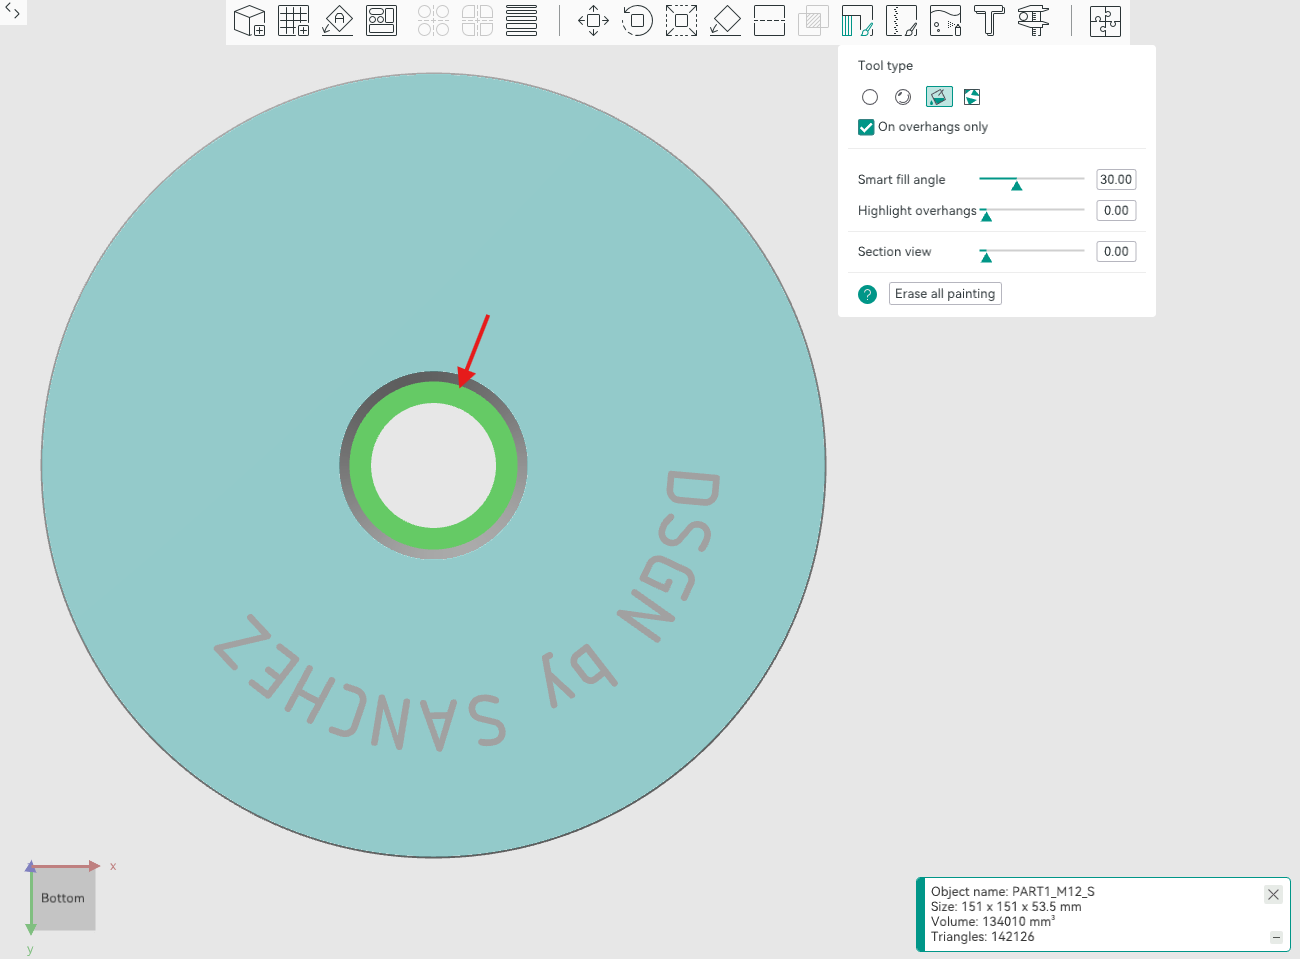
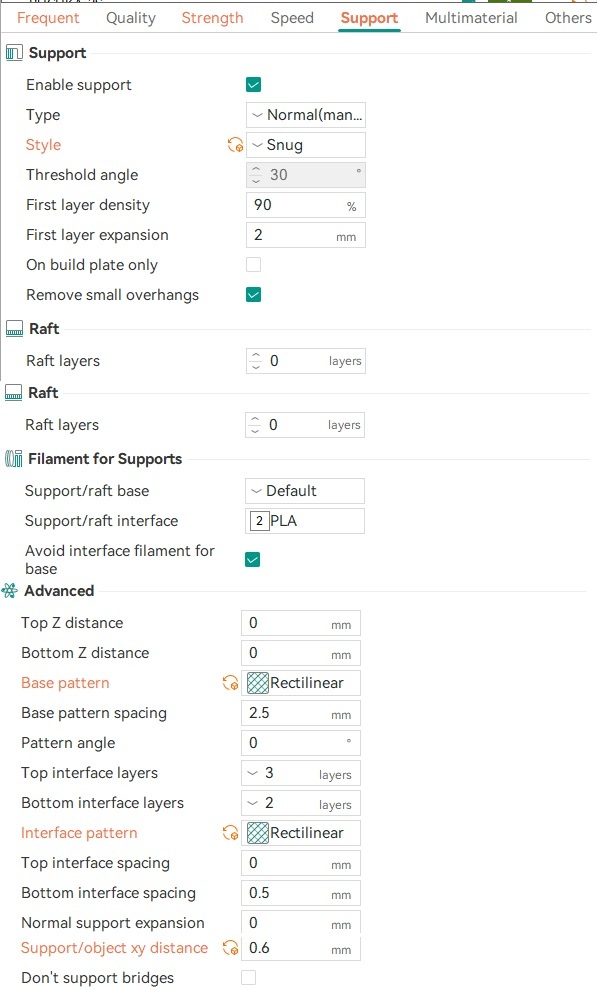
Parts 1, 2, 3 and 4 are printed with overhang support, surfaces are selected manually. For better support separation, I recommend using PLA filament for the raft interface
| Example of a manual product and overhang settings (if you are not using a 3mf file) |
 |
 |
Actual dimensions of the filament spool

ONE MORE THING...
This free model is the result of hundreds of hours of work. If you find the model useful, please support me with a one-time donation.


UPDATE FROM 02.03.2025
1. Added files in STL format;
2. Added a description of the settings for each part.
UPDATE FROM 27.09.2025
1. The diameter of the part has been increased - PART5.2_M12_ZAGLUSHKA;
2. Updated this file in STL and PROJECT_M12_S.3mf.