
Secular Perpetual Calendar program wheel
Obliczymy ostateczną cenę na podstawie wybranego pliku. Sprawdzisz ją i zaakceptujesz przed płatnością.
Zapisane na tym urządzeniu.
Informacje o modelu
- Źródło
- Printables
- Kategoria
- Engineering
- Licencja
- Creative Commons — Attribution — Share Alike
This is a prototype implementation of the IWC secular calendar program wheel from the company's Portugieser Eternal Calendar’ watch. After studying two videos of the design, I adapted it for 3d printing using the program wheel of Shinsaku Hiura perpetual calendar. It is designed to be a replacement for his program wheel.
A secular perpetual calendar mechanism is designed to keep the correct date until the year 3999 AD. It does this by skipping over the leap days for the years 2100, 2200, and 2300. The year 4000 AD has not been determined to be a leap year or not. In short, a secular perpetual calendar mechanism is designed to follow the Gregorian Calendar system. I still need to figure out how to set up the mechanism to keep track of the correct date for the year 2100 any way. I am publishing the design for people to tinker with and perhaps figure out a procedure to set the mechanism. I am in the process of testing the mechanism, and will redesign when needed.
Many of the pieces should be printed using a fine detail setting. The program wheel is best printed as two parts, and then attached together. The two files pWheelTop and pWheelBottom are designed to be attached with some small screws. Something like this: https://www.amazon.com/gp/product/B075GC465B.
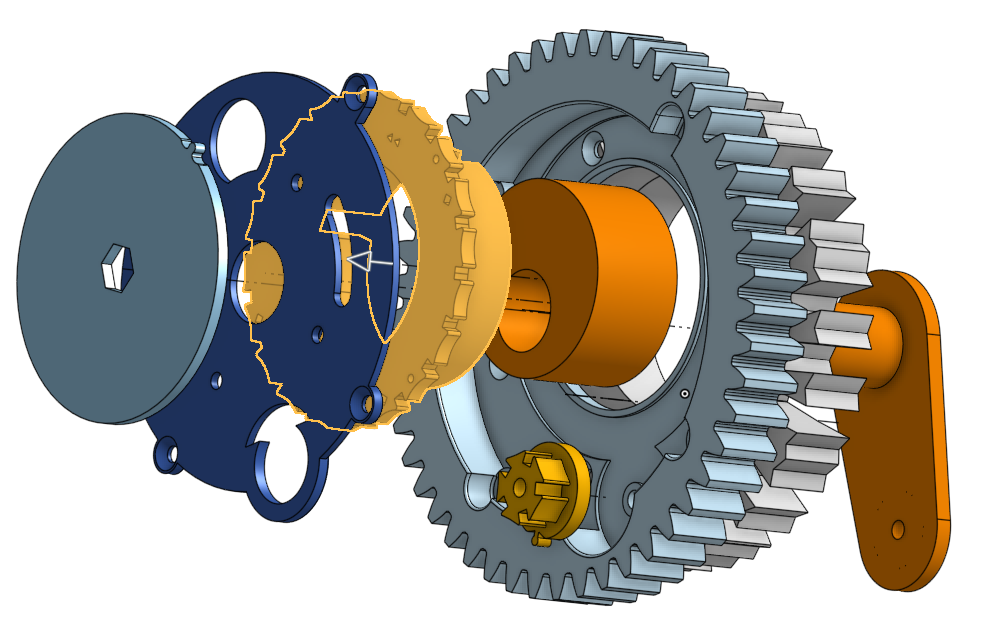
The mechanism requires a 2 mm diameter post about 10 to 12 mm long for the small genevaWheel. There is a picture of the assembly in the cad platform onshape, under the name
secular perpetual calendar mechanism.
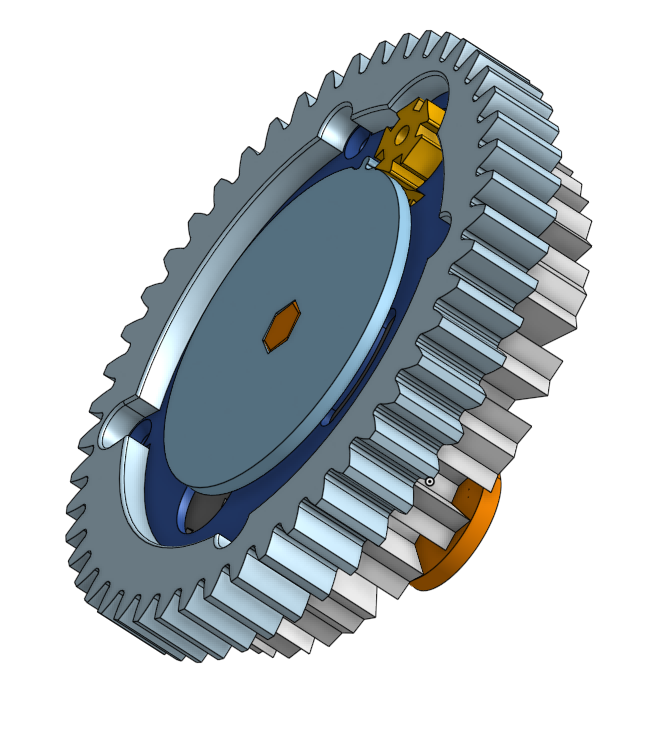
The next image shows what the assembled mechanism look like.
Updated 2/7/2025:
Perhaps one way to set the mechanism is described next.
Some abbreviations:
T = complete turn, full rotation
Y = year
t = teeth
1 T of 20 Y gear = 1 t of 400 Y gear
1 T of 4Y gear = 1 t of 20 Y gear
To set the program wheel, place it so that the larger radius gear of the program wheel is on top.
The lGenevaCrank should be fixed, while the 4Y (48 t) wheel rotate clockwise. The 5t geneva wheel (20 Y wheel) will rotate counterclockwise while the 20 t geneva wheel (400Y wheel) will rotate clockwise. The 400Y wheel determines which leap year to skip.
1 T of the 4Y wheel = 1 t of the 5t geneva gear
1 T of the 20Y wheel = 1 t of the 20 t geneva gear
The year 2025 is 75 years from the year 2100, a non leap year. This will guides us in setting the 20 t and 5 t wheel.
Since 75 Y / 20 Y = 3 + 3/4 T of the 20Y ( 5 t ) wheel. This equation tells us that in 75 years, there are 3 and ¾ turn of the 5t wheel. Three turn of the 5t wheel means three teeth of the 20t wheel moves. This mean three teeth of the 20 t wheel need to move from 2025 to 2100 so that the leap year is skip. So the 20 t wheel need to be set in 2025 to be three teeth from 2100.
Now 75Y / 4 = 18 + ¾ T of the 4Y wheel
18 T / 5 = 3 + 3/5 T of the 5 t wheel. This equation tell us that the 5 t wheel should be set to have 3 teeth from the position where it geneva crank part with the one tooth move the 20Y wheel.
Be mindful of the sense of rotation of each wheel. It matters.
Now for more engineering for smoother operations.
Updated: 2/10/2025
I have uploaded a picture of what the setting result should look like. The first slot in the 20tGeneva wheel should line up with the little slot in the top program wheel. The picture shows the two pieces lined up with the red slots closely aligned. These pieces are already uploaded.
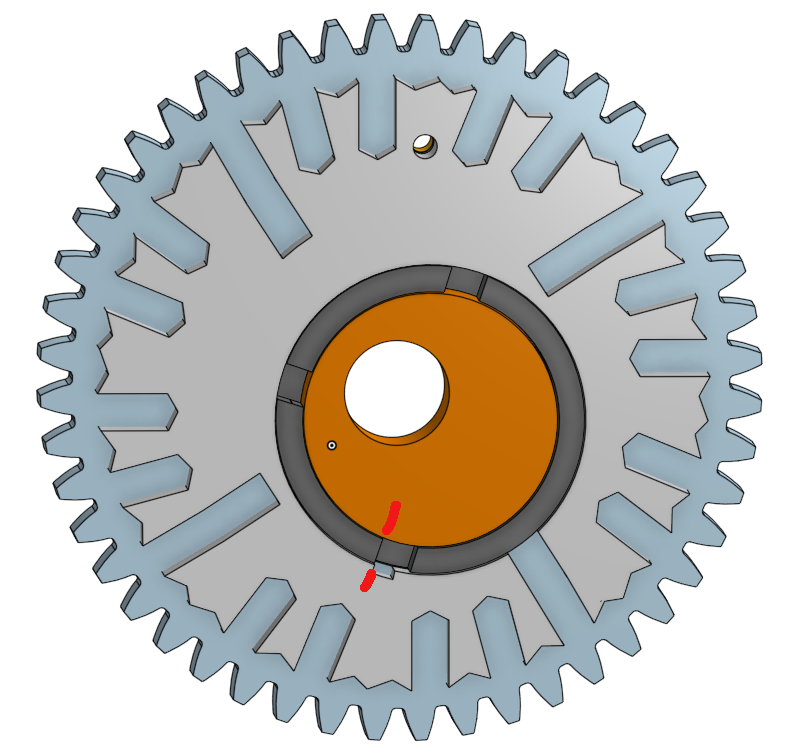
The modified pieces folder are the parts that will need to be used if the secular program wheel is used to replace the perpetual program wheel of my remix of Shinsaku Hiura Quartz movement clock ver 1.
Updated 2/13/2026:
I have added some more parts that will make the mechanism fit better with my version of the Shinkua's Quartz movement clock version 1.
I also found that using oraslicer to align the seam makes for a smoother moving mechanism. Any slicer that allows you to align the seam could be used. Just make sure to lightly sand down the midPost piece to make the cylinder as smooth as possible.