
Futuristic Wand/Saber
Obliczymy ostateczną cenę na podstawie wybranego pliku. Sprawdzisz ją i zaakceptujesz przed płatnością.
Zapisane na tym urządzeniu.
cool futuristic light-saber-inspired hilt to play around with or put on display
- Ocena
- 0 / 5
- Polubienia
- 6
- Pobrania
- 16
- Wydruki
- 0
- Wyświetlenia
- 115
- Oceny
- 0
Aktualizacja u źródła:
Informacje o modelu
- Źródło
- Printables
- Kategoria
- Props
- Licencja
- Creative Commons — Attribution — Noncommercial
Overview:
For this project, I had free choice from a variety of past projects in this class, so I decided I wanted to follow the wand/saber creation guide to create a futuristic saber/hilt type thing. I used saberforge.com to find inspiration for all of the parts I tried to recreate.
General Constraints & Instructions:
Decide what you want your saber to look like. Creating a GoogleDrawing is useful.
Outline your saber “Build Plan”. Begin with a picture of the pommel you will be creating and outline the steps you will take and features you will use to create that section.
- The full hilt should be between 23cm and 27cm in length
- Additional prongs etc. can reach another 2-4cm but DO NOT exceed a maximum total length of 27cm
- Handle length should be between 9cm and 13cm in length
- Handle thickness should be between 3.65cm and 3.80cm
- Maximum diameter should not exceed 3.80cm
- Begin with a reference axis created from the front and right planes. This will be helpful later.
- Next, make your FIRST reference sketch. Make a VERTICAL center rectangle that is 2.60cm in width and 18.50cm in height CENTERED ON THE ORIGIN. Save this as its own separate sketch. This will represent the “light beam”
- Create a SECOND reference sketch that maps out the sizes of the four main parts of your saber (pommel, handle, switch, emitter).
- Start with a large overall center rectangle representing the total length of your hilt. It should be coincident with the blade centerline, but don’t attach it to the origin.
- Then draw horizontal lines and dimension their relative heights to map out your hilt.
- Notice how the “light beam” reference sketch is grayed out and that there is a 2cm smart dimension between the bottom of the hilt and the bottom of the “light beam”.
- You MUST maintain a minimum thickness of 0.30cm between the “light beam” and the side edges of your hilt for structural integrity.
- Begin constructing your hilt one section at a time. Start from the pommel and work your way up. You can make your hilt completely solid as you construct it as we will hollow them out for the light beam at the very end.
Design Choice 1:
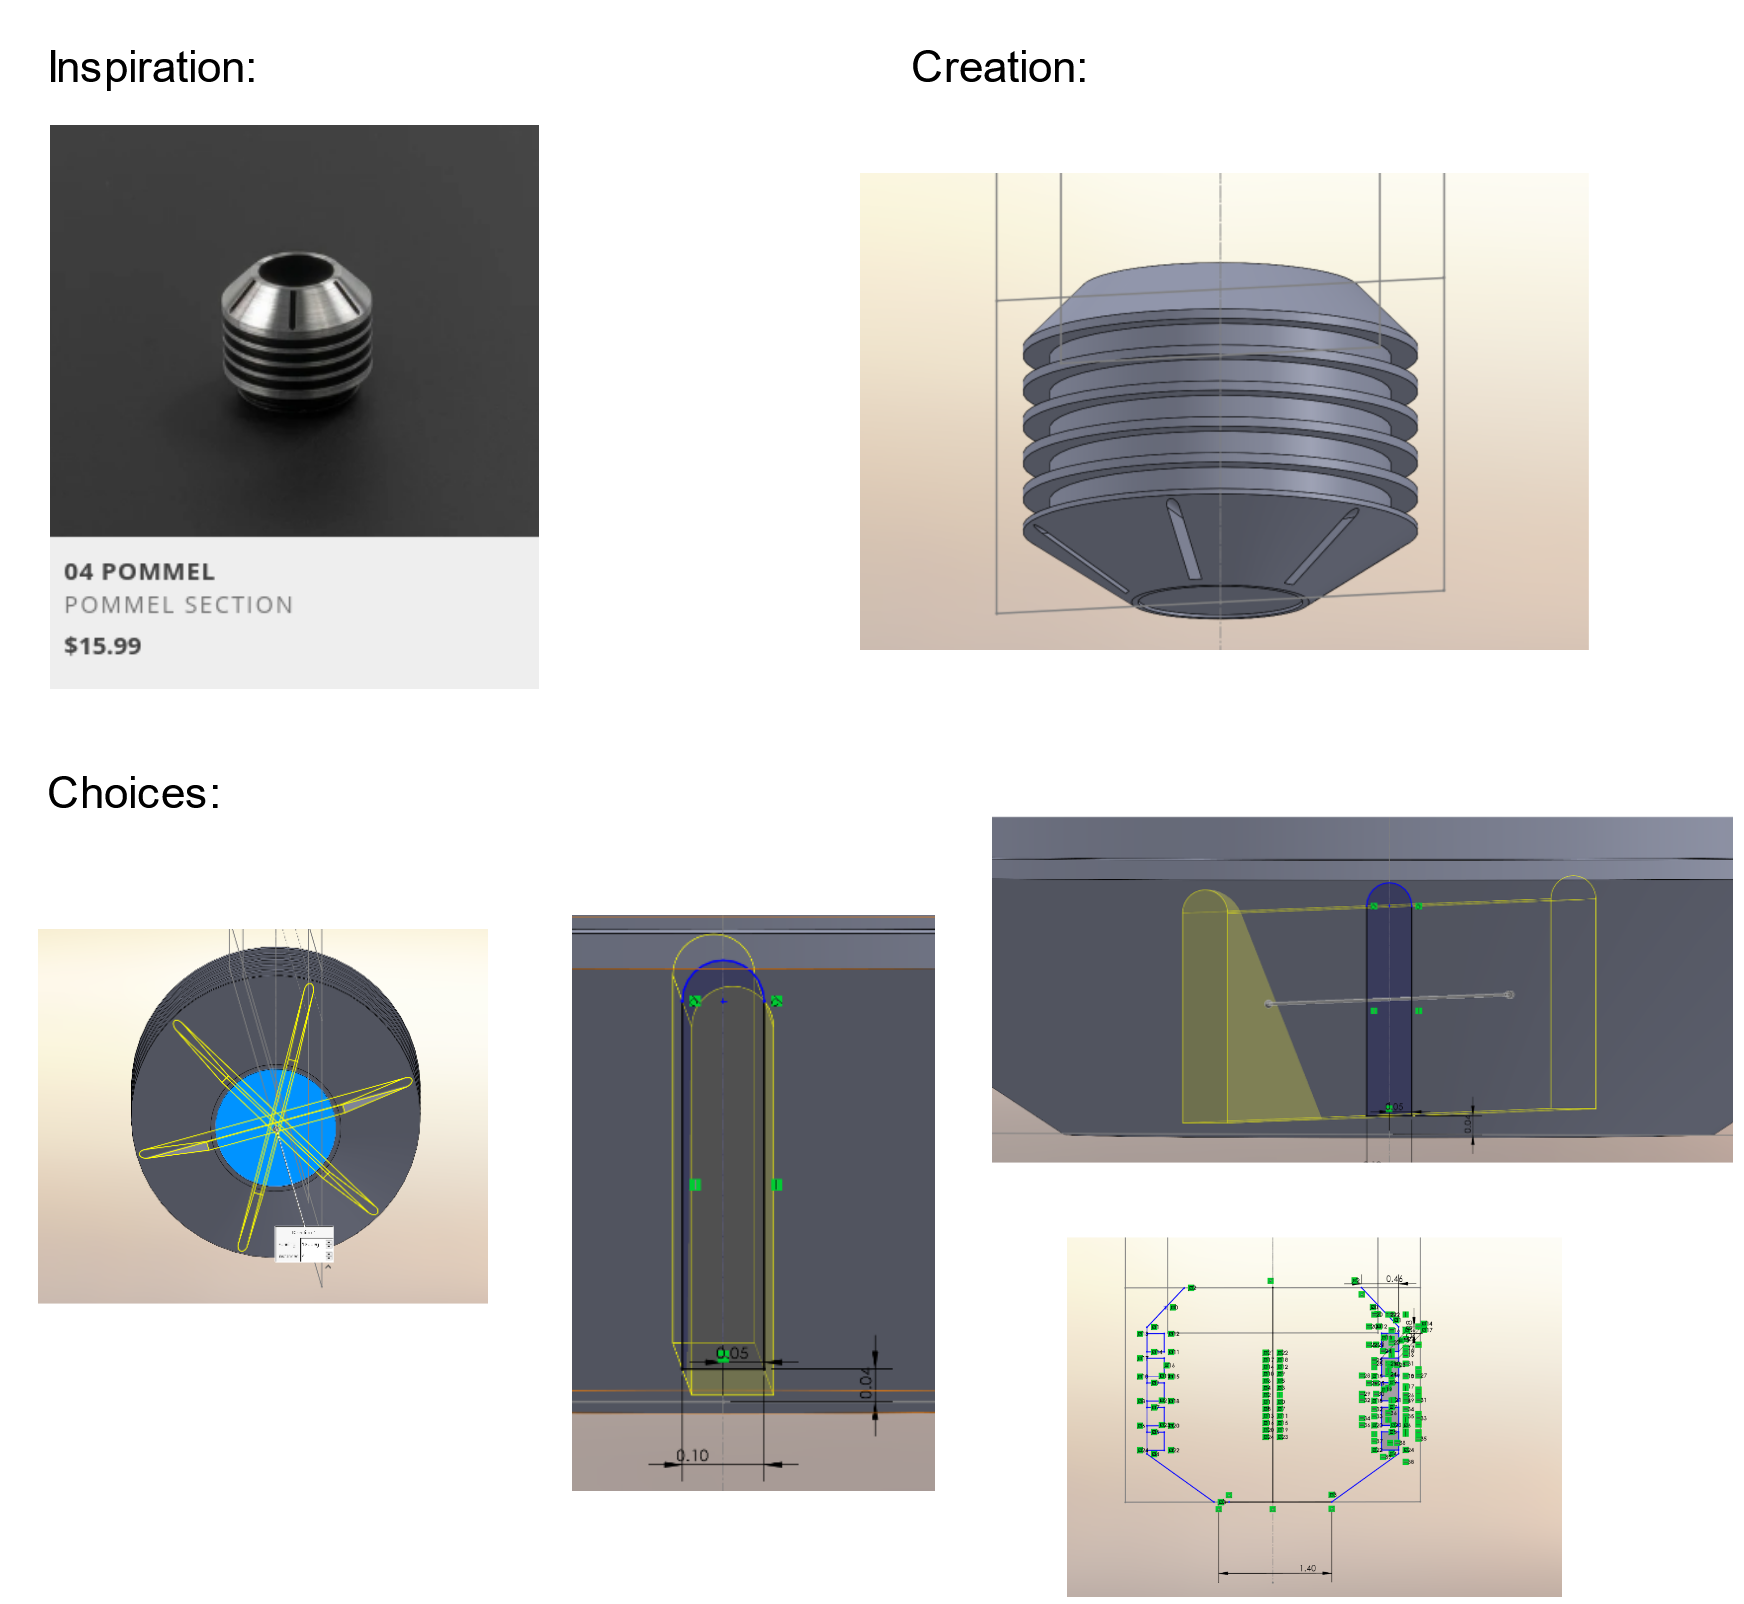
Explanation: This was the inspiration for my pommel section of the saber. I wasn’t sure how it was made from the image, so I first tried outlining the general shape. Then, I did a circular pattern of an extruded cut all through the bottom portion of the pommel. This solution made it look very close to the image.
Design Choice 2:
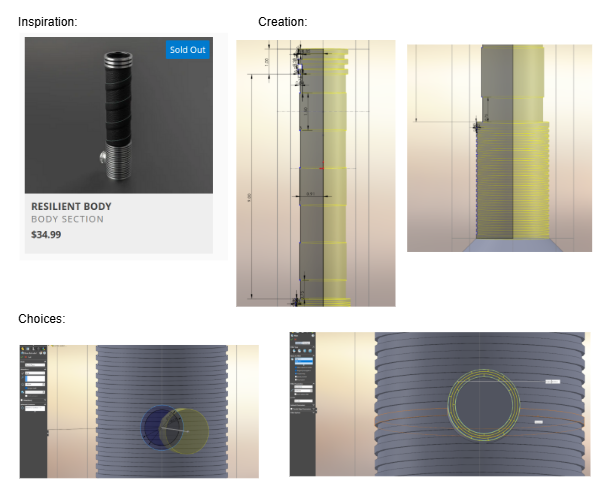
Explanation: For the body section, most of it was just outlining exactly what I saw in the image. It consisted of many lines using equal relations, to create gaps and texture seen in the screenshots. Then, for the button portion, I decided to extrude a cylinder out, and then fillet the corners to make it look like the image. This seemed like a fit result for the little I was able to see in the image, and using the knowledge I have currently.
Design Choice 3:
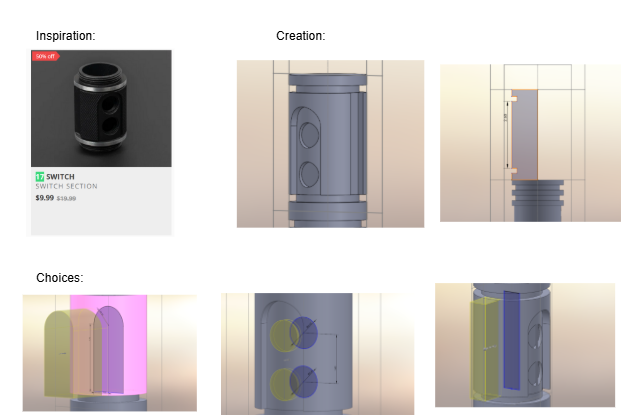
Explanation: I didn’t stray too hard from the inspiration here for the switch section, or face many challenges. My goal was to create the base figure, and then try to experiment with a combination of different shaped extruded cuts. This idea went well, and I was able to replicate a very similar shape to my inspiration. The hardest part was probably trying out all the different cut features until I could get them to cut at the exact part and thickness so that they wouldn’t mess up my model.
Design Choice 4:
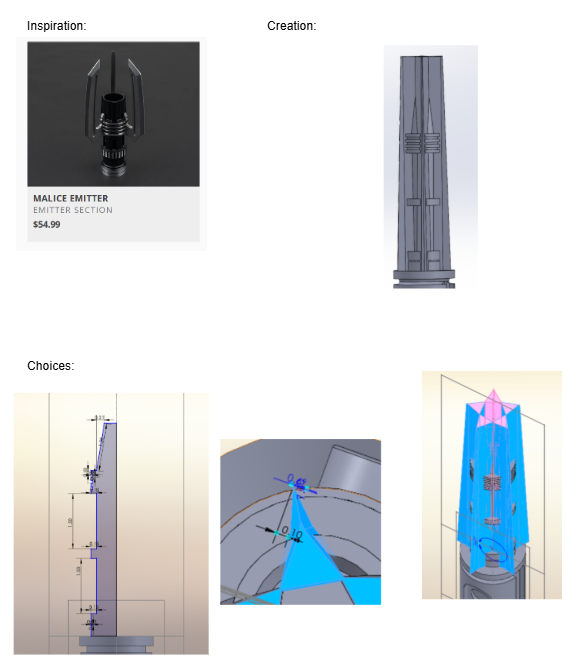
Explanation: For the emitter section, I made a lot of changes compared to the inspiration. I knew that the blade parts were probably going to be difficult to model for my skill level, and maybe have trouble printing, so that’s why I strayed from the original. However, I still wanted to go for the blade idea. So I decided to make an extruded blade-like polygon, and then circular pattern it around the top of the saber. I got stuck here, as my circular pattern wasn’t centered exactly at the top, and I had to play around with the revolution face of the circular pattern to make sure it fit properly which took some time. This portion was probably the most challenging, but also the most rewarding when I figured it out.
Design Choice 5:
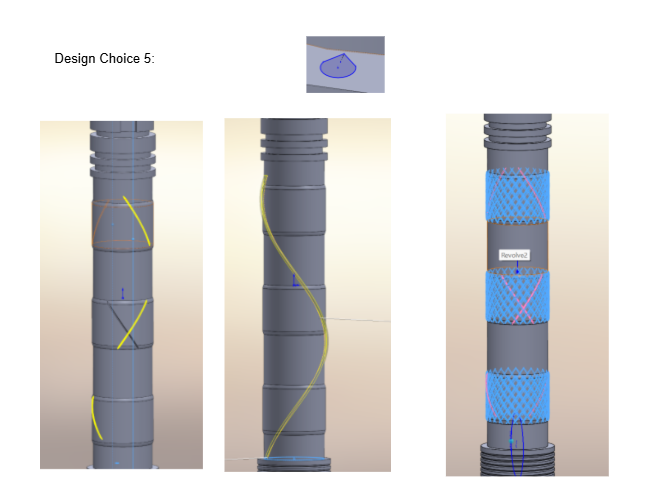
Explanation: To add some extra grip texture to my body section, I did a circular pattern of a mirrored swept cut of the small image shown above, to create the patterned effect shown on the right. I had to get some help for this part, but it was very worth it. I recommend doing lots of cautionary saving when trying to replicate this feature as it can cause a lot of crashing (which I almost learned the hard way).
Design Choice 6:
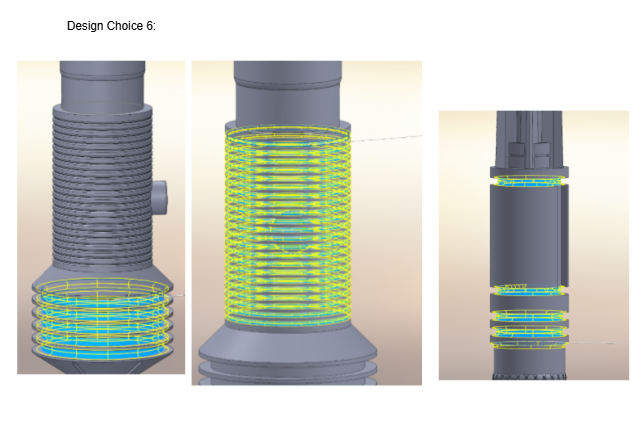
Explanation: As a final touch to my saber, I added fillets to all of the sharp edges in my saber model as they would likely cause issues in the 3d printing process. This involved a lot of precise clicking on all the right faces, but overall wasn’t too bad.