
Owala Lid - Print in Place Remix
Obliczymy ostateczną cenę na podstawie wybranego pliku. Sprawdzisz ją i zaakceptujesz przed płatnością.
Zapisane na tym urządzeniu.

The Owala lid, handle, and spout cover models now in a tidy single print in place version.
- Ocena
- 0 / 5
- Polubienia
- 21
- Pobrania
- 414
- Wydruki
- 0
- Wyświetlenia
- 1992
- Oceny
- 0
Aktualizacja u źródła:
Informacje o modelu
- Źródło
- Printables
- Kategoria
- Other Toys & Games
- Licencja
- Creative Commons — Attribution — Noncommercial
An updated print method for the original Owala Lid Model.
Bottles
Updates:
- Thank you Nathan_1472019 for helping review this model pre-launch!
- This Lid has been updated with new threads which fixes thread splitting on the bottle when printing with a Bambu.
Articulated Lid Print in Place
- 15% infill
- 0.2 layer height
- Organic Supports Everywhere (Additional paint on supports are recommended around the handle lip)
- A 3mf file is included. This presets:
- Recommended settings listed above.
- A scheduled filament switch to change colors for a different color rim.
- 35% scale for a mini bottle that can hold a chapstick
- 100% scale is life size
- To customize the color combinations of the lid, spout cover, and handle, it is recommended that you print the model multiple times, once for each of the different colors of lid, spout cover, and handle. Afterwards disassemble the print in place pieces, and swap to the desired combination.
- Why go through this extra effort to print a this version? - I've found that these pieces fit together much more cleanly and they come out a little more true to their intended shape instead of being warped slightly due to individual printer and slicer quirks. Tldr: The result looks better!
Now to disassemble and re-assemble your print!
Once the lid is printed, remove the supports for the handle lip and the threads that are on the rim of the base of the lid.


Then remove ~75% of the bottom half of the supports from the center. Use a set of pliers to gently press upwards on the remaining supports until the spout cover swings open. Once it is free, remove the rest of the supports


Next, to remove the spout cover, open the cover completely. Gently twist the spout cover in a back and forth rotation, holding the base of the lid in place. If this does not free the spout cover, press firmly directly downwards on the spout to release it from the hinge mechanism. This part requires a bit more force than any other step.


Next in order to free the handle, place your fingers on each arm of the handle and gently squeeze inwards freeing the arms from the interior of the lid.
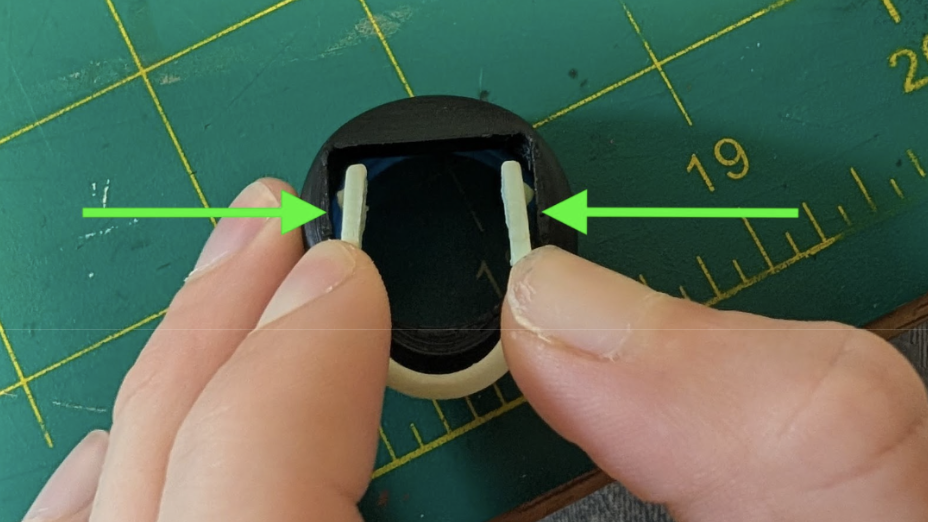
Next, put the nose of your pliers through the bottom of the lid, with each tip resting on the underside of each arm of the handle. Gently push upwards on the pliers while holding the base of the lid steady to release the handle.

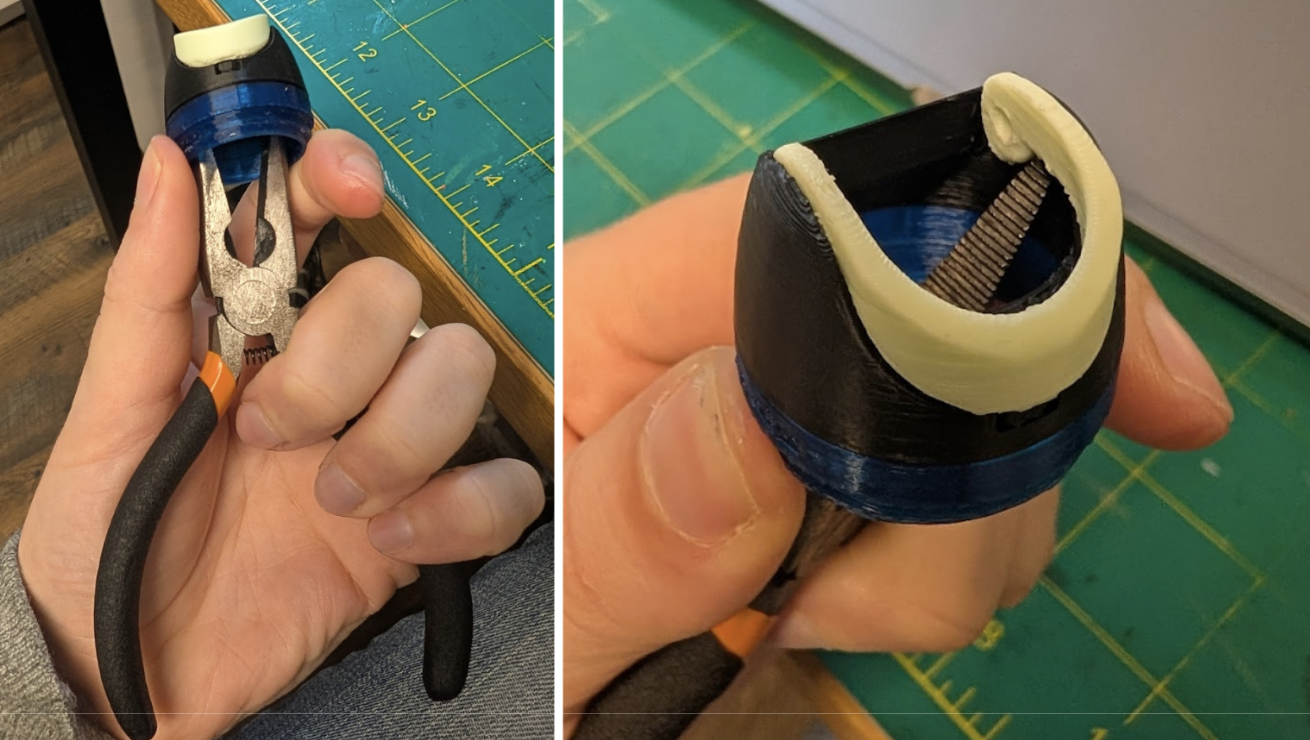
Once you have your desired colors, snap the pieces back in by nesting the spout cover into the handle, then keeping the two together, snap the handle arms into the lid.

Voila! Or should I say Owal-a?
