Keyblade - Kingdom Key - Dummy 13 Sword
Obliczymy ostateczną cenę na podstawie wybranego pliku. Sprawdzisz ją i zaakceptujesz przed płatnością.
Zapisane na tym urządzeniu.

The default keyblade for Dummy 13 models
- Ocena
- 5 / 5
- Polubienia
- 71
- Pobrania
- 228
- Wydruki
- 0
- Wyświetlenia
- 847
- Oceny
- 1
Aktualizacja u źródła:
Informacje o modelu
- Źródło
- Printables
- Kategoria
- Other Toys & Games
- Licencja
- Creative Commons — Attribution — Noncommercial — NoDerivatives
The default Kingdom Key keyblade from Kingdom Hearts, scaled to be a Dummy 13 weapon.
There are a few options to print this out with various pros and cons.
Print by Plate (AMS optional)
This allows multi-colored prints without needing an AMS.
- Plate 1: Shaft and key bit
- Orientation: Print the shaft and bit lying flat.
- Supports: None
- Plate 2: Guard
- Orientation: Print lying flat
- Supports: Manually paint supports onto the end rod sticking out. Automatic supports can work, but unnecessary supports will be generated at the bridged sections.
- Plate 3: Handle
- Orientation: Print lying flat
- Supports: None
- Plate 3: Rain Guard
- Orientation: Print lying flat OR standing up. Printing lying flat will have a more uniform print texture with the rest of the keyblade, but will require more post-processing to ensure the hole is big enough.
- Supports: None
Print by Object (AMS required)
If you have an AMS, this is the same process as the “Print by Plate” but with everything on the same plate.
AMS Merged
If you don't mind a lot of purged material and a ~6x increase in print time, you can opt to print most of the keyblade in one piece using the AMS. This profile won't require as much assembly and will likely result in a stronger print.
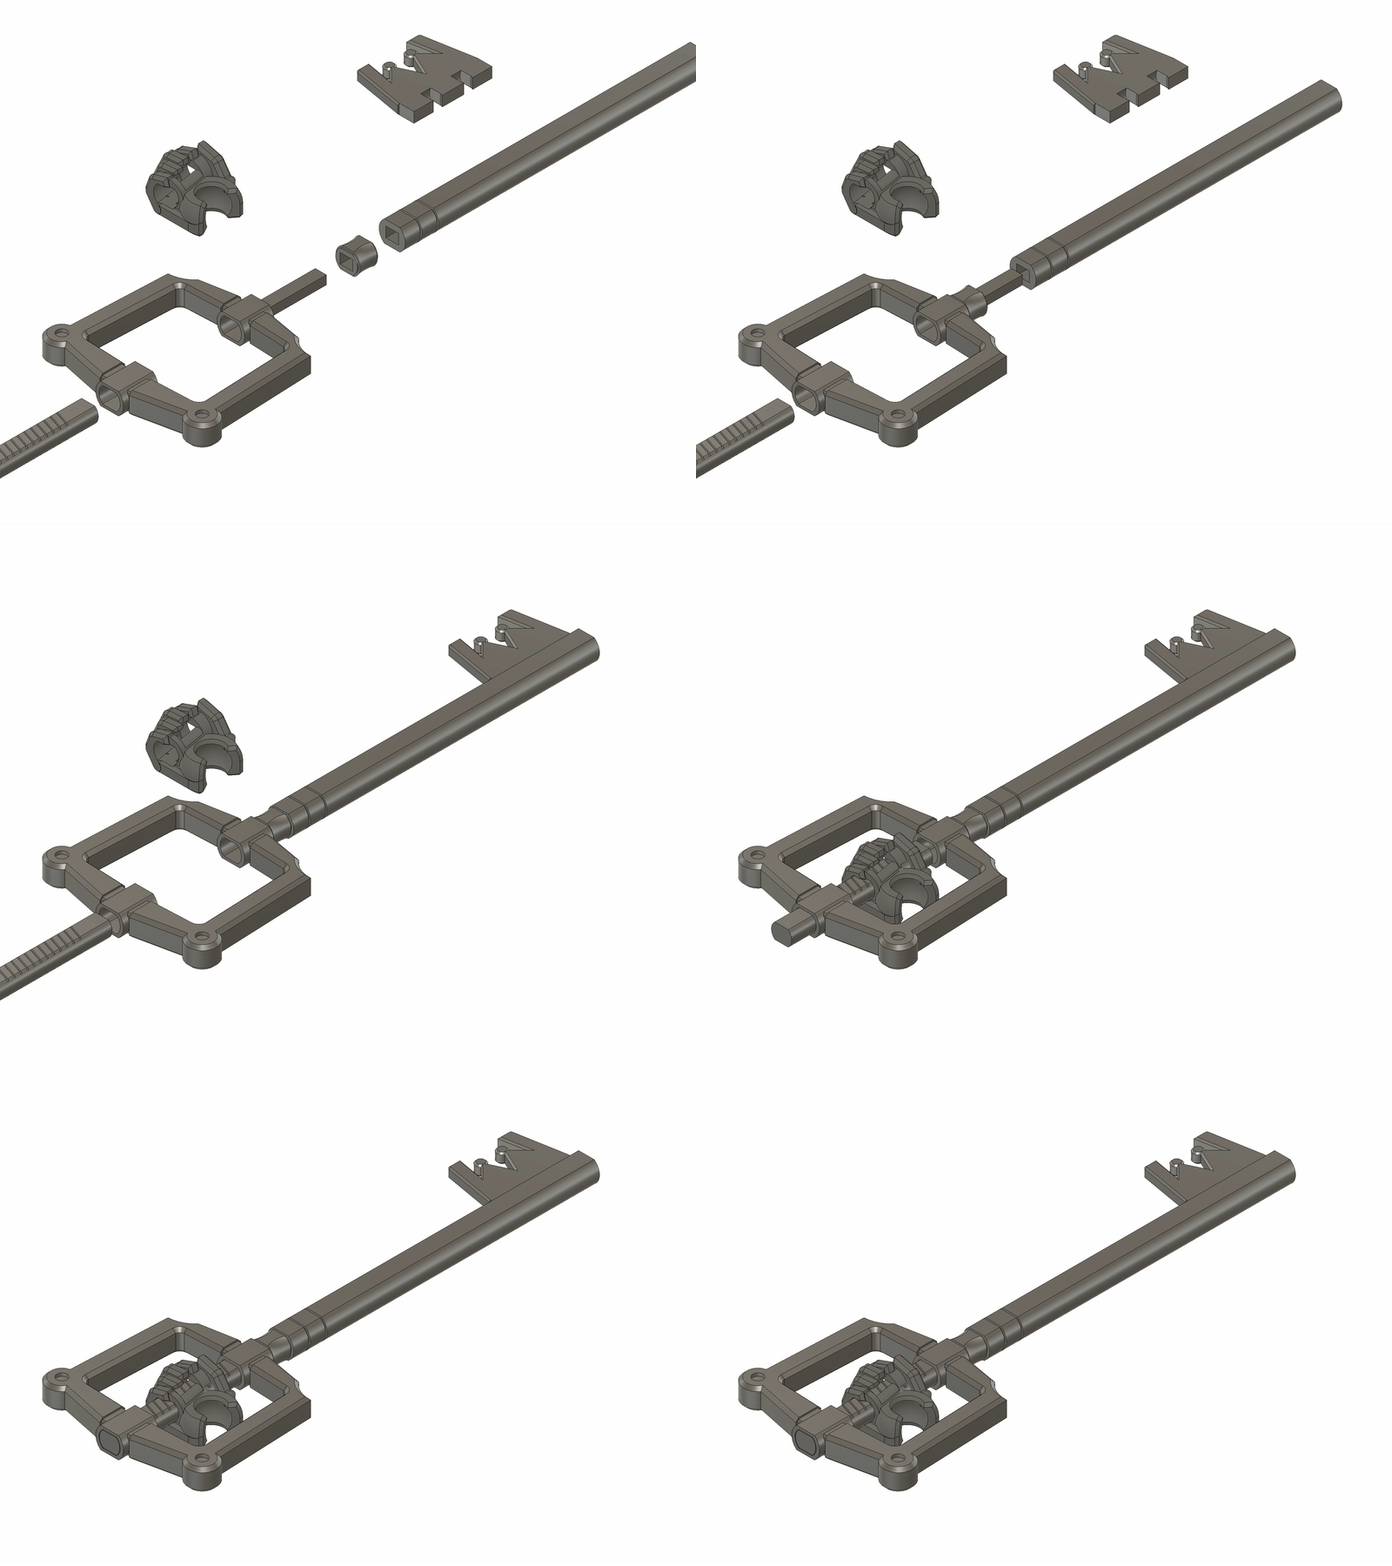
Assembly Instructions
- IMPORTANT: ensure the shorter end of the handle goes in first.
- Be careful when removing the supports from the guard. Don't bend the peg. If you're having a hard time fitting the pieces in, make sure that the hole in the rainguard is clear of stringing. You may need to shave some plastic off of the peg carefully to get everything to fit.