
Ghostbusters ATC/2016 Remote Trigger
Obliczymy ostateczną cenę na podstawie wybranego pliku. Sprawdzisz ją i zaakceptujesz przed płatnością.
Zapisane na tym urządzeniu.

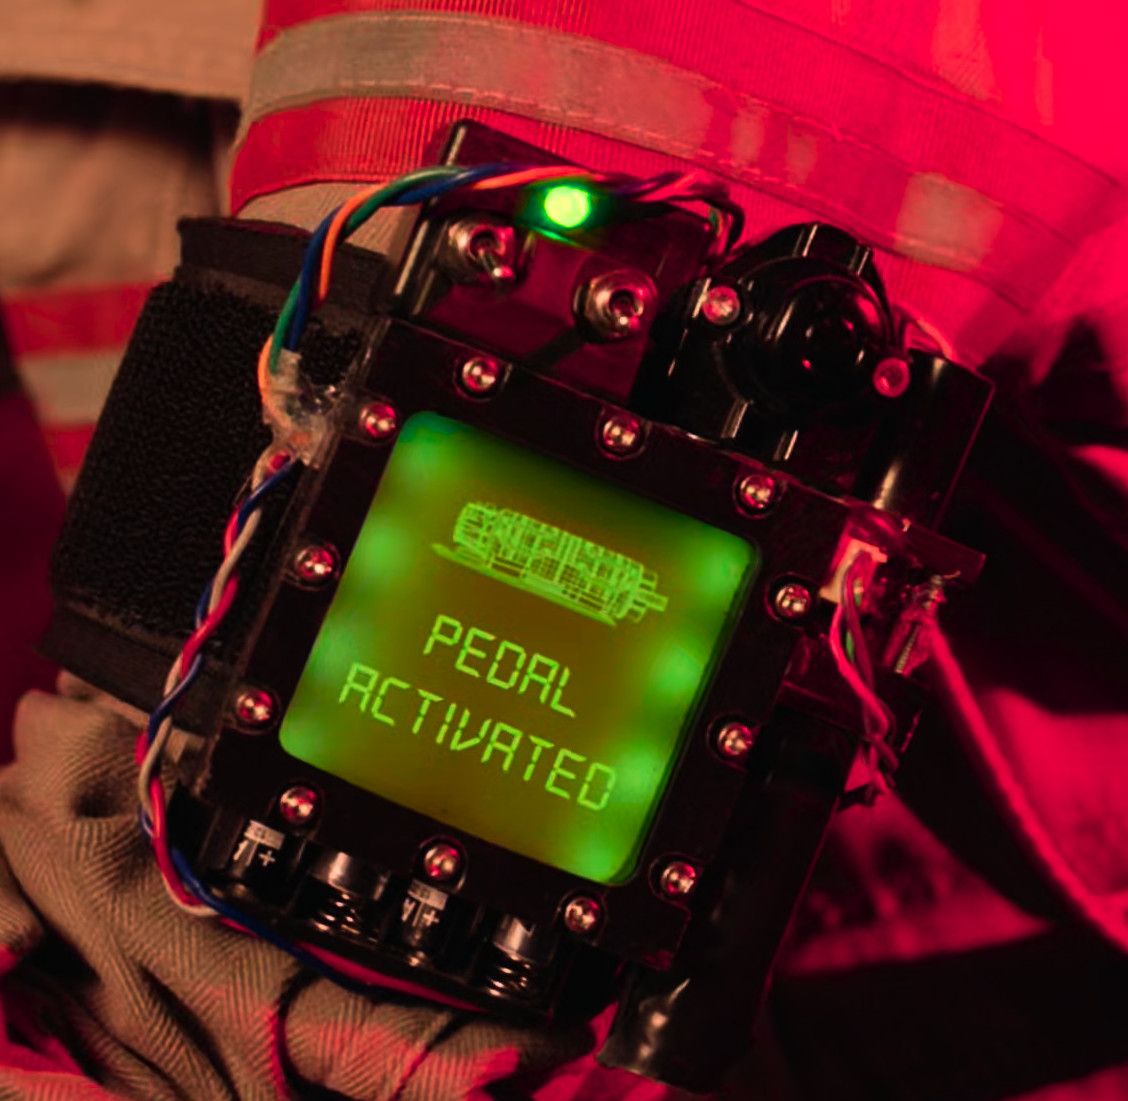
This is a wearable replica of the Ghostbusters: Answer The Call (2016) Remote Trigger armband as worn by Holtzmann.
- Ocena
- 0 / 5
- Polubienia
- 9
- Pobrania
- 44
- Wydruki
- 1
- Wyświetlenia
- 211
- Oceny
- 0
Aktualizacja u źródła:
Informacje o modelu
- Źródło
- Printables
- Kategoria
- Props
- Licencja
- Creative Commons — Attribution — Noncommercial — Share Alike
This is a wearable replica of the Ghostbusters: Answer The Call (2016) Remote Trigger armband as worn by Holtzmann. In the above photos you can see a close-up screenshot of the prop from the film, as well as one of my fellow South Australia Ghostbusters wearing a prototype replica (I've since made a few adjustments before sharing these files, ). You can also see a photo of one of the stunt (resin/foam?) replicas which was auctioned off a while back, including measurements. This is what I've based mine on.
I ended up making the upper-right section into a push button in case I want to add electronics to this in future, but you can glue this in place if you prefer. I also reinterpreted the side rod, I couldn't figure out what was visible from the front opening (it's covered with electrical tape in later scenes) so I decided that this would be the “antenna”. I've included an inner piece which I wrapped in copper wire and installed into the side rod using an M4 bolt. You could also install LEDs here if you prefer, or just wrap it in tape.
The whole thing should be easy to print, supports are needed on a few parts (such as the two upper boxes for the switch/button. It's designed to assemble using M3 bolts. Most of them are countersunk, I've made sure to countersink most of the holes to keep things flush. The front screen cover uses M3 hex bolts, and some longer M3 bolts run between the two rod mounting blocks on the right side (as seen in the film).
Additionally you'll need standard mini toggle switches for the upper left box, and if you'd like to make the push button functional you'll need a small spring (I used a 3/8"x3/4" compression spring), and a PCB tactile switch.
You'll also need a 4xAA battery holder, this is to be glued onto the removable backplate piece and then bolted to the backplate. When you need to swap the batteries you can unscrew both of these bolts and slide the whole thing out.
If you don't plan on using electronics, please make sure the wires from the AA battery holders don't ever touch! Cut the wires off or tape the ends to prevent them from shorting.
The screen is a 60x60x5mm square, I've included a printable template. In the photo above we used a sticker to look like a screen, this is included here as a PDF with a couple of variations. You can also laser etch this onto 5mm acrylic if you prefer, or use a sticker but add acrylic behind it so you can backlight it with LEDs. You could also cut out a clear phone screen protector or sheet of plastic to place over the sticker, to make it look more like a real LCD screen.
NOTE: In the film the screen seems to be 100% CGI over a blank screen, only the top blue LED is real, but it was tinted green with CGI when the switch was flipped.
For the armband we made ours out of velcro and elastic, it seems secure enough for cosplay purposes.
And finally there are all the wires, ribbon cable, 4-pin polarised header connector, 5mm LED and any other small details. These vary wildly from scene to scene as the prop gradually became more damaged from filming, which is why sometimes wires are hanging loose or hotglued back into place, and there's electrical tape everywhere. So feel free to improvise with these. I've designed the left-side hole for the wires to allow for a rubber cable grommet, I thought it would look nicer than a blob of hotglue like in the film…
As of right now I haven't modeled the separate “keypad” module which attaches to the other side of the armband via the ribbon cable, but I'm hoping to get to this in the near future.
Finally, please note the license for these files are strictly Non-Commercial.
Please feel free to print these, modify them, remix them, build them for your friends, repurpose them for other film franchises, whatever you want! Just don't sell them without permission.
UPDATE - 9th April 2025
I have made some small changes to make wiring easier, as well as making the main box slightly deeper (the AA batteries didn't quite have enough clearance behind the screen). I have also added a “Rod Inner Wire Holder”, which allows you to attach wires to it and install it in the top of the side rod. This is optional, it just seemed cleaner than hotgluing them in place.