
New v3.0 of top riser set for Flashforge Adventurer 5M (AD5M) Minimal DIY Enclosure - prints faster, uses less plastic - and more
Obliczymy ostateczną cenę na podstawie wybranego pliku. Sprawdzisz ją i zaakceptujesz przed płatnością.
Zapisane na tym urządzeniu.

New v3.0 of top riser set for Flashforge Adventurer 5M (AD5M) Minimal DIY Enclosure - prints faster, uses less plastic -
- Ocena
- 4,957 / 5
- Polubienia
- 795
- Pobrania
- 7538
- Wydruki
- 60
- Wyświetlenia
- 23 795
- Oceny
- 46
Aktualizacja u źródła:
Informacje o modelu
- Źródło
- Printables
- Kategoria
- Accessories
- Licencja
- Creative Commons — Attribution — Noncommercial — Share Alike
How to use the 'All Files' choice
"Download All Files" gets everything — including the .3mf file — named "ad5m-minimal-enclosure-by-design8studio-for-orcaslicer-230.3mf" — which is an OrcaSlicer project file, containing multiple print beds, and all the files (and the various file options) are plated up and ready to go.
IMPORTANT: when you open it in OrcaSlicer, you would need to switch from my printer profile to your own printer's profile, in the upper left corner.
ALSO NOTE: don't just indiscriminately print everything in there. Some choices are called for:
Do you want the plain riser or the one with the "Design8Studio" logo?
Which of the 5 included choices of side-mounted spool holder do you want?


Heads-up News
Heads-up:
This listing provides various improvements to the riser set. But there is also a helpful new “guard plate” improvement remix addressing what several makers have noticed re. the attachment challenges on the C and D guard plates. As one maker noted, they were thrilled with the design overall, except for one area: "The only issue I had with the design is that I wish the rear (C and D) guard plates had a more robust way to attach, either to each other, or to the printer." — So do please check out a new remix by @Gduck59_3101769: https://www.printables.com/model/1259116-remix-of-guard-plates — he made various improvements including adding magnet sockets to the C and D guard plates. And now back to your access to the improved riser set (and other parts):
Also, heads-up #2:
As of late January, 2026, I added a newly remixed door hinge that repositions the door downward by 5mm to prevent any scraping against the touchscreen. In conjunction with that, you'll also want to print the new, remixed v2 HANDLE that has its latch moved upwards by 5mm to counterbalance this new hinge, so the handle will still latch properly. The new handle is included in this listing.
=======
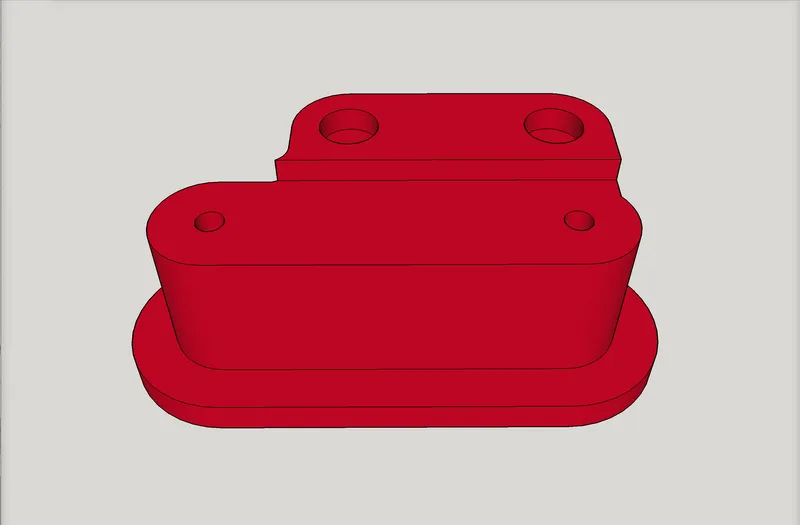
NEW Top Riser Set (v3.0) has a wider ledge to make use of lid easier, adds LED mount nubs back in (matching those on the OG enclosure - apparently for use with a Flashforge LED light bar), and this set of risers is wider and longer by 1.5 mm each way, to reduce the amount of slop. All of these improvements are the same as what I did for the “retrofit” version of the minimal enclosure, available separately for those who already made the OG enclosure, and yet want to replace the top risers with a minimal set, and get their touchscreen back onto the steel metal frame.
I've included a .3mf file that has all the parts needed, or, regarding individual STL files, you can just grab the newer riser set from here, and then get the rest of the files for the minimal enclosure from the earlier listing of my “Minimal Enclosure” remix, available here: https://www.printables.com/model/1130485-flashforge-adventurer-5m-ad5m-minimal-diy-enclosur — and for assembly/installation details, see the earlier listing please. The only thing different in this listing is the riser set.
Change log
Tuesday, February 10, 2026 - added both STEP file and Fusion 360 file for the v3 risers.
Tuesday, January 27, 2026 - uploaded tweaked version of the new v3 of the AD5M DIY Enclosure DoorHinge. In the new area added for aesthetics, a hinge "tooth" was missing. If you already downloaded and printed, there is no need to redo it. The missing tooth will not affect functionality. The number of hinge teeth present before this fix was already more hinge teeth than the original. Kudos to fellow Printables maker Алексей Елсуков for catching this during slicing.
Thursday, January 22, 2026 - added new v3 of the AD5M DIY Enclosure DoorHinge - remixed to be especially for MINIMAL enclosure and its remixes, because it moves the plexiglass front door downward by 5mm, to allow no collision with touchscreen without having to so do any surgery on the plexiglass - plus all the earlier v2 and v1 improvements: easier to separate, better door placement through left-right adjustability. NOTE: the .3MF file with the whole project still has v2, and the new v3 is added as a standalone .STL and standalone .3MF.
Thursday, January 1, 2026 - replaced the .3mf Orca Slicer project file (setup file with everything) because it was brought to my attention that I had accidentally added the wrong set of STLs for the set of four Spool Holder v2.1 — I had accidentally included four Spool Holder v2.0 instead of four Spool Holder v2.1. That 2.0 version was an odd experiment requested by someone, that has an altered angle for the spool. Thanks and kudos to Printables user Mekanic @RichGouge_4100820 for pointing out the mistake! Note: I also updated the file name to indicate which version of OrcaSlicer was used to saved it (OrcaSlicer 2.3.0).
Monday, March 31, 2025 - On two vertical guard plates (labelled C1 and D1), I expanded the large recessed area on the inside face by 9mm of additionally longer recess, because one maker reported that a screw head on his AD5M frame was outside the recess and colliding with and buckling out the guard plate set on the C1 side. After I expanded the C1 side, I then mirrored the same change on the D1 side just to be safe. C1 and C2 are on the rear left column and D1 and D2 are on the rear right column. It's unclear if this issue was affecting only him or everyone, and unclear if his unit is made differently from others.
Saturday, March 29, 2025 - added .3mf Orca Slicer setup file here containing all part files, not just the new riser set. If you are not using the .3mf file, then just get the STL files for all other parts from the earlier listing of the minimal enclosure, linked above.
Saturday, March 29, 2025 - initial upload of new riser set.
PS: For the retrofit version mentioned above, click here: https://www.printables.com/model/1220294-flashforge-adventurer-5m-ad5m-retrofit-minimal-enc — It's only for makers who already made the OG enclosure but want to retrofit the new minimal riser set onto it.
FAQ
Q: Is there a guide for how is this assembled?
A: This is based on (remixed from) Flashforge's DIY enclosure and their kit they sell for that. Below on this page is their video for assembly. In addition to the video, here is a link to their Installation Guide that comes with their kit: https://wiki.flashforge.com/resource/models/printer-mod-and-diy/ad5m_enclosure_manual_a03_20240710.pdf - Note: there are some obvious differences between their original and this one, primarily due to the vertical guard plates each being split into two parts to save massively on print time while also saving some filament, and the resulting parts carry the same naming system (columns are lettered, and upper and lower halves are numbered, i.e. "A" is front right column, "B" is front left column, "C" is rear left column, and "D" is rear right column, and "A-1" means upper, while "A-2" means lower. In addition to the letter-number naming, I added words such as "front" and "side" to make clear which split part goes where. Also, the .3MF file contains two choices for side mounted spool holder (and one of them in four cosmetic variations), and I also offer a remix (parent listing of the spool holders here) that mounts at the back instead of the side. For more on how to install the filament sensor / spool holder, see a Q&A on that below.
Q: Which magnets are called for? What size are they? How many are needed?
A: This is based on (remixed from) Flashforge's DIY enclosure and their kit they sell for that. Below on this page is their video for assembly. In addition to the video, here is a link to their Installation Guide that comes with their kit: https://wiki.flashforge.com/resource/models/printer-mod-and-diy/ad5m_enclosure_manual_a03_20240710.pdf - According to their installation guide, it calls for "Magnet 5*2 × 33", which is to say, a quantity of 33 disk magnets that are 5 mm in diameter and 2 mm thick.
Q: How are guard plates D (D1+D2) and C (C1+C2), supposed to stick to the frame while being secured by only two screws per set, i.e. one screw for each part? Mine look like this /\ only vertical.
A: OK, so there are at least three possible answers here:
First, have you glued the upper and lower parts to each other? This was originally described in the parent of this remix — see copy and paste below.
Second and third, check out (links below) some various remixes of that parent of this remix, that have, in one case, magnet sockets, and in another case, added screw holes:
Copy and paste re. first answer:
(2) added beveled “grip tabs” to the two back vertical Guard Plate Part sets, since the essential minimization process had both the top and bottom parts needing to be installed with only one screw each. I had CA-glued the top to the bottom on each side. These added beveled “grip tabs” will help the tops and bottoms to lock into each other, increasing strength in case there is no glue, and aiding with indexing / alignment if there is glue. See screen shot: "
Remix with added screw holes: https://www.printables.com/model/1602683-remixed-c1-and-d1-guard-plates
Remix with sockets for magnets: https://www.printables.com/model/1259116-remix-of-guard-plates
Q: I printed your enclosure and I can’t figure out how to install the filament sensor / spool holder. I’ve looked on YouTube for installation videos and still stuck. Any help would be greatly appreciated.
A: Not long after the initial release of the Adventurer 5M, the manufacturer, Flashforge, switched from shipping the original bidirectional sensor to a unidirectional sensor, for which my remixes fully support both options. The switch to the unidirectional sensor meant that the sensor's input "jack" or "socket" for the wire, is now positioned closer to the bed (not closer to the back of the printer as before). There is enough excess wire that can be "fished" up out of the inside of the frame, and there is a pathway in my remixed design to get that excess wire to cover the distance to where it needs plugged in. It's like a groove.
Note that the printed part that has the sensor mounted to it, as shown in my remixes, has a special addition: a protrusion toward the side, with a screw hole in it. The backside (inner side) of that screw hole has a nut capture slot (M3). There were already some other M3 nut capture slots in that printed part, and this is an added one, just for my side-mounted spool holder designs. After I insert the nuts, I use a drop or two of CA glue to make sure they don't fall out. The side-mounted spool holder formerly would attach with only one screw; a replacement for the short M4 screw that holds the top of the rear, side, guard plate. My side-mounted spool holders all require that stock M4 screw to be replaced by a slightly longer one. But using only one screw was less than ideal. So I modified the sensor mount and my side-mounted spool holder remixes to have their own matching protrusions toward each other. It's made for an M3 screw into the captured M3 nut. That allows a second screw for securing them much better.
Note: This is all designed intentionally to be compatible with the enclosure kit sold by Flashforge, and the contents of their kit comprise the entire BOM for this project, except for the extra M3 nut and M3 screw, and the slightly longer M4 screw. Here's an affiliate link to the kit on Amazon, sold by the official Flashforge vendor listing: https://amzn.to/4ijsmRb — You can also order the enclosure from Aliexpress, probably cheaper, with slower delivery. Here's a link to Flashforge's wiki about their OG enclosure, upon which this is based, only this one has improvements saving time & plastic and having better features: https://wiki.flashforge.com/en/knowledge_corner/printer-mod-and-diy
And here is Flashforge's video on how to install the DIY enclosure. It helps a lot with understanding that can be applied to my remixes:
Q: What additional hardware is needed to mount the side-mounted spool holder?
A: For the side-mounted spool holder that has four cosmetic options, there is a BOM (bill of materials) in the description, and it tells exactly how many screws and nuts (and what size) are needed (beyond what comes in the enclosure kit). The same applies to the newer, low-slung edition of side-mounted spool holder. I’m going by memory here, but I believe the larger screw is an M4x10mm, and some people have reported that they needed to use M4x12mm. The smaller screw I think is an M3x8mm. Here’s a link to one of the listings that has that BOM: https://www.printables.com/model/1127538-1-of-4-flashforge-adventurer-5m-ad5m-improved-side
Q: "I noticed the left front top riser of the enclosure has your ‘Design8Studio’ logo. Can I just download the one without the logo and replace it?"
A: Yes. One without any embossed logo or letters is provided. You can just use it. Also, if you are interested in embossing your own lettering, check out my video showing how it can be done right in Orca Slicer. https://www.youtube.com/watch?v=YqgFYqWjmBg
Q: What are the hardwares needed? What size and thickness of plexiglass and how many of each?
A: This is designed intentionally to be compatible with the enclosure kit sold by Flashforge, and the contents of their kit comprise the entire BOM for this project. Here's an affiliate link to the kit on Amazon, sold by the official Flashforge vendor listing: https://amzn.to/4ijsmRb — You can also order the enclosure from Aliexpress, probably cheaper, with slower delivery. Here's a link to Flashforge's wiki about their OG enclosure, upon which this is based, only this one has improvements saving time & plastic and having better features: https://wiki.flashforge.com/en/knowledge_corner/printer-mod-and-diy
Quoting from the Flashforge wiki: "If you want to do 100% DIY: Acrylic plate size (designer: Flashforge) — Download the dimensions for acrylic plates:


