
Sun Telescoping Fidget & Fidget Spinner
Obliczymy ostateczną cenę na podstawie wybranego pliku. Sprawdzisz ją i zaakceptujesz przed płatnością.
Zapisane na tym urządzeniu.

A pretty 8x8cm "print in place" sun-shaped fidget that can fit in your pocket and be played with anywhere!
- Ocena
- 3 / 5
- Polubienia
- 15
- Pobrania
- 141
- Wydruki
- 1
- Wyświetlenia
- 527
- Oceny
- 1
Aktualizacja u źródła:
Informacje o modelu
- Źródło
- Printables
- Kategoria
- Other Toys & Games
- Licencja
- Creative Commons — Attribution — Noncommercial
Summary
Our fidget is a telescoping sun fidget that can fit in your pocket (around 8x8cm) and looks pretty anywhere! It doubles as both a fun thing to shake around, but also a fidget spinner because of its circular shape! It’s called a PIP (or Print-In-Place) fidget because it can be printed all at once and doesn’t require any assembly. Worked with @6pioneer_2915695.
Assignment
Make a telescoping fidget using a series of sketch offsets and angled extrusions and cuts. It should have an area of less than 64cm2 and be identical to that of your partner’s.
Constraints:
- The sketch must begin with a constraint box, (center-rectangle created from the origin)
- Your outermost outline must fit within an 8cm x 8cm box or equivalent area (64cm2)
- Dimensions/Relations should be efficient.
- It is not required to fully define your entire sketch, but it will help.
- The sketch must contain zero error messages.
- Demonstrate efficient use of “Offset Entities”
Construction Instructions/Assembly
- Sketch with offsets
To start our project, we first chose a reference image and then tried to replicate that. After that was finished, we offset the interior circle of our sun over and over again until we got this: 
2. Unmirrored design
After the series of offsets, I realized that I had two too many spikes on my sketch, so I had to redo that (look at design changes). After fixing the issue, we repeatedly extruded and cut out sketch, drafted 20 degrees inward

3. Mirrored Design
And then mirrored it so the rings would be able to “nest” inside each other.

Design Choices
- Sketch Issues
Originally, when my partner and I were making the sketch, we tried to just make 14 rough triangles and then set all the lines to equal. This didnt work originally, because we accidentally made a bunch of automatic relations that over-defined our sketch. To solve this, we had to go through all of our relations and delete any parallel, perpendicular or tangent relations we saw.

2. Wrong number of points
This issue was only for me, not my partner because I counted the amount of points I made on each side of the sun wrong. It was convenient to fix but it was fine either way, I just wanted them to be identical.
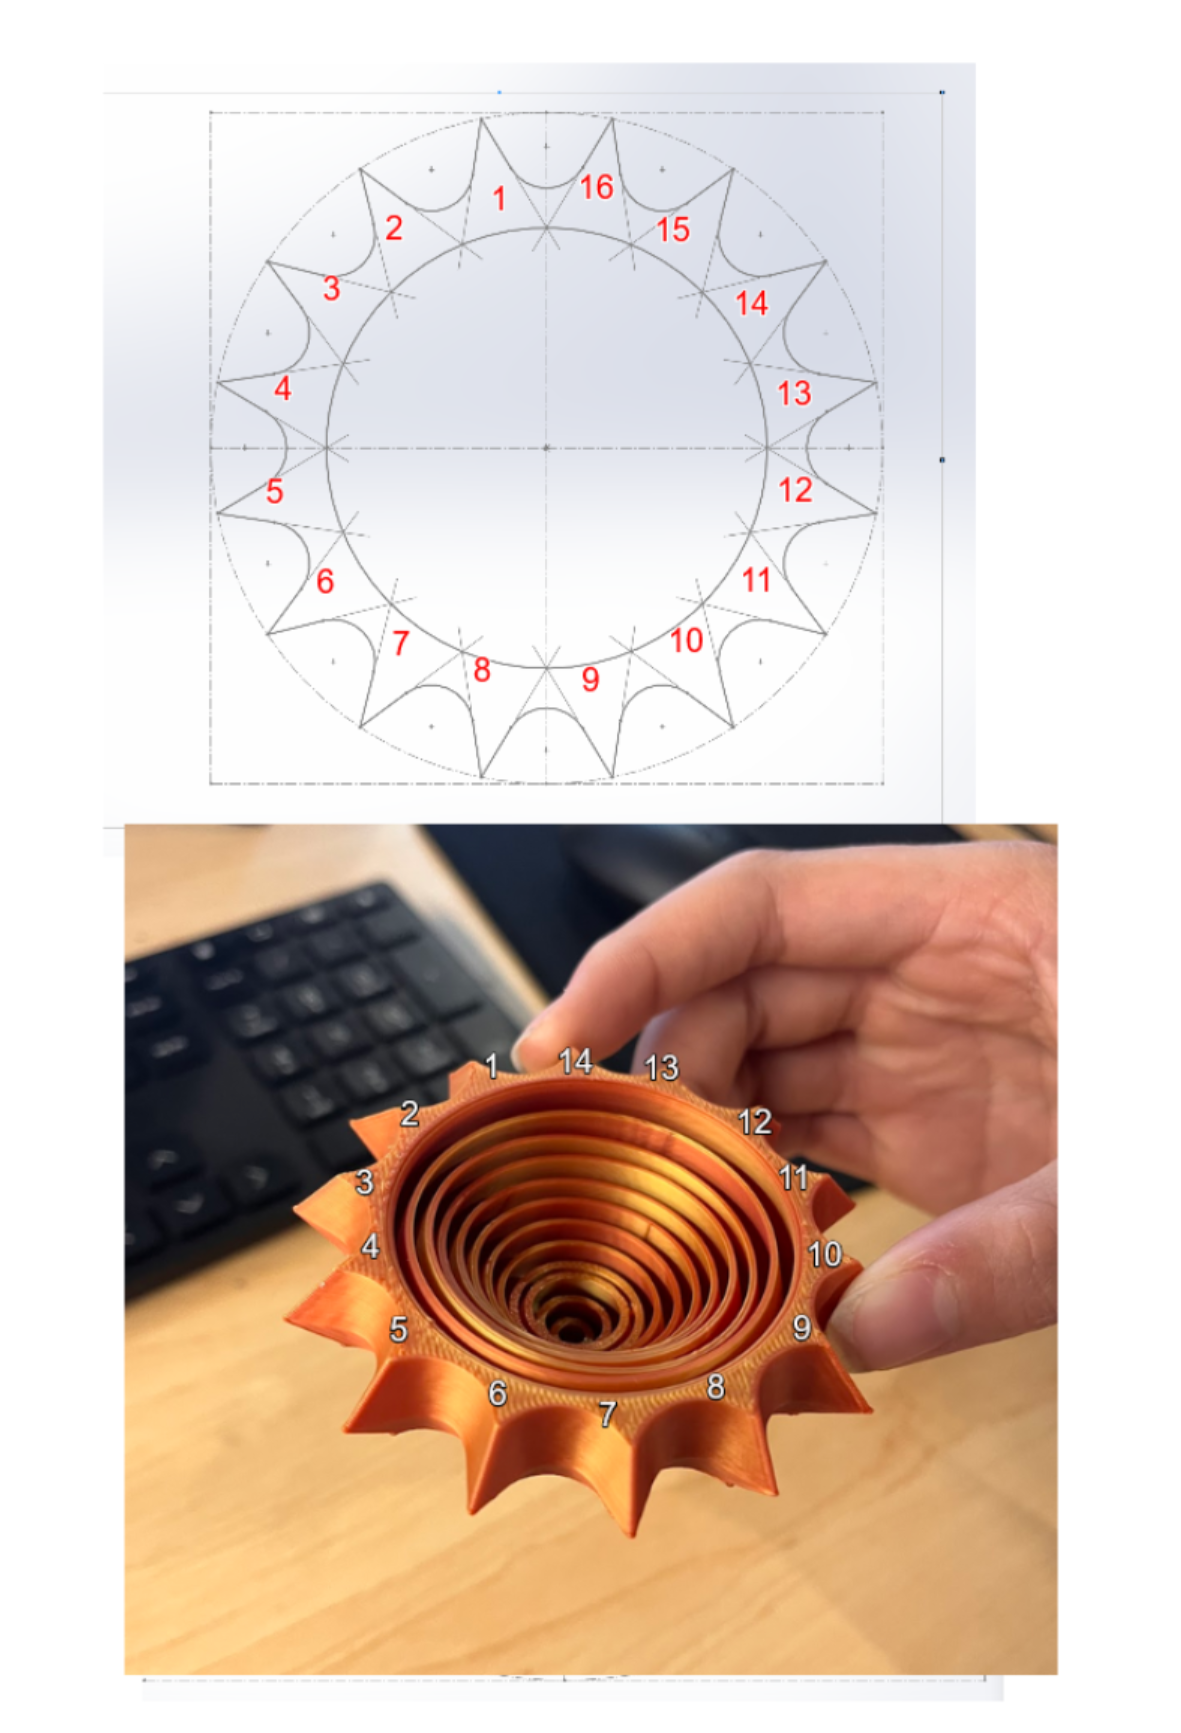
3. Extruding Mistake
When we started extruding our model, we made a mistake and accidentally skipped a ring when extruding our sun. We knew this was wrong because we could see “daylight” which meant it would just fall out if we printed it.

4. Angle Adjustments
After printing out our first model with the 15 degrees in our instructions, we noticed that it was very loose and pieces were falling out a lot and rolling around. After that we made two models, one with a 20 degree angle and one with a 25 degree angle and determined that the 20 degree draft was optimal.


