
TF2 Baby Face's Blaster (Nerf blaster mod from Mighty Shrub's SMILEY)
Obliczymy ostateczną cenę na podstawie wybranego pliku. Sprawdzisz ją i zaakceptujesz przed płatnością.
Zapisane na tym urządzeniu.

A lever-action Nerf blaster was modified from the SMILEY by Mighty Shrub, and the advice from MHP.
- Ocena
- 0 / 5
- Polubienia
- 280
- Pobrania
- 389
- Wydruki
- 1
- Wyświetlenia
- 6317
- Oceny
- 0
Aktualizacja u źródła:
Informacje o modelu
- Źródło
- Printables
- Kategoria
- Outdoor Toys
- Licencja
- Creative Commons — Attribution — Noncommercial — Share Alike
If you want to buy me a coffee :) https://buymeacoffee.com/methanejuice
Check updates at the bottom
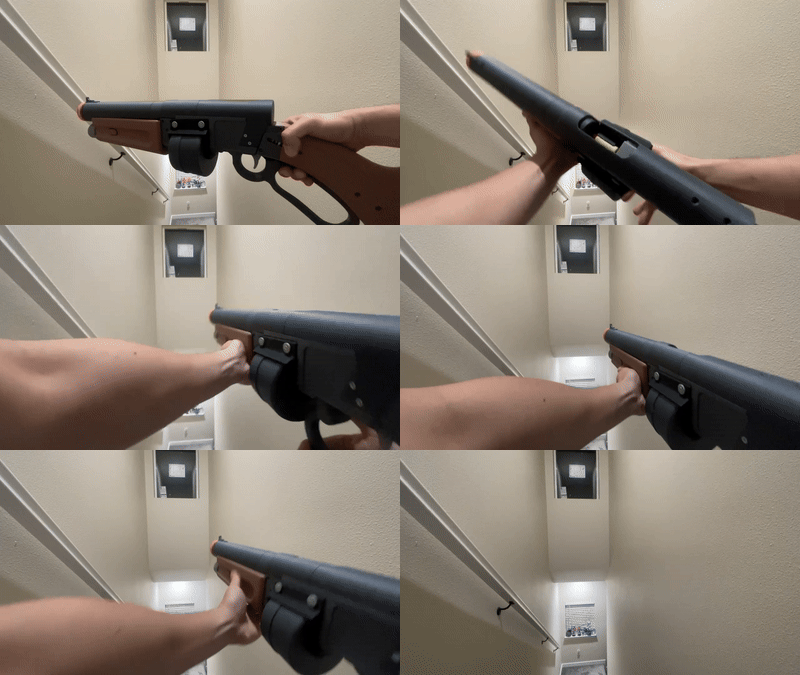
This blaster cuts the plunger volume by half so it only shoots bamboo darts at 100 FPS with a K25 spring... Update: 120 FPS with a K25 spring, 0.509 12in barrel after modifying the breach housing, pusher, and the barrel housing.
This was intended to be using the hardware kit from SMILEY but ended up with some divination. This will use ….
#4 x 0.375in Thread-Forming Flat Head Screw, QTY 30
M3 x 40mm button head screw, QTY 6
M3 x 35mm button head screw, QTY 3
M3 nuts, QTY 9
O-ring 3/8" ID, 9/16" OD, QTY 1
O-ring 5/8" ID, 3/4" OD, QTY 4
O-ring 10x14x2 mm, QTY 1
Talon mag spring, QTY 1
3mm x 30mm pin, QTY 2
5mm x 40mm pin, QTY 2
5mm Ball Plunger, QTY 1
Small spring, <6mm OD and 20mm long, QTY 1
Glue
Lubricate
I think that's all there is to it, please let me know if you found something missing…
I didn't have my SMILEY kit yet so idk what's in there exactly, but the 10x14x2 mm Oring is for sure not in there…
To began …

Apply a bunch of lubricant at the interface between the “CylindercasingBack” and the “Breach Housing”, there will be friction but after some cycling, it should be relatively smooth. After that, take the pieces apart

These are the parts that weren't modified from the SMILEY

Assemble the “Breach Housing” and “Pusher” with a 3mm x 30mm pin…

and QTY 4 of the #4 x 0.375in Thread-Forming Flat Head Screws, in position 1~4. 3 and 4 will pinch on the “Pusher”, and don;t screw all the way in, the flat heads should be flat with the blue surface in the image
Also, add in the 10x14x2 O-ring, with a little bit of glue at the back

Sandwich previously assembled pieces plus: "TriggerHousing1", “BB Leaver”, “BB Side PanelL”, in the image above, the lever is secured with a 5mm x 40mm pin. If there's friction on that pin connection please lubricate. Install the spring at the “Catch”, and covered with "TriggerHousing2" with QTY 2 #4 screws. (The plunger tube is not secured here and can be left out. “Trigger” is secured by a #4 screw (Don't torque too much)

Placed the “BB Mag Catch” at the indicated location. Thread an elastic cord through and place two knots at both ends, with sufficient tension

Cover the ASM with “BB Side PanelR”, secure with a M3 x 40mm button head screw with a nut on the other side. A placeholder M3 screw can be placed at the catch.

Install the 5mm Ball Plunger in the middle of the “Breach Housing”. Pull up the “Breach Housing” to install the “CylindercasingBack”, and seat both piece back in the way depicted in the image.

The tooth on the “Breach Housing” and the gear on the “BB Leaver” will mate, while the hole pattern on the “CylindercasingBack” will align with what's on the Side Panels. Secure with QTY 4 #4 screws

Make sure these screws (on both side) get all the way through to the “Plunger guideblock” by checking from the underside

Glue on the “BB StockDecalLEFT” and “BB StockLEFT V2” like so in the image, do both sides with matching left and right pieces

Slip in the right side first like in the image, put in QTY 2 M3x35mm Socket head screws, this will also secure the catch. The screw going through the “Catch” should not be torque too much. This is also the right time to put the plunger tube and "PlungerHead (Long)" in (install 3/8" ID, 9/16" OD O-ring for and silicon pading first)
After that slip in the "BB StockLEFT V2" ("BB StockDecalLEFT" already glued on)

Use another M3x35mm in location one, and a M3x40mm in location 2, and apply nuts

Assemble “Cylindercasing Front", “BarrelRest”, “BarrelHousing” in the manner above…

Slide in from the front, secure with QTY 2 M3x40mm screws. Add the QTY 2 1-3/16" ID, 1-3/8" OD O-rings from the SMILEY kit inside the “BarrelHousing”

Installed “Drum frame” with QTY 3 #4 screws, one on the right and two on the left, going though the “Decorating shims”

Fit the “Follower Type III” inside “BB Drum” in this manner, and add in the Talon mag spring by curving around the drum channel
Install the cover with QTY 4 #4 screws

Install the magazine, apply some lub to this O-ring. Cycle the lever a couple of times to ensure everything is smooth

Another version of the drum has an indent for the “Drum clip”. Install with QTY 3 #4 screws

Install “Barrel” by pressing it down onto “BarrelRest”, after that thread the 30cm metal Barrel through

Apply lubrication on both “MagReleasePusherBack” and “MagReleasePusherFront”. Feed both through the opening on "BB FrontGrip" to see if it fits smoothly. Mine was printed flat and had a slight bow on both push parts, so only one orientation fits

After that take fit the “MagReleaseButton” inside the “BB FrontGrip” in this manner, the top side is wider, with the opening facing back

This is how they all fit with each other

Glue the “Safty Tip” onto “BarrelSight ” first, install QTY 2 1-3/16" ID, 1-3/8" OD O-rings.
Screw on the “BarrelSight ” piece

Install “Cap” and use QTY 3 #4 screws to secure the grip and the barrel pieces in place

If at this point there's a gap between “Cylindercasing Front” and “Barrel” uninstall the front grip and barrel to install “Barrel Shim” (may take 1 or 2)

Apply tinny bit of glue on the “Just decorateR” and “Just decorateL” pieces before gluing them on both side of the blaster

Install spring and “BB SpringRest”, secure with a 5mm X 40mm Pin

Install “BB StockBack V2” with QTY 2 M3 x40mm button head, and glue the plugs in place

This should conclude the build. There are other stuff in the f3d file but I've not printed and tested them, so don't print them yet it's illegal
20250526 Update
Breach Housing_v2, Pusher_V3, BarrelHousing_V2, uploaded. Previous version will ram on the BarrelHousing, causing a bad seal. Pusher V3 requires another Oring 10x14x2.


20250704 Update
Reinforce lever joints by making them torque around printed inserts with a different print orientation

Now the lever has two Hex Reinforcement inserts on the left and right, with the pin in the middle, switch to a 3mm pin of the same length. The middle also as a 5mm to 3mm sleeve
