
Prusa Core One Nozzle Wiper Remix V1 and Purge Bin
Obliczymy ostateczną cenę na podstawie wybranego pliku. Sprawdzisz ją i zaakceptujesz przed płatnością.
Zapisane na tym urządzeniu.

Remix of Ed's Prusa Core One Nozzle Wiper Remix that can be printed without supports and blocks LED status bar less.
- Ocena
- 4,97 / 5
- Polubienia
- 937
- Pobrania
- 8492
- Wydruki
- 75
- Wyświetlenia
- 29 521
- Oceny
- 67
Aktualizacja u źródła:
Informacje o modelu
- Źródło
- Printables
- Kategoria
- Prusa Parts & Upgrades
- Licencja
- Creative Commons — Attribution — Noncommercial

Check out the new >> Core One Nozzle Wiper V2 with Purge Bin <<. |
This is a nozzle wiper arm for the Prusa Core One that uses Bambu Lab A1 nozzle wiper silicone pads.
It's a remix of the Core One Nozzle Wiper Remix V1.1 by Ed.

Changes to Ed's Version
Flattened the front so that it can be printed on its side without supports
Reduced the overall thickness so that it doesn't block the LED status bar under the bed as much
Providing two versions with heat-set inserts: Voron spec D5.0 and RatRig spec D4.6 inserts
Providing version with square nut
Providing version with hex nut
This also includes a modified version of Ed's Core One Purge Bin Remix that fits the modified wiper arm.

Required Hardware for Wiper Arm
Silicone Pads
The Wiper Arm uses silicone pads for the Bambu Lab A1 printer. You can find them on the Bambu Lab store, Aliexpress, Amazon, and various other places under the terms "Bambu A1 nozzle brush" or "Silicone nozzle brush for A1", "Silicone nozzle wiper for A1", etc.
It should be 37mm long and 8mm deep and have 3 rows of 14 bristles. You don't need a genuine silicone pad, knock-offs will be fine as long as they look like in the image below. I bought mine on Aliexpress.
DIY: If you want to make your own silicone pad out of high-temperature gasket silicone, check out @Lucho's printable silicone brush mold.

Heat-Set Insert Version
Qty | Description | Sourcing |
|---|---|---|
1 | M3 D5.0 L4.0 (Voron spec) or M3 D4.6 L4.0 (RatRig spec) brass heat-set insert | |
1 | M3 x 8mm socket head or button head cap screw | Core One spare parts, Aliexpress |
All sourcing links have been tested by me unless otherwise noted.
Square Nut Version
Qty | Description | Sourcing |
|---|---|---|
1 | M3 square nut thin (DIN 562 / Prusa M3nS) | Core One spare parts, Prusa, Aliexpress |
1 | M3 x 10mm socket head or button head cap screw | Core One spare parts, Aliexpress |
All sourcing links have been tested by me unless otherwise noted.
Hex Nut Version
Qty | Description | Sourcing |
|---|---|---|
1 | M3 hex nut (DIN 934 / Prusa M3n) | Core One spare parts, Aliexpress |
1 | M3 x 12mm socket head or button head cap screw | Core One spare parts, Aliexpress |
All sourcing links have been tested by me unless otherwise noted.
Printing The Wiper Arm
Print the part with its front face facing down. The STL files are pre-rotated for printing.

Recommended Settings
The part is long and skinny which makes it prone to warping on the narrower side. I highly recommend using a brim if you choose to use a material that likes to warp.
Material: Use a material that is suitable for the temperatures inside the enclosure. I used Prusament PC Blend. Other suitable materials: PC Blend CF, other PC, ASA, ABS
Layer height: 0.2mm
Extrusion width: 0.45mm
Perimeters: 4
Infill: 15% Gyroid
Supports: no
Brim: recommended
Purge Bin
Disclaimer: I have not personally printed and tested the modified purge bin yet but @folkommen has printed the purge bin (see Make) and it appears to work fine. |
Magnets
Depending on which version you use you will need either…
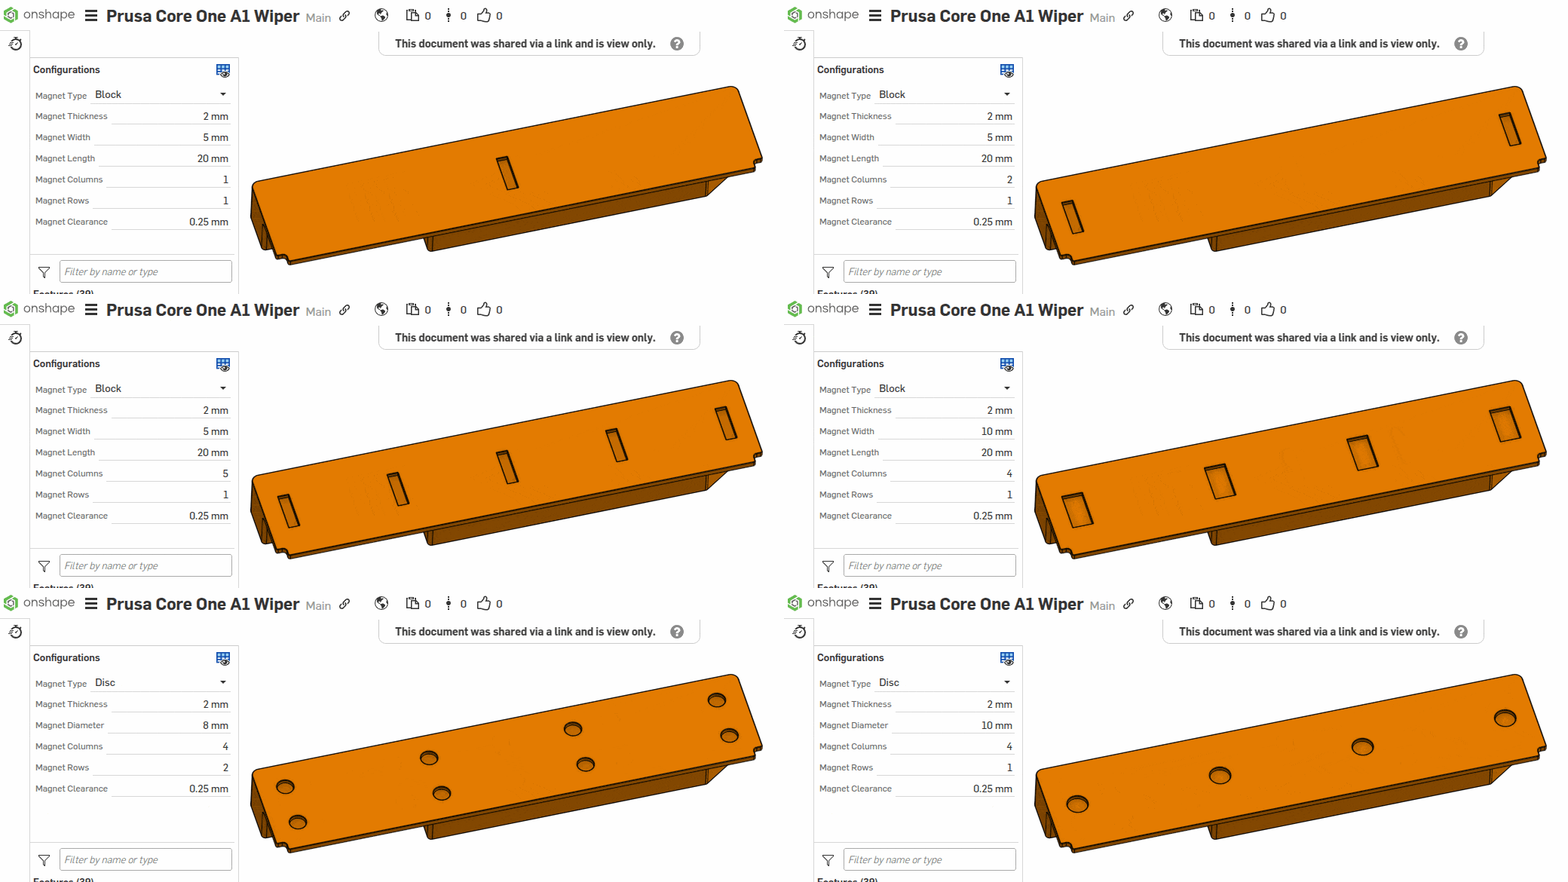
up to 5 20x5x2mm neodymium block magnets
up to 4 20x10x2mm neodymium block magnets
up to 10 6x2mm neodymium disc magnets
up to 8 8x2mm neodymium disc magnets
up to 5 10x2mm neodymium disc magnets
You don't have to use all the magnet pockets. The magnet pockets have 0.2mm clearance around the magnet (0.4mm larger than magnet nominal size).
Customize in Onshape
Use different magnets? You can customize the Purge Bin magnets in Onshape and change the type, dimensions, rows, columns, and clearance in the Configurations panel in the upper left of the sidebar.
To export, right-click on the part and select “Export”. In the Export dialog, select STL as the output format and set the units to millimeters.
Printing
Print the Purge Bin with the built-in "0.2mm Structural" profile in a material that can withstand the temperatures. Considering that it bears no load and isn't close to a heat source, PETG should be sufficient.
Installation
For installation and Start G-code modification please refer to the documentation of the original model. I used exactly the same G-code except that I added two more wipes across the pad for good measure.
Adhesive
According to this video, you should ideally use a silicone adhesive to bond the pad to the printed part.
I have tried the adhesive that came pre-applied with the silicone pads from Aliexpress but it failed after about a couple of prints. The adhesive remained on the silicone pad but stopped sticking to the PC Blend printed part.
I now use 3M 300LSE adhesive tape on top of the factory adhesive that failed and it's been holding like a champ for several months. Feel free to try different adhesives and report your findings in the comments.
Start G-code Adjustment
Important: Verify whether the coordinates work for your machine by manually jogging to the positions via the LCD before copy-pasting the G-code. |
In order for the printer to use the wiper you need to replace the stock nozzle cleaning command with a sequence of wiping moves.
In the “Start G-code” editor under “Custom G-code” in the printer settings, find the line that starts with
G29 P9 X...and replace it with the following G-code snippet:
;G29 P9 X208 Y-2.5 W32 H4 ; stock nozzle cleaning
G0 X40  Y-14 Z1.5 F10000;
G0 X76 Y-18 Z1.5 F10000;
G0 X40  Y-14 Z1.5 F10000;
G0 X76 Y-18 Z1.5 F10000;
G0 X40  Y-14 Z1.5 F10000;
G0 X76 Y-18 Z1.5 F10000;
G0 X40  Y-14 Z1.5 F10000;
G0 X76 Y-18 Z1.5 F10000;
G0 X40  Y-14 Z1.5 F10000;
Remixing
STEP files are included, with a dummy silicone pad and heat-set insert. You can also create a copy to modify in Onshape:
