3D Printed 3D Printer That Also Prints a 2D 3D Printer
Obliczymy ostateczną cenę na podstawie wybranego pliku. Sprawdzisz ją i zaakceptujesz przed płatnością.
Zapisane na tym urządzeniu.

Use a 3D printer to 2D print a 3D printer! This model was inspired by Szkandera.Jan's PrintMark.
- Ocena
- 0 / 5
- Polubienia
- 9
- Pobrania
- 11
- Wydruki
- 0
- Wyświetlenia
- 330
- Oceny
- 0
Aktualizacja u źródła:
Informacje o modelu
- Źródło
- Printables
- Kategoria
- Other Gadgets
- Licencja
- Creative Commons — Attribution
Intro
I first want to thank Szkandera.Jan (@skandalf_3025793) for their amazing PrintMark model, which sparked the creation of this design! I found their model to be very creative and cool, so I took it one step further. Introducing the 3D-Printed 3D Printer That Also Prints a 2D 3D Printer! This model has a moving X and Z axis, and the Y axis moves up and down to make stamps. This can be a great way to show off your love for 3D printing as well.
To be honest, it is really hard to get the supports off (it took me an hour).
If this model gets a lot of attention, I will look into creating a more advanced and detailed model that works better too. Make sure to leave a like! 👍
Print Information
Please use organic supports on build plate only. I have tested this model with only PLA and PETG, but other filament types may work well too. The design should already fit on the print bed of an MK4S and does not need to be arranged.
DO NOT SPLIT TO OBJECTS OR PARTS IN PRUSA SLICER
Build guide
- Prepare these parts and tools
- Frame
- Top bar
- X axis
- Hammer or mallet
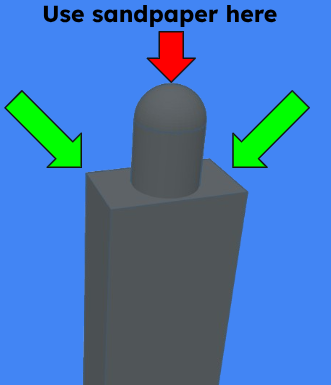
- Sandpaper
- Needle nose pliers
- Take off supports (some spots will be hard to get, use pliers if needed) (this step takes quite a while, but I believe in you)
- Sand the top of the printer frame (both sides)
- Align the X axis with the top of the printer frame
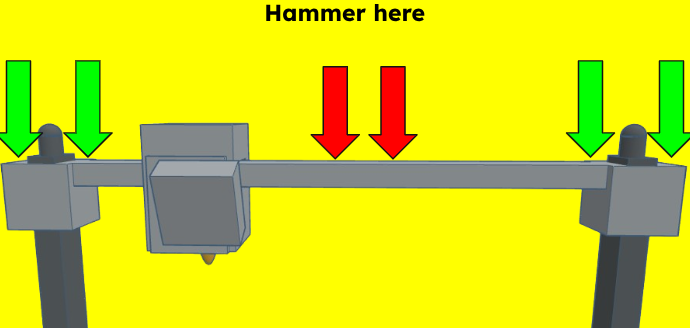
- Push down on the X axis (this might be hard to do, this is where the hammer or mallet comes in) Do not hammer or push on the middle of the X axis
- After the X axis is pushed down a significant amount, put the top bar on, aligning it with the rods on top of the frame