
Mini Vault with 6 Lever Detector Lock
Obliczymy ostateczną cenę na podstawie wybranego pliku. Sprawdzisz ją i zaakceptujesz przed płatnością.
Zapisane na tym urządzeniu.
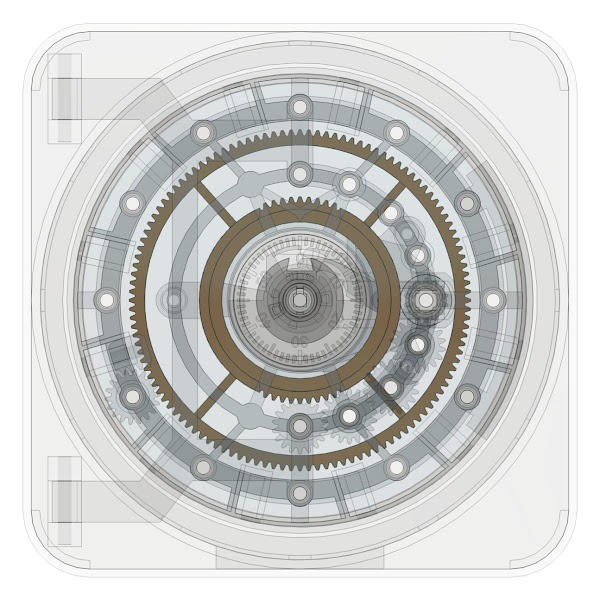
Compact 3D printed vault with a 6-lever detector lock, designed to fit and print on a Prusa Mini. Secure and functional!
- Ocena
- 5 / 5
- Polubienia
- 403
- Pobrania
- 493
- Wydruki
- 1
- Wyświetlenia
- 6768
- Oceny
- 1
Aktualizacja u źródła:
Informacje o modelu
- Źródło
- Printables
- Kategoria
- Other Ideas
- Licencja
- Creative Commons — Attribution — Noncommercial — Share Alike
This vault is small enough to print with the Prusa Mini and has a 6 Lever Detector Lock with warding and curtain, setting a new standard for 3D printed locks. It's easy to open with the key, but picking this open is extremely difficult.
This is an intricate mechanism with many moving and interlocking parts, making dimensional accuracy essential. This should ONLY be printed if you are confident that your printer is well calibrated and capable of printing dimensionally accurate parts.
Please refer to my Youtube video for assembly instructions, and watch the entire video before you begin assembly. Assembly should follow the order shown in the video. If you try to install things out of order, you might run into problems.
Files which end in “-x#' indicate multiple copies are required. For example: ”Vault Bolt-x8" means 8 copies should be printed.
Required non-printed pieces:
- Metal dowels
- In the video, I use (2) 35mm x 5mm metal dowels for the lock and (2) 40mm x 5mm dowels for the hinges. 35mm x 5mm dowels can be used for the hinges, but they will be recessed inside the hinge, meaning they won't be removable. So, there are 2 options:
- As shown in video: 4 total dowels, (2) 35mm x 5mm and (2) 40mm x 5mm. Hinge dowels can be easily removed.
- (4) 35mm x 5mm dowels. Hinge dowels will not be removable
- In the video, I use (2) 35mm x 5mm metal dowels for the lock and (2) 40mm x 5mm dowels for the hinges. 35mm x 5mm dowels can be used for the hinges, but they will be recessed inside the hinge, meaning they won't be removable. So, there are 2 options:
- Ball Bearing
- I used a standard 608-2RS bearing. Link to product used in video:
Recommended non-printed pieces, as shown in video:
- Threaded inserts (Can be omitted if gluing Lock Cap and Vault Cap as shown at end of video)
- (7) M4xL6xD6 Threaded inserts - link to product used in video:
- Screws (Can be omitted if gluing Lock Cap and Vault Cap as shown at end of video)
- (3) M4x12mm Screws - link to product used in video:
- (4) M4x8mm Screws - link to product used in video:
- Box Weights
- I used auto repair wheel weights. You can use whatever loose material you have available. Link to product used in video:
- Rubber Feet
Materials Used in Video:
- Filament:
- Prusament PETG: Pistachio Green, Orange
- Hatchbox PETG: Gold
- Bambu Lab PETG HF : Red, Green, Gray, Black, Lake Blue
- Adhesive:
- JB Weld Plastic Bonder
Optional Printed parts:
- Alignment Pins - These are used to help align the Lock Cap and Vault Cap if you opt to omit the screws and threaded inserts. 7 are required, and they are all identical
- Bogus Key - This key will NOT open the door, it can be used to illustrate the detector. The bitting for lever 4 is too big, so it will lift lever 4 too high and trip the detector
- Box Weight Cover - Used to cap weight recesses at rear of box. It's not required unless you add weights.
Lock Cover Options:
- Open Lock Cap is shown in video (aside from brief moment near end of video showing closed cover). The files required are:
- Lock Cap-Open
- Handle
- Handle Mount-Bottom
- Handle Mount-Top
- Closed Cover is shown briefly near end of video. This cover is totally enclosed to block the lock, and includes a sliding keyhole cover. The files required are:
- Lock Cap-Closed
- Lock Cap-Closed-Cover
- Alignment Jig
- This is used to align ‘Lock Cap-Closed’ and ‘Lock Cap-Closed-Cover’
- Lock Cap-Closed-Slider
- Lock Cap-Closed-Frame
- Handle
- Handle Mount-Bottom
- Handle Mount-Top