
Jenga Tower Alix
Obliczymy ostateczną cenę na podstawie wybranego pliku. Sprawdzisz ją i zaakceptujesz przed płatnością.
Zapisane na tym urządzeniu.

Use this Board Game Themed Office Supply set to bring some life and organization into your desk!
- Ocena
- 0 / 5
- Polubienia
- 3
- Pobrania
- 6
- Wydruki
- 0
- Wyświetlenia
- 68
- Oceny
- 0
Aktualizacja u źródła:
Informacje o modelu
- Źródło
- Printables
- Kategoria
- Office
- Licencja
- Creative Commons — Attribution — Noncommercial
Summary- Use this Board Game Themed Office Supply set to bring some life and organization into your desk! Includes a dice pencil sharpener, chess usb holder, cards phone mount, and lastly, a Jenga pencil holder! Try to print it yourself today!
Objective- Staples finance department has concluded that sales for desktop organization products have declined in recent years. The company would like to ramp up their profits in this area by enhancing the aesthetic nature of these products.
They want my group and I, including Ali and Alex, to create a board game themed office supply set. We needed to use solidworks and to make 4 different parts - A dice pencil sharpener, chess usb holder, cards phone mount, and lastly, a Jenga pencil holder.
You can find the 3mfs for all of these linked but I will focus on the design process of the Jenga in this printables. If you want the other design pages, be sure to go to my partners pages.
Initial steps-
This was our first idea, just for the main ideas not for the printables steps.

Making the Jenga Tower-
We started off by making one block, and rounded off the edges.
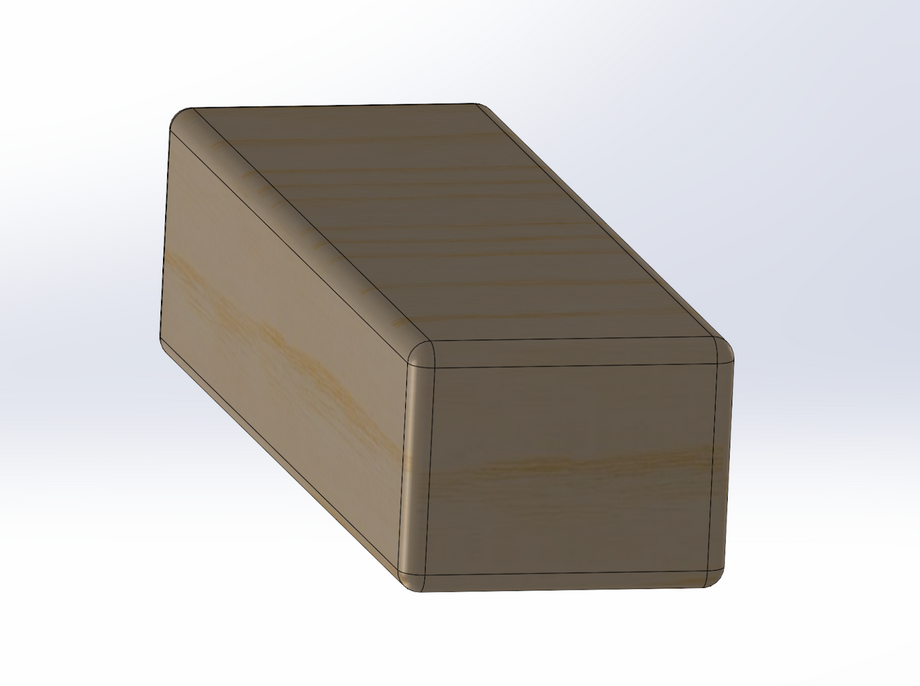
Next, we linear patterned the Jenga piece horizontally, and then vertically to create a 3 block wide 10 block tall structure of jenga blocks.


For the signature 3 by 3 orientation, we used move copy body to orient every other layer by 90 degrees.
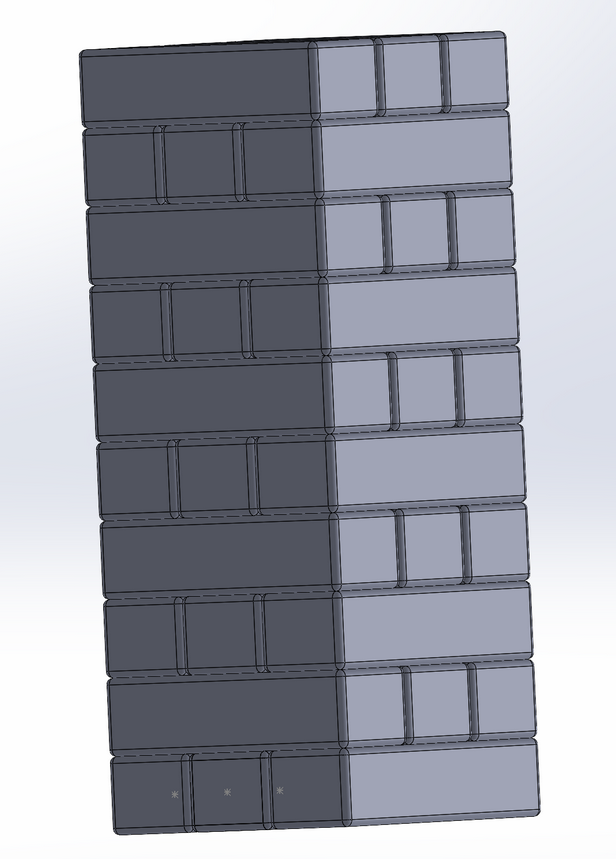
(Sorry for the black and white, it was an earlier screenshot)
Next we cut a hole in the top of the tower, where the pencils will go.
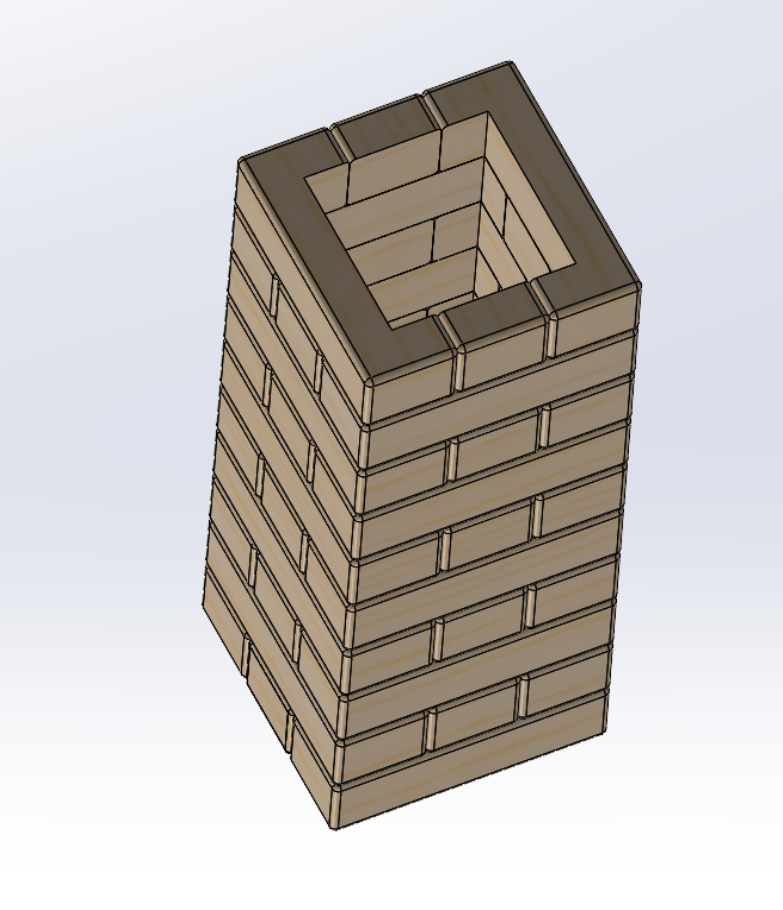
We also cut specific jenga blocks away from the tower, which I will talk about more in the design choices.
Design choices and changes-
Our first design choice was a small one, where we cut each block out of the tower to be more unique. Here was our first plan and how I changed it-
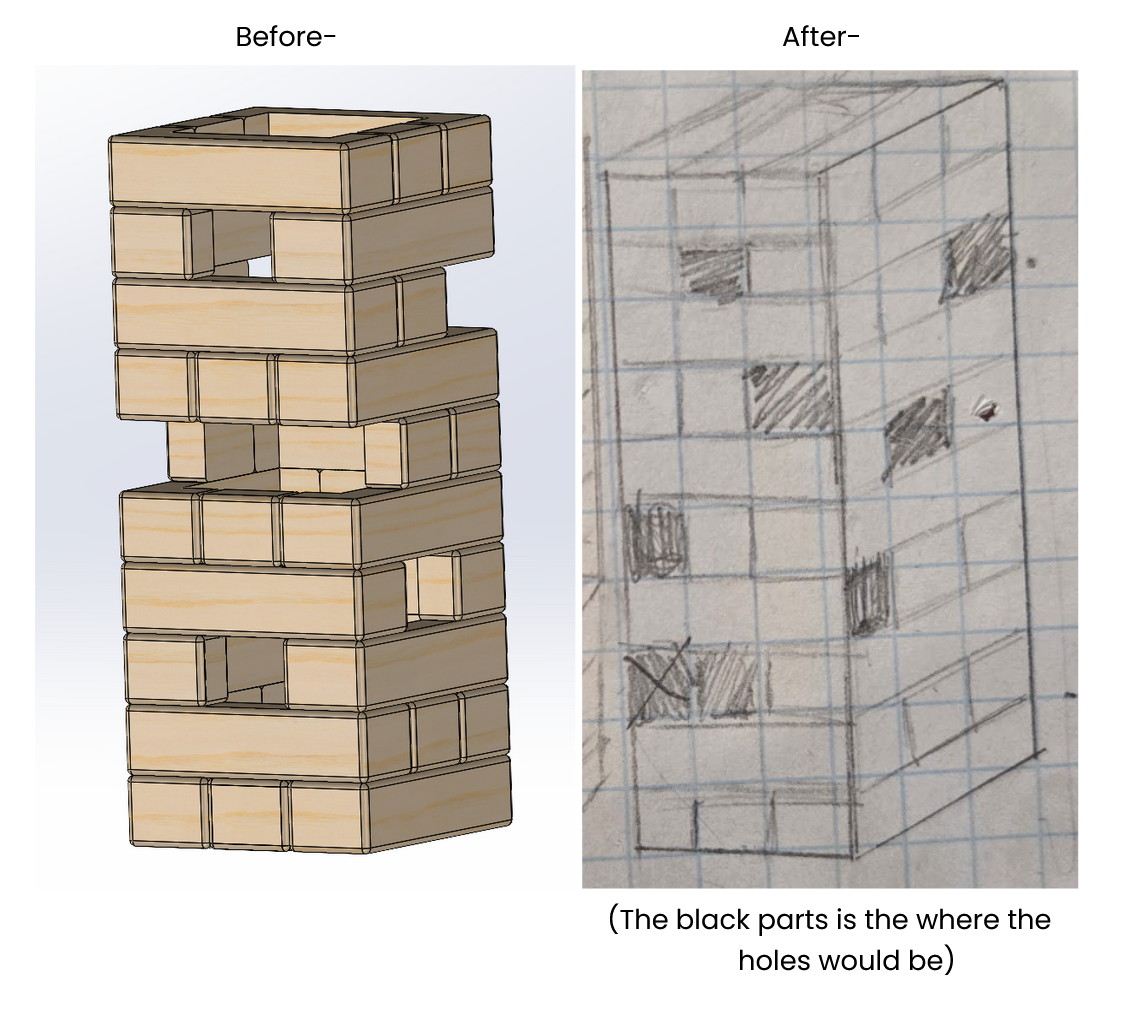
As you can see, we changed some of the bottom cuts just to look more asthetic, but overall a very simple change. After this, I was finished with the Jenga for a while before I added some things to it, like the Jenga Logo-
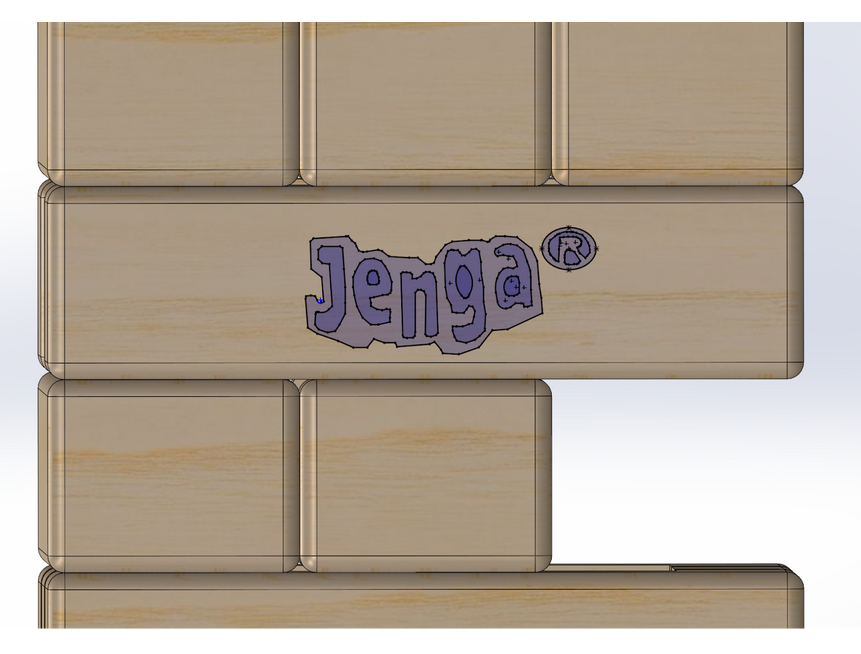
I sketched it on one piece of the completed one, but it was very difficult to copy it to another piece if it was on another plane. To solve this, my team scrolled back to when the Jenga pieces were unoriented and I continued from there.

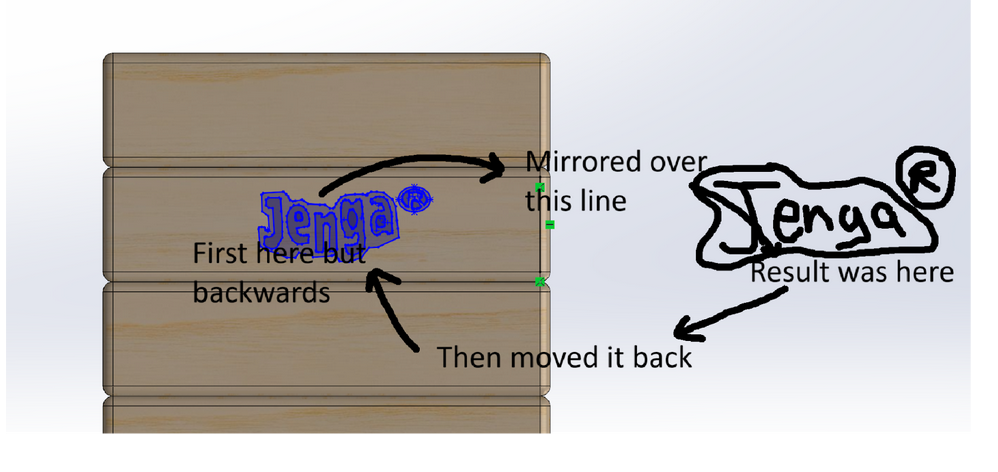
It took some trial and error, including trying to mirror it and to circular pattern it, each ending with failure. Finally, I decided to mirror it onto the other side, then mirror it over a line and move it back into the original location. and because it was backwards.
This is what came out of it after linear patterning down the sides-
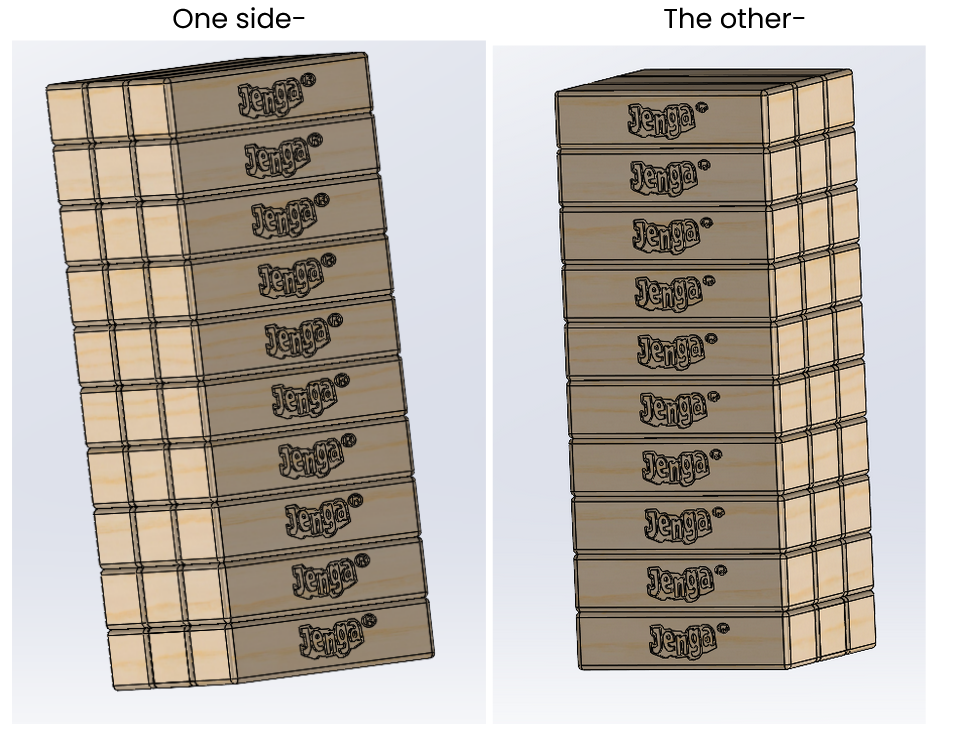
And then moved the bar on the sideveiw back to the most recent version-

Finally, looking at the result after it was printed, I have some changes in mind. Firstly, the Jenga logo is a little hard to see, so maybe make the color inside a little darker or cut it deeper.Next, Its also a little small , so I would scale it up maybe 1.5 or 1.3x the dimensions to fit pencils better.

Update- Printed it again at 1.4x size, and its a little too large.
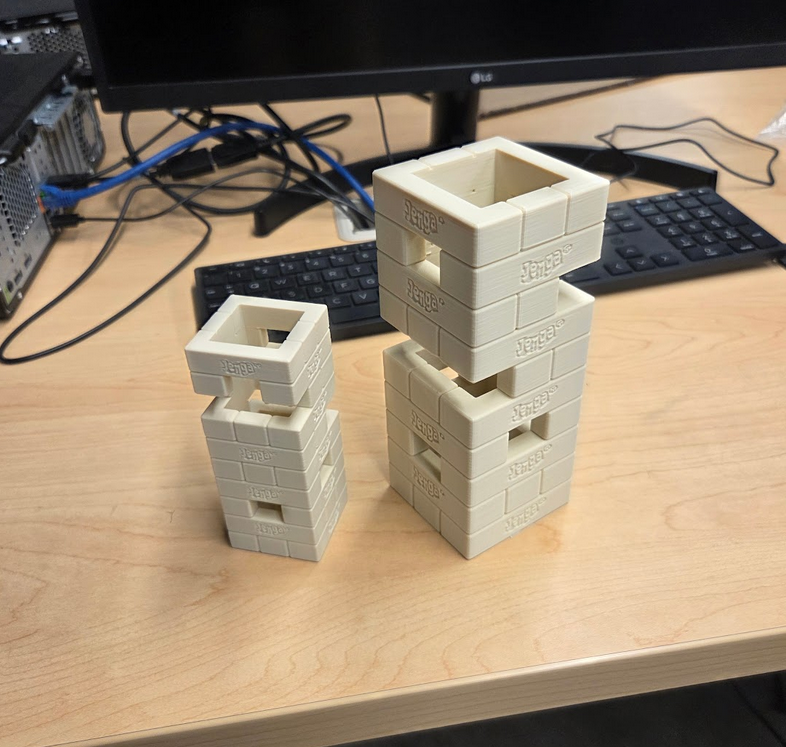
For the perfect size, I would go with around 1.25-1.3 times the size of the original, as pencils barely poke out of the new-1.4x jenga tower.