
3D Chess XL (Star Trek TOS)
Obliczymy ostateczną cenę na podstawie wybranego pliku. Sprawdzisz ją i zaakceptujesz przed płatnością.
Zapisane na tym urządzeniu.
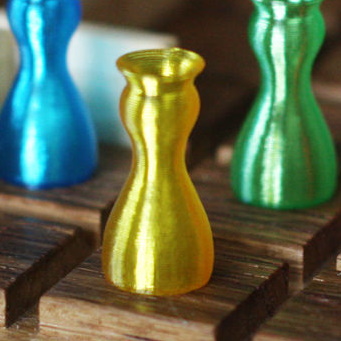
Star Trek inspired 3D-chess set in full size designed for the Prusa XL (2 tools or more). Nice to look at or play with!
- Ocena
- 4 / 5
- Polubienia
- 70
- Pobrania
- 214
- Wydruki
- 1
- Wyświetlenia
- 998
- Oceny
- 1
Aktualizacja u źródła:
Informacje o modelu
- Źródło
- Printables
- Kategoria
- Board Games
- Licencja
- Creative Commons — Attribution — Noncommercial — Share Alike
The design is based on the 3d chess from the old series (TOS) of Star Trek:
I made some adjustments to take advantage of 3D printing and I improved the design to my liking. The size should be similar to the original one, it is: 50 cm x 30 cm x 62 cm. Also included is a set of chess pieces, designed according to the original model and having just the right size.

It would have been possible to build this construction without screws without any problems. But I wanted the chess set to be stable and durable on the one hand, and the parts to be easy to replace on the other. So I decided to use screws. But don't worry, there is only one size of screws for the whole design.
Printing
The design can be printed in PLA and PETG. I decided to use these filaments for my print:
- Translucent blue and clear PETG for the boards and the rods
- Ultra silk silver and ultra silk gold PLA for the stand (arm and foot)
- Black PLA and light ivory PLA for the pieces
Be free to use any other colors and please post a photo in the comments!
Your printer needs a build area of at least 36 cm x 36 cm (the largest part is the arm) and must be able to print multi-color with at least two colors.
I have provided both the STL and the 3MF files. The later contain all the relevant settings. Here is a description of all the printed parts:
board large (3x):  | The boards are idealy printed on a textured steel sheet using translucent PETG:
To further improve the result I have turned on ironing for all top surfaces via a height modifier in the range of 0 mm … 1 mm. I must say: The result is amazing! |  |
board small (4x):  | The small attack boards are printed in the same way as the large boards. |  |
rods (2x):  | The rods with which the attack boards are plugged onto the large boards are printed in 0.2 mm layer height. You have to print one set in clear and one in the colored translucent filament. Each print contains 2 rods in 3 different sizes. So you can later choose which one fits best. If none fits, just slightly adjust the scale factor in the slicer. |  |
arm (1x):  | The arm is printed in ultra silk silver PLA at 0.2 mm layer height. 4 perimeters and concentric fill pattern make this part very stable and look great. This is by far the largest part of the print. |  |
foot main (1x):  | Print Settings:
|  |
foot bottom (1x):  | This part of the foot optional but recommended for stability. It is printed in ultra silk gold PLA, same settings as foot-main, but variable layer height from 0.3 mm to 0.1 mm. |  |
pieces (2x):  | As expected you will need two sets of pieces - most likely in black and white or ivory. PLA usualy gives the best result.
|
 |
Assembly
Assembling the parts is straightforwar and almost self explanatory. Here is a step by step walkthrough:
1. Get some Screws
You will need 17 pieces of M3 flathead screws (ISO-7380 works great). Length must be in the range of 6 mm up to 8 mm (recommended: 8mm):

2. Attach the main part of the foot to the arm:
 |  |
3. (Optional) Attach the bottom part of the foot:

4. Attach the large boards to the arm:

5. Select the rods and mount them to the attack boards:
Each print contains 2 rods in 3 slightly different sizes. So choose which one fits best: They should be such that they can be easily inserted into and removed from the large boards. In the attack baord, they sit much tighter.
Depending on which of the rules you play by, you may need to distinguish which player an attack board belongs to. So attach the darker sticks to the upper and the light sticks to the lower attack boards.
 |  |
6. That's it! Happy playing:
You can find various rules for playing the game online. So just ask your favorite search engine.

Optional (!) improvements
If you want to go the extra mile to push the design, I have a few recommendations. They are totaly optional but might be worth to consider.
1. Increase the weight of the stand
The stand is already extremely stable on its own, so no improvement is needed here. But since there is so much space inside the foot, you can easily add a weight to make it appear more valuable and make it even more stable. In stores for car accessories you can buy cheap adhesive weights for balancing:

2. Increase the weight of the pieces by adding screws
The chess pieces in my opinion have the right weight for the 3d chess. However if you want to use them on an ordinary board you might want to increase their weight. You can use M6 screws for that:

Screws with a maximum thread length of 25 mm will fit each of the pieces.

3. Add rubber to the pieces to keep them from sliding
PETG - ans also PLA - has very low friction. So I recommend to add rubber to the bottom of the pieces to keep them from sliding. Transparent rubber for spraying is available in spray cans from car accessory stores:

Since I discovered it I have used this spray successfully for various designs and can really recommend it for a lot of situations.
Source Code
The design is open source and has been implemented in OpenSCAD:

As of today I recommend using a recent development snapshot of OpenScad since it is much faster than the outdated release from 2021.
Even the figures were built from geometric primitives - and yes: also the knight (just don't ask…):

The source code is provided for download, so feel free to adjust it to your needs!
Happy printing!
If you like this design, then please leave a like and also post a photo in the comments. Also check out my other designs.