
Corsair VRM Cooler Capswap: Less Than $10 Build! (No extra hardware)
Obliczymy ostateczną cenę na podstawie wybranego pliku. Sprawdzisz ją i zaakceptujesz przed płatnością.
Zapisane na tym urządzeniu.

VRM Cooling is important! With Corsair's VRM Cooler out of stock, I decided to make my own. No extra hardware required.
- Ocena
- 0 / 5
- Polubienia
- 28
- Pobrania
- 30
- Wydruki
- 0
- Wyświetlenia
- 862
- Oceny
- 0
Aktualizacja u źródła:
Informacje o modelu
- Źródło
- Printables
- Kategoria
- Computers
- Licencja
- Creative Commons — Attribution
Update: IMPORTANT
@EvilCrab_158308 mentioned that this Capswap might interfere with the AIO tubes. If you are having this issue, please print the models with the [FIXED] tag. Slicing instructions are the same. The images are of the non-fixed model.
Thanks for the catch, EvilCrab :D
One of the most common failure points for motherboards, (especially those in overclocked builds) are the Voltage Regulator Modules, or VRMs. These limit the voltage going into the CPU and can get very hot while running under large loads.
There is usually a pocket without airflow next to these VRMs that creates a thermal hotspot. Inadequate cooling in this region can lead to VRMs overheating, causing system instability and even permanent damage.
There is an existing Corsair VRM Fan Capswap but there are some problems. Stock is limited, color options are limited to a dark or light tinted translucent (no all-white or all-black variants), and at around $30, it’s a pricey option for an RGB fan Capswap.
Slicing tutorial for fuzzy skin:
I am using Orcaslicer. This should work similarly in Prusaslicer and Bambu Studio. If you do not want fuzzy skin then you may skip this part. This is a simple tutorial for beginners that are trying to figure Orcaslicer/Prusaslicer/Bambu Studio out. For advanced slicers, skip to step 4.
Step 1
Insert the [Corsair Capswap V3/V3 Slim] into the slicer. The suggested orientation should be correct.

Step 2
Right click on the object and go [Add Modifier] → [Load…]

Step 3
Load in your [Modifier V2]

Step 4
The model will load into a corner. Select [Move] or click the M key. Set all values to zero.


Step 5
Go into object settings and click on Modifier V2.step / Modifier V2.stl
Then click on [Other] and turn on fuzzy skin to contour. These are my settings.


You will need to print:
1x [Corsair VRM Cooler V3]. Print the FIXED version if you think that the normal one will interfere with the AIO tubes. I don't own this AIO so I can't confirm (if I somehow get a Titan AIO, I will test this model). The slim version is for darker and more opaue filaments because the walls are thinner.
3x [Corsair VRM Cooler Clip V1]
1x [Wire Plug V3]. You should add a bit of negative horizontal expansion, but it also works without it (read file description).
Build tutorial:
You will need to buy the fan that I have used. Other 60mm fans will not work (you will see why later) The fan comes in black (currently $8.59) and white (currently $7.39).
Step 1
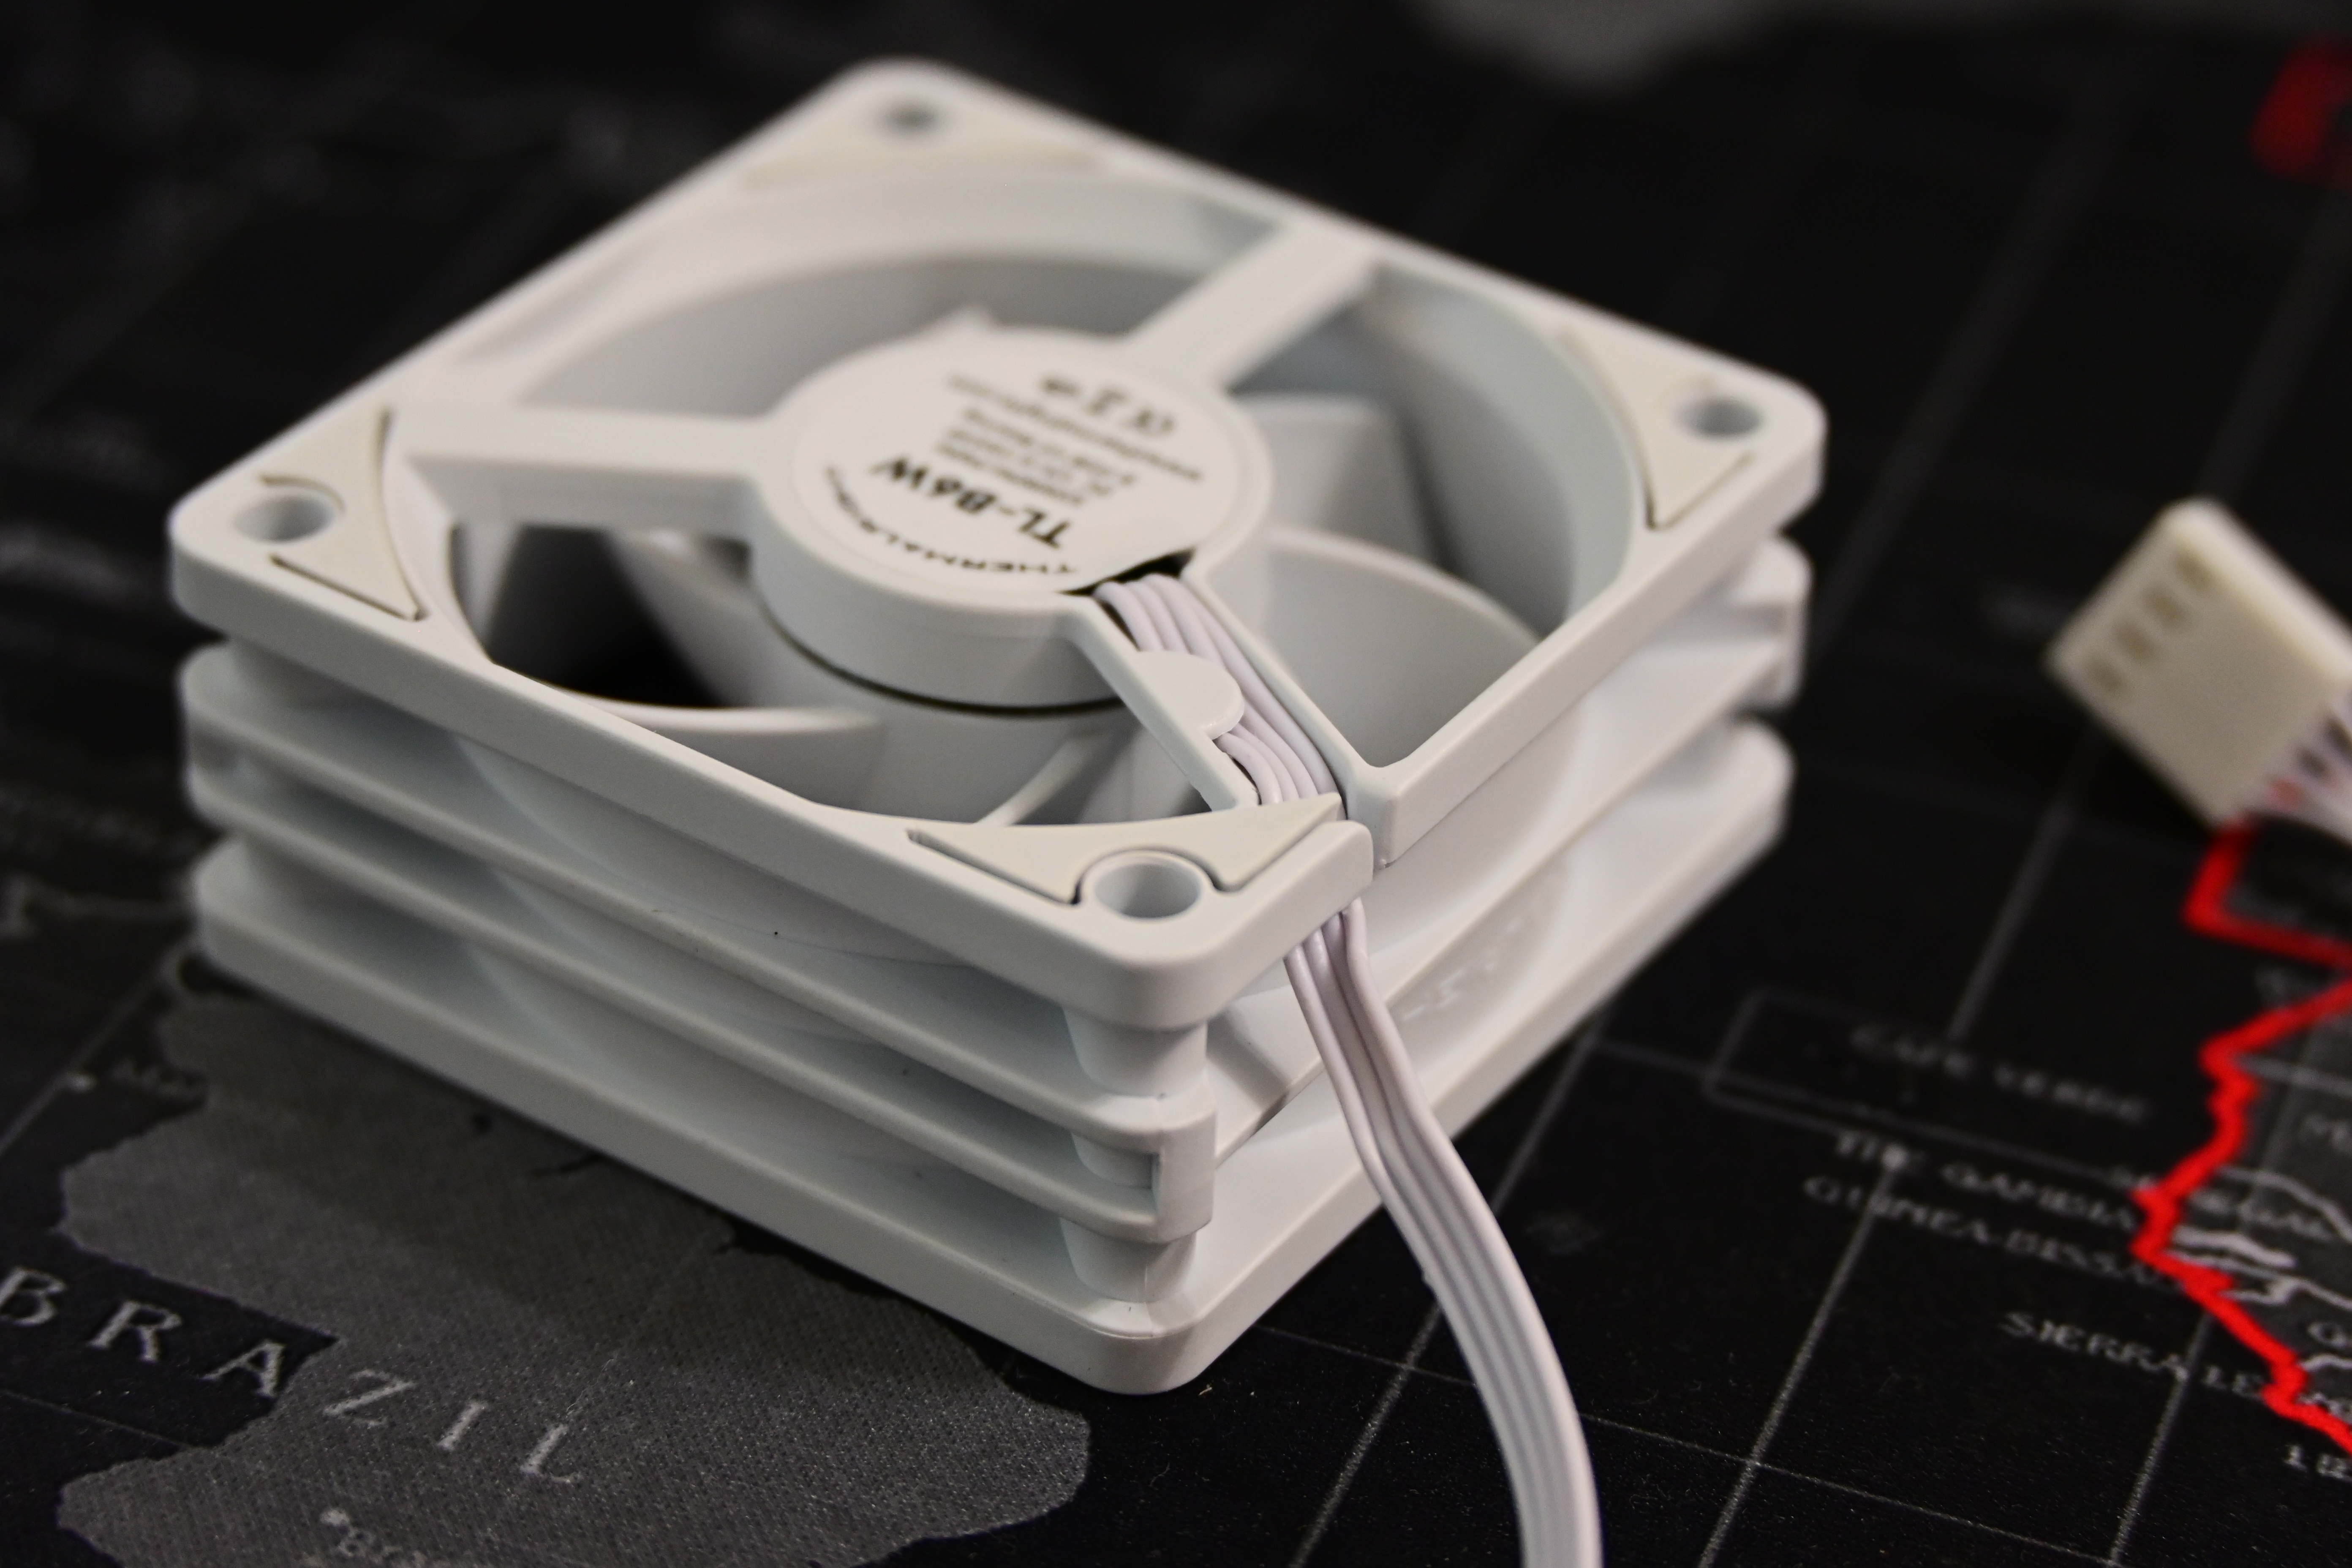

Take the cable out of the first cable guide but not the second as shown.
Step 2
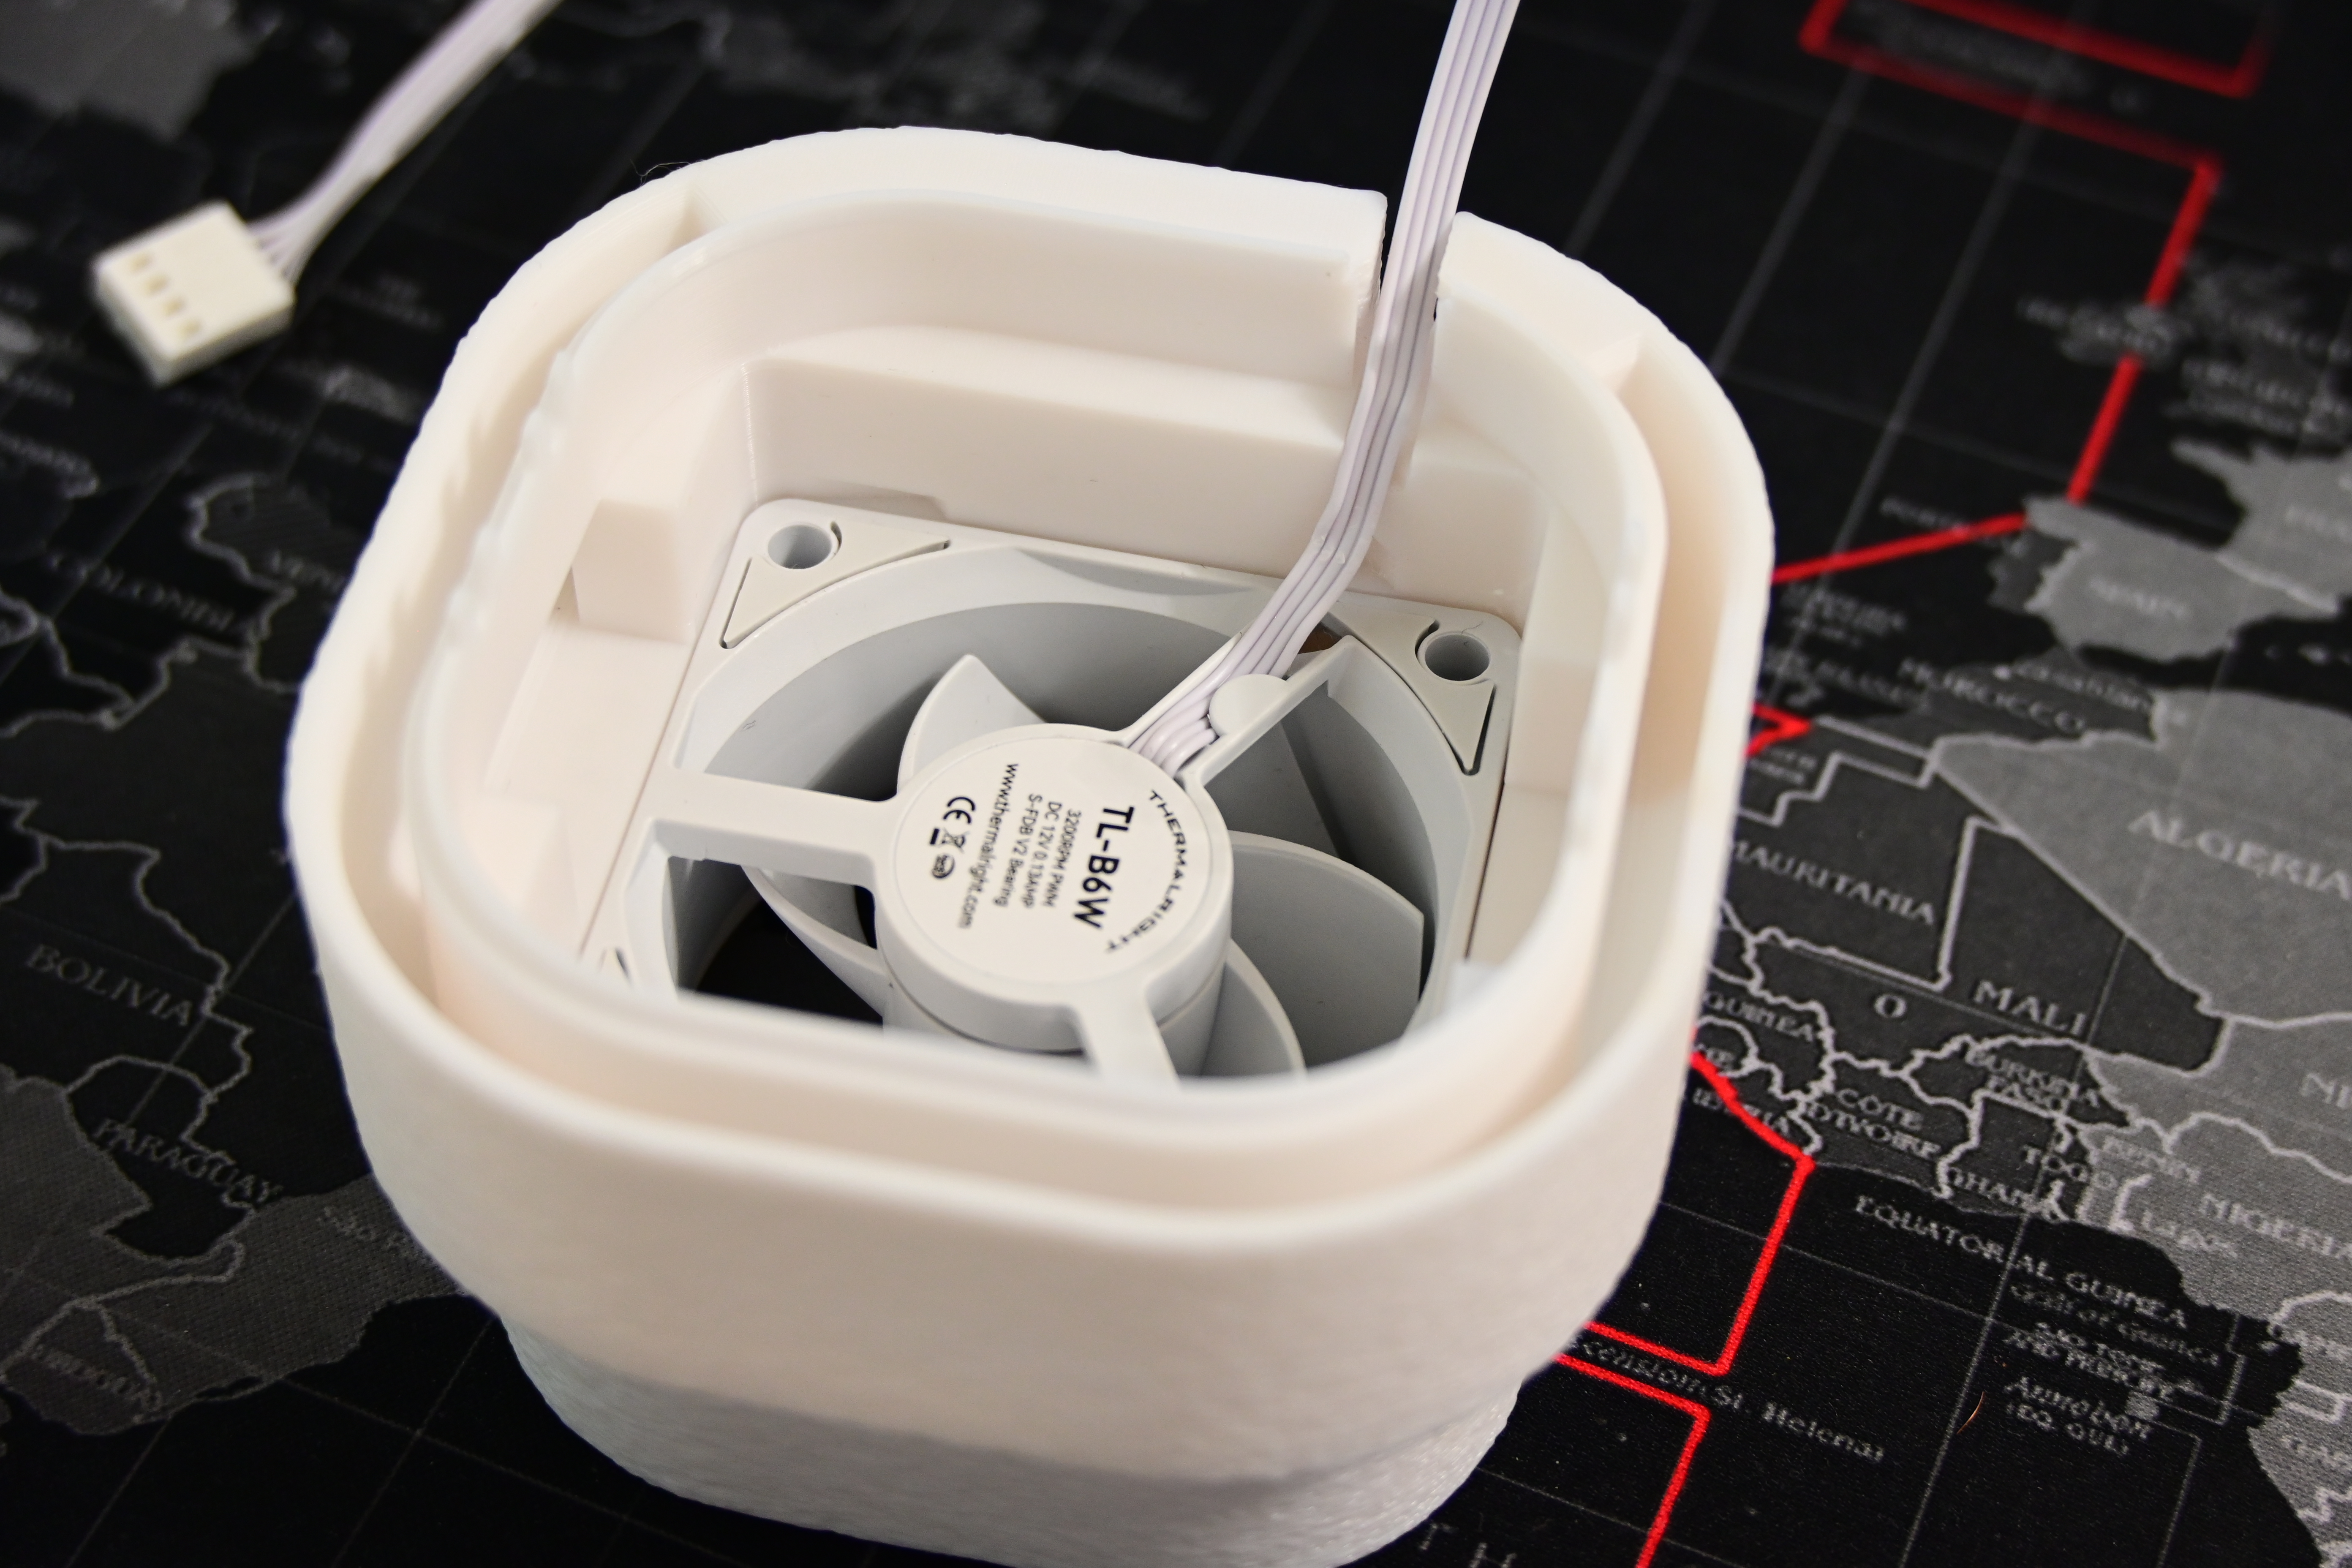
Place the fan as shown with the cable facing the gap.
Step 3
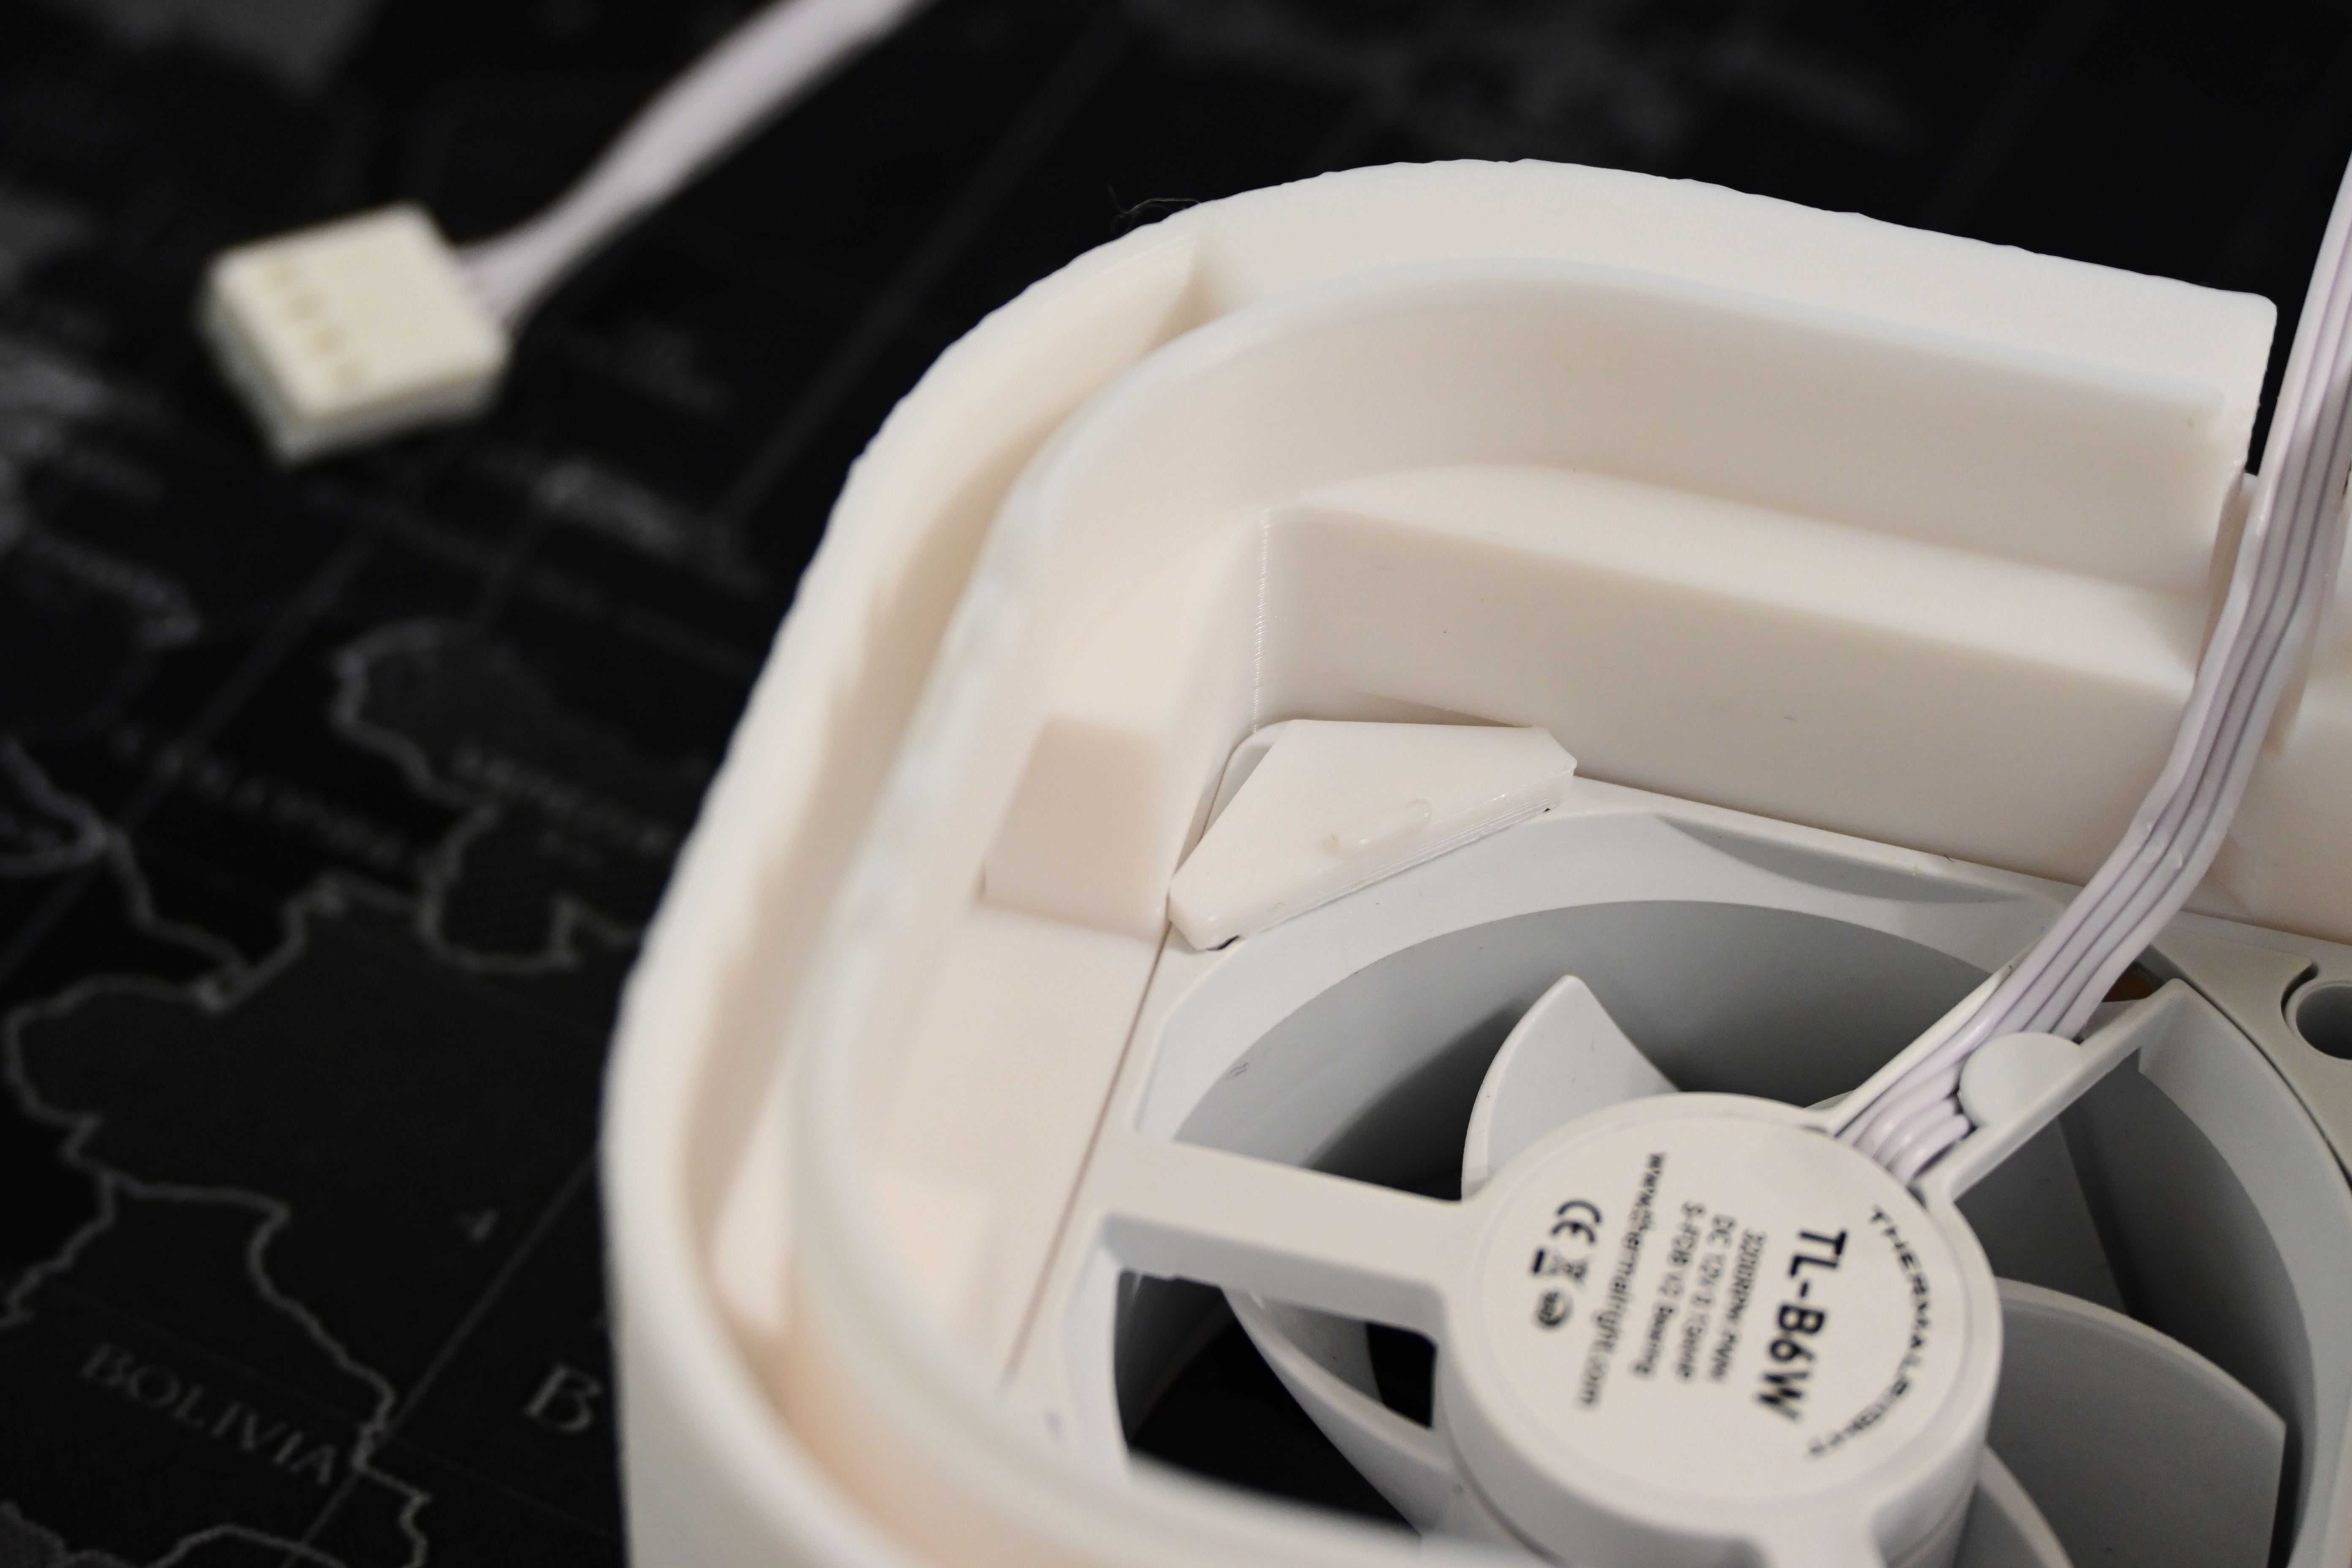
Place one [Corsair VRM Cooler Clip V1] and align it with the gaps on the walls.
There is a small rubber pad on the fan that should squish downwards slightly, allowing the clip to slide in.
It takes a bit of force but isn't too hard.

Repeat this process for the two other clips.
Step 4

Now push the cable into the printed cable guide
Step 5
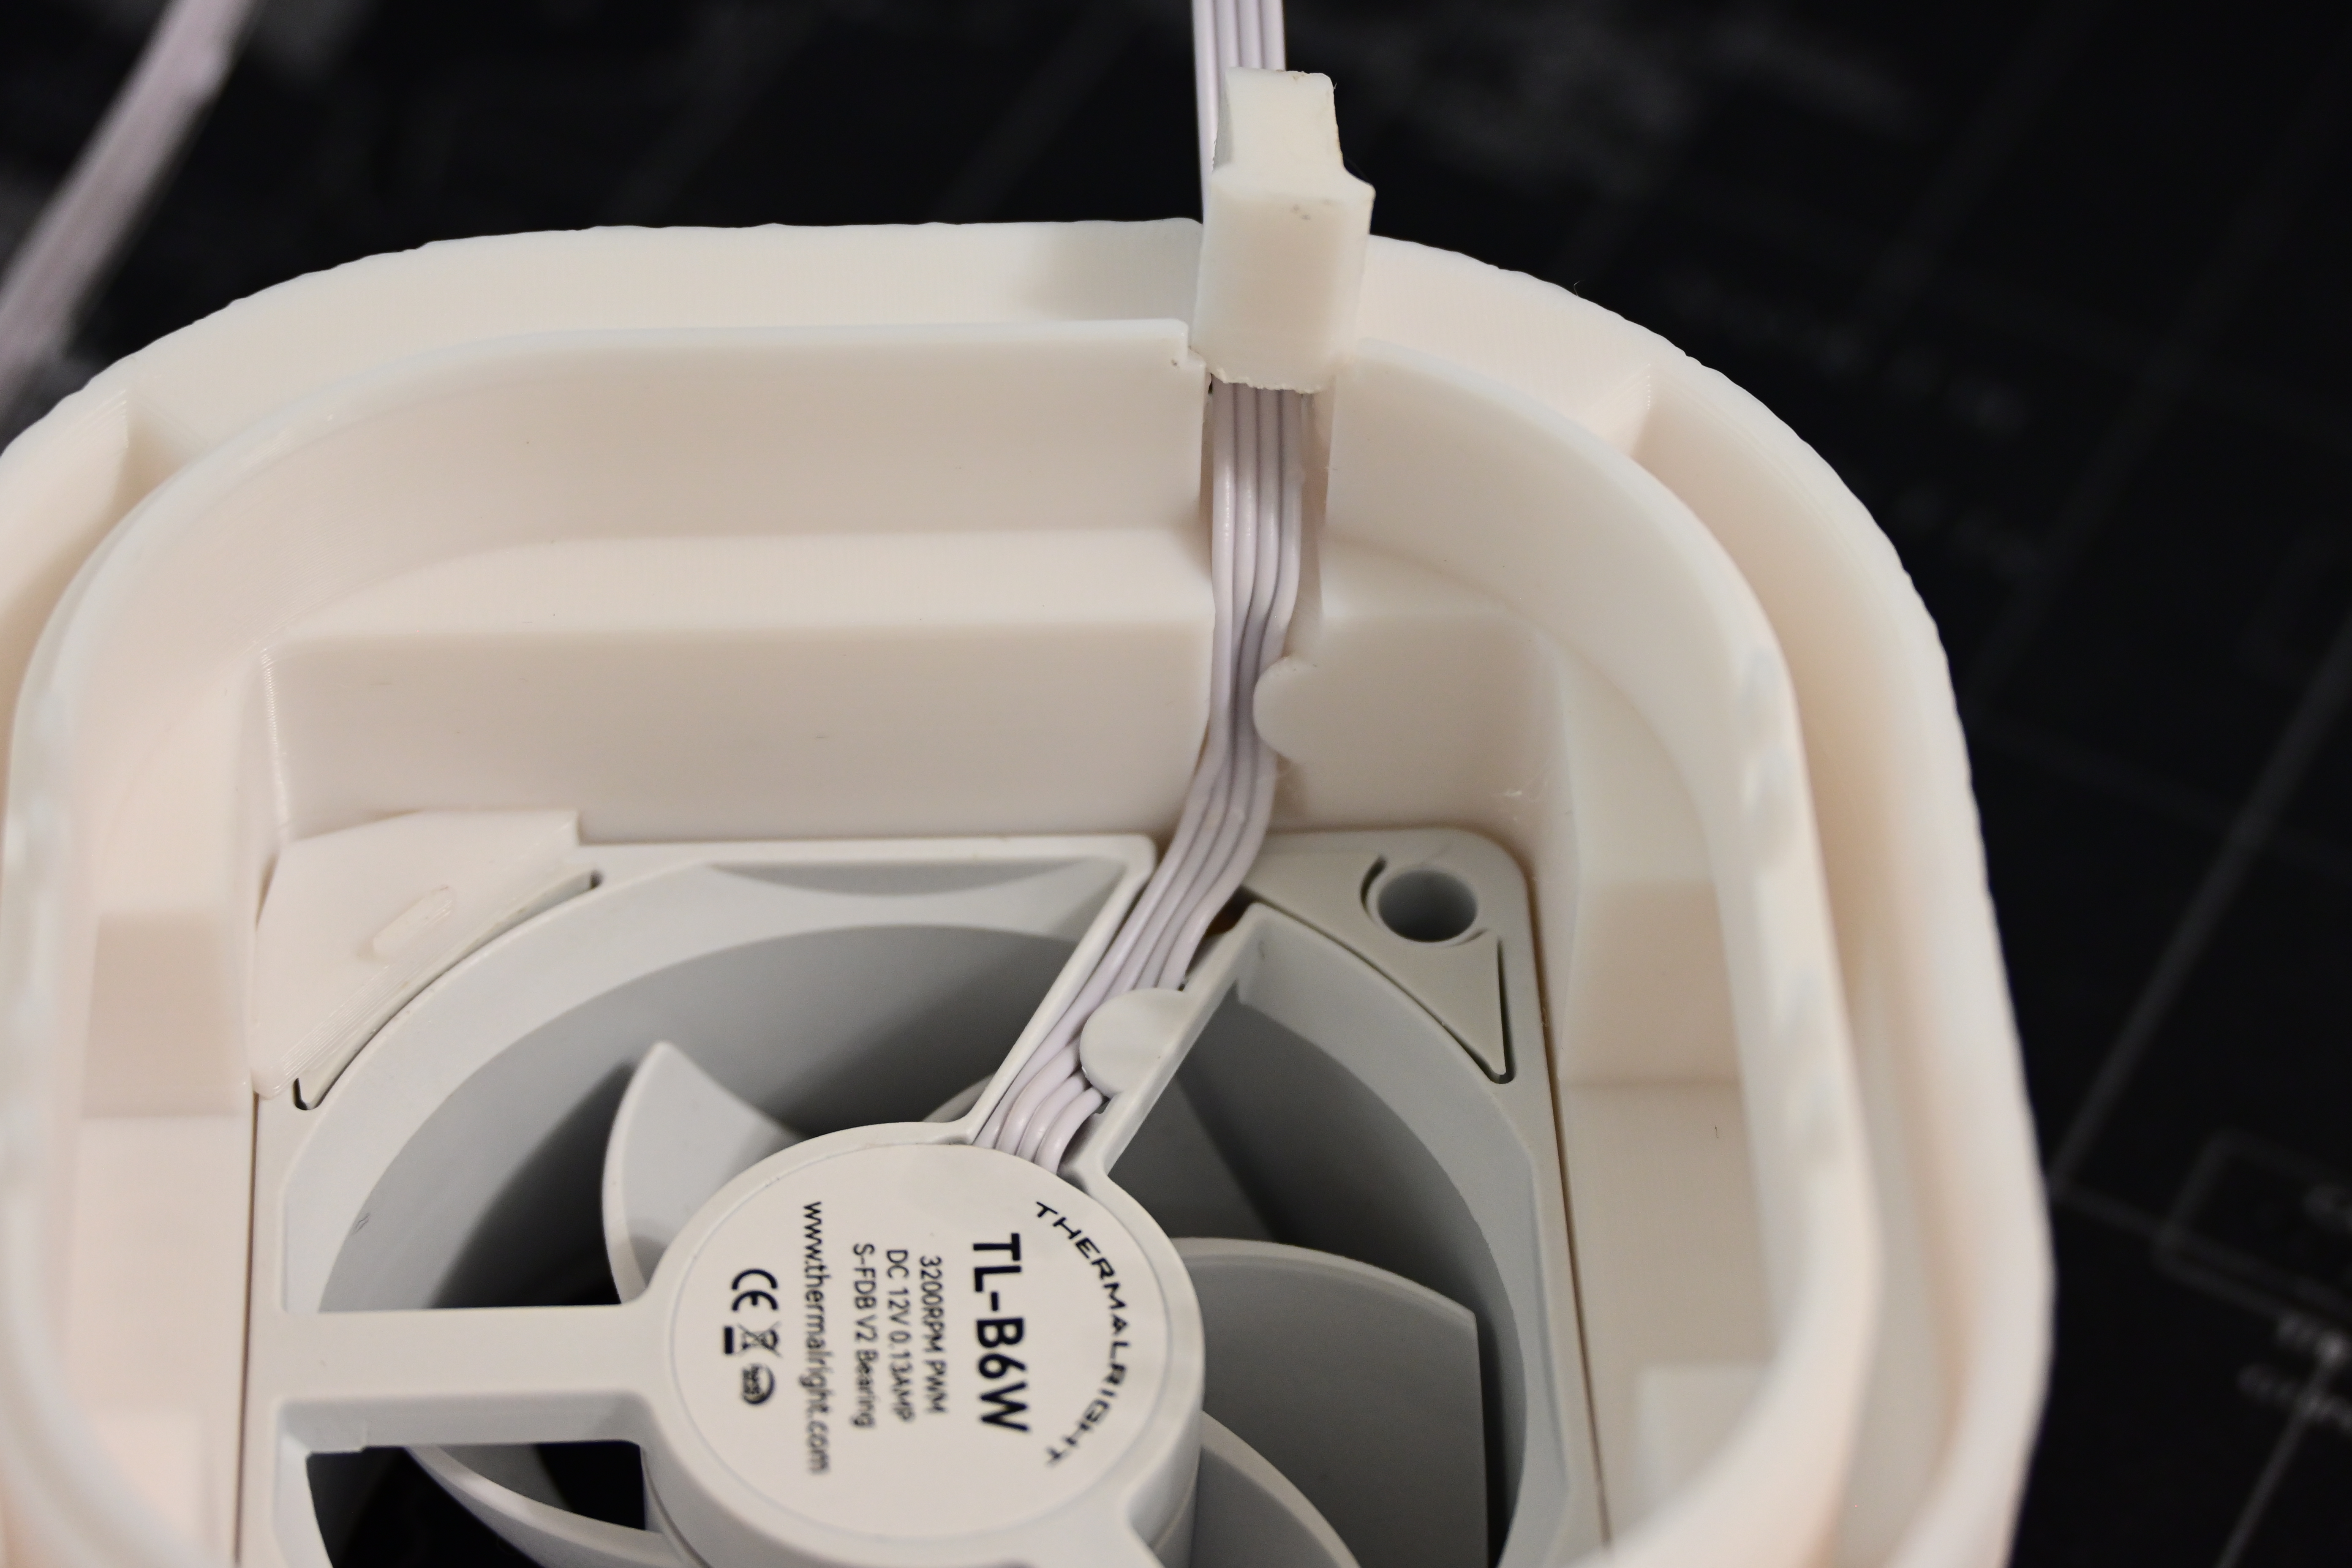
Take your [Wire Plug V3] and push it into the slot, so that the cable can't fall out.
Step 6: Optional
You can print either of the fan center caps to hide the brass and silver. I don't recommend fuzzy skin on either. You must also use some kind of adhesive to stick it on.
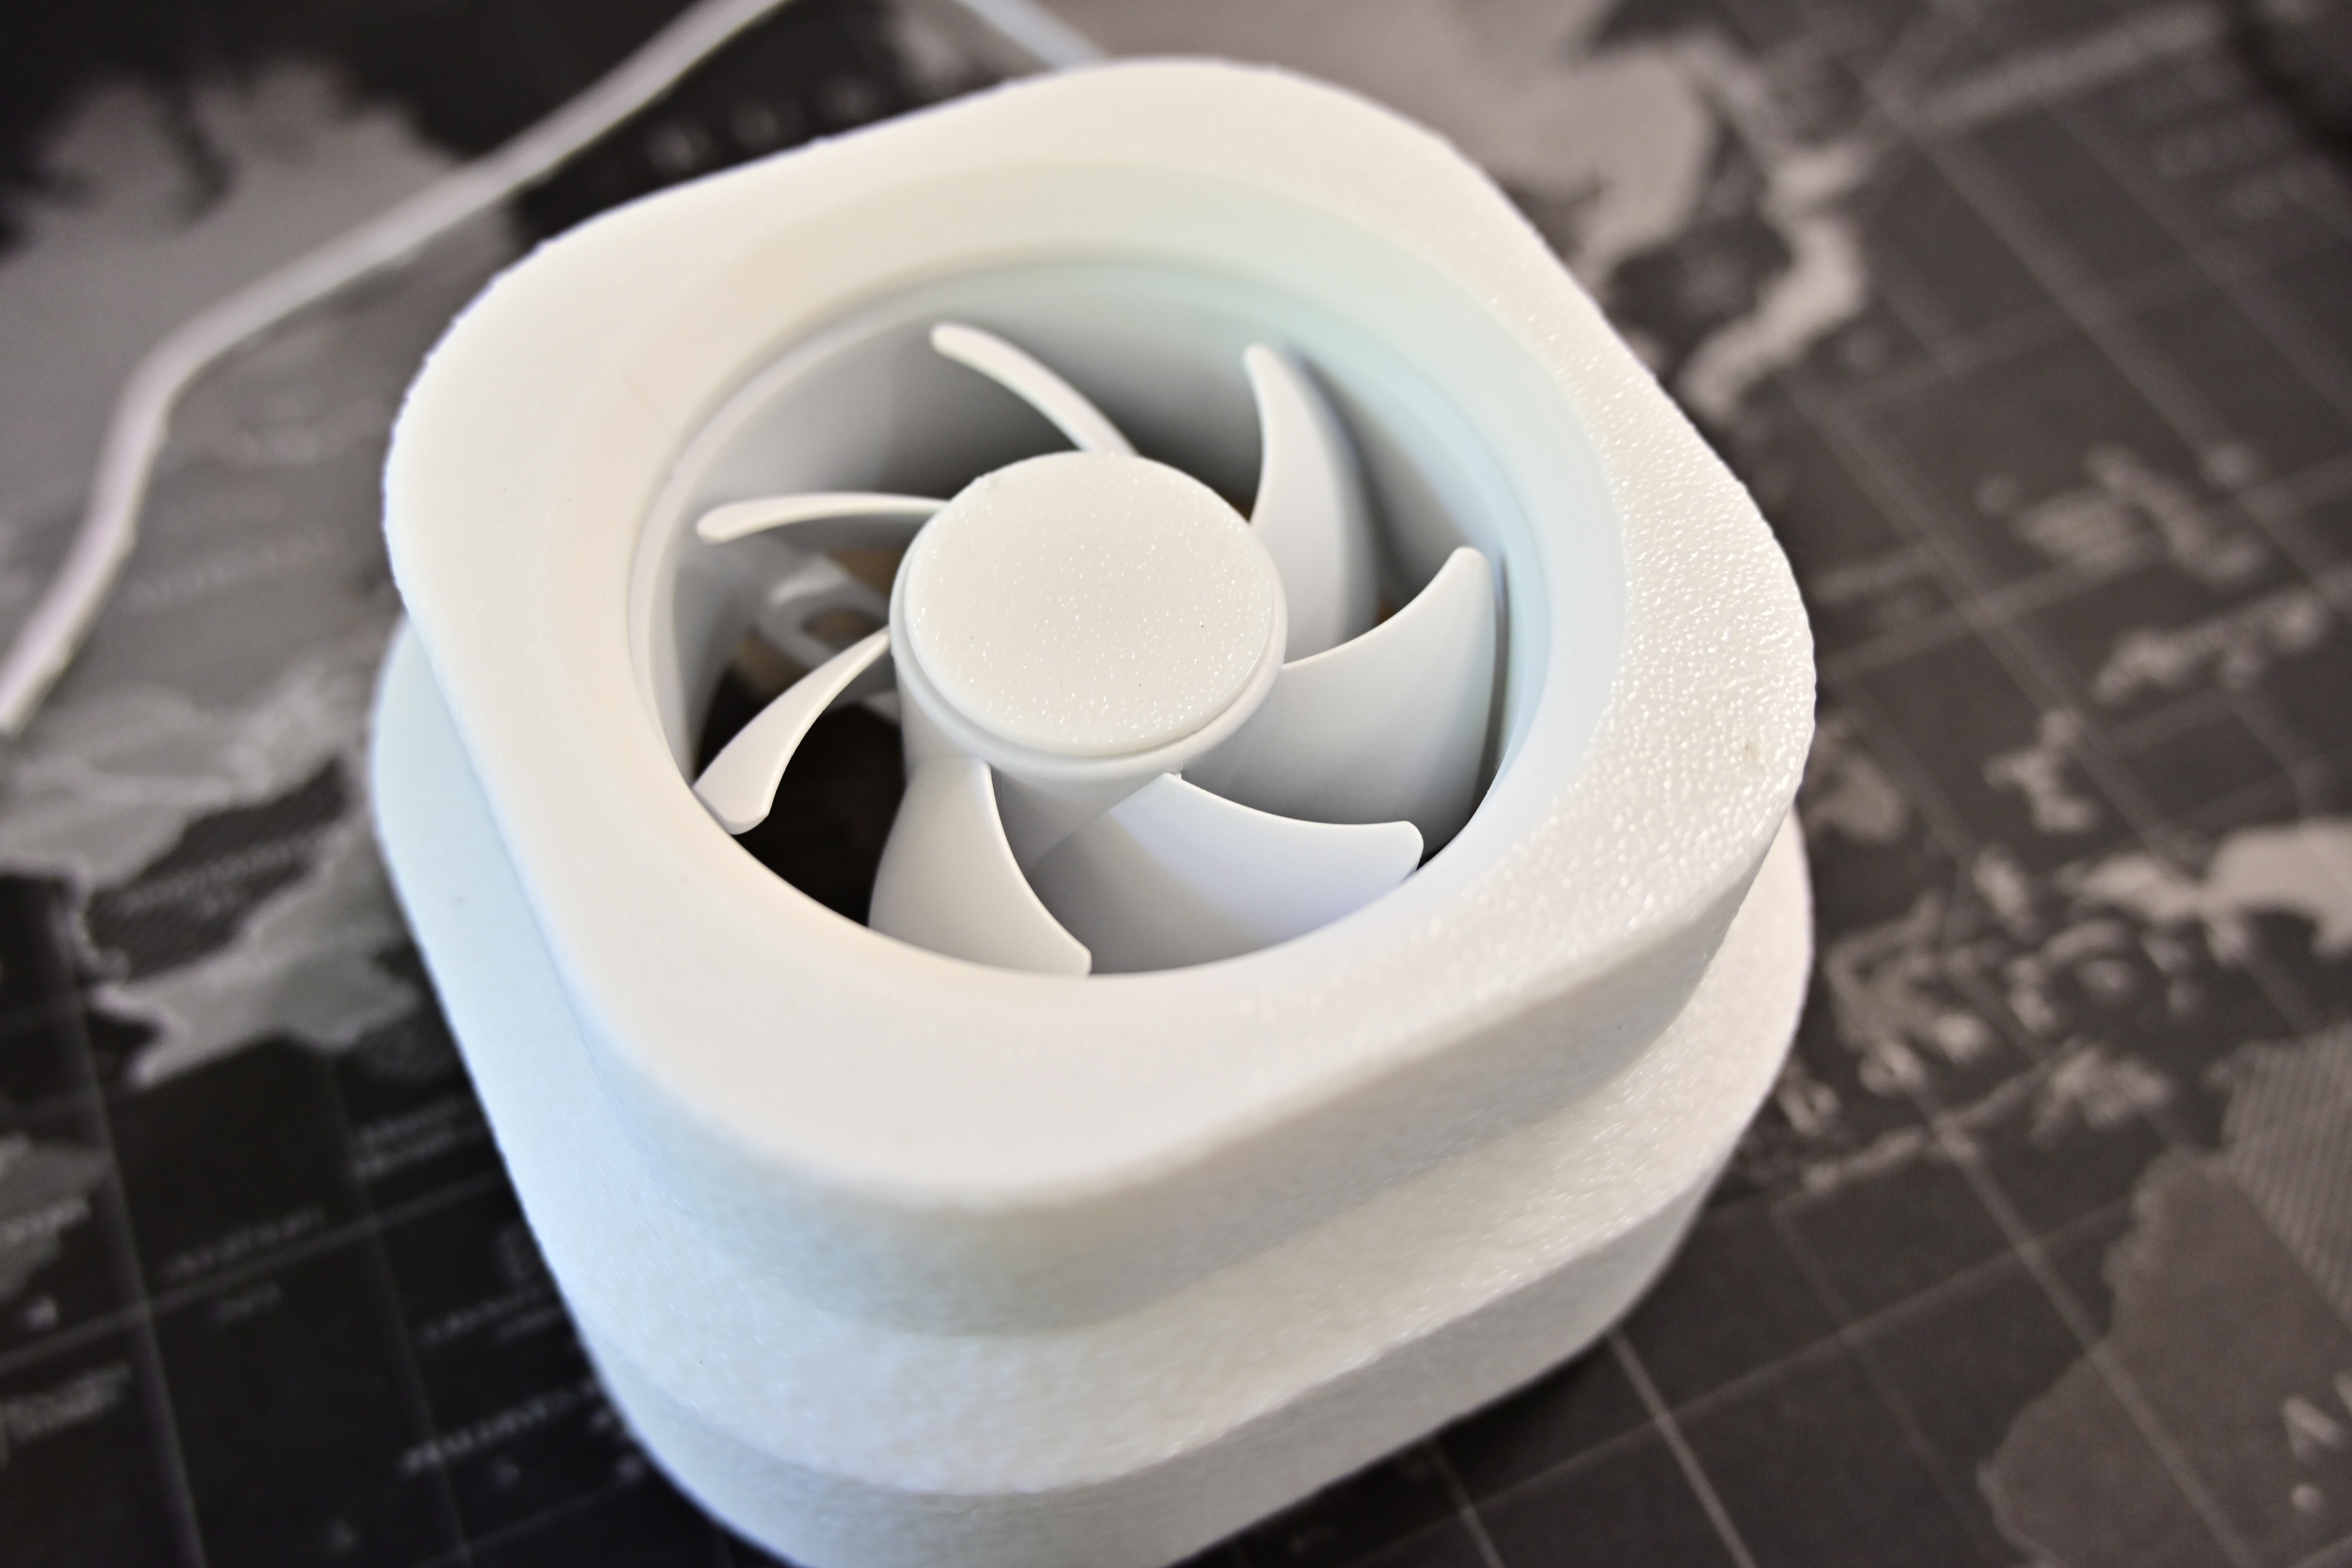
Now you are done!
If there are any questions, comments, or concerns, please tell me in the comments.