Weight Adjustable Diving Toy
Obliczymy ostateczną cenę na podstawie wybranego pliku. Sprawdzisz ją i zaakceptujesz przed płatnością.
Zapisane na tym urządzeniu.
Informacje o modelu
- Źródło
- Printables
- Kategoria
- Outdoor Toys
- Licencja
- Creative Commons — Attribution
Using little stones, marbles or similar, you can adjust the weight and sinking speed of this diving ring. There are three options available:
- Magnetic: Everything is held in place using 6x2 mm magnets. Depending on the magnets strength, you may not want to throw the ring into the water too strongly.
- Screwed: Everything is held in place using M3x8 mm screws. This is the most rigid option but adjusting the weight is only possible using a screw driver or allen key.
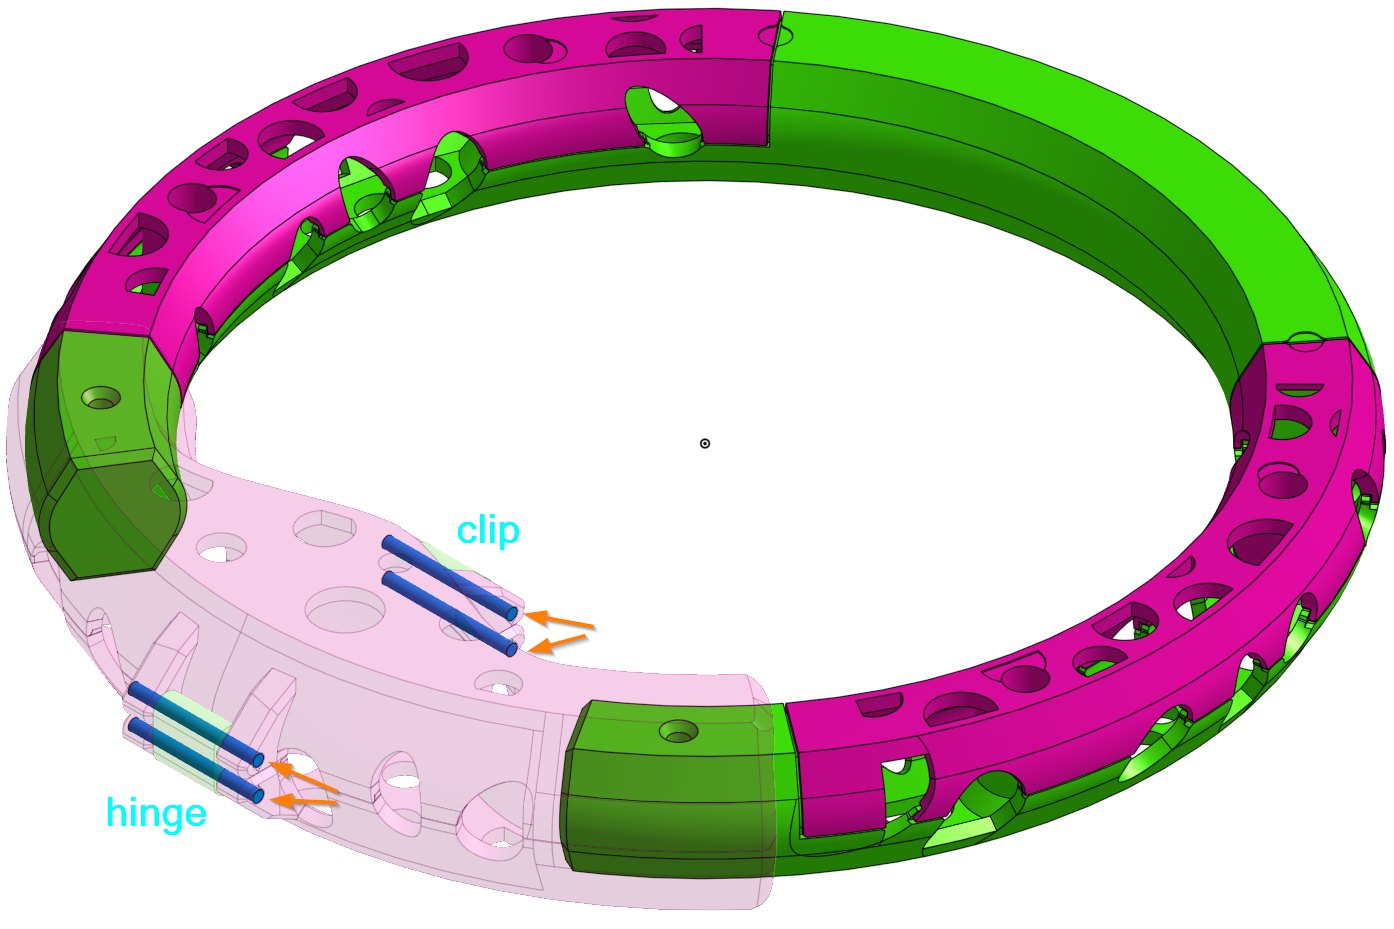
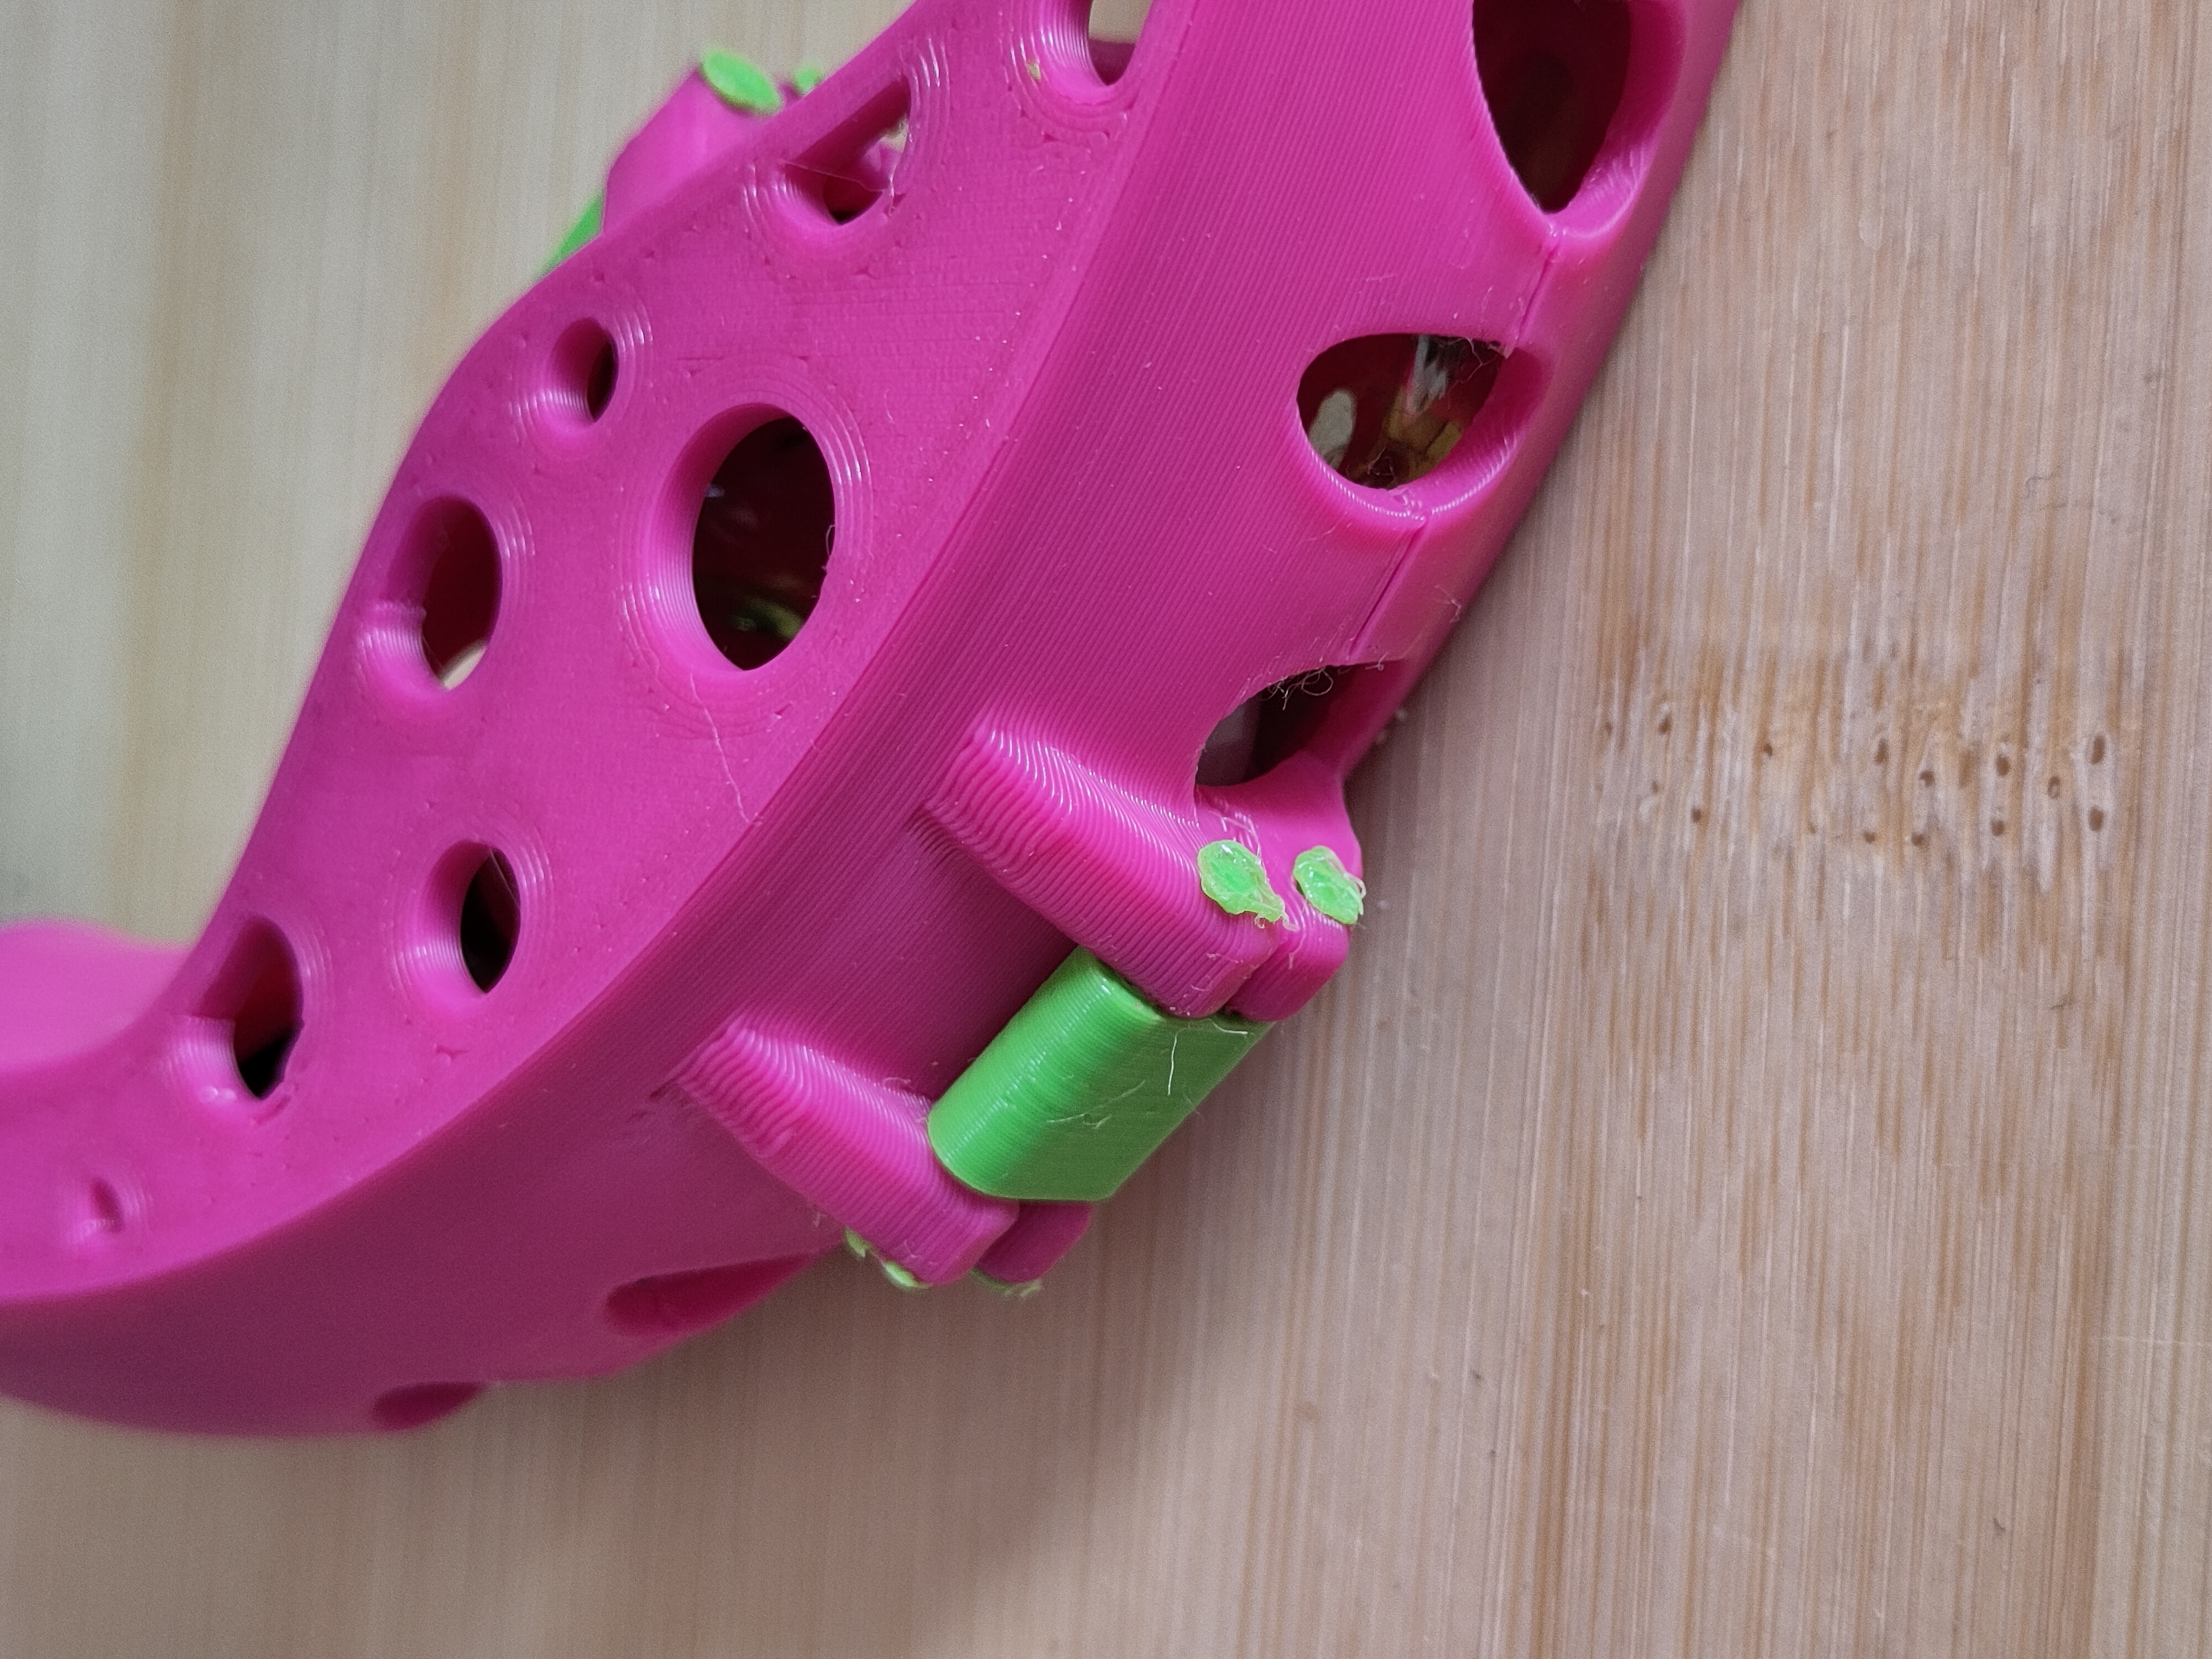
- Hinged: The hinge mechanism lets you open and close the weight basket easily. Parts that don't need to move are held in place using M3x8 mm screws. The hinge and the clip are attached using small pieces of filament.
BOM
| Magnetic version | |
| Item | Qty |
| 6x2 mm magnet | 22 |
| Screw version | |
| Item | Qty |
| M3x8 mm SHCS | 8 |
| Latch version | |
| Item | Qty |
| m3x8 mm SHCS | 6 |
| 1.75 mm filament (for hinge & latch attachment) | ~ 10 cm |
Print instructions
General instructions
All parts are in print orientation.
- Layer height: 0.2 mm
- Walls: 3-4
- Infill: 10%
- Support: no
- Optional: use only one wall for top and bottom layers
Instructions for the magnetic version
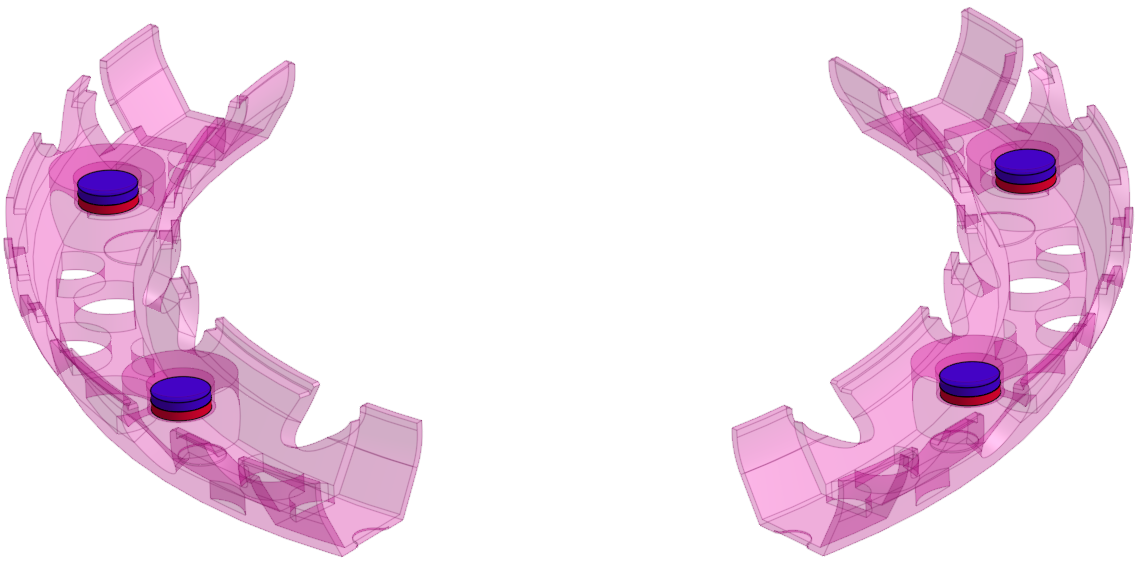
The magnets are embedded in the parts. So, you need to pause the prints a few times. Check your layer heights. Pay attention to the magnets orientation (see pictures bellow)!
| Print pause for magnet insertion | |
|---|---|
| Part | Pause at start of layer # |
| Ring | 29 |
| 40 | |
| 84 | |
| Ring cover (left & right) | 39 |
| Weight Basket Top | 19 |
| 60 | |
| Weight Basket Bottom | 19 |
| 66 | |
Magnet orientation
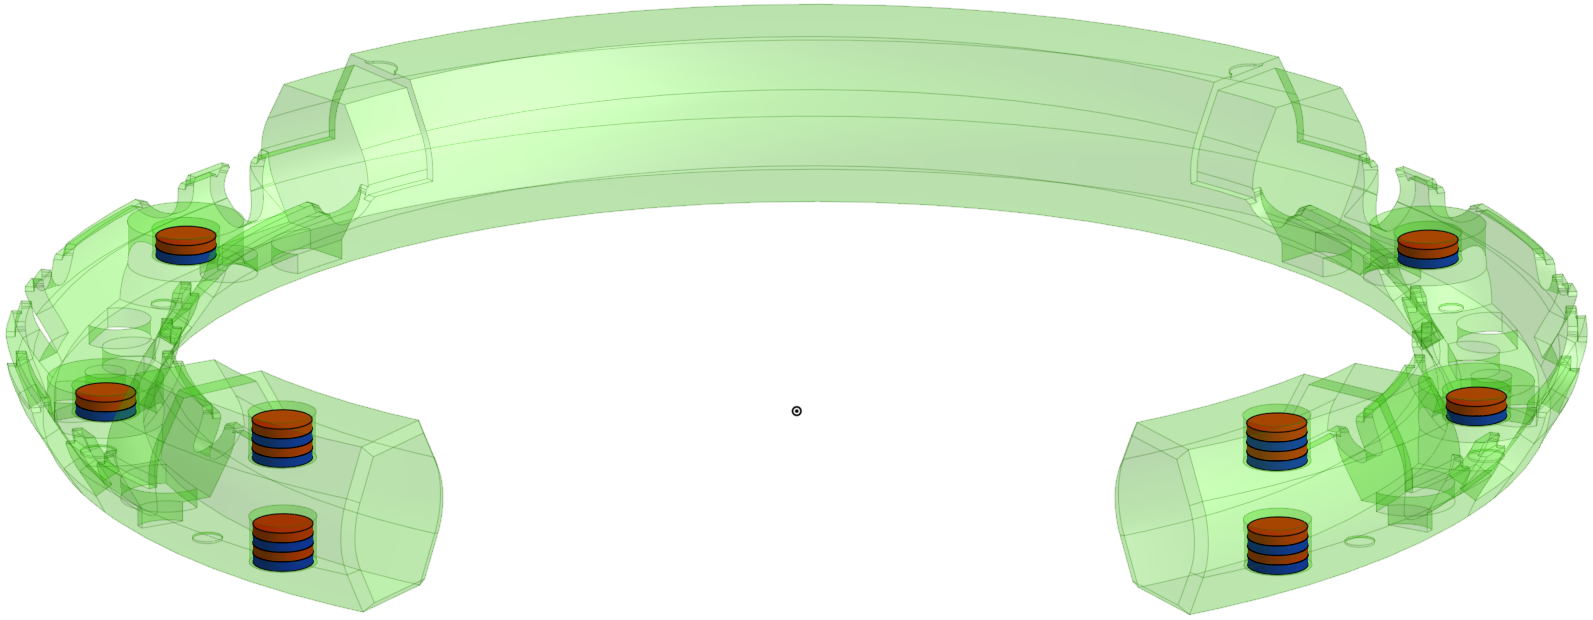
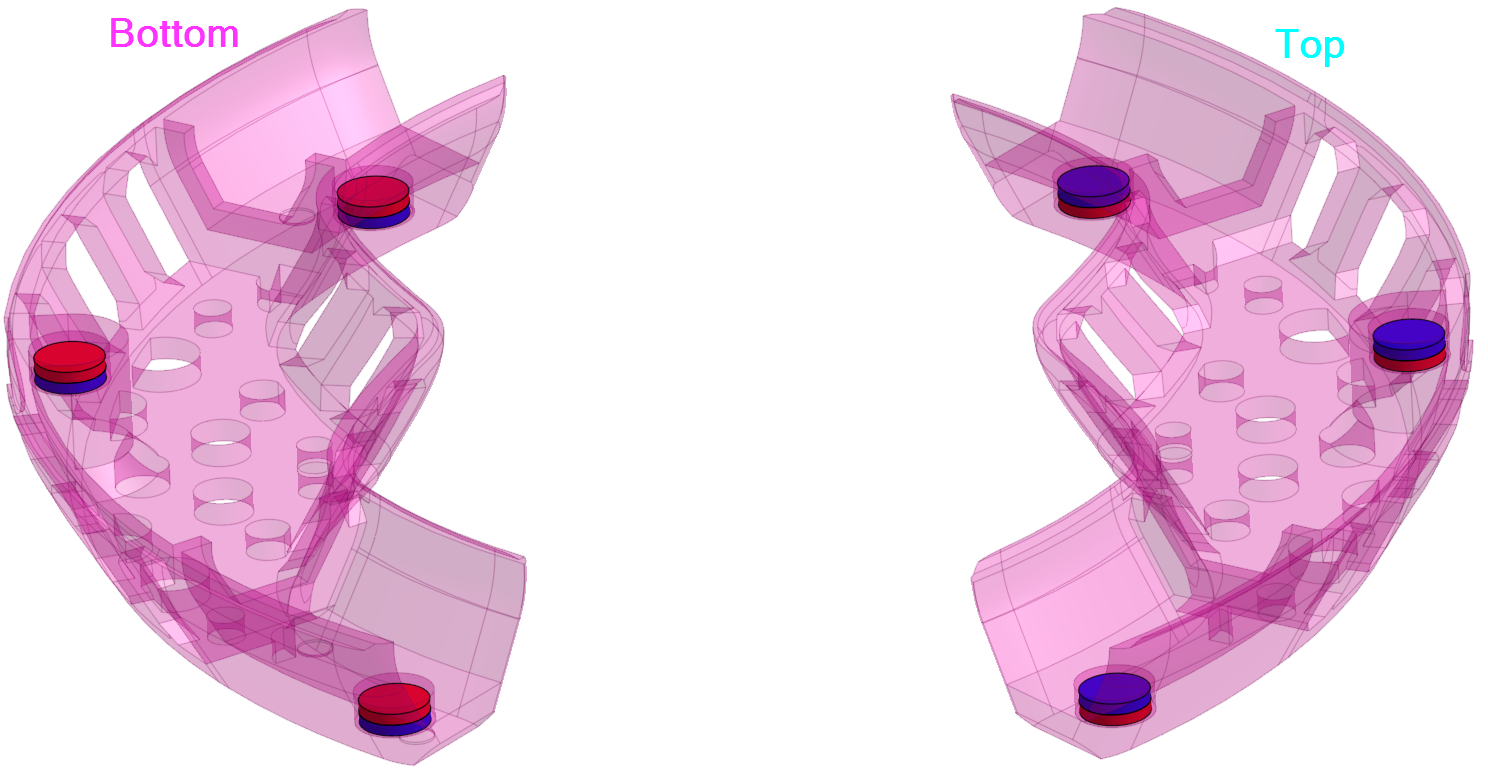
The right magnet orientation is displayed the pictures bellow. The two poles of a magnet are red and blue. Note that in the ring there are places where two magnets are stacked on top of each other (blue/red - blue/red).
Magnet orientation for the ring:
Magnet orientation for the weight basket parts:
Magnet orientation for the covers:
Build instructions
Magnetic option
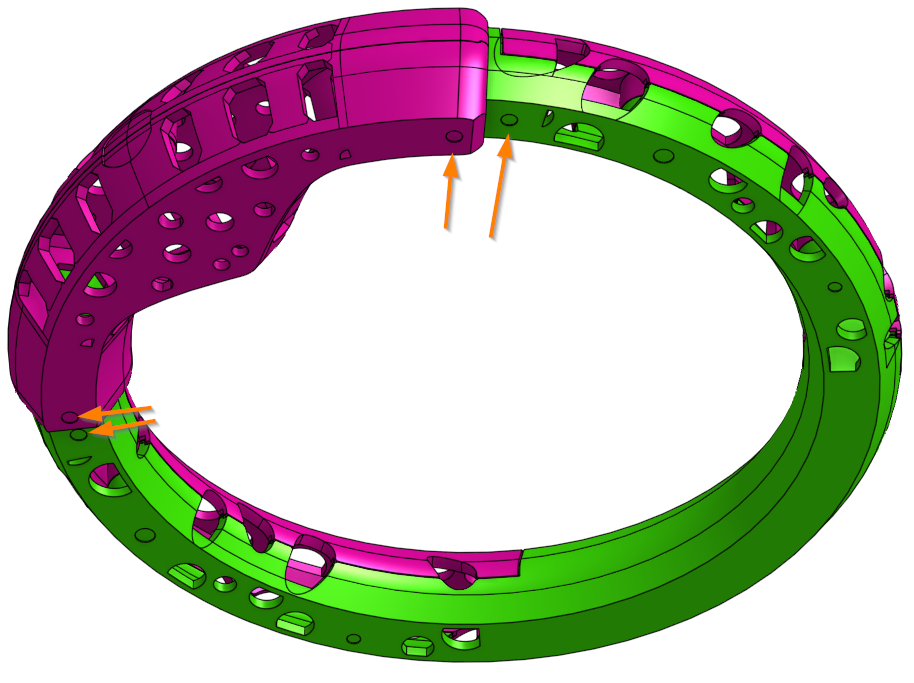
If the magnets are inserted as described above the bottom of the weight basket can be attached to the bottom of the ring. Both are marked with a little hole (see image bellow).
Screwd option
Attach the covers and weight cage parts to the ring using M3x8 mm screws. For printability reasons, there is a sacrificial layer in the holes where the screw heads sit. These layers can be easily broken.
Hinged option
The hinge and clip can be attached using four small pieces of filament. Insert the filament from one side so that it just sticks out the other side. Use a soldering iron with a flat tip to melt the filament to secure it in place. Cut the excess filament and melt that tip as well.