
Printable Lazy Suzan & Planetary Gear Vise Open Ball XL
Obliczymy ostateczną cenę na podstawie wybranego pliku. Sprawdzisz ją i zaakceptujesz przed płatnością.
Zapisane na tym urządzeniu.

An Open Ball remix with a printable lazy suzan, heat inserts, M3/M5 standardisation and printability improvements.
- Ocena
- 5 / 5
- Polubienia
- 45
- Pobrania
- 220
- Wydruki
- 0
- Wyświetlenia
- 1359
- Oceny
- 2
Aktualizacja u źródła:
Informacje o modelu
- Źródło
- Printables
- Kategoria
- Tools
- Licencja
- Creative Commons — Attribution
UPDATE 2025-09-09: I've added the missing lazy susan files. Thanks for letting me know!

I got impatient waiting for the lazy suzan to arrive from Amazon so I designed a printable version. While I was at it I remade the fractal vase to print easier (based on Teaching Tech's design). Then started to adjust things here and there to fit the hardware I'm used to (M3 and M5 DIN912 bolts and heat inserts) and ended up with a full remix.
I say “full remix” but there are parts that I did not change from Chris' upload, those parts are prefixed with o_ for “original”.
The entire design is on Onshape. The whole BOM is at the bottom.
I hope you'll enjoy this one :)
Thanks.
Assemblies
Bellow you will find the design separated into it's assemblies. You might choose not to print some of them or one the original ones.
There's a Bill Of Materials (BOM) for each assembly, an exploded view to be used as the manual and if it mattered a build plate from a slicer presenting the print orientation.
Almost everything is designed to be printed with 0.3mm layer height and 0.4 wall width - the fractal parts must be printed with 0.12mm layer height.
Ball
Start with the Ball Assembly. There are built-in supports to help with the print of the main ball shell. Snap those off once printed, you don't need to be precise, it's going to be submerged in concrete in a moment.
I made and printed the inner concrete interface to have something in the concrete being held from both sides (if that makes sense) - not sure if it's important or not. If you decide to print it make it without the top and bottom - just the infill for the concrete to pass through.


BOM
Part | Qty | Description |
|---|---|---|
ball_main_shell | 1 | Printable |
o_ball_top | 1 | Printable |
concrete_interface | 1 | Printable, Top and bottom shell layers: 0, 10% infill Rectilinear |
M8 coupler 24mm | 9 |
|
M8 65mm Bolt | 1 |
|
M8 10mm Bolt | 8 |
|
Printing

Base
You will find one TPU part here - it's the rubber ring - you might have a fi 6mm piece of rubber which is probably a better solution but if instead you have TPU laying around you can print the ring. It's a snug fit but it fits.
The bottom base is modified to require no supports. Most of the files are from the original.
I did not like how my concrete job looked through the little windows so I made little glue on covers.


BOM
Part | Qty | Description |
|---|---|---|
large_inner_base | 1 | Printable |
tpu_ring | 1 | Printable |
o_base_cover | 1 | Printable |
bottom_case_cover | 1 | Printable |
o_bottom_left_spacer | 1 | Printable |
o_bottom_right_spacer | 1 | Printable |
o_upper_left_spacer | 1 | Printable |
o_upper_right_spacer | 1 | Printable |
o_bottom_back_spacer | 1 | Printable |
foot | 4 | Printable |
M8 25mm Bolt | 10 |
|
M8 coupler 24mm | 8 |
|
Back Holder
The biggest change here is that I'm using a 20mm fi pipe in the back - that's a size I easily found in a polish hardware store, while a 19mm pipe was nowhere to be found. Additionally I have friction mounted parts there - both parts clamp around the pipe (not scratching the pipe).
The open top of the pipe ask to be used for some kind of a light fixture where the power wire could go inside the tube, but I ran out of ideas here :)
There's a soldering iron holder on the back that can hold a 20mm iron. The gridfinity shelf is changed to take a M5 bolt.


BOM
Part | Qty | Description |
|---|---|---|
back_pipe_base_20fi | 1 | Printable |
back_pipe_hander_20fi | 1 | Printable |
gridfinity_shelf_5mm | 1 | Printable |
back_iron_holder_a | 1 | Printable |
back_iron_holder_b | 1 | Printable |
M5 Nut | 6 |
|
M5 20mm Bolt | 6 |
|
M8 25mm Bolt | 3 |
|
pipe_20fi |
|
|
Lazy Suzan
You would not believe how well this rotates. I used a bit of silicon lube on it but even dry it's great. Holds the weight of the concrete ball, prints easily. I very happy with this.
You'll see a lot of heat inserts here - this is just future proofing, might become handy in the future vise deigns of something. Really you only need the 4 to hold the vise plate.


BOM
Part | Qty | Description |
|---|---|---|
lazy_susan_cage | 1 | Printable |
lazy_susan_peg | 30 | Printable, print them standing up, use brim in need be |
top_lazy_susan | 1 | Printable |
lazy_susan_top | 1 | Printable |
M8 10mm Bolt | 4 |
|
heat_insert_M3xD4.6xL4.0 | 69 or 4 | :} |
Vise Plate
Very similar to the original just that it takes heat inserts. Just like the original it requires the dove_tail and the vise_adaptor_plate to be glued together.


BOM
Part | Qty | Description |
|---|---|---|
dove_tail_v2 | 1 | Printable |
vise_adaptor_plate_v2 | 1 | Printable |
knob | 2 | Printable |
big_knob | 2 | Printable |
vise_break | 2 | Printable |
M3 8mm Bolt | 4 |
|
M3 12mm Bolt | 4 |
|
M3 25mm Bolt | 2 |
|
M3 35mm Bolt | 2 |
|
heat_insert_M3xD4.6xL4.0 | 12 |
|
Fractal Jaw (1 set of 2)
There's not much to those, I watched TT's video (link above) and learned how to do it. It was difficult to scale it down so much but in the end I got 60mm of travel and the vise works like a charm. Lube helped here as well.


BOM (for one set - you need 2!!)
Part | Qty | Description |
|---|---|---|
fractal_B1 | 1 | Printable, 0.12 Layer Height |
fractal_B2 | 1 | Printable, 0.12 Layer Height |
fractal_C1 | 2 | Printable, 0.12 Layer Height |
fractal_C2 | 2 | Printable, 0.12 Layer Height |
fractal_D1 | 4 | Printable, 0.12 Layer Height |
fractal_D2 | 4 | Printable, 0.12 Layer Height |
M3 8mm Bolt | 4 |
|
M3 16mm Bolt | 6 |
|
heat_insert_M3xD4.6xL4.0 | 4 |
|
Printing

Vise Gear Interface
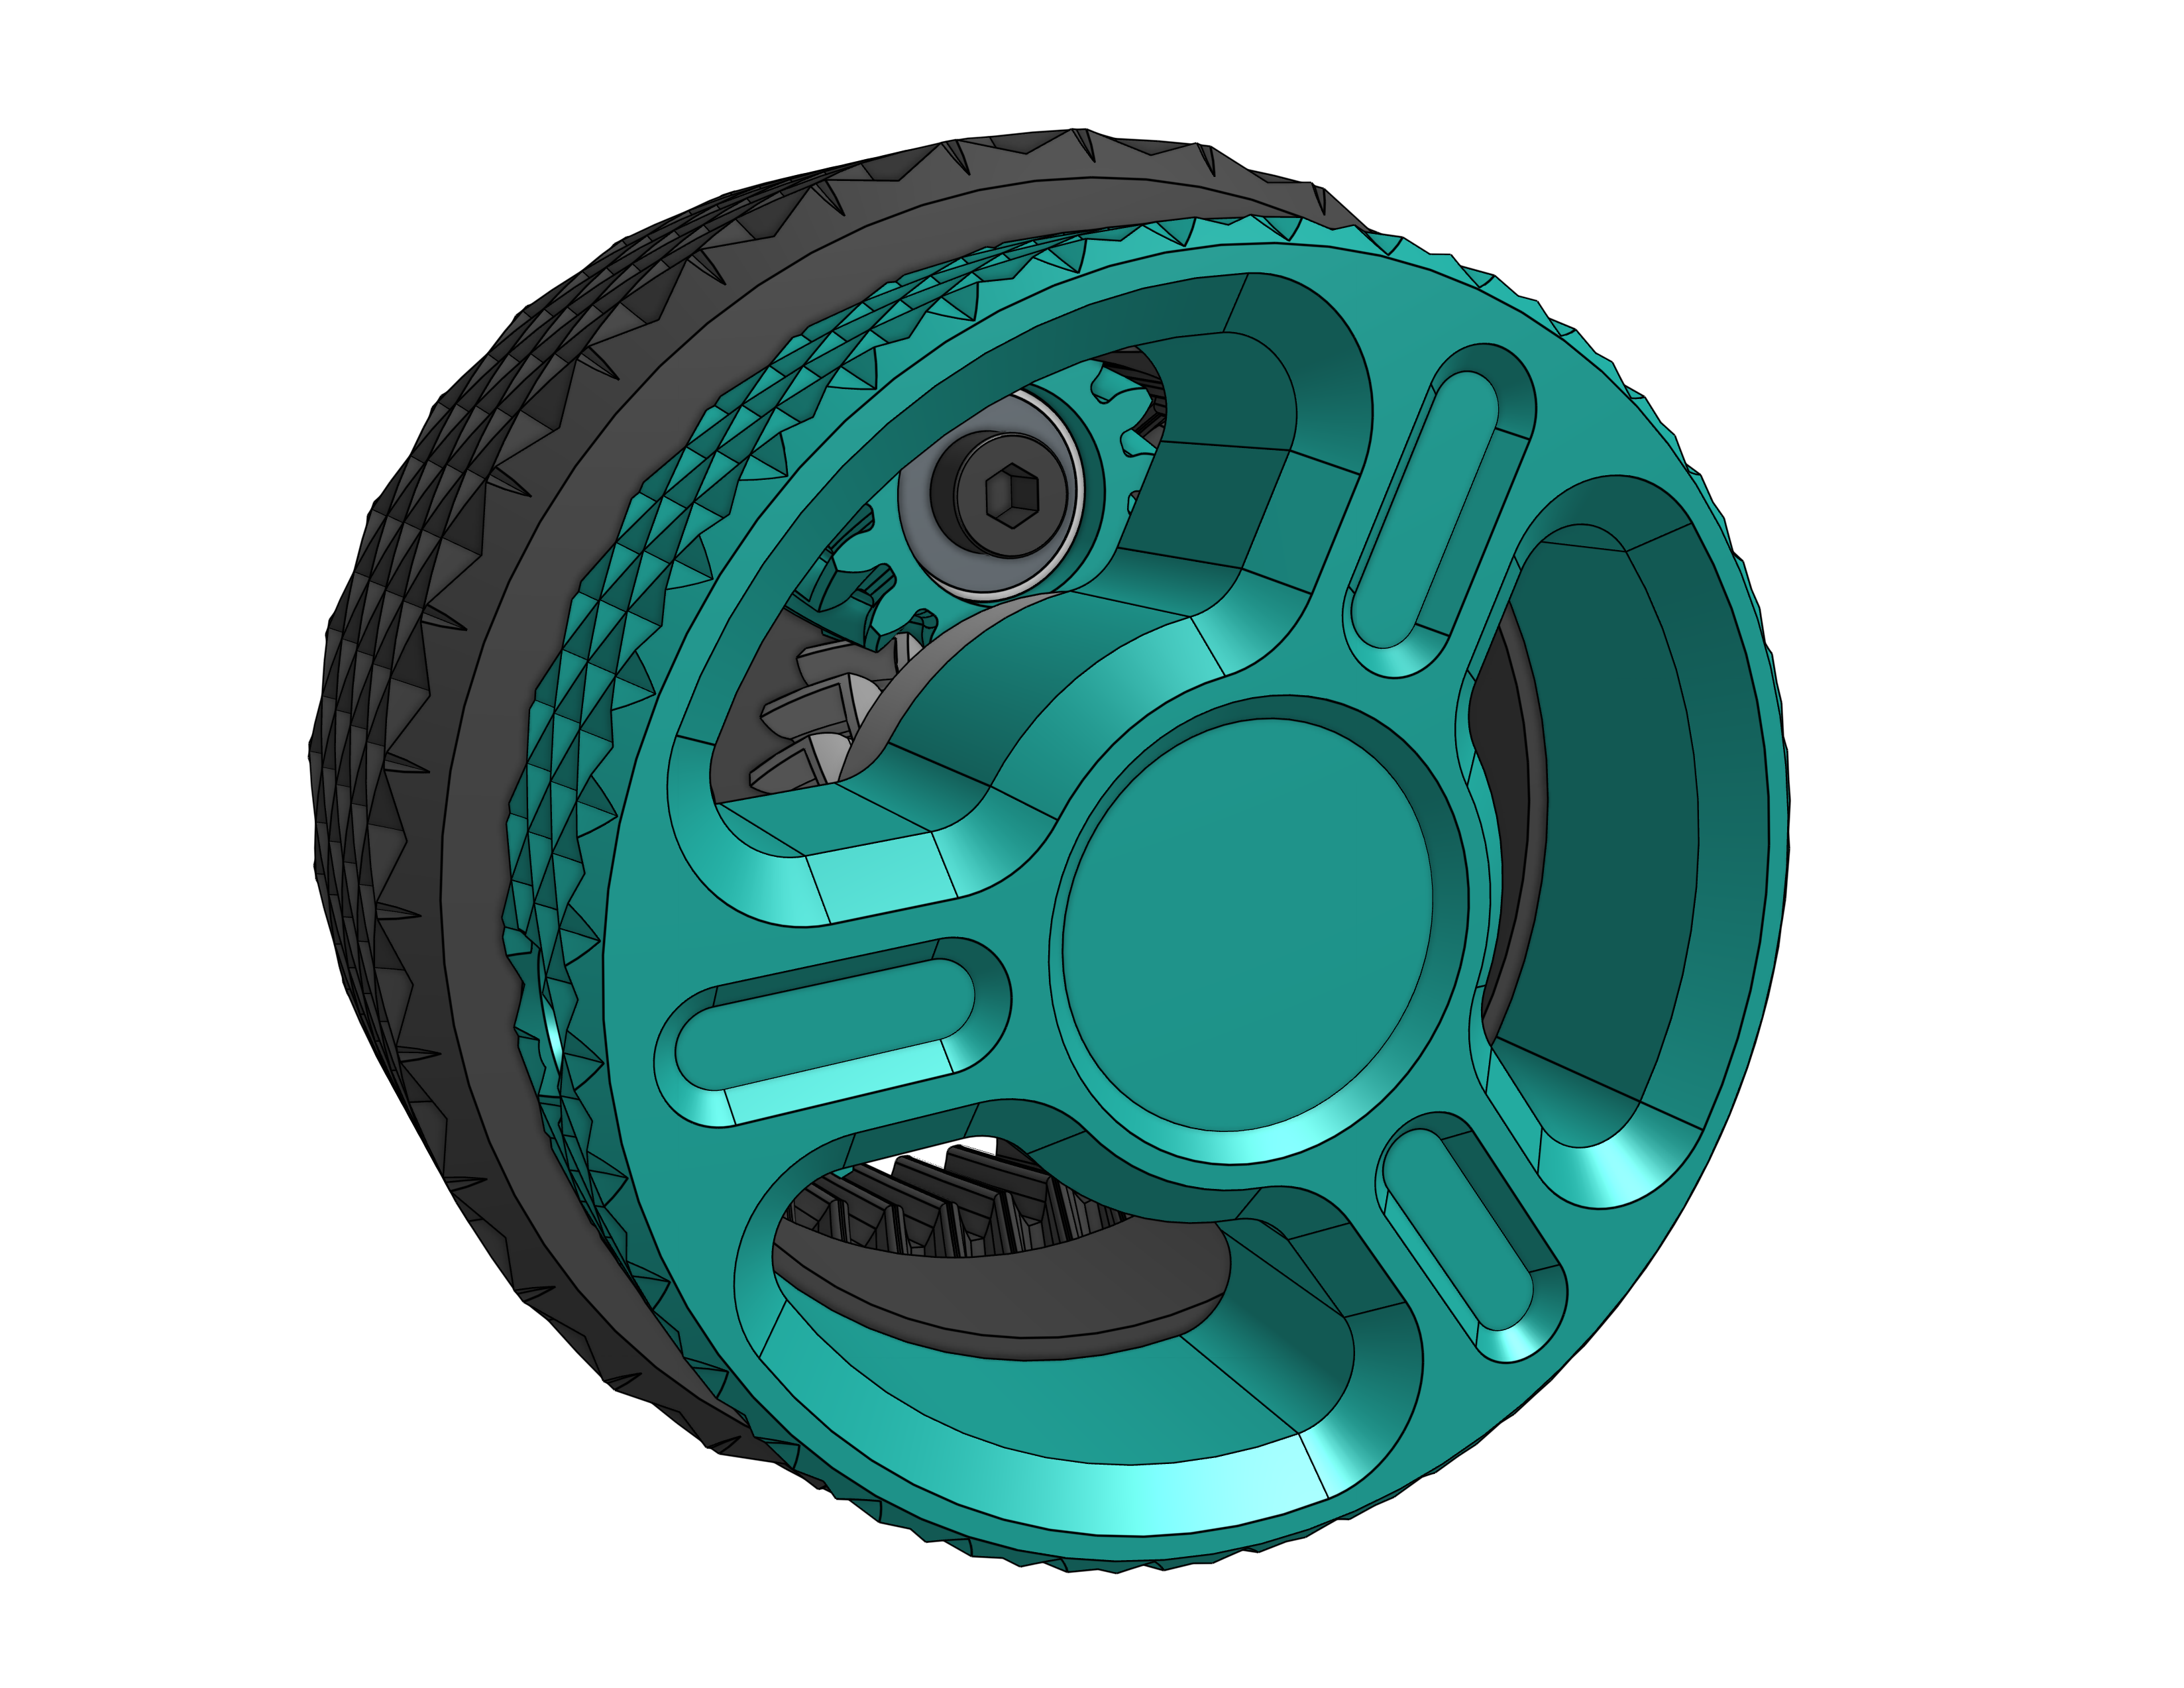
This one is cool, let's you clamp the jaws down with a 3:1 or 1:1 gear ratio using one wheel or the other. Again can use lube here. It's difficult to print - check the instructions. Do NOT over tighten the M3 screws that go into the bearings.

Part | Qty | Description |
|---|---|---|
spur_gear_planet_15t | 3 | Printable |
spur_gear_ring_45t | 1 | Printable |
spur_gear_sun_15t | 1 | Printable |
vise_gearbox_reverse_wheel | 1 | Printable |
vise_gearbox_interface | 1 | Printable |
623 Bearing | 3 |
|
M3 12mm Bolt | 3 |
|
M3 16mm Bolt | 3 |
|
heat_insert_M3xD4.6xL4.0 | 6 |
|
Printing
The planetary gearing must be printed in one print as the herringbone spur gears will not assemble afterwards.
There are three options:
Make sure to load the 5 files as one object with multiple parts to retain the parts position for printing.
Load only the
GROUPfile and make sure your slicer did not connect any of the gears together.Use the
SIMPLEversion - it's less fun but will work for everyone.
Don't forget the other two parts.

Fractal Vise
Now using the two assemblies from above you can construct the vise itself.


BOM
Part | Qty | Description |
|---|---|---|
fractal_jaw_mount_moving | 1 | Printable, 0.12 Layer Height |
fractal_jaw_mount_fixed | 1 | Printable, 0.12 Layer Height |
vise_body | 1 | Printable |
Lead Screw (square thread, 4 start) | 175mm |
|
M3 12mm Bolt | 1 |
|
M3 35mm Bolt | 4 |
|
heat_insert_M3xD4.6xL4.0 | 5 |
|
Printing

FULL Bill Of Materials
Part | Qty | Description |
|---|---|---|
ball_main_shell | 1 | Printable |
o_ball_top | 1 | Printable |
concrete_interface | 1 | Printable |
lazy_susan_cage | 1 | Printable |
lazy_susan_peg | 30 | Printable |
top_lazy_susan | 1 | Printable |
lazy_susan_top | 1 | Printable |
spur_gear_planet_15t | 3 | Printable |
spur_gear_ring_45t | 1 | Printable |
vise_gearbox_interface | 1 | Printable |
spur_gear_sun_15t | 1 | Printable |
vise_gearbox_reverse_wheel | 1 | Printable |
vise_body | 1 | Printable |
fractal_jaw_mount_fixed | 1 | Printable, 0.12 Layer Height |
fractal_jaw_mount_moving | 1 | Printable, 0.12 Layer Height |
fractal_B1 | 2 | Printable, 0.12 Layer Height |
fractal_B2 | 2 | Printable, 0.12 Layer Height |
fractal_C1 | 4 | Printable, 0.12 Layer Height |
fractal_C2 | 4 | Printable, 0.12 Layer Height |
fractal_D1 | 8 | Printable, 0.12 Layer Height |
fractal_D2 | 8 | Printable, 0.12 Layer Height |
dove_tail_v2 | 1 | Printable |
vise_adaptor_plate_v2 | 1 | Printable |
knob | 2 | Printable |
vise_break | 2 | Printable |
big_knob | 2 | Printable |
large_inner_base | 1 | Printable |
tpu_ring | 1 | Printable |
o_base_cover | 1 | Printable |
back_pipe_base_20fi | 1 | Printable |
back_pipe_hander_20fi | 1 | Printable |
gridfinity_shelf_5mm | 1 | Printable |
back_iron_holder_a | 1 | Printable |
back_iron_holder_b | 1 | Printable |
bottom_case_cover | 4 | Printable |
o_bottom_left_spacer | 1 | Printable |
o_bottom_right_spacer | 1 | Printable |
o_upper_left_spacer | 1 | Printable |
o_upper_right_spacer | 1 | Printable |
o_bottom_back_spacer | 1 | Printable |
foot | 4 | Printable |
M8_coupler_24mm | 17 |
|
DIN 912 M8 65 mm | 1 |
|
DIN 912 M8 10 mm | 12 |
|
heat_insert_M3xD4.6xL4.0 | 71 |
|
bearing 623 | 3 |
|
DIN 912 M3 16 mm | 15 |
|
DIN 912 M3 12 mm | 8 |
|
DIN 912 M3 8 mm | 12 |
|
Lead screw (4 start) 175mm | 1 |
|
DIN 912 M3 35 mm | 6 |
|
DIN 912 M3 25 mm | 2 |
|
pipe_20fi | 1 |
|
DIN 912 M8 25 mm | 13 |
|
DIN 912 M5 20 mm | 6 |
|
M5 Hex nut Nyloc | 6 |
|