Nerf Auto Gryphon Pistol V2
Obliczymy ostateczną cenę na podstawie wybranego pliku. Sprawdzisz ją i zaakceptujesz przed płatnością.
Zapisane na tym urządzeniu.

Compact 3D Printed Talon full-auto blaster pistol. 130-150 fps, 6 dps.
- Ocena
- 0 / 5
- Polubienia
- 15
- Pobrania
- 45
- Wydruki
- 0
- Wyświetlenia
- 687
- Oceny
- 0
Aktualizacja u źródła:
Informacje o modelu
- Źródło
- Printables
- Kategoria
- Electronics
- Licencja
- Creative Commons — Attribution — Noncommercial — Share Alike
This is the remastered version of a Gryphon remix I made previously, using Ironz's gearbox pusher design and form factor with Flygonial's v1.3 Gryphon parts. The Flywheel cage setup and magwell can fit with any stock Gryphon parts, although I don't think the pusher will work with a full length magwell. The Cage parts I used below have been modified to remove the extra material in front of the muzzle, to remove the wasted space before the darts will hit a BCAR.
My current setup is daybreak wheels with x2 Krakens for the Flywheel motors, a Kraken to replace the stock blue gearbox motor. This gets 140-150 fps on 3S lipo with ~6 darts/sec. With a bcar, this can drop down to ~130s FPS. I chose a single-stage cage for the compact form factor, but there's no reason this wouldn't work with a dual stage gryphon cage.
However, I don't recommend using this blaster with a 2S lipo, as the gearbox will have a very slow fire rate. I haven't really tested with a 4S lipo.
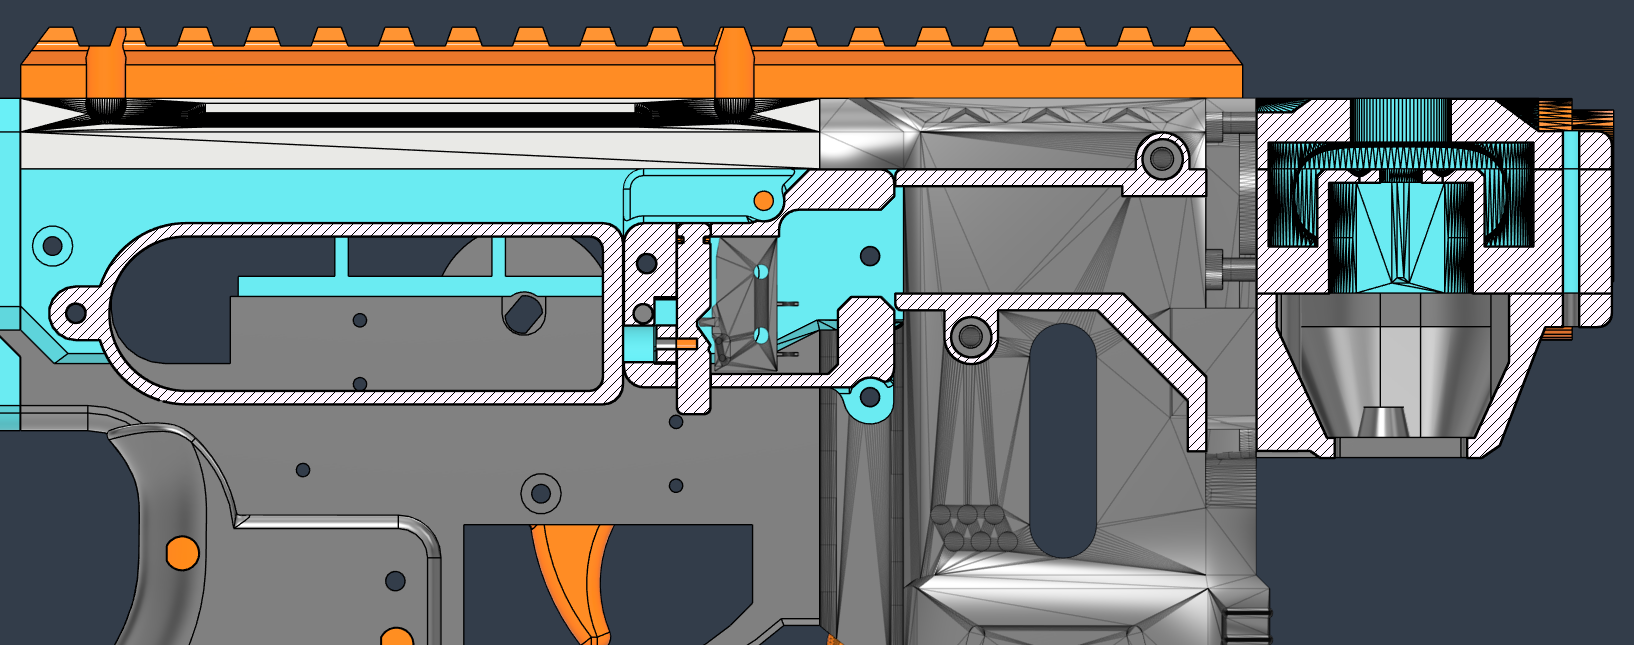
The 3 microswitches (Pusher/Gearbox, Rev, and Pusher Position switches) are held in place with screws, metal pins, or glue if it's easier, as long as they don't shift when the gearbox is in motion. (See the reference photos of the gear mechanism internals.) The FA Gear is attached to the blue gearbox with a 3M screw.
The End Cap has picatinny rails on the back, idea taken from the DanKinetics's Crush blaster. Any sort of stocks that attach to picatinny will work there.
The Grip part can be removed for transport by tapping out the two M5 3D printed pins. For a more permanent attachemnt a 3M screw can be used to secure the grip to the Grip Frame.
For materials/hardware, a collection of 3M screws, some 2M screws or 2mm metal pins to secure each of the x4 microswitches, one compression spring for the trigger, and one extension spring (0.4x4x15mm) that will pull the vanguard pusher backwards.
Tolerances have worked for me so far, but sanding and lube/greasing for moving gear parts may be needed depending on print quality. Ideally the Vanguard Pusher can move back and forth without catching or grinding on anything.
All of my printed parts were done with a Prusa Mk4 in PETG with 0.2mm layer height and 25% infill (Adaptive Cubic) except for the Flywheel Cage part, which was 0.16mm layer height and 50% infill (Adaptive Cubic). Supports as needed for the parts with sharp overhangs, like the right side AG Gearbox Mech Cover.
Here is the OFD Quik wiring guide I used to map the microswitch and motor connections. Replace the N20 pusher motor with the gearbox motor terminals, but everything else is accurate. I used the Live Center Wiring method.

Here are labels for the switch positions. Use the Quik wiring guide above to connect them. The wiring space is tight, so measure your wires out before soldering them to the terminals.
And on the Left side of the blaster is the killswitch box, I spliced it to the positive wire running from the lipo to the Rev microswitch. By default, the Toggle Power Switch down position is OFF (as in picture below), and the up position (showing the notch) is ON.