
sensormount for particulate matter sensor in air ventilation duct
Obliczymy ostateczną cenę na podstawie wybranego pliku. Sprawdzisz ją i zaakceptujesz przed płatnością.
Zapisane na tym urządzeniu.
sensormount for Sensirion SPS30 PM sensor on Zehnder flexaal HRV200/170 duct
- Ocena
- 0 / 5
- Polubienia
- 0
- Pobrania
- 5
- Wydruki
- 0
- Wyświetlenia
- 58
- Oceny
- 0
Aktualizacja u źródła:
Informacje o modelu
- Źródło
- Printables
- Kategoria
- Other House Equipment
- Licencja
- Creative Commons — Attribution
Several of our neighbors like to burn their stove from time to time. When they do, we need to switch off our ventilation system, otherwise our entire house smells like smoke. As a solution, I installed a particulate matter sensor on the inlet duct of our ventilation system. When the sensor readings are abnormal, the ventilation is switched of automagically.
The housing is suitable for a Sensirion SPS30 sensor mounted on a Zehnder HRV200/170 flexaal duct. On top of the sensor housing, there is space for the micro controller (ie ESP32).
Required material (non printed parts):
- 12x M5x30 ISO10642 countersunk hex bolts
- 12x M5 DIN562 square nuts
- 6x M4x20 DIN912 hex socket bolts
- 6x M4 DIN562 square nuts
- 6x M5x20 DIN912 hex socket bolts (optional / for blind flange only)
- 6x M5 DIN125 washer (optional / for blind flange only)
- 6mm neoprene foam sealing cord (350mm?)
- SPS30 sensor & controller
Installation instructions
1 ) Drill a 66mm hole in the ventilation duct (I used a hole saw with center drill)

2 ) Use the outside flange (blue) as a template to drill 4 holes (5mm) through the countersunk holes in the corners around the center opening.

3 ) Prepare the segmented inner flange (red) by gluing 3 square M5 nuts in each. Carefully guide them through the hole and screw the outer and inner flange together with 6x M5x30 countersunk bolts.
Keep in mind that some parts could fall down on your ventilation unit and damage it. (it's probably a good idea to switch it of and maybe take some other precautions)
If you can reach the inside of duct, this job is a lot easier. In this case, you could use the ‘non segmented inner flange’ in stead.

4 ) Install 6 square nuts M5 in the outer flange (blue), and install an O-ring in the groove. (I used a 6mm neoprene foam sealing cord cut to length / this is not visible on the picture below)

5 ) Install the sensor housing (magenta) with 6 countersunk bolts M5x30. The sensor should be mounted in a way that the holes for air sampling are preferably on the bottom. This prevents too much dust settling on them.
On the second picture below you can see the separated inlet and outlet of the sensor.
The big round hole in the middle is to press the sensor out of the housing (it's a tight fit)


6 ) After inserting the sensor, you can slide the cover (yellow) in place. Also install 6x M4 square nuts in the housing (magenta)

7 ) Finally, you can install the backpack (pink) to place your ESP32 or similar inside. Bolt it down with 6x M4x20 hex socket bolts. You can use the holes on the side of the backpack as a strain relief for the power supply cable to the micro controller.
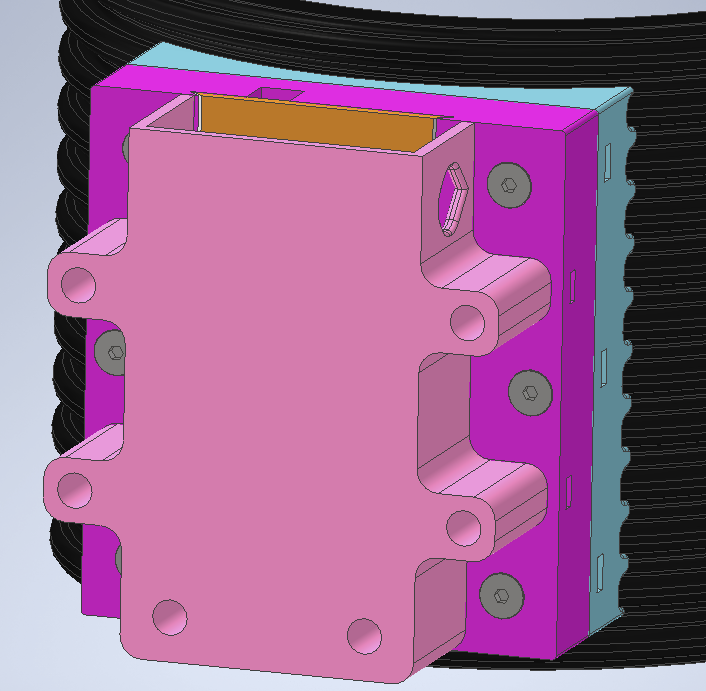
8 ) Optional: If you would like to remove the sensor and close the hole, you can you use the blind flange (purple) in stead of the sensor housing. For this you will need 6x M5x20 hex socket bolts & 6x washer M5.
