
1 / 7
Bidirectional Ratchet: Low Friction, High Satisfaction
Zamów wydruk tego modelu
Obliczymy ostateczną cenę na podstawie wybranego pliku. Sprawdzisz ją i zaakceptujesz przed płatnością.
Zapisane na tym urządzeniu.

Two directional ratcheting device
- Ocena
- 0 / 5
- Polubienia
- 120
- Pobrania
- 147
- Wydruki
- 0
- Wyświetlenia
- 2825
- Oceny
- 0
Aktualizacja u źródła:
Informacje o modelu
- Źródło
- Printables
- Kategoria
- Other Toys & Games
- Licencja
- Creative Commons — Attribution — Share Alike
SzczegółyPliki (12)Wydruki i komentarze (Wydruki: 0) (Komentarze: 0)Remiksy (0)Kolekcje (129)Powiązane
Hardware:
M3*20 Hex socket machine screw: 4
M3 nut: 4
4mm diameter, 2mm height magnet: 4
Assembly:
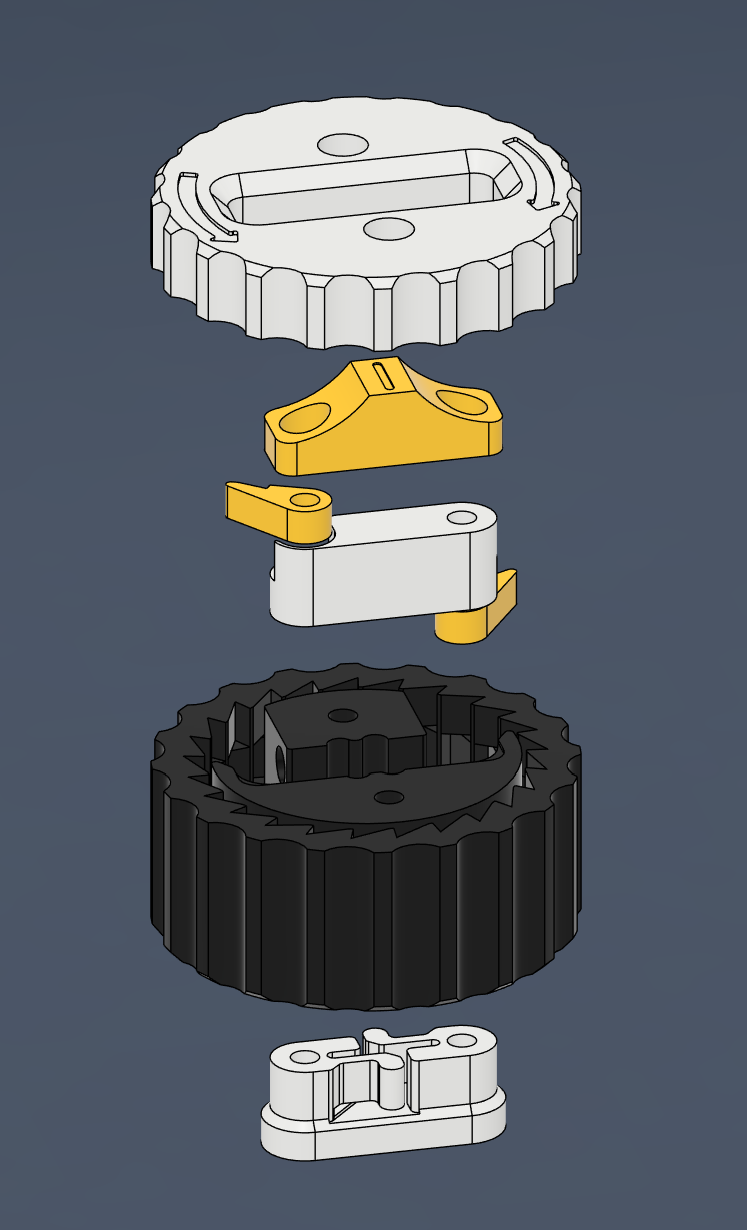
- Prepare all parts. PLA is fine for all parts, but i suggest PETG for the "slider latch" which has flexing pins. Print with 4+ walls and 30% or more rectilinear infill. Check if the base rotates properly. If rotation is difficult, or if it seizes, add a low viscocity oil between the two moving parts.
- Insert 2 magnets in to the base on the sides. They should not need glue, but if they fall out, you may want to use an adhesive. The other two magnets must be glued in to the ratchets. Make sure the same pole is facing out, as these magnets are intended to repel.

- Insert the slider latch through the bottom and add 4 M3 nuts to the base.


- Assemble the core as the following. Use M3*20 screws. Screw it in to the base. Do not overtighten:


- Test the ratchet. If it all works, proceed to add the top cover. There is only one orientation for it as the indicator arrows have a specific direction. This requires another two M3*20 screws


Notes:
Print the following part in this orientation. Otherwise flexing pins will not print properly. I suggest PETG for this part too.

I suggest using some low viscosity lube on the inside of the ratchet to improve sound dramatically and reduce friction, especially in the print-in-place base