
Prusa Spool Storage Organizer
Obliczymy ostateczną cenę na podstawie wybranego pliku. Sprawdzisz ją i zaakceptujesz przed płatnością.
Zapisane na tym urządzeniu.

Prusa Spool Storage Organizer – Stackable 6-Compartment System
- Ocena
- 5 / 5
- Polubienia
- 122
- Pobrania
- 221
- Wydruki
- 6
- Wyświetlenia
- 2546
- Oceny
- 5
Aktualizacja u źródła:
Informacje o modelu
- Źródło
- Printables
- Kategoria
- Organizers
- Licencja
- Creative Commons — Attribution — Noncommercial — Share Alike
Update 16.06.2026:
Replaced wrong Connector STL with v2 version for the spring to fit
Update 10.09.2025:
Added Prusa-storage Drawer_Large.stl. 3 of those drawers would fit into one spool, can also be mixed with the original drawer.
for example, 1 large and 4 small:

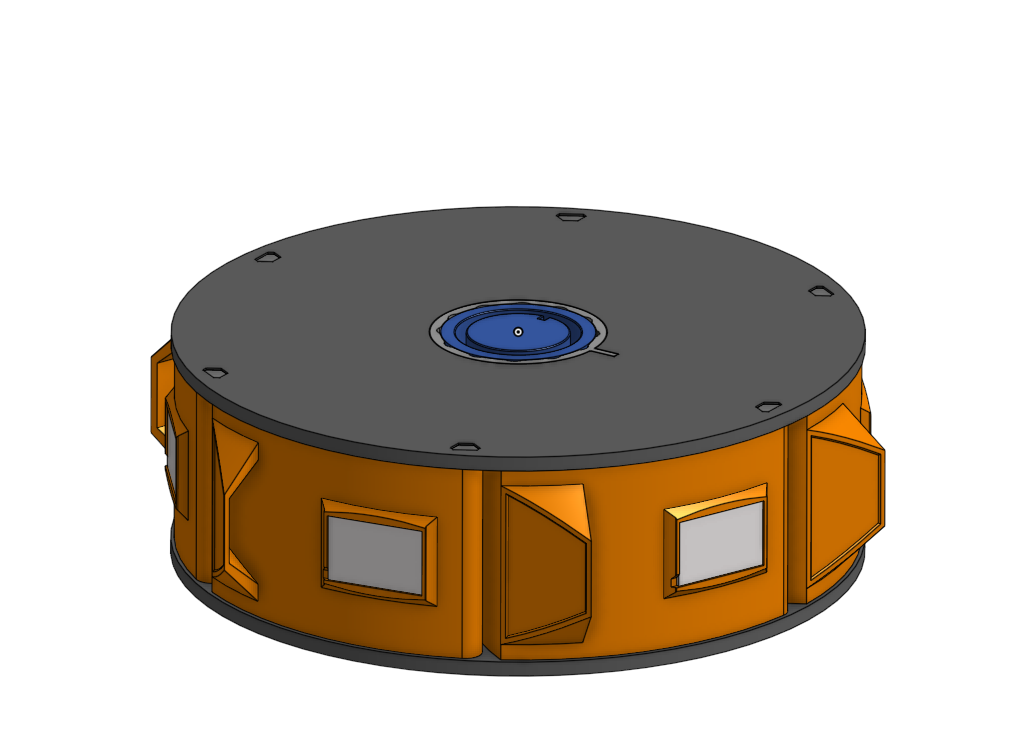
Give your empty Prusa spools a second life with this modular storage solution! This 3D printable insert transforms a standard empty Prusa filament spool into a compact, stackable organizer with six individual compartments—perfect for storing small parts, hardware, or hobby supplies.
Features:
6 Compartments: Each section is sized for easy access and efficient storage.
Stackable Design: Multiple units can be stacked using additional empty spools, saving space while keeping things organized.
Snap Fit or Slide-In: Designed to fit snugly inside the spool without glue or screws.
Eco-Friendly: Reuse your filament spools instead of tossing them—great for sustainability!
Print Settings:
No supports required
Layer height: 0.2 mm recommended
Material: PLA or PETG
Fits: Original Prusa filament spools (check dimensions before printing)
Whether you're organizing screws, LEGO pieces, or electronic components, this spool-based storage system is a smart and space-saving solution for any maker's workspace.
One spool:
For assembly:
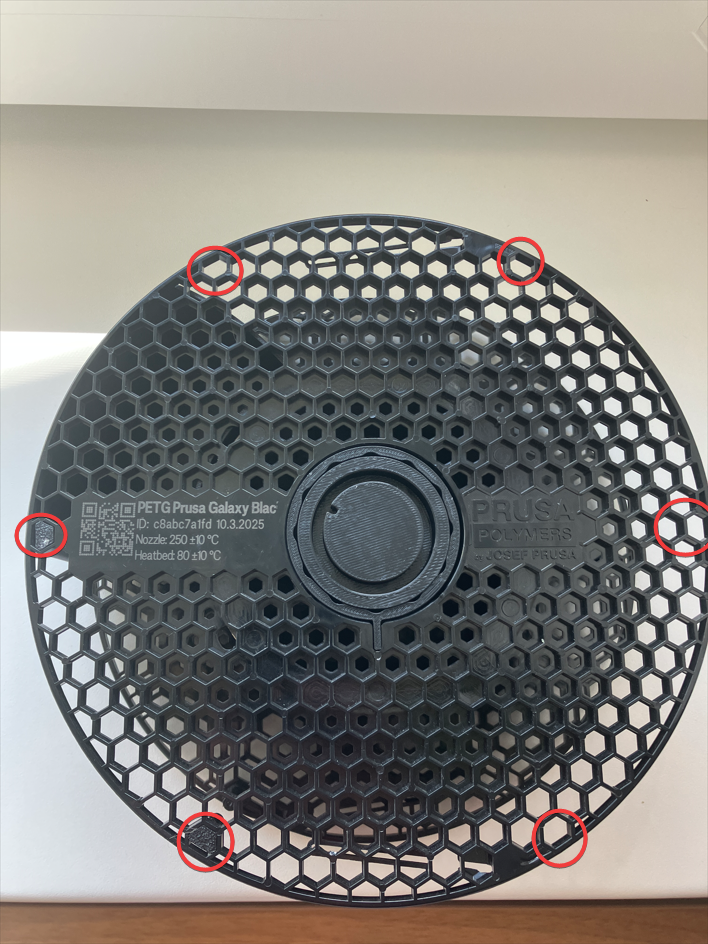
1. pull the spool apart and insert the bolts. There 6 spots on the spool were the bolts fit.
2. Put the spring into the stand and slide the Spool-adapter onto the stand.
3. Put all the drawers on the bolts and press the spool together
4. slide the spool on the stand
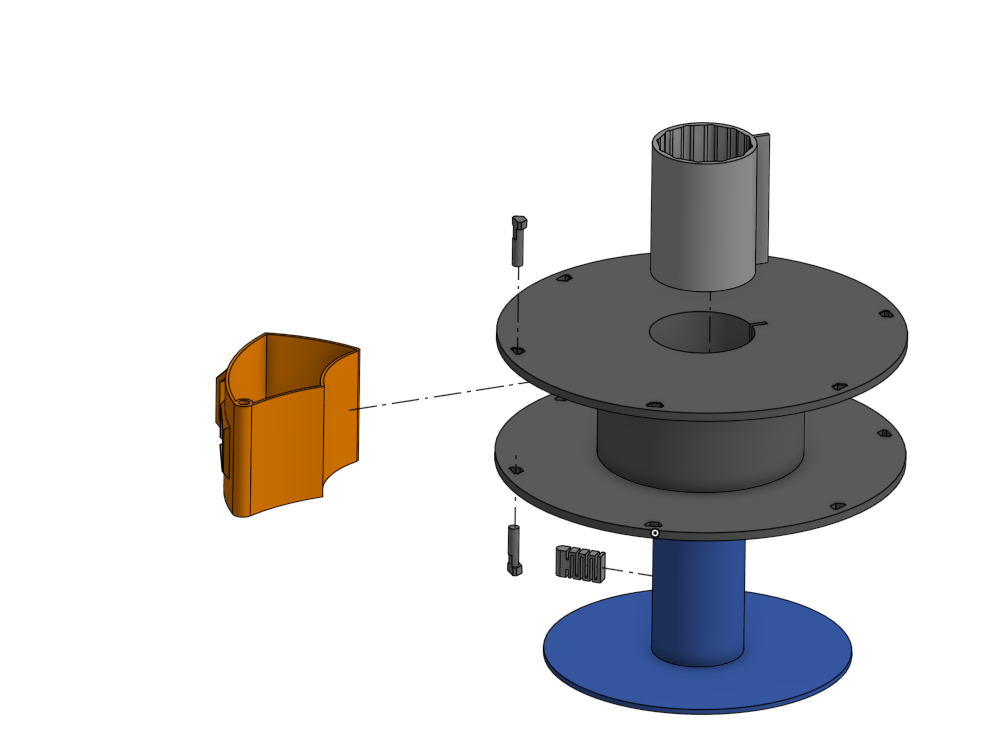
If you want to use the double version just repeat the process and use the “Connector” instead of the “Stand” (don't forget the spring) and put the two spools together


You might need to scale the lable a bit down. I would recommend only to print one lable first and test it.
To remove the lable just use a screwdriver and insert it in the gap on the bottom left.
For the stand, please use some rubber feet that the spinning mechanism works
I use these ones: https://www.amazon.de/dp/B09TW15NHP?
You for the single version you need:
12 x Bolt
6 x Drawer
6 x Lable
1 x Stand
1 x Adapter
1 x Spring