
1 / 3
CENTAURI CARBON SPOOL HOLDER
Zamów wydruk tego modelu
Obliczymy ostateczną cenę na podstawie wybranego pliku. Sprawdzisz ją i zaakceptujesz przed płatnością.
Zapisane na tym urządzeniu.
Informacje o modelu
- Źródło
- Printables
- Kategoria
- Other Printer Parts & Upgrades
- Licencja
- Creative Commons — Attribution — Share Alike
Spool Holder Assembly Instructions for 3D Printer
Remove screws from enclosure
Remove 3 screws from enclosure - right side of machine (down back corner and 2 neighbors)
Insert the bearings onto the rollers
Place the bearings onto the prepared shafts, making sure they are seated evenly and securely.
Attach the body to the printer frame
- You can use M3 x 10 screws – in this case, no spacer is required.
- Alternatively, you may reuse the screws that secured the print bed during transport. In this case, add a spacer to ensure proper mounting.
Insert the shafts and press in the axle
Place the shafts with the mounted bearings into the body and press in the axle so the assembly is stable and ready for use.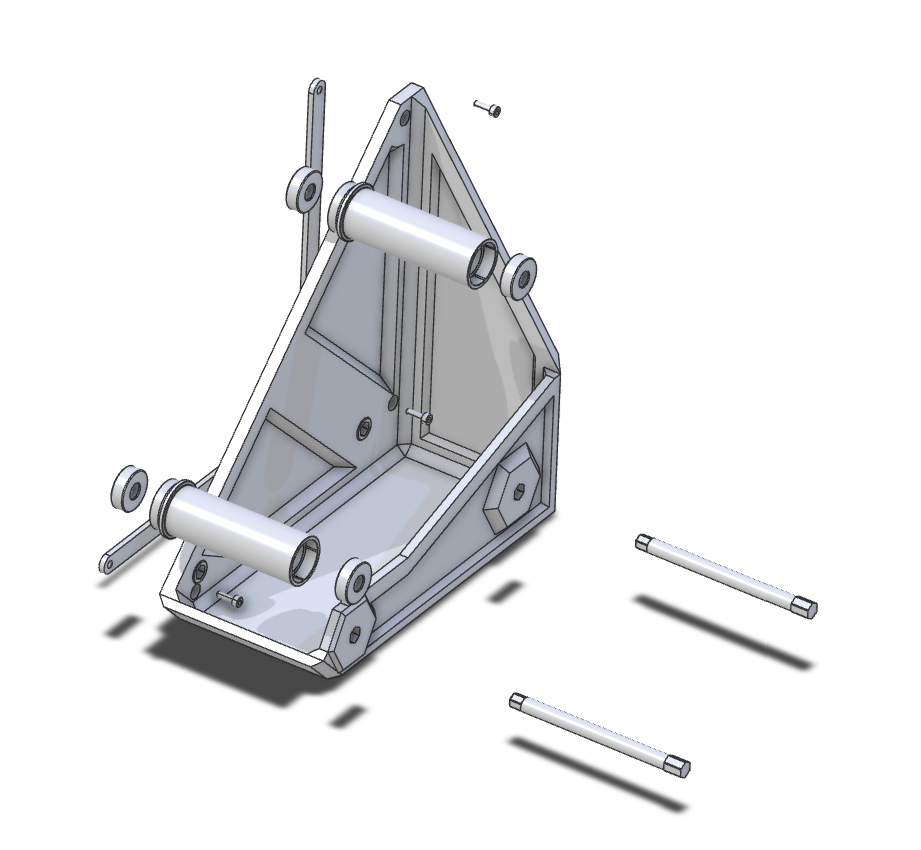
Bill of Materials – Spool Holder for 3D Printer
- Body – 1 pcs
- Roller – 2 pcs
- Axle – 2 pcs
- Screw M3 x 10 (or bed transport securing screws) – 3 pcs
- Bearing 608 2RS – 4 pcs
- Spacer – 1pcs if required
Printing orientation is show on the photo( no suport needed)