
Retro Pull-horse and Other Animals (Tahací kůň a další zvířátka)
Obliczymy ostateczną cenę na podstawie wybranego pliku. Sprawdzisz ją i zaakceptujesz przed płatnością.
Zapisane na tym urządzeniu.

Your grandfather's favourite toy, now fully printable. With choice of animal!
- Ocena
- 0 / 5
- Polubienia
- 3
- Pobrania
- 9
- Wydruki
- 0
- Wyświetlenia
- 72
- Oceny
- 0
Aktualizacja u źródła:
Informacje o modelu
- Źródło
- Printables
- Kategoria
- Other Toys & Games
- Licencja
- Creative Commons — Attribution
Introduction
This is a recreation of a classic kids' toy that your granddad and mine used to play with. Try gifting this to kinds once they got tired of all the articulated animals you've been printing.
Printing

Each toy consists of:
- 1 base
- 4 axles
- 4 wheels/tires
- 2 halves of an animal: left and right
They can all be made of PLA. I made the tires from TPU and I'm grateful for it since it's noticeably more silent on hard floors. All components can be printed without supports.
All parts of the model are available in gcode, 3mf and stl. Please don't get overwhelmed by the sheer numbers and just pick the type you prefer.
Note that the animals themselves have one or two colour changes in each print. You need to find the layer where the details start, and add a colour change to it. The image on the right illustrates how to the that in Prusa slicer. The half-animals are 4mm thick, so unless you were scaling, the colour change should occur at the first layer above 4 mm. The attached gcode and 3mf files already have the colour changes encoded.
In the gcode files I have provided, wherever I print multiple small objects at once, I use the option to print individual objects, which reduces stringing. Also, if you print from multi-colour filament, it will give you a different colour for each piece.
Assembly
Once everything is printed, you can proceed with the assembly.

Put the halves together
Start by putting together the two halves of your animal. Each half has a few round holes in the back, matching same holes in the other half. You can cut short pegs (max. 6 mm) from raw, 1.7-mm filament, and slot them into the holes. This will hold the halves together and prevent them from sliding.Start by putting together the two halves of your animal. Each half has a few round holes in the back, matching same holes in the other half. You can cut short pegs from raw, 1.7-mm filament, and slot them into the holes. This will hold the halves together and prevent them from sliding.
The holes for the pegs are located mainly around the top edge of the shape, in tricky areas. I didn't use glue on any of my models, but if you got it handy, by all means use it.

Put the tires on the axles
Pull the tires on. If you printed them out of PLA, they may be rotating on the axles, but I don't think it matters.Pull the tires on. If you printed them out of PLA, they may be rotating on the axles, but I don't think it matters.
Careful! Pull on the tires before putting the axles into the base. It's easy to break them if you try to remove them.

Slide your animal into the base
First, be careful you are putting the animal's head on the side where the loop is. Otherwise your toy will spend its life backing up!
This is not as important as the previous step, but it's better to install the animal into the base while the wheels are still off. You may need to use some force, but all my prints worked and I didn't need any tools. Just proceed with care and don't break anything. Having the base on a solid flat surface helps a lot.
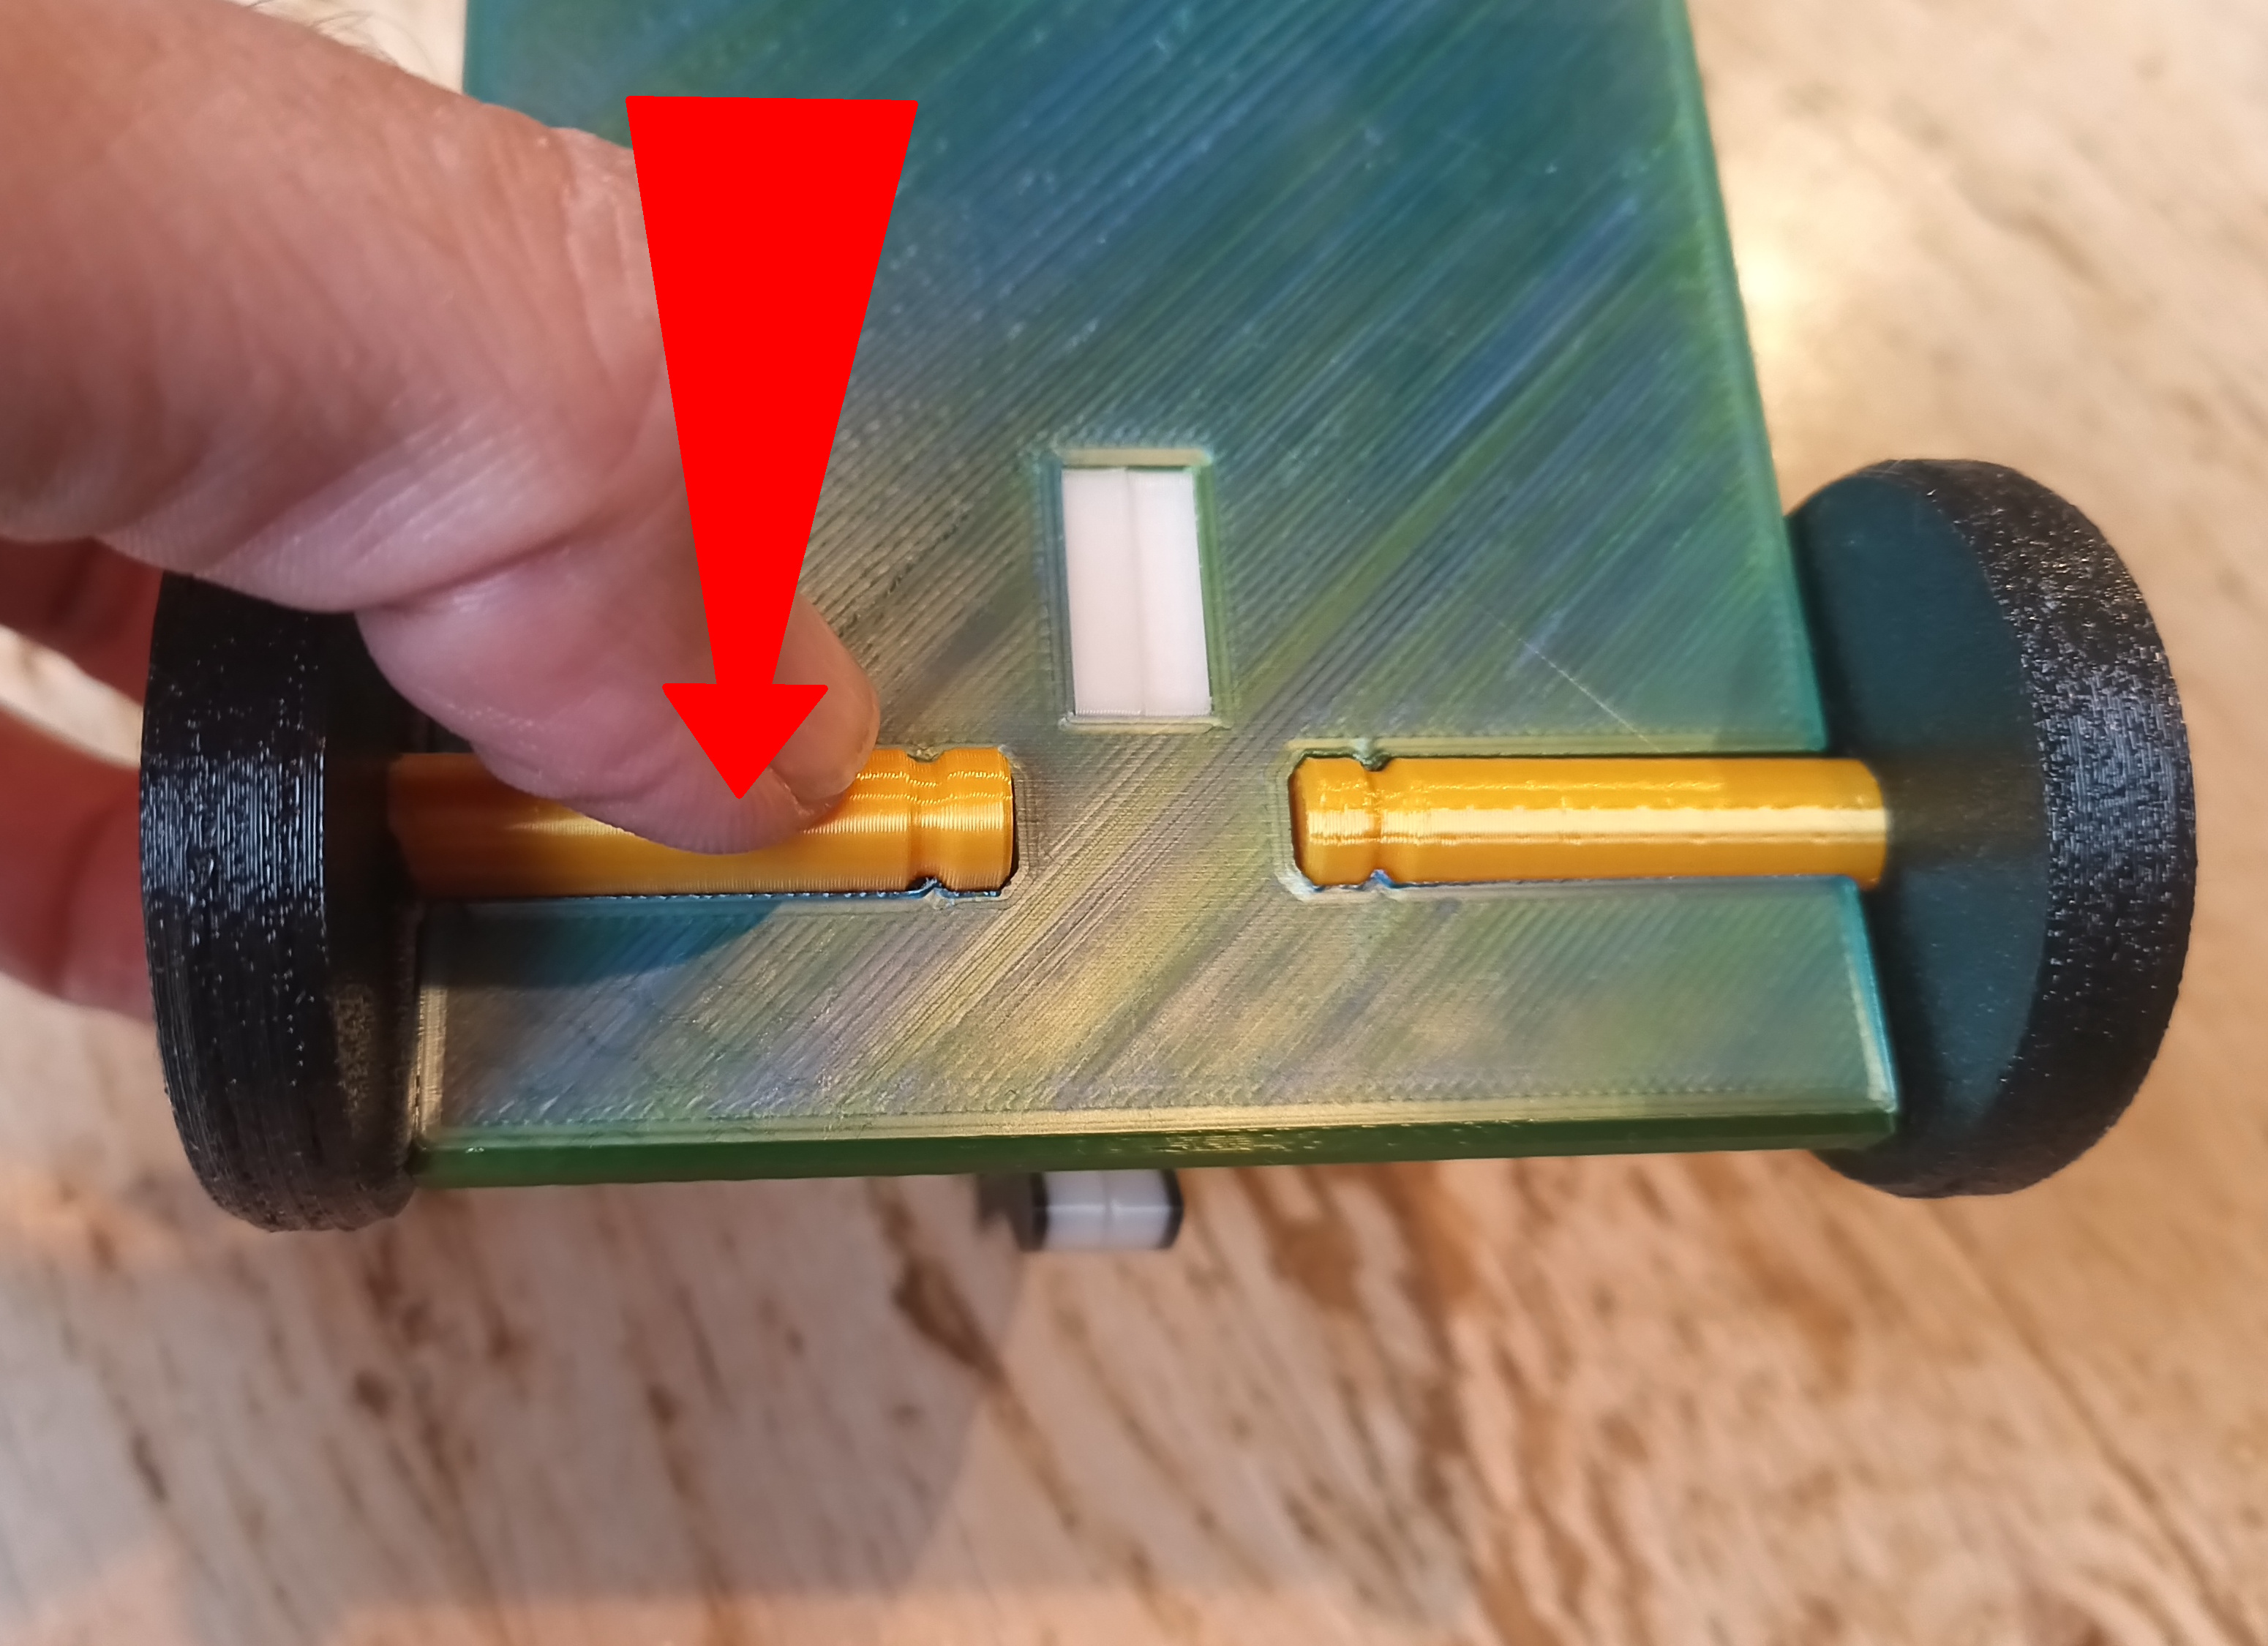
Snap in the axles
The wheel axles are intended to snap in from the broad (bottom) side, not to be pushed in along the long axis. The axle will click in place if you push it, and then rotate freely. There's a crest that prevents it from sliding out.
If your axles printed with a noticeable seam on the outside, you may want to file it off, or take the deburring tool to it. This is just a tip. I did it while dialling in on the proper dimensions. I never had to do it once I got the tolerances in the model right.

Tie the string
This is the cherry on top. When all the previous steps are done, pull a piece of string through the loop and tie a knot. Your pull-toy is ready for pulling. Enjoy!
Remixing
Among the model files there is a file titles slot.stl. It is the part that matches the apertures in the universal base, and any shape you affix to it will then work as a pull-toy. The nominal width (thickness) of my animals is 8 mm, therefore the half-animal is 4 mm thick.