
1 / 3
Ring Tolerance Gauge 15mm-40mm in 0.1mm increments
Zamów wydruk tego modelu
Obliczymy ostateczną cenę na podstawie wybranego pliku. Sprawdzisz ją i zaakceptujesz przed płatnością.
Zapisane na tym urządzeniu.
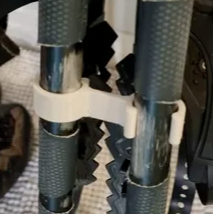
Get a perfect fit, every time! Measure diameters exactly - handles printer tolerances and filament shrinkage
- Ocena
- 0 / 5
- Polubienia
- 1
- Pobrania
- 5
- Wydruki
- 0
- Wyświetlenia
- 66
- Oceny
- 0
Aktualizacja u źródła:
Informacje o modelu
- Źródło
- Printables
- Kategoria
- Tools
- Licencja
- Creative Commons — Public Domain
SzczegółyPliki (52)Wydruki i komentarze (Wydruki: 0) (Komentarze: 1)Remiksy (0)Kolekcje (4)Powiązane
When you need an exact fit. Calipers are great for measuring, but they can't predict print tolerances, filament shrinkage, etc.
Print these gauges and know precisely how big you need to make holes.
Also great for using up near-empty spools
Printing
- Use whatever settings and filament you will use for the part you want to build
- example:
- PETG
- 100% infill
- no brim or supports
Assembly
- Print the gauges (ex: ring_tolerance_gauge_21mm.stl) in the filament you'll use to hold it (ex PETG)
- Each gauge consists of ten rings, printed in order. Starting with the largest on the bottom, thread each ring onto a piece of filament
- Use a lighter to melt each of the filament, and press on metal creating a foot, so none of the rings can fall off
Usage
- Measure the part you want to build for, down to the closest mm (ex: part is a little bigger than 21mm)
- Push the part through the rings, largest first
- The smallest ring the piece fits through is the size of the part
- Each ring is marked with dots showing its internal diameter: 34.2mm is *** **** **, read right to left from above
- (Optional) Store all your gauges on this lovely holder! https://www.printables.com/model/1475145-ring-gauge-holder
Other
As always, let me know if you want other sizes, or have ideas about how to improve!