
Everything Presence Pro Ceiling Mount
Obliczymy ostateczną cenę na podstawie wybranego pliku. Sprawdzisz ją i zaakceptujesz przed płatnością.
Zapisane na tym urządzeniu.

A 3D printed ceiling mount for the Everything Presence Pro presence sensor
- Ocena
- 5 / 5
- Polubienia
- 74
- Pobrania
- 560
- Wydruki
- 0
- Wyświetlenia
- 4092
- Oceny
- 1
Aktualizacja u źródła:
Informacje o modelu
- Źródło
- Printables
- Kategoria
- Other House Equipment
- Licencja
- Creative Commons — Attribution — Noncommercial — Share Alike
My new and improved downlight enclosure for the Everything Presence Pro sensor!
Repackages the Everything Presence Pro as a ceiling-mounted sensor
Fits a 90mm or 92mm downlight hole
Parts
4 x M3x12mm
2 x M2x6mm
2 x M3x25mm
Optional 6mmx20mm springs
Printing
Print each component flat side down, I used a textured print bed. Matte filaments blended into my ceiling best.
PLA should be fine, but if you're in a warm climate, PETG is a much better option.
No supports required
Assembly
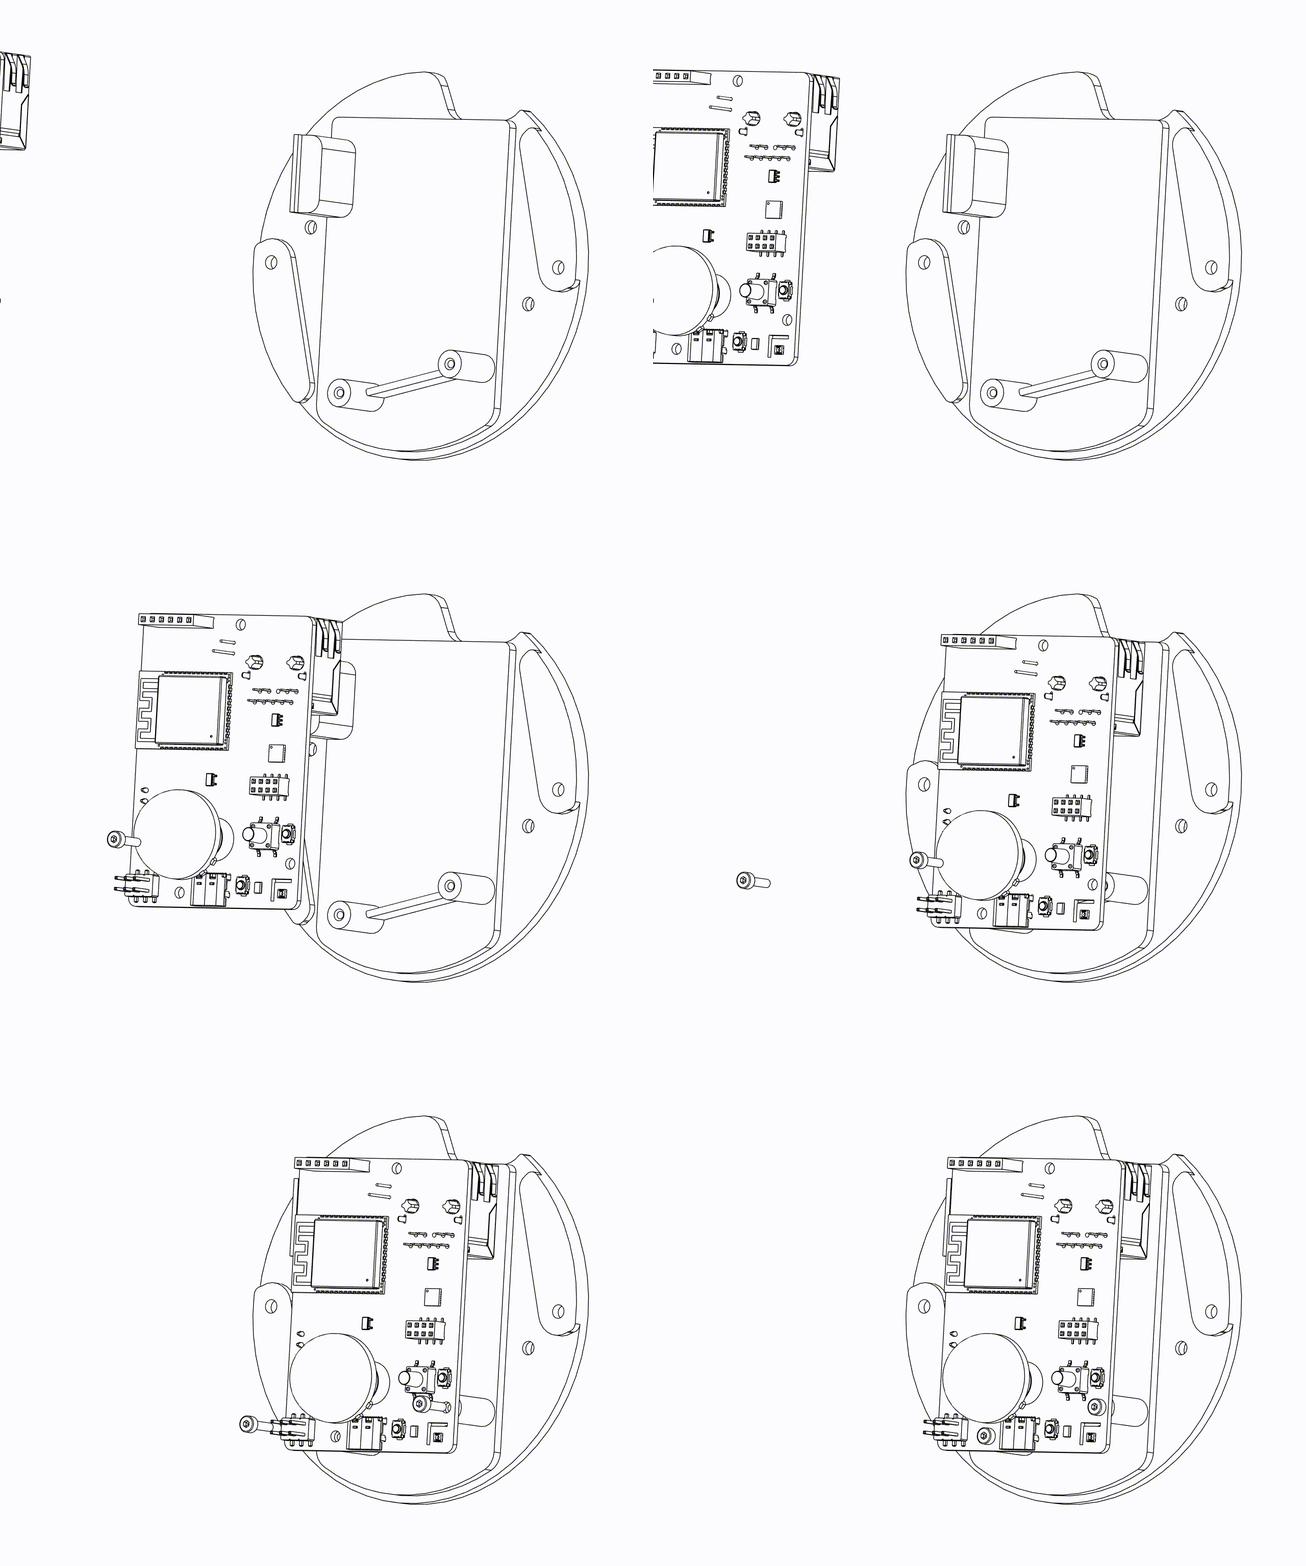
Disassemble your EP Pro sensor, and using the M2x8mm screws, screw it into the Sensor_Mount component. Only two of the screw holes are utilised.
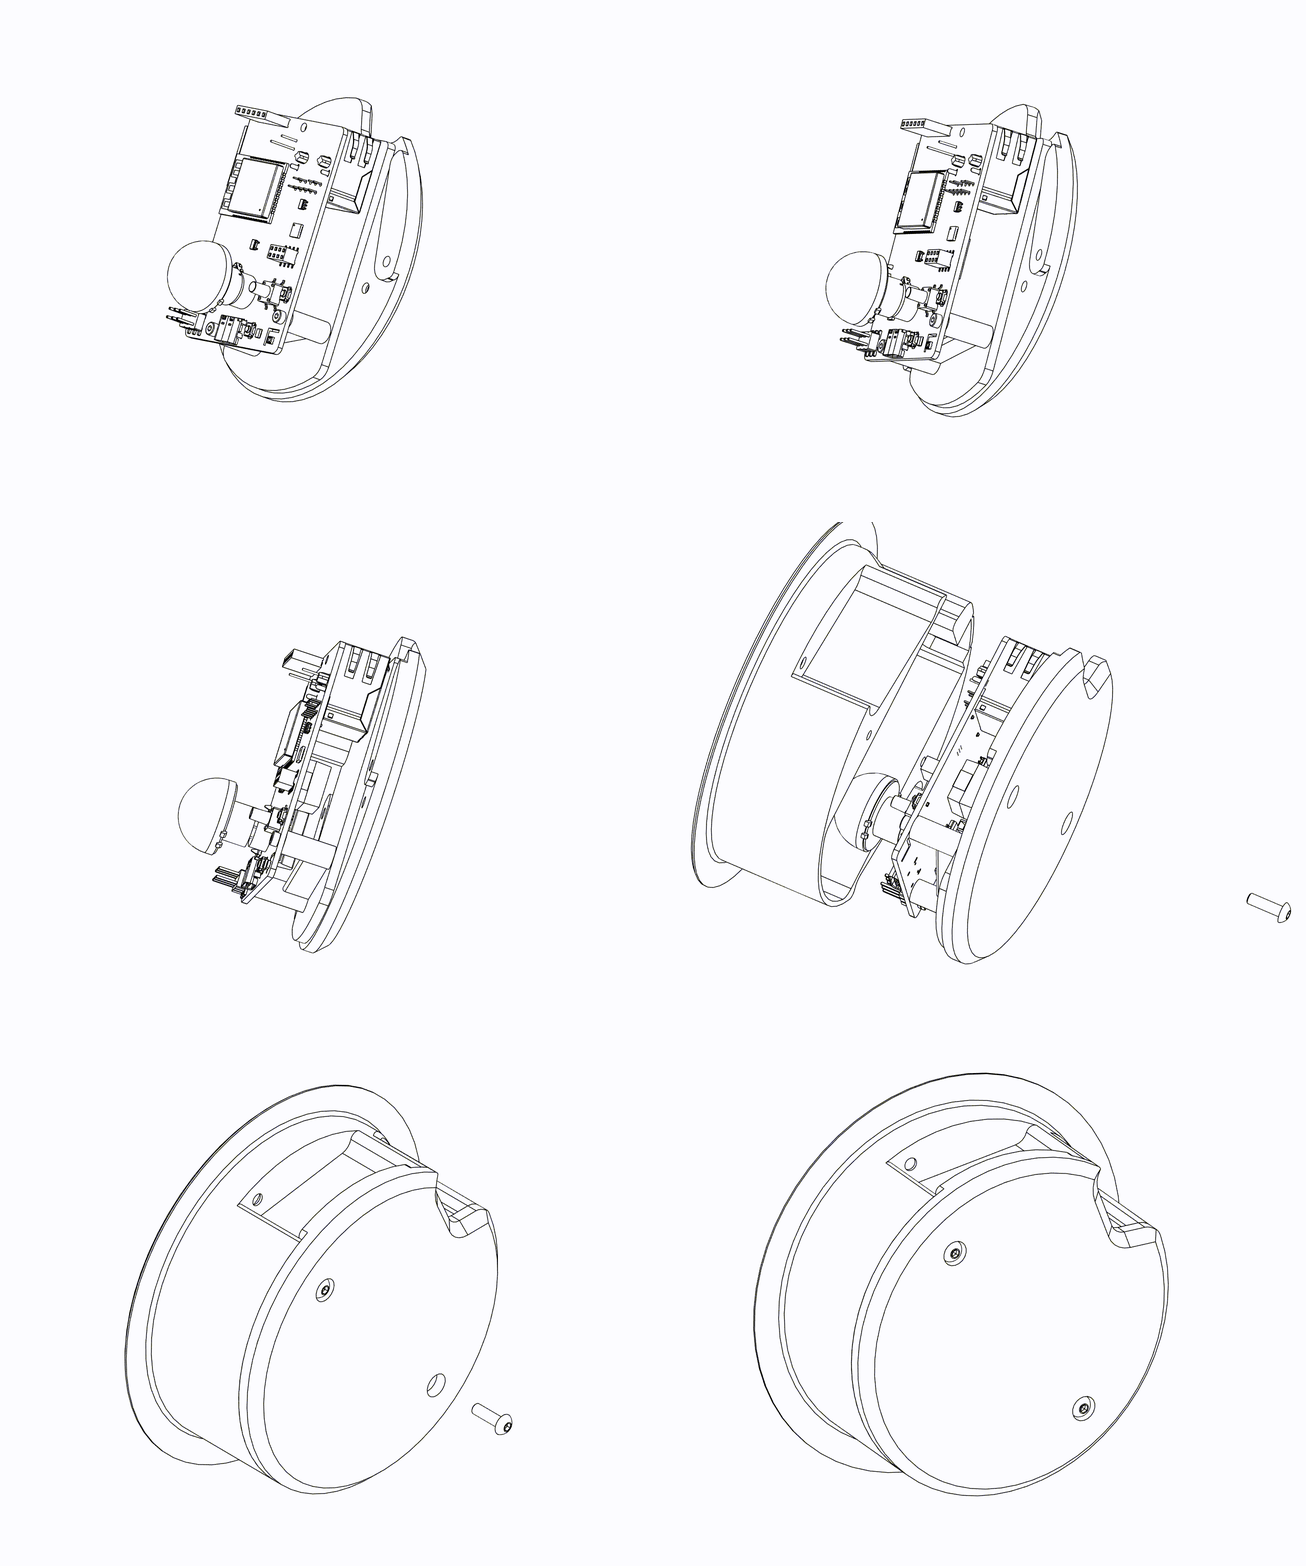
Install the Shroud using 2 x M3x10mm screws.
Lastly, install your arms with the M3x25mm screws through the Shroud and the arms, adding springs between the arm and Shroud component if you want to!
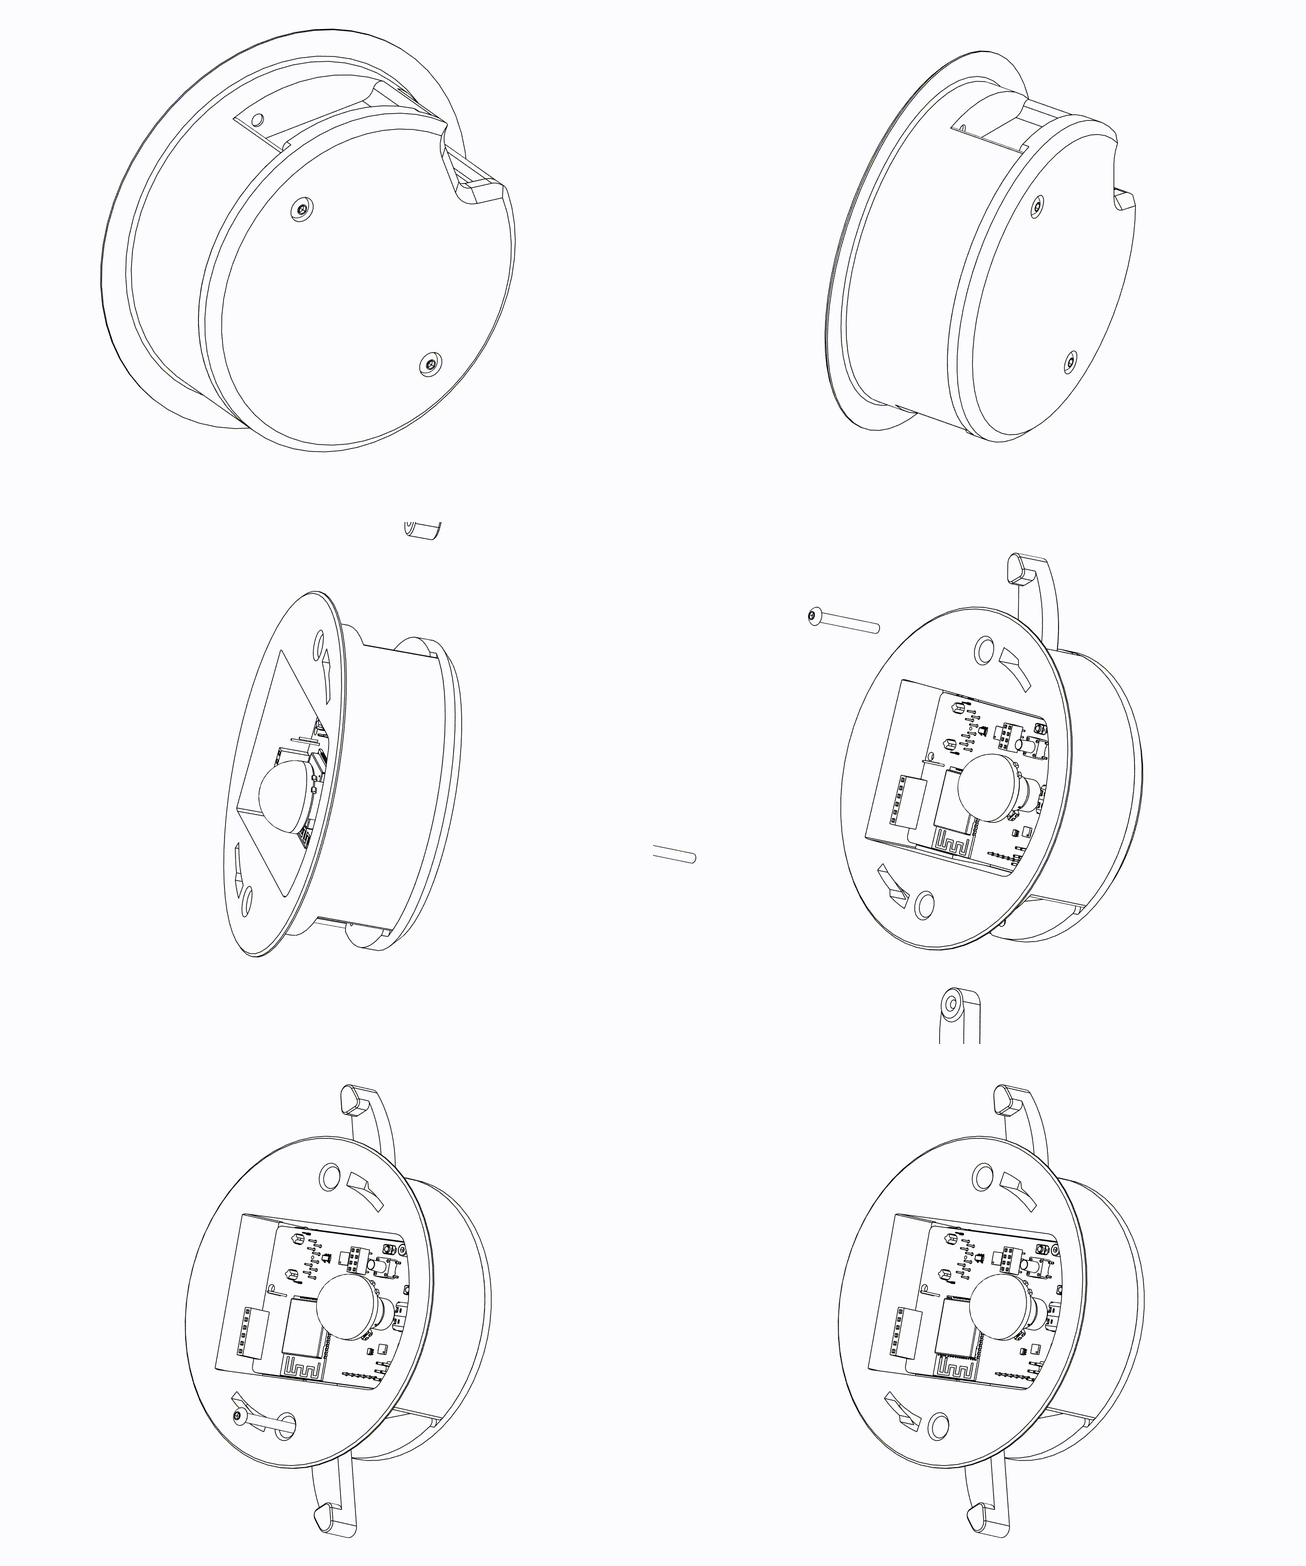
You're done! To install your sensor, cut a 90mm hole in your ceiling, slide the sensor into place and tighten the 25mm M3 screws.

As you tighten them, the arms will swing out and tighten against the back of the plasterboard.

Once tight, lock your faceplate in place.
