4 Elements Geocache
Obliczymy ostateczną cenę na podstawie wybranego pliku. Sprawdzisz ją i zaakceptujesz przed płatnością.
Zapisane na tym urządzeniu.
Informacje o modelu
- Źródło
- Printables
- Kategoria
- Puzzles & Brain-teasers
- Licencja
- Creative Commons — Attribution — Noncommercial
This is my four elements geocache. As a high school science teacher, the four elements has always been a bit of an interest in how people tried to understand their world. This geocache has four main elements you need to address in order to solve it. the video below shows how it works
Required Hardware
1 x M3 x 12mm bolt
3 x M3 x 15mm bolt (can be longer - for the dials that cannot be removed
4 x M3 nyloc nut
1 x M3 heat set insert
1 x 2mm rod, approx 95 mm long
6 x 12mm round x 2mm rare earth magnet
2 x 20mm round x 2nn rare earth magnet
Assembly
After printing all the parts I followed the following steps to put it together starting with the main body of the puzzle
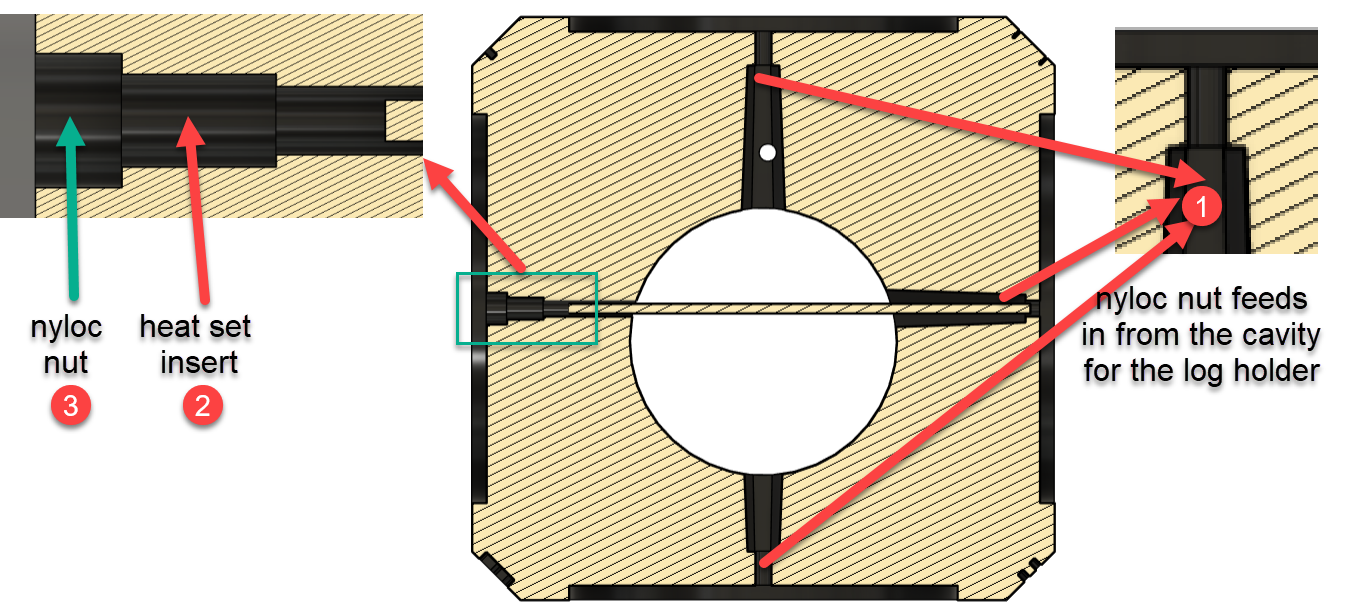
I started by choosing the three dials I wanted to be captive (can move but not be removed). and put one of the 15mm (or up to 20 mm) bolds through the hole in the dial. I then placed a lock nut on the end of my finger and fed the nut into the larger holes on the inside of the log cavity and then attached the dial to the nut. I found it was easier to put the nut inside the cavity and to hold it in place with a piece of bent wire while I screwed it in. I repeated this with the 3 dials. Make sure it is not too tight as the dials need to spin but should not be super loose
I installed the heat set insert into the section shown of the geocache
I put the 12mm bolt through the last dial and attached a lock nut to the back of the dial so the bolt was held firmly in place
I cut a piece of 2mm wire/rod, installed the log holder and fed the rod though the heat set insert and into the body of the cache and then attached the dial screwing it most of the way dow
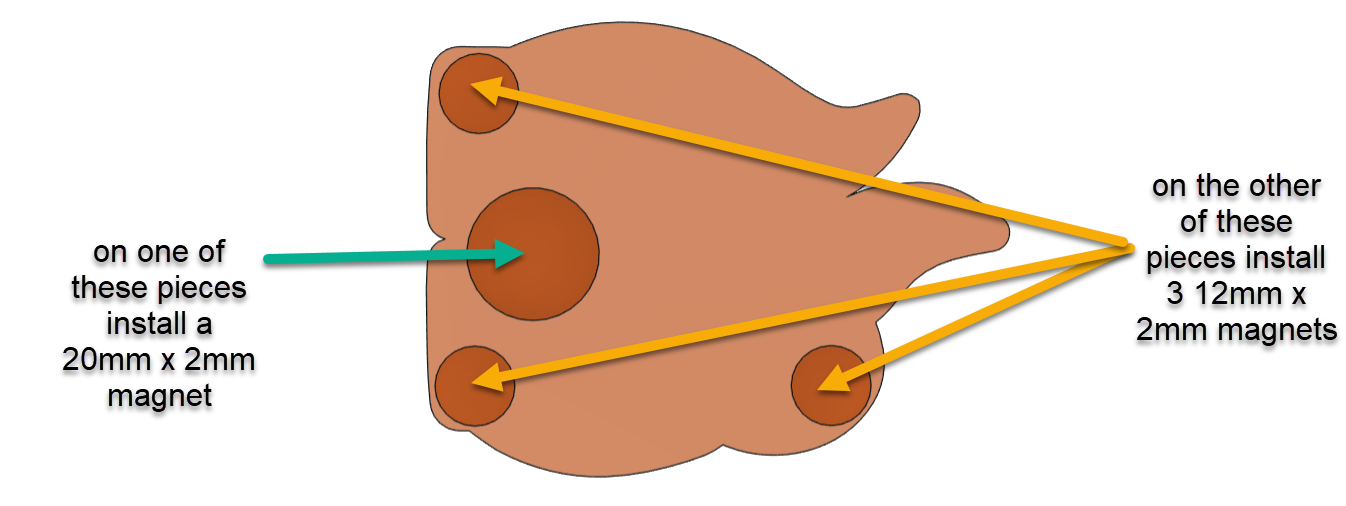
I installed the single 20mm magnet and the 3 x 12 mm magnets into the cache body in the areas shown
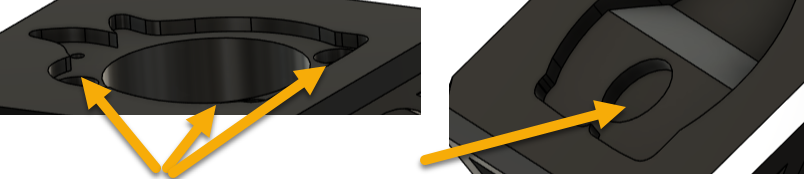
I took the two pieces as show below. In one piece I installed the single 20mm magnet and into the other i installed the 3 x 12 mm magnets. I sealed them all in using a 3D pen for longevity. Take careful not of ensuring the magnets will attract rather than repel when installed