
Prequel TTRPG Box Set
Obliczymy ostateczną cenę na podstawie wybranego pliku. Sprawdzisz ją i zaakceptujesz przed płatnością.
Zapisane na tym urządzeniu.
Informacje o modelu
- Źródło
- Printables
- Kategoria
- Miniature Gaming Accessories
- Licencja
- Creative Commons — Attribution — Share Alike
About This Set
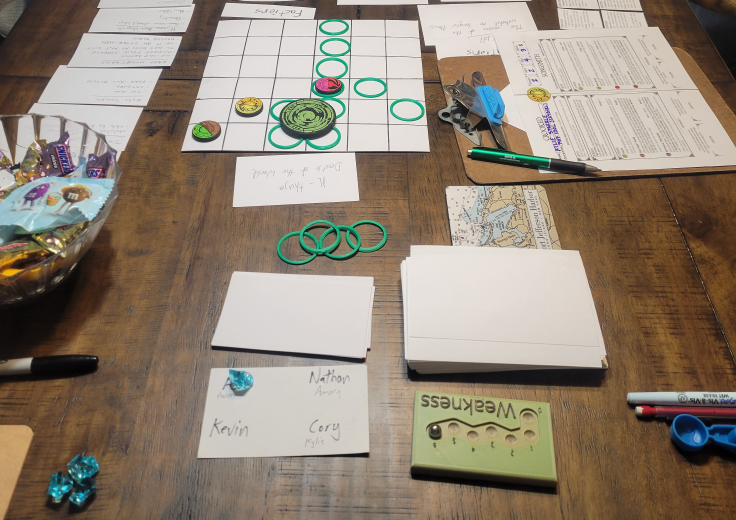
This is a box set intended to contain all the main components necessary for playing Prequel, by Glyphtide Games. I, personally, have no relation to Glyphtide Games; I just backed the kickstarter for Prequel, and got excited enough about the game to design all this fancy stuff to play it with.
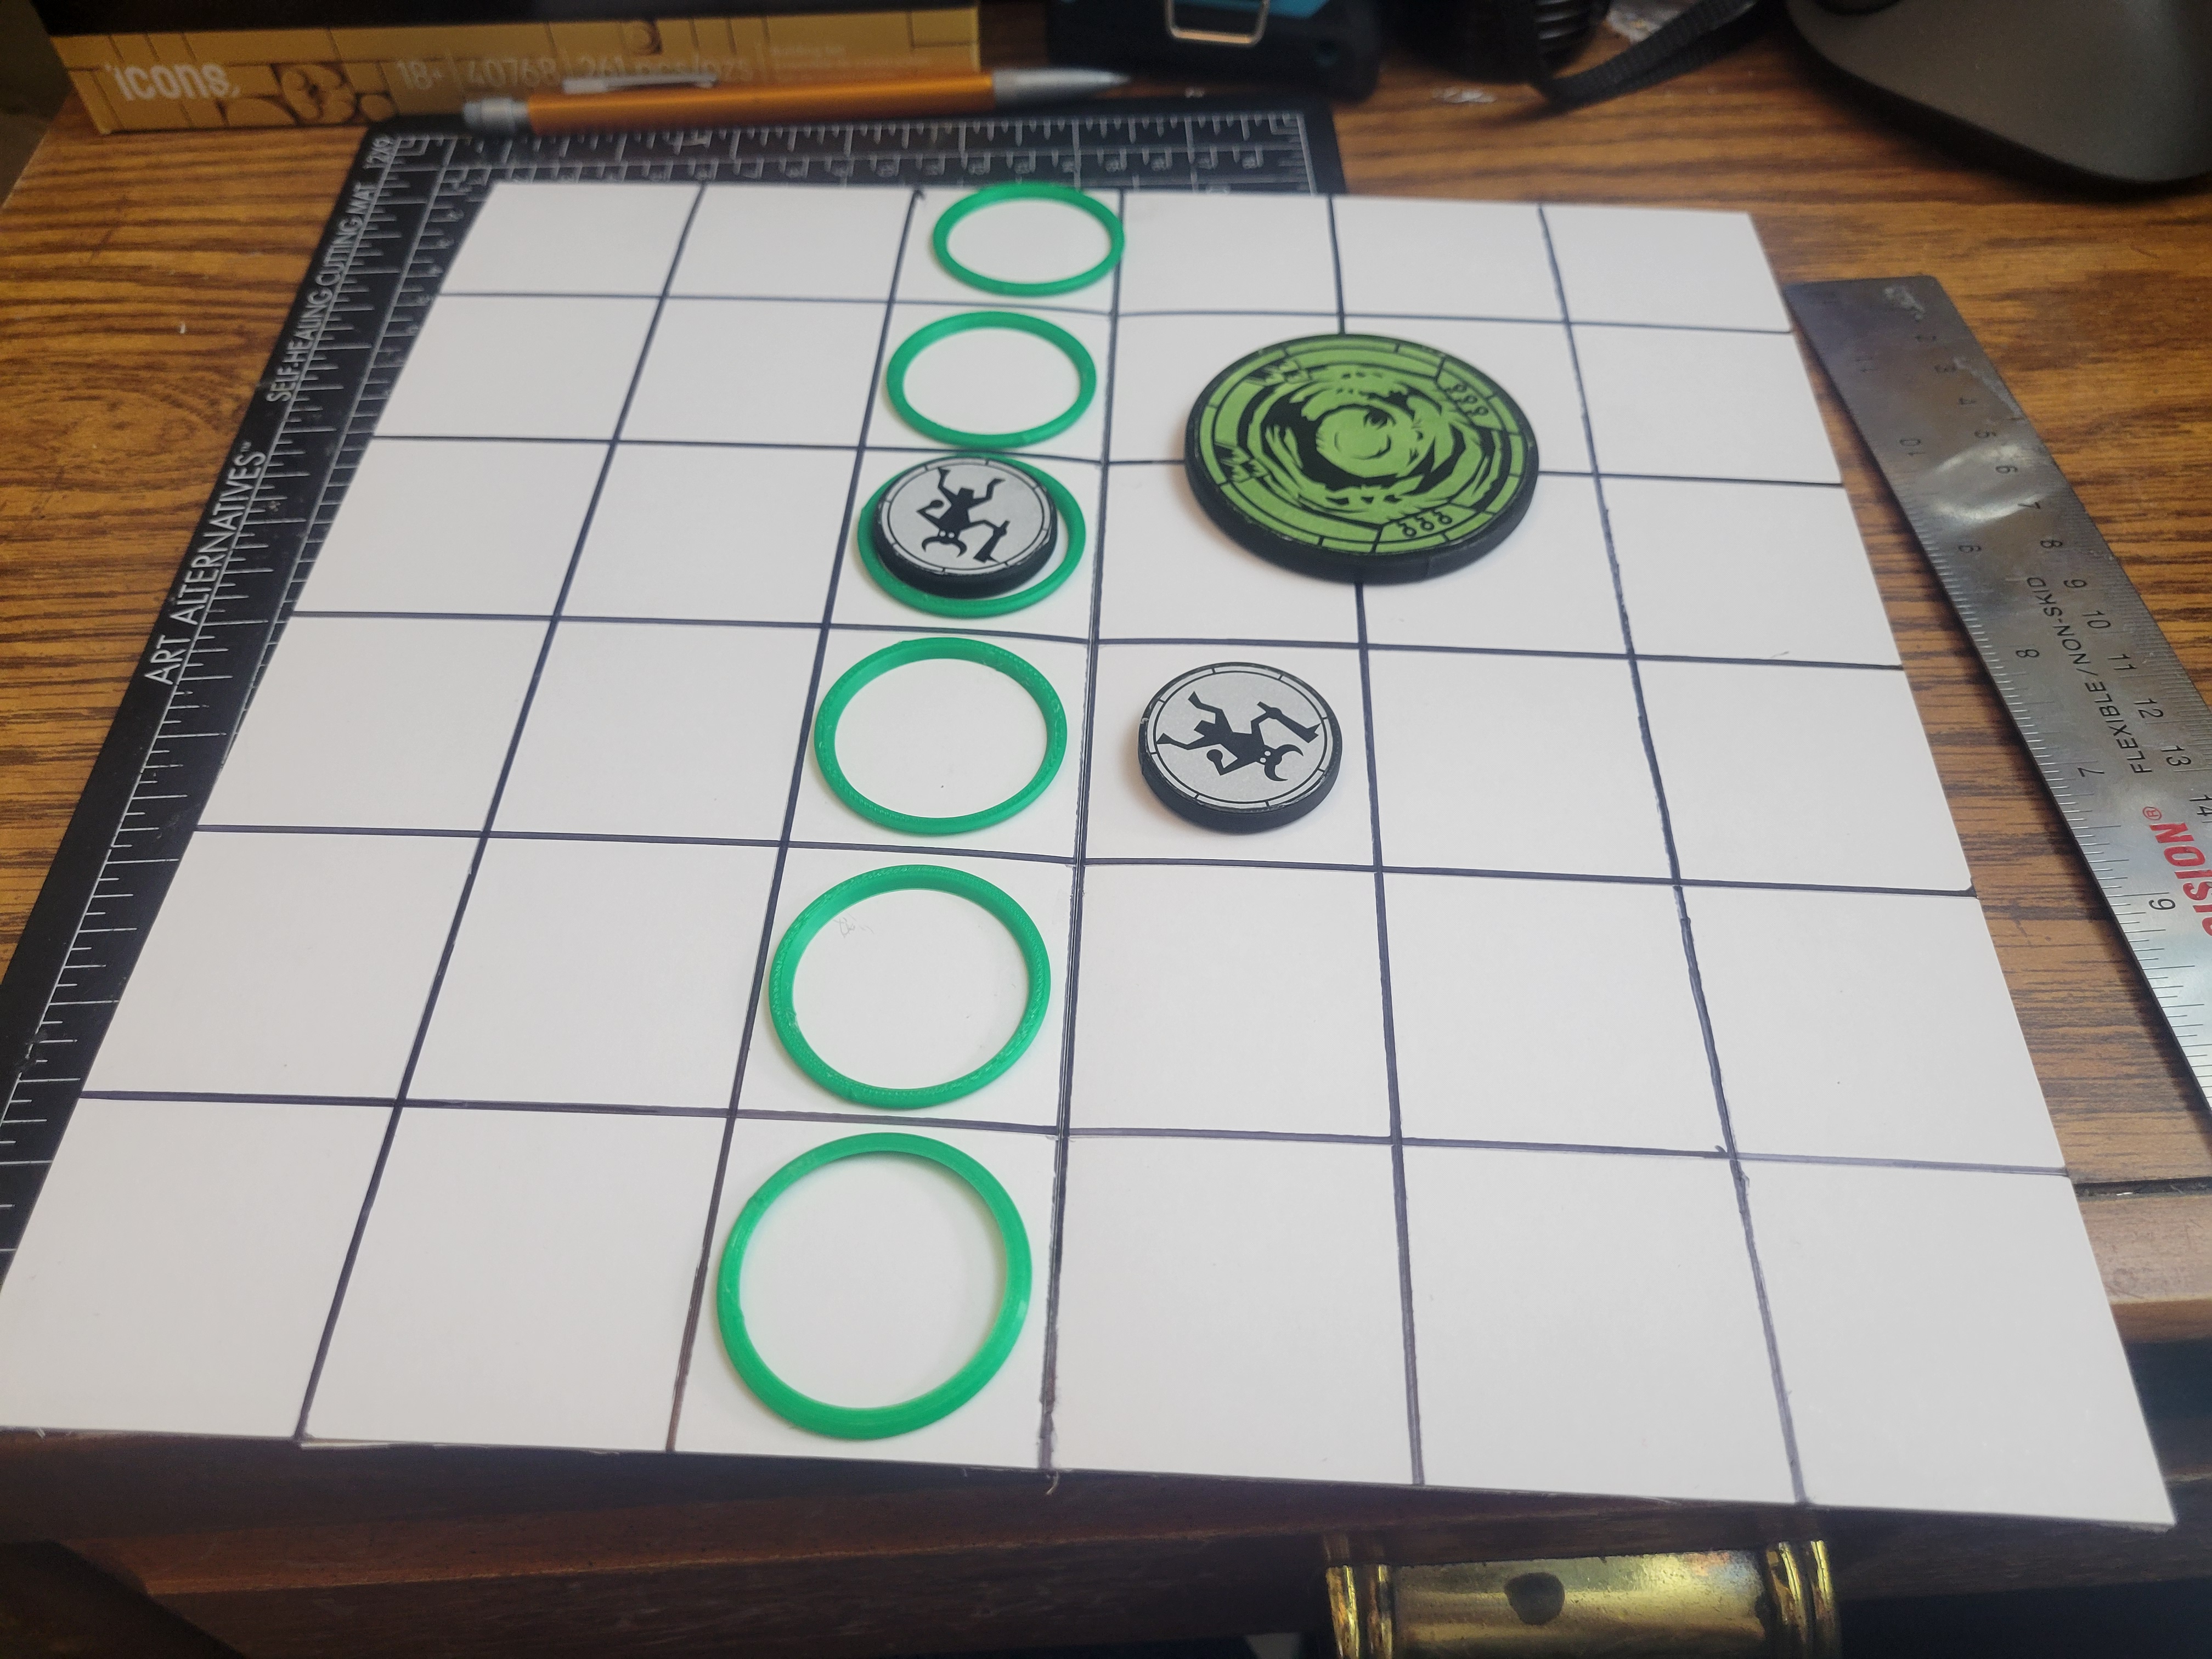
I started by test printing tokens in a couple of different sizes, but when I got them in my hands I felt that anything smaller than 30mm (including the usual 25mm standard most RPG minis use) felt too small, especially since the whole battle grid for Prequel is only 6x6. So I picked 30mm as the base token size to make everything feel a little chunkier in the hands and occupy more of the table visually. I chose the grid size to be a little larger than that (45mm), so as to allow for the marker rings, plus a little extra wiggle room just to make it easier to reach in and manipulate a single token without crashing all the other tokens around it.
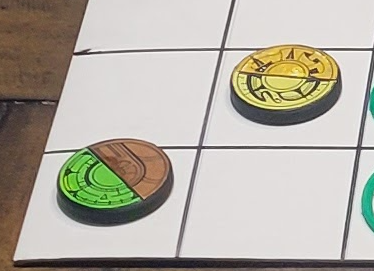
The monster tokens are simple, just a plain disc with a tiny chamfer on the bottom to make them easy to pick up and a tiny roundover on the top to feel nice in your hands. The player tokens are the same form factor, but since characters in Prequel are made by combining two archetypes, I made a set of slightly thinner half-circular tiles to put the icons for those archetypes onto. The player token itself is the same as the monster token, but with a matching recess in it to allow you to press-fit two of the tiles into, so you can make a unique player token for each player.
The token marks are another relatively simple component. Depending on the Evil you face, these have different uses-- They are sometimes used to mark squares on the battle grid, and sometimes attached to tokens as, e.g. "cursed haloes." So I designed them as rings that are slightly larger than the tokens, so that they can either be placed around a token, or placed on a grid space which tokens can then move freely through. The odd angles on the sides of rings are my attempt to split the difference between "make it easy to pick up the token without picking up the mark" and "make it easy to pick up both the token and the mark at the same time" to accomodate these disparate use cases.
There are two other accessories included here-- First, I found that when I tweaked the half-tiles for the player tokens to make them press-fit nice and tight into the tokens, they became very difficult to remove. So I added a hole in the bottom of the player token itself, so that you can poke a pencil or something into it and pop the tiles out. Then I designed a special tool to replace "a pencil or something" for this purpose-- it's a token disc much like the others, but a little larger and with a pencil-shaped nub in the middle. You can totally skip this and use whatever other pointy thing you like-- I'm just including this because I find it pretty useful. The other accessory is a Weakness counter that replaces the clocks suggested in the book with a numbered magnet-and-ball-bearing track. I designed this simply because I thought it would make a nice addition to the play experience and had a form-factor that took up less vertical space than a lot of the "RPG clock" printable items I've seen.
And as for the actual storage box (the most interesting print of this set, arguably)-- When I started working on this playset of tokens, I was just keeping all the pieces in a plastic bag together. But I soon realized that the Prequel book happens to be exactly the same size as the inside dimensions of a box I had lying around, so I asked myself: "Can I design a 3D-printed insert to store all these pieces I'm designing, along with the book, in that box?" The answer, as it turns out, is yes. The only things you need for the game that don't fit in this box are the battle grid and the story-writing consumables (index cards, sticky notes, writing implements, etc.)
Construction
Tokens
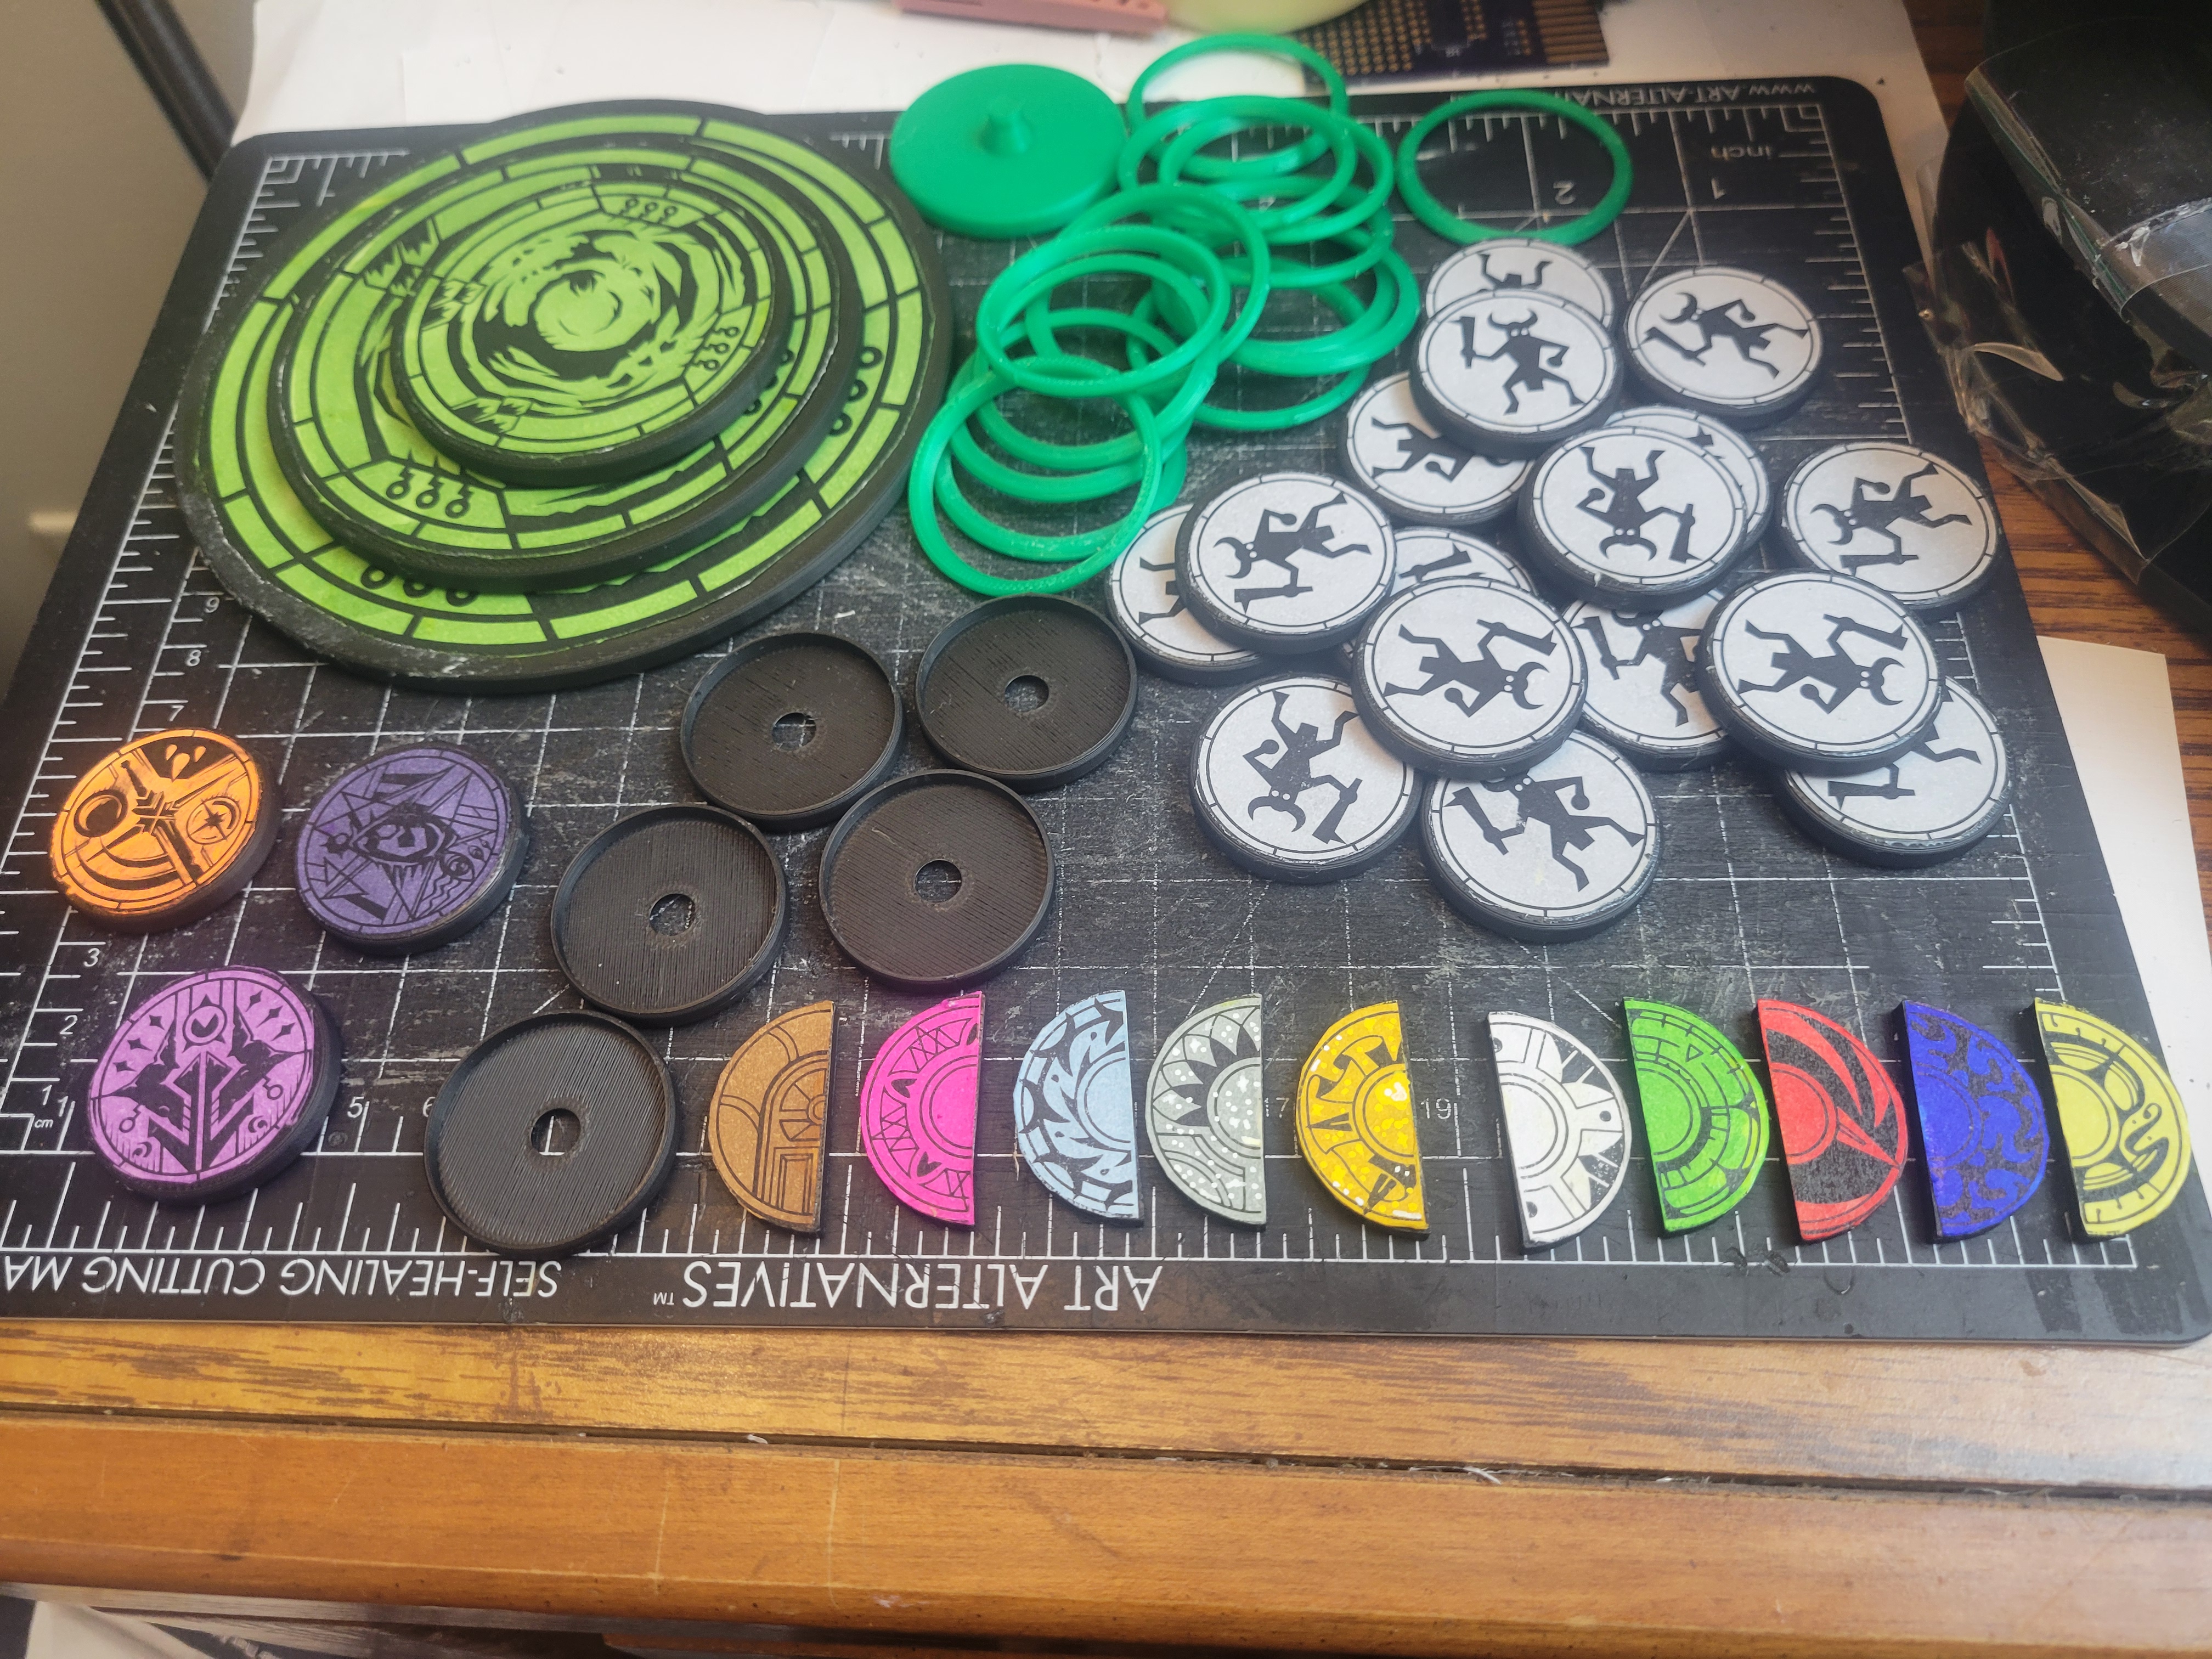
My monster and player tokens are printed in plain black PLA. For the graphics, the icons are straight from the Prequel book itself, and you can download digital versions of them from the Glyphtide Games website for exactly this sort of purpose. The only exception is the minions, which don't have an "official" icon for them. I don't have the artistic talent to make my own cool icon in the same visual style, so I just took the same segmented-circle outer frame that the Evil tokens use, edited out the middle part, and dropped in a free "Evil Minion" icon from game-icons.net. Even though it was purely because it was free, I kind of like the simplicity of that minion icon contrasted to the complexity of the other tokens on the battlefield. I've included my minion icon as a PNG in case you want to use it yourself.
I wanted the tokens to have contrasting, thematic colors to make them a bit more readable and easy to discern from one another on the table. I only have a laser printer, though, so I printed them in black and white and borrowed some of my wife's fancy alcohol markers to add the colors. If you have a color printer, obviously you could just print them with color directly and save some effort there. I cut each icon out and glued it to the PLA tokens using wood glue, which is the option that's worked best for me for gluing paper to PLA prints.
The marker tokens are just printed in any contrasting color. I used green PLA because it was the only good solid color, non-black, non-white reel of PLA that I had available at the time. I printed 16 of them in a single go, and then while removing them from my build plate two of them pinged off and rolled under a desk somewhere. So I said, "whatever, we probably won't need to mark more than 14 spaces on the board anyway" and didn't bother doing any more printing. But when we played our first game I ended up needing fifteen marks. So maybe try not to lose them.
The Grid
Right now, the grid is one of the weaknesses of my design. I made mine by just drawing the grid with marker on two appropriately-sized pieces of heavy cardboard and taping them together. (I used the kind of matte board you might use to mount photos or whatever, which again just happened to be a craft material I had lying around). The two pieces are securely taped together so that the board can fold, but because I chose to make a larger grid, the folded grid isn't quite small enough to fit in the box. I'm not sure how best to fix this-- As a quick fix, I might simply cut it in half again in the other direction, so that it is four segments instead of two and folds into a small square that will definitely fit in the box. But as you'll see further down, that might be a bit of a tight squeeze.
Weakness Counter
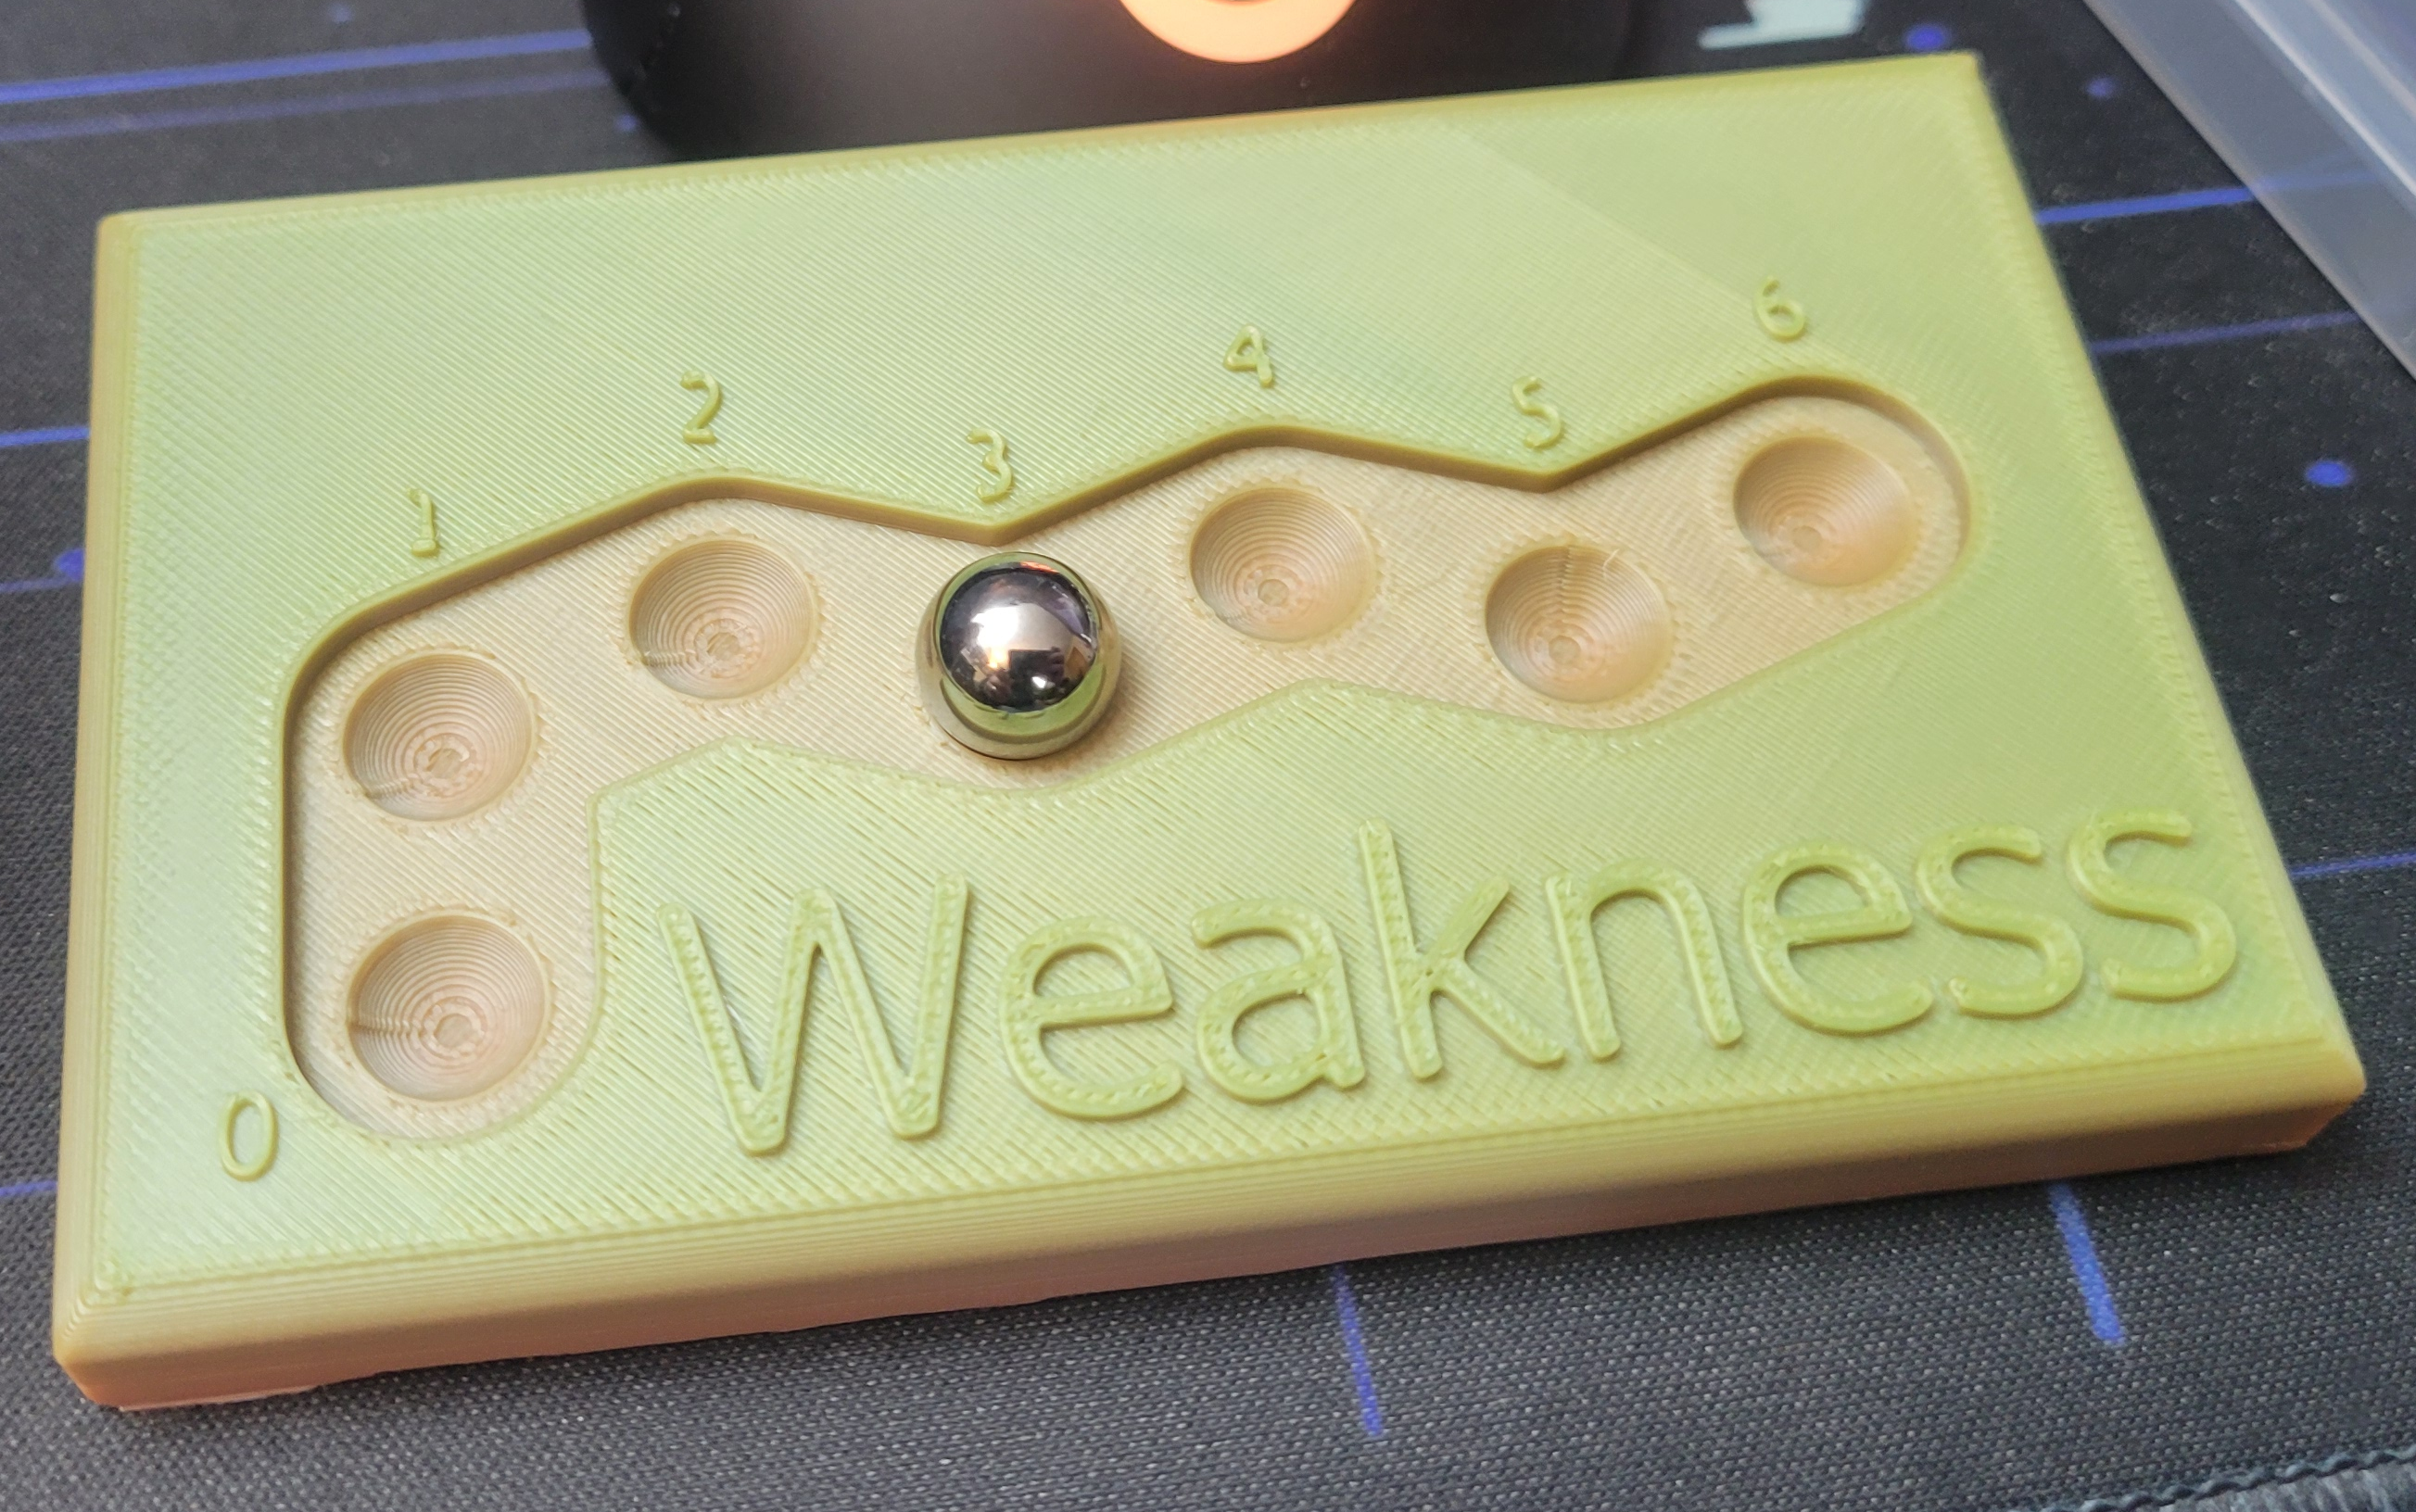
The weakness counter is designed to hold a 10mm steel ball bearing that moves between the slots to indicate the current value of the weakness clock. There are also internal 6mm x 2mm magnet cavities in the model directly below each slot on the counter-- If you want to magnetize the counter, just pause the print at the layer right before those cavities are covered up, and press a magnet into each one before resuming. (I picked 6x2mm because I've been organizing my things with gridfinity, and that's the standard size for gridfinity magnets, so I already owned a big pile of them). The magnets help the ball bearing lock into place and makes it a little easier to nudge it from recess to recess without it going wild. If you drop the counter on the floor, the ball bearing is still gonna go flying, but I can hold mine upside down and move it around naturally without the ball coming out. I colored the numbers on mine with a paint pen to make them more visible; a Sharpie would work just as well.
Box Insert
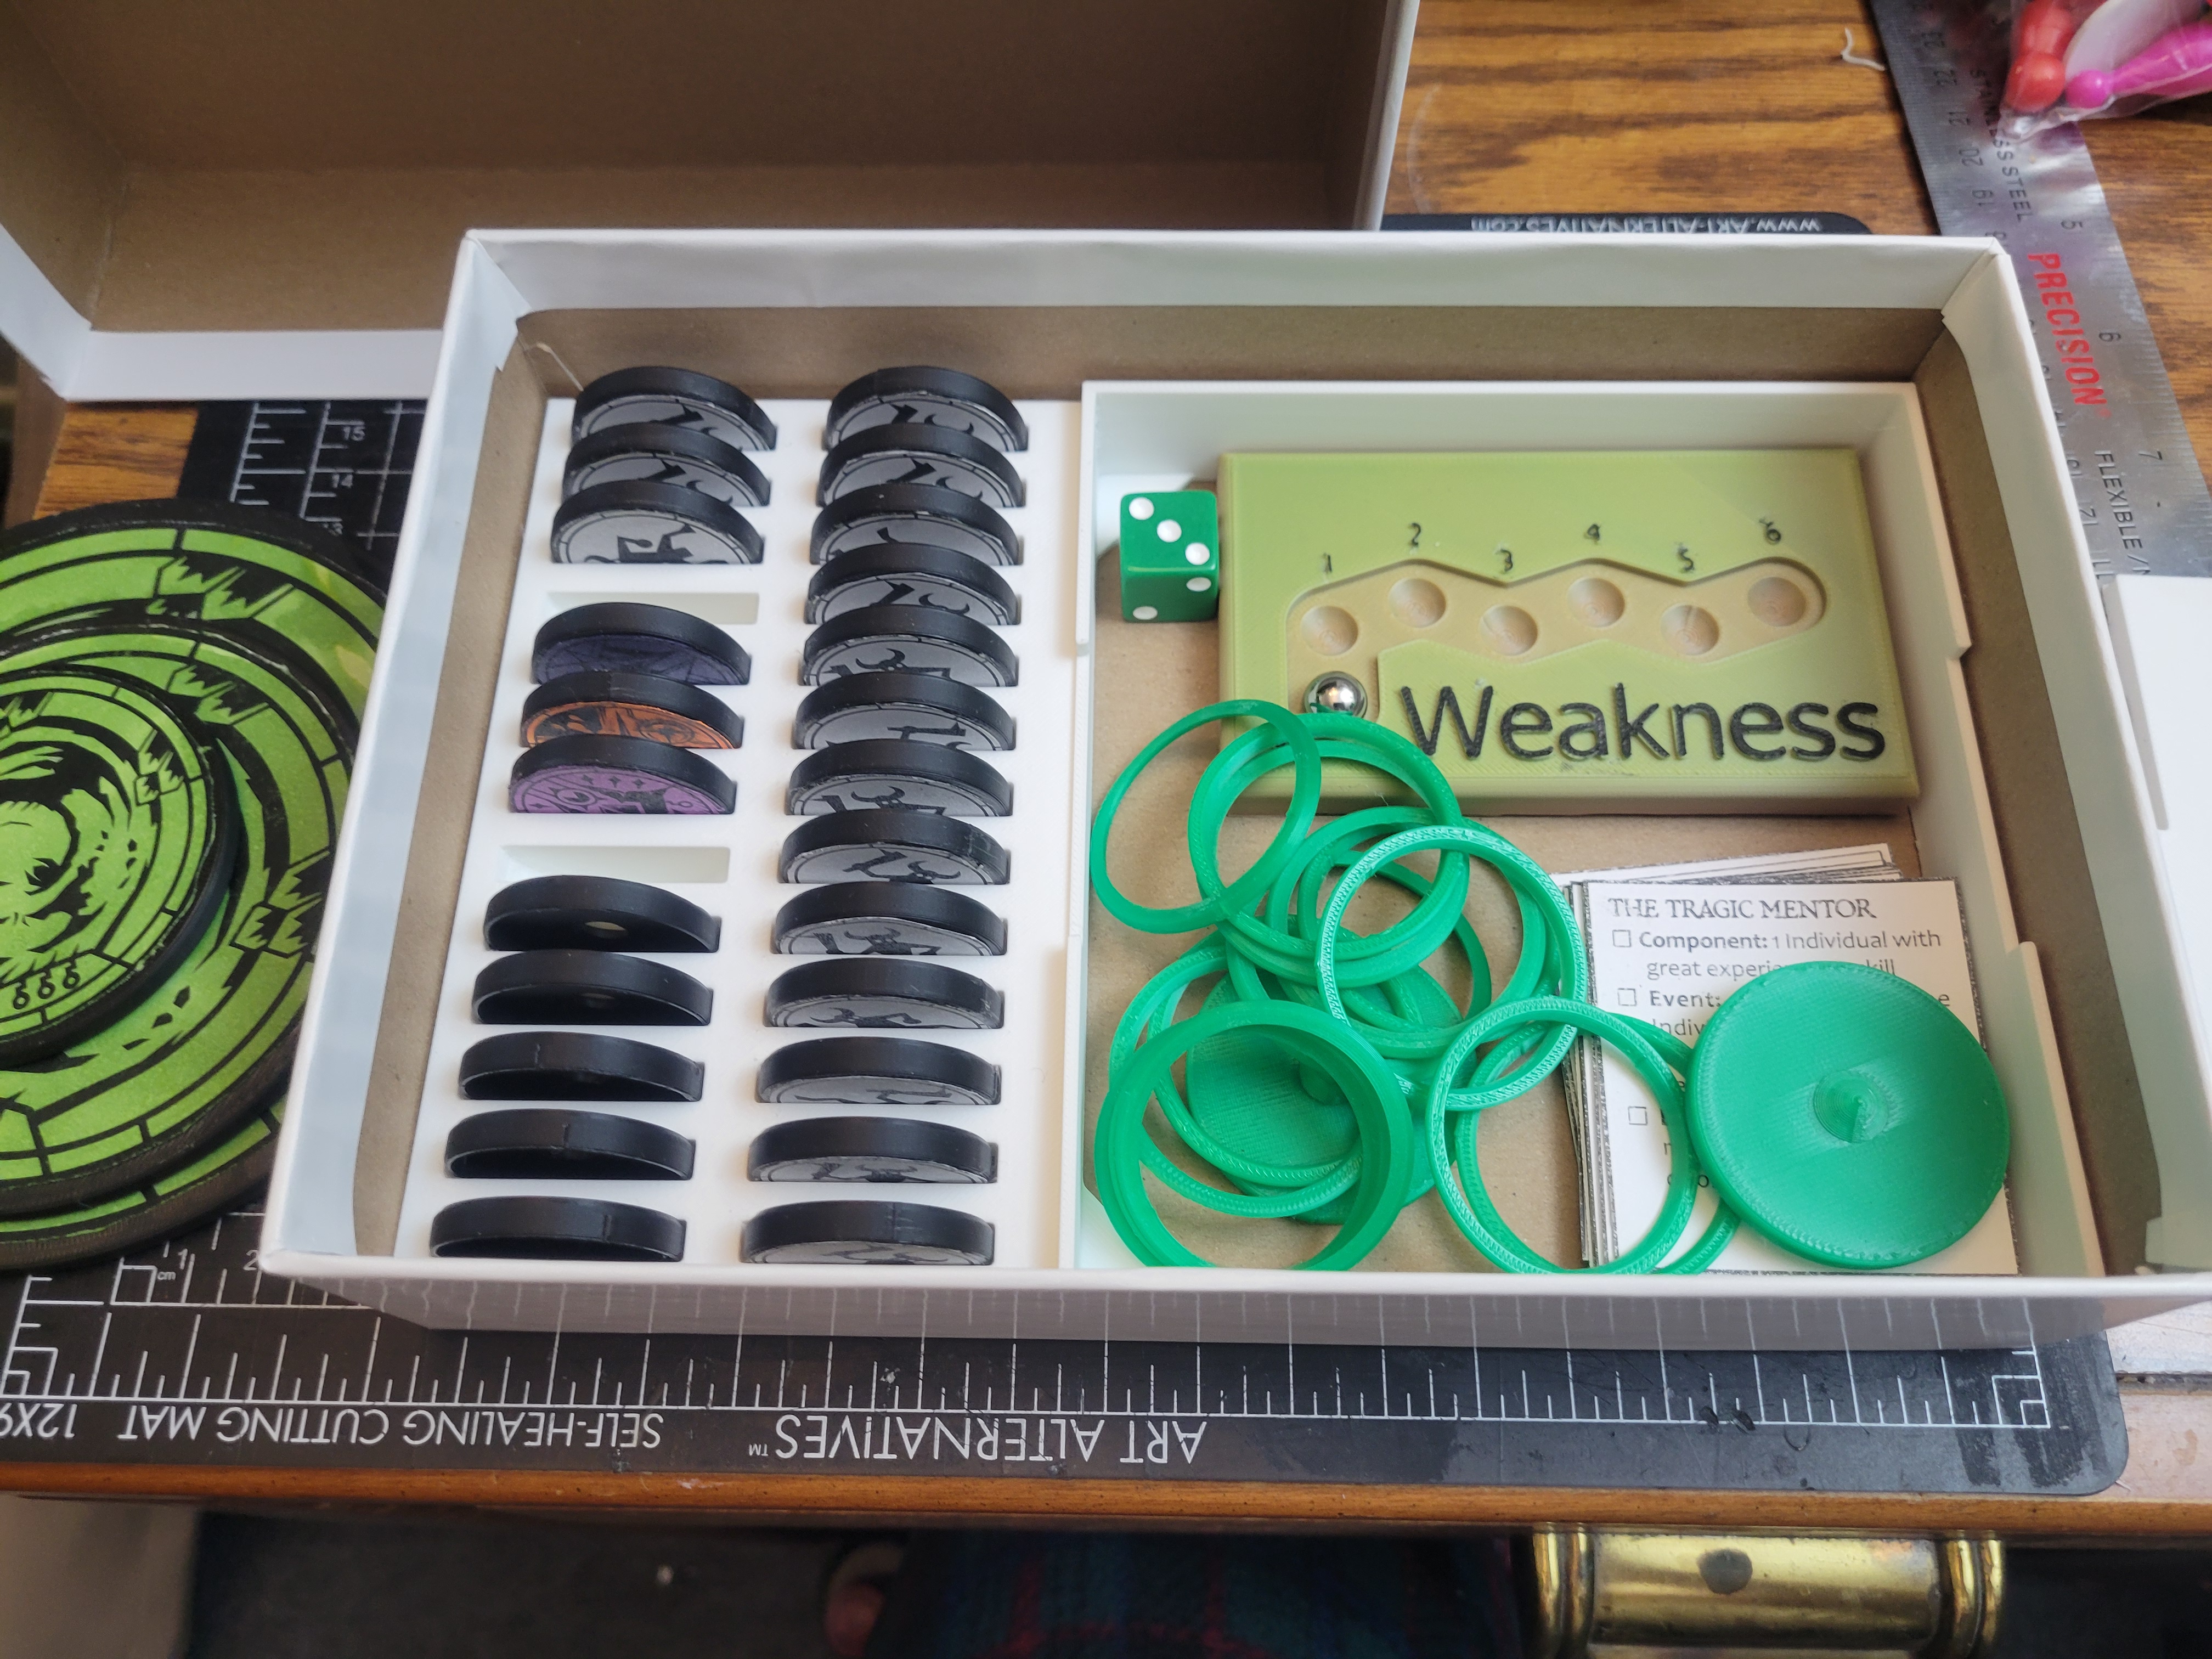
The box insert I designed is intended to fit perfectly into a Medium Stout Box from The Game Crafter, which is what I used. The box body has slots in it to snugly fit 26 normal-sized tokens. I've filled it with five player tokens, the three regular-sized Evil tokens, and sixteen Minion tokens. Two of the slots are left empty to let me visually separate the groups of tokens from one another and make it easier to extract the ones I'm looking for.
The other half of the insert is a little bin that has enough space to hold my weakness counter, my removal tool, a generous pile of marker tokens, a six-sided die, and a full set of legend cards. (Not pictured, but I've also put a few large acrylic beads in there, because I like using them as initiative markers to track who has and hasn't taken their turn yet each round.)
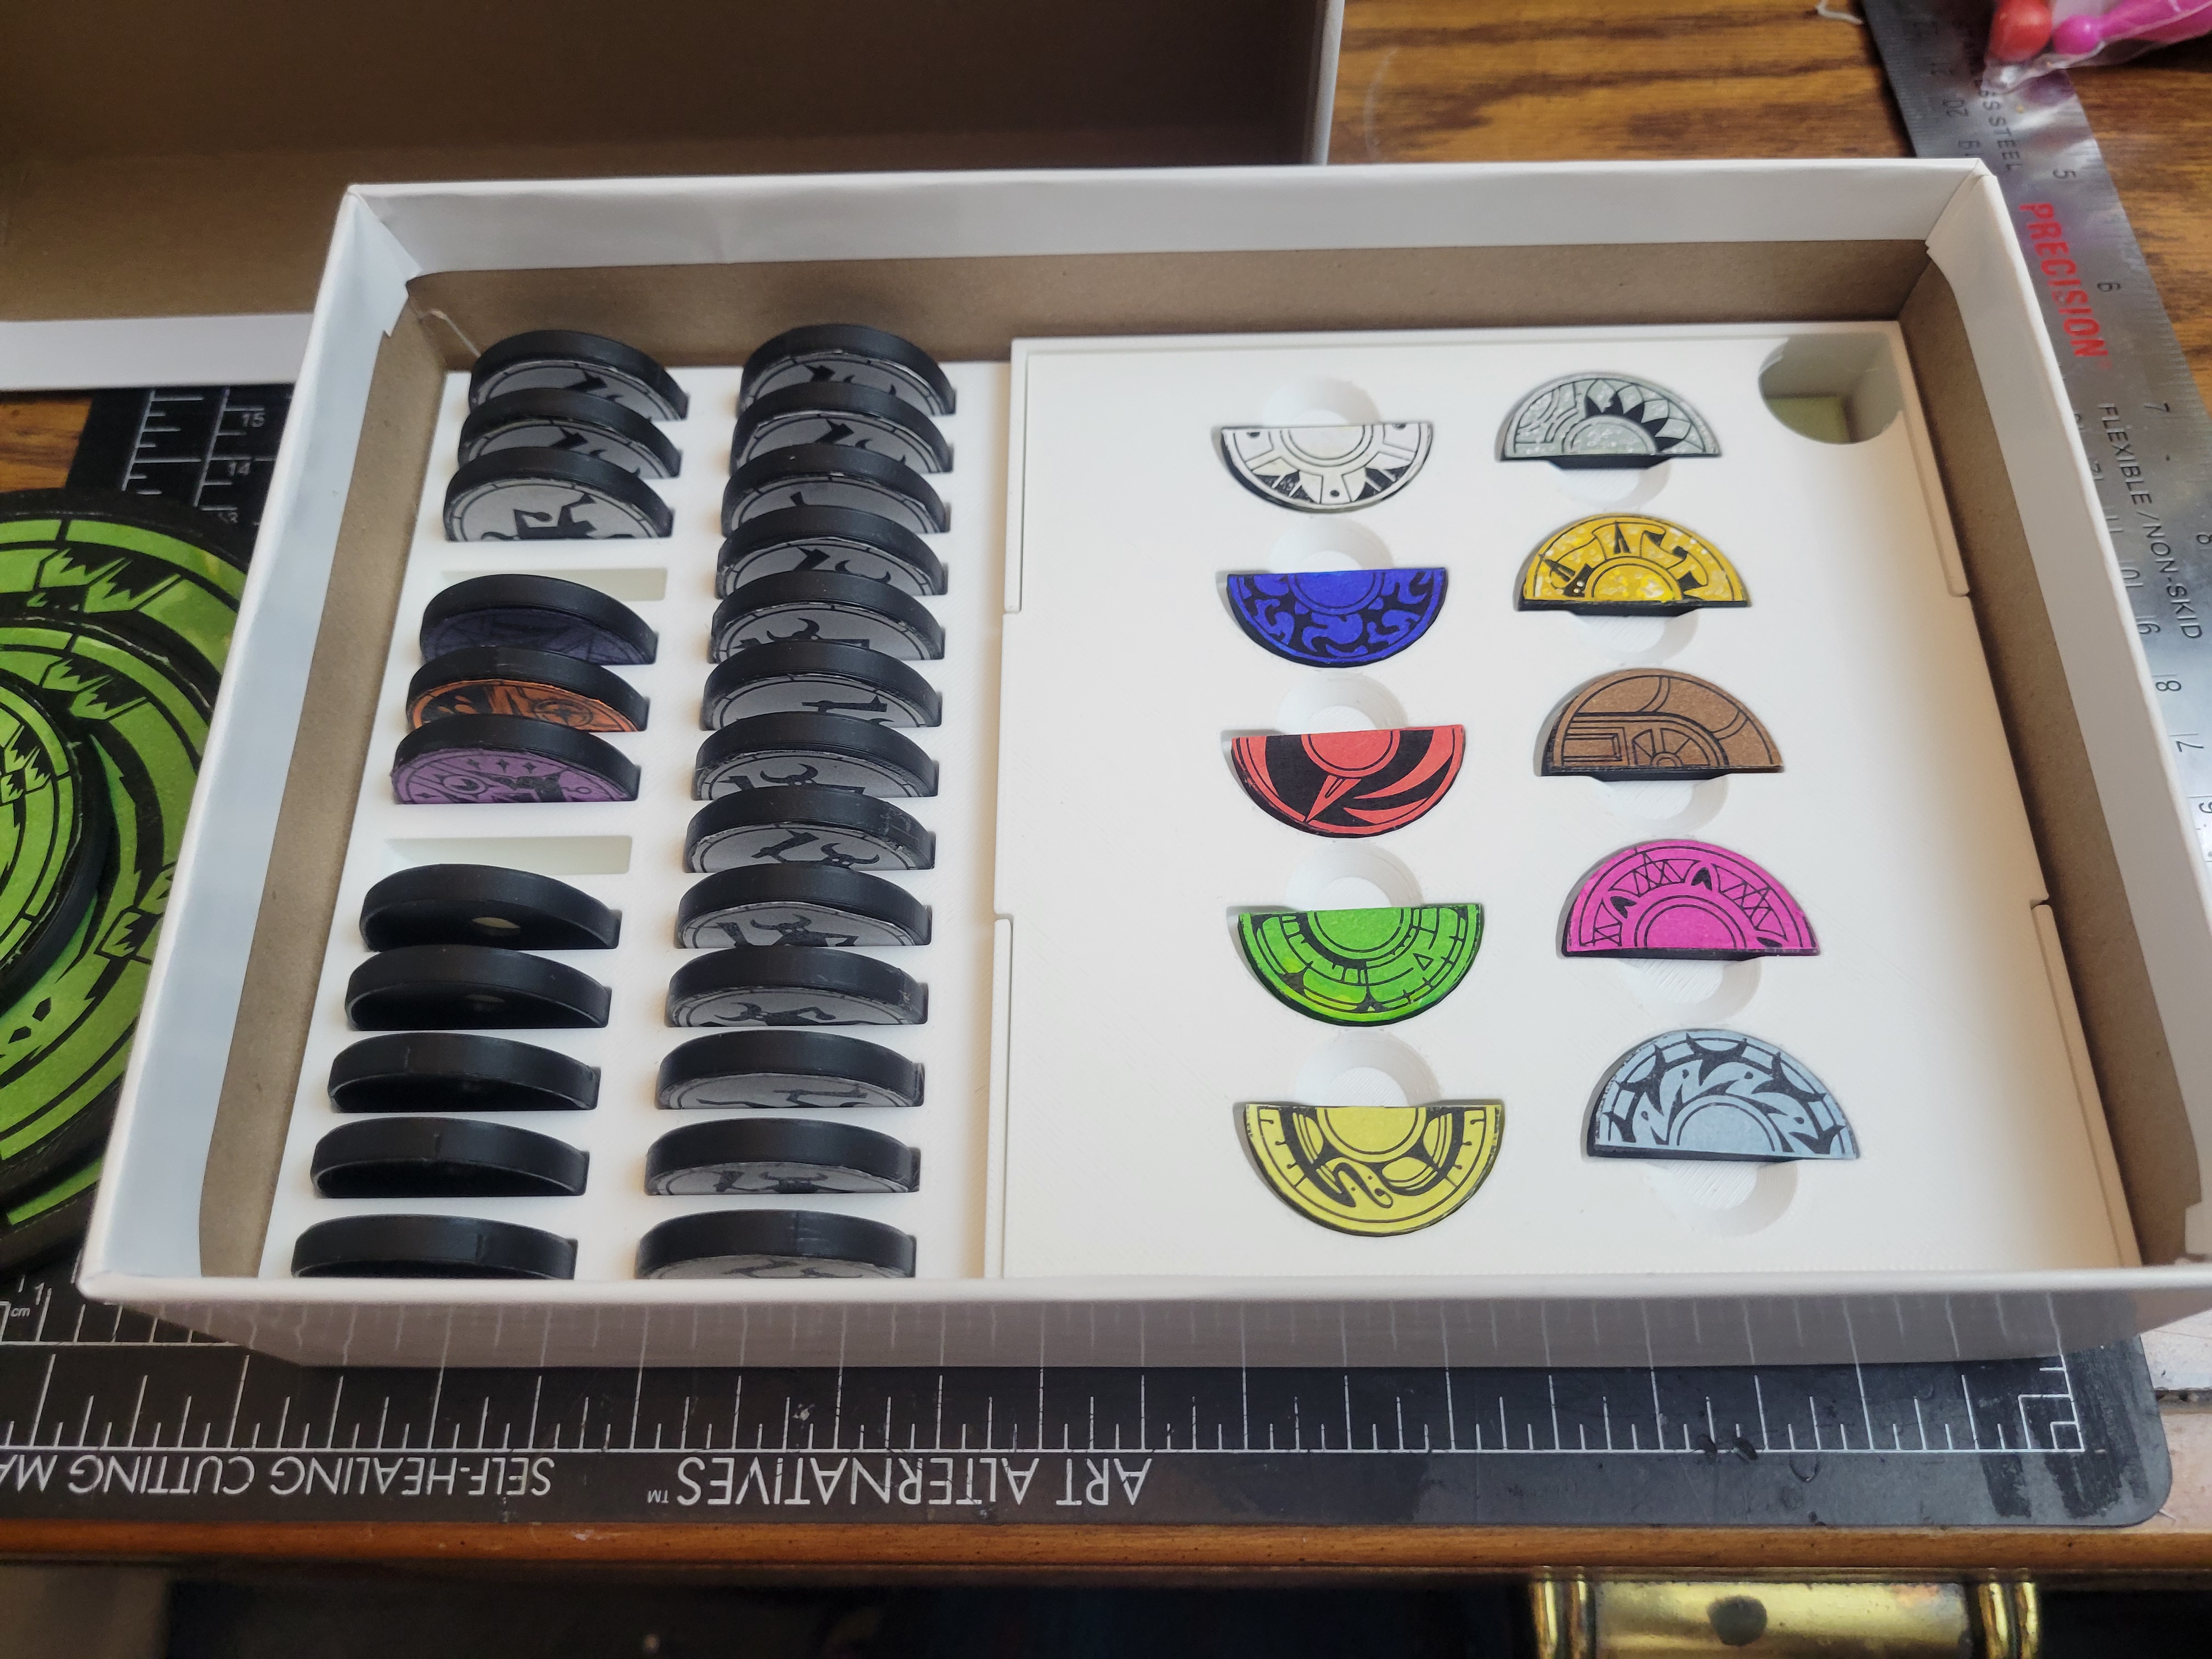
The lid for the insert sits on top of the bin. Recesses in the lid are designed for each of the ten Origin and Calling tiles to slot into, with finger wells to help you lift them out. A hole in the corner gives you a place to get your finger in and lift the lid out to get at the contents of the bin.
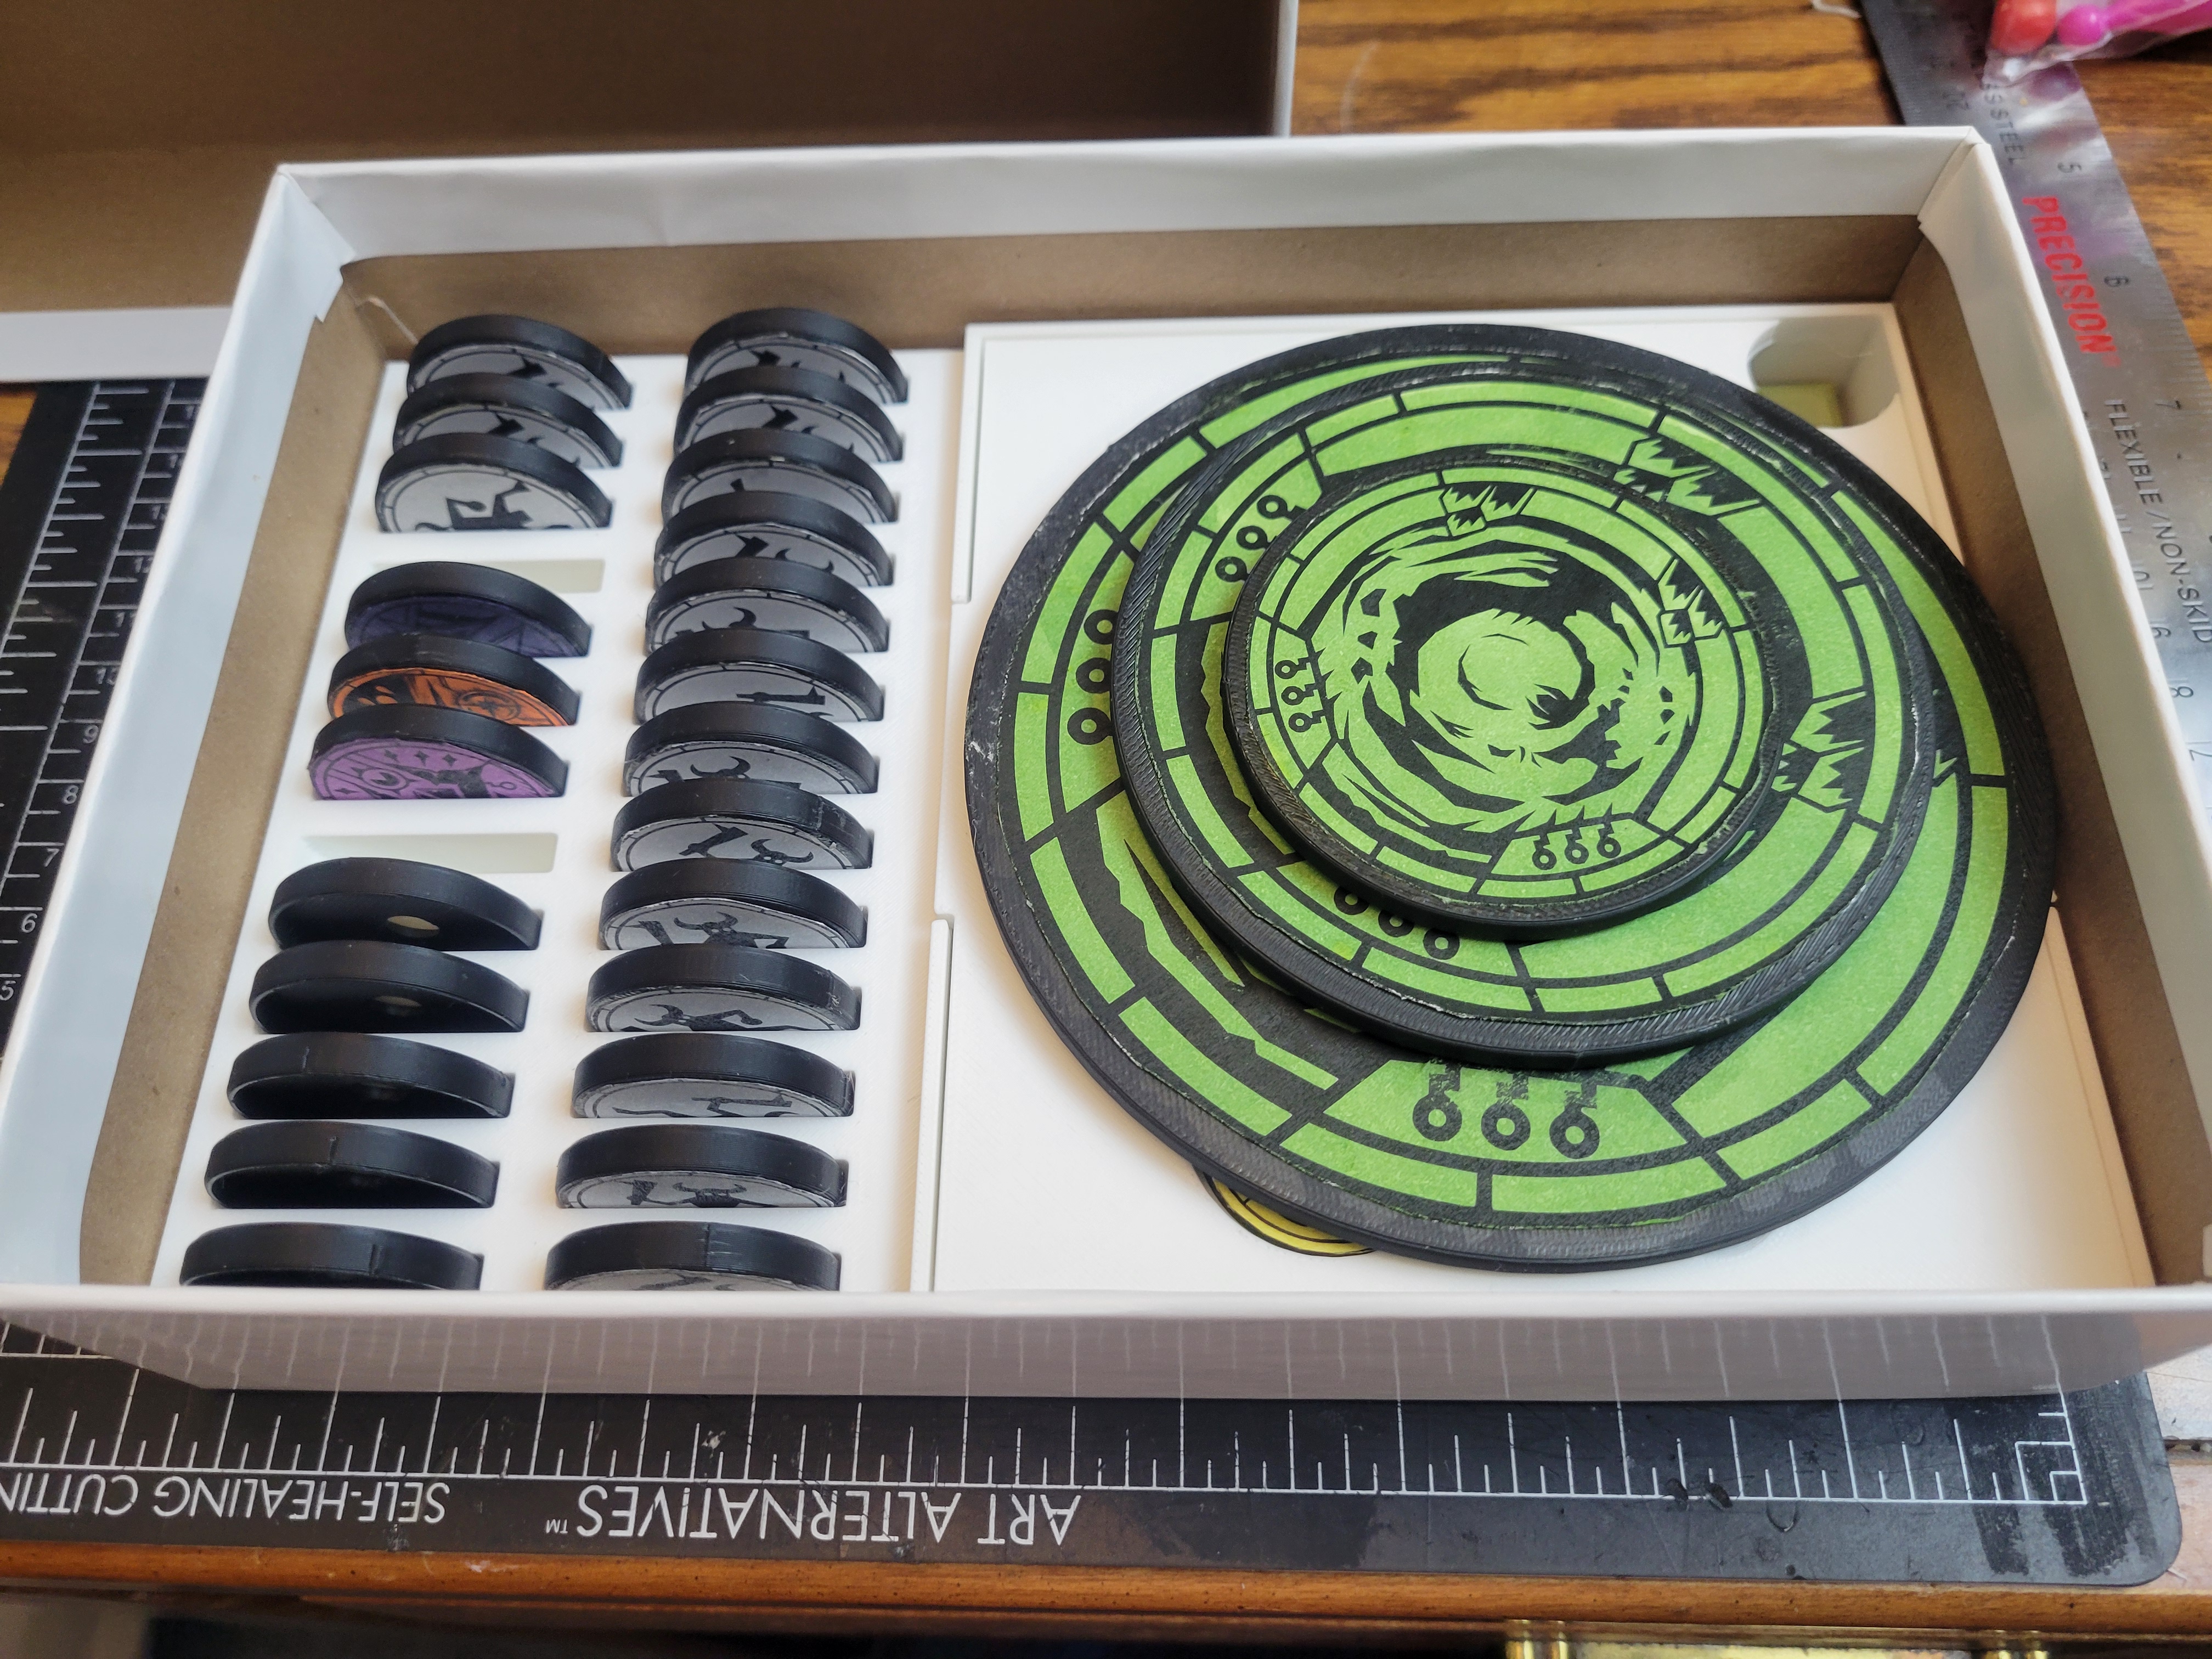
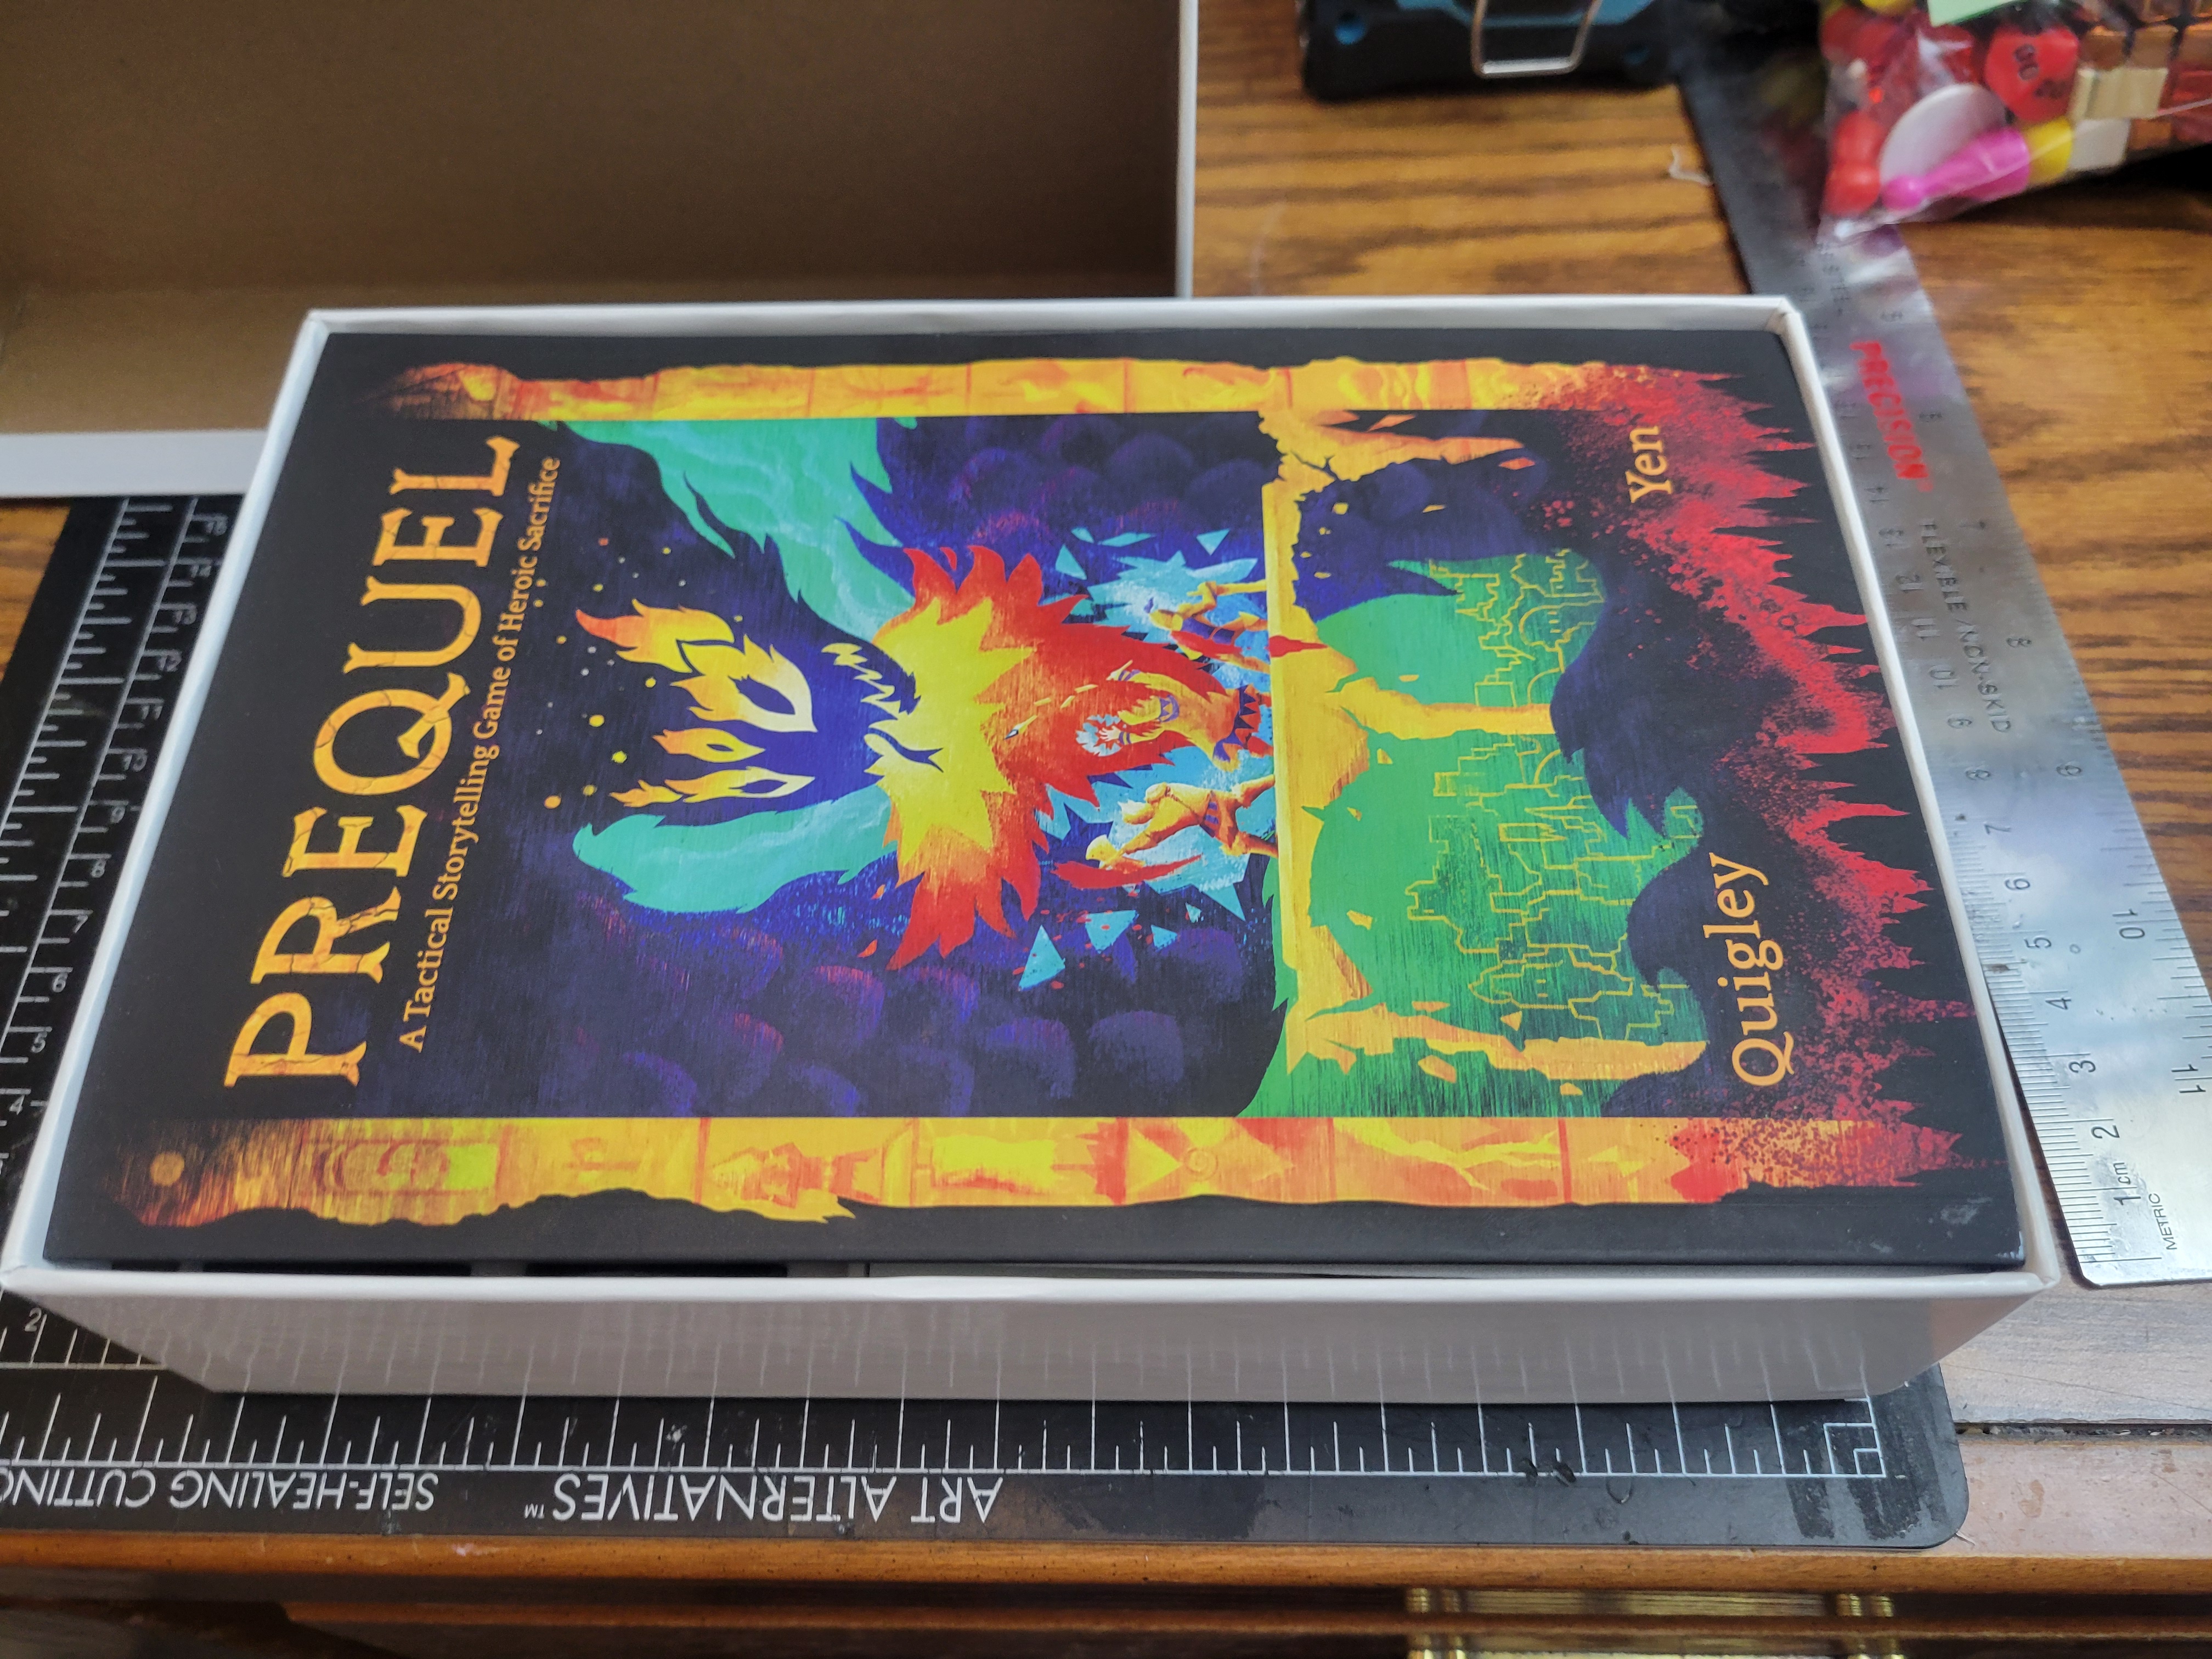
Once you've got the tokens in the slots, the bin filled with components, the lid on, and the player tokens in place, the three oversized Cataclysm tokens stack on top of the lid. The 4x4 token is plenty big enough to hold all the player tiles in place, and the 3x3 and 2x2 can stack on top of that. The remaining space at the top of the box is just enough space to fit the Prequel book itself, along with laminated printouts of the character sheets for use with wet-erase markers, and a few miscellaneous additional materials printed off from the Prequel website, like the Guide to Evil pamphlet or the little snippets of player advice.
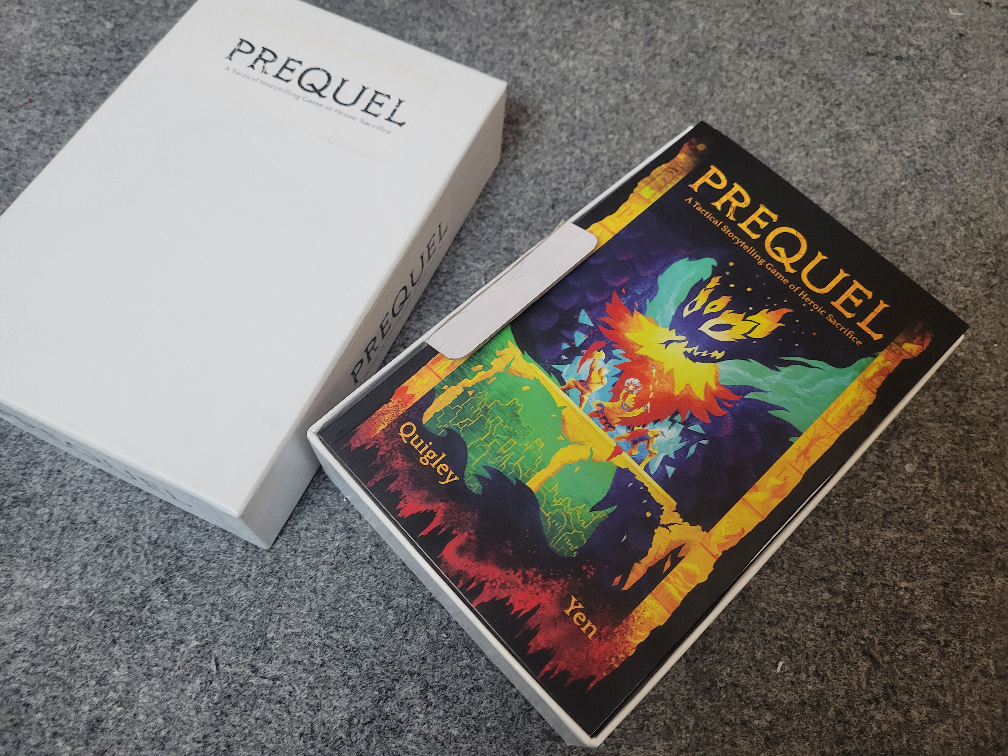
I found, however, that the book is such a perfect fit in the box that it became a little hard to remove. So I added a cardboard lever (cut from the same cardboard as the grid) that I can put beneath the book, character sheets, and printouts, with a tab that sticks up past them to provide a handle with which to lift them out of the box and reveal what's underneath.
Future Work
(or, "suggestions for things you might improve if you're making your own")
The cardboard lever under the book and papers works fine, but I definitely want to replace it with something prettier. I'm as yet undecided whether I want to make some kind of more elaborate paper envelope or cardboard sleeve that wraps the book more completely and has a lift tab, or something more like a wide ribbon attached to the inside of the box, which would serve the same purpose as my current cardboard lever, but would look a lot nicer and more professional.
As mentioned above, the grid doesn't quite fit in the box. I don't like this at all. If I make it into a four-way folding grid, then it would definitely fit in the box, but it would take up a lot of vertical space folded like that-- the natural place to stow it would seem to be where I currently have the Cataclysm tokens, so they'd need a new home.
And on the topic of the Cataclysm, it can potentially grow larger than 4x4; I haven't included a 5x5 or 6x6 token because they would be larger than the box-- plus, growing the Cataclysm to 6x6 will instantly end the game, so it probably isn't worth having a special token for. I started to explore a few possible 5x5 solutions with a token that comes in multiple pieces and click together, but that feels inelegant, and it's such a specific niche in the game that it didn't seem worth pursuing, compared to just continuing to use the 4x4 token and, say, putting a big 5x5 piece of paper underneath it to indicate the area it now occupies. This can loop back to the grid issue too-- If I can find an alternative solution to making the Cataclysm grow and still look cool, that could free up the space currently occupied by the oversized tokens to be used for the quad-fold grid instead.