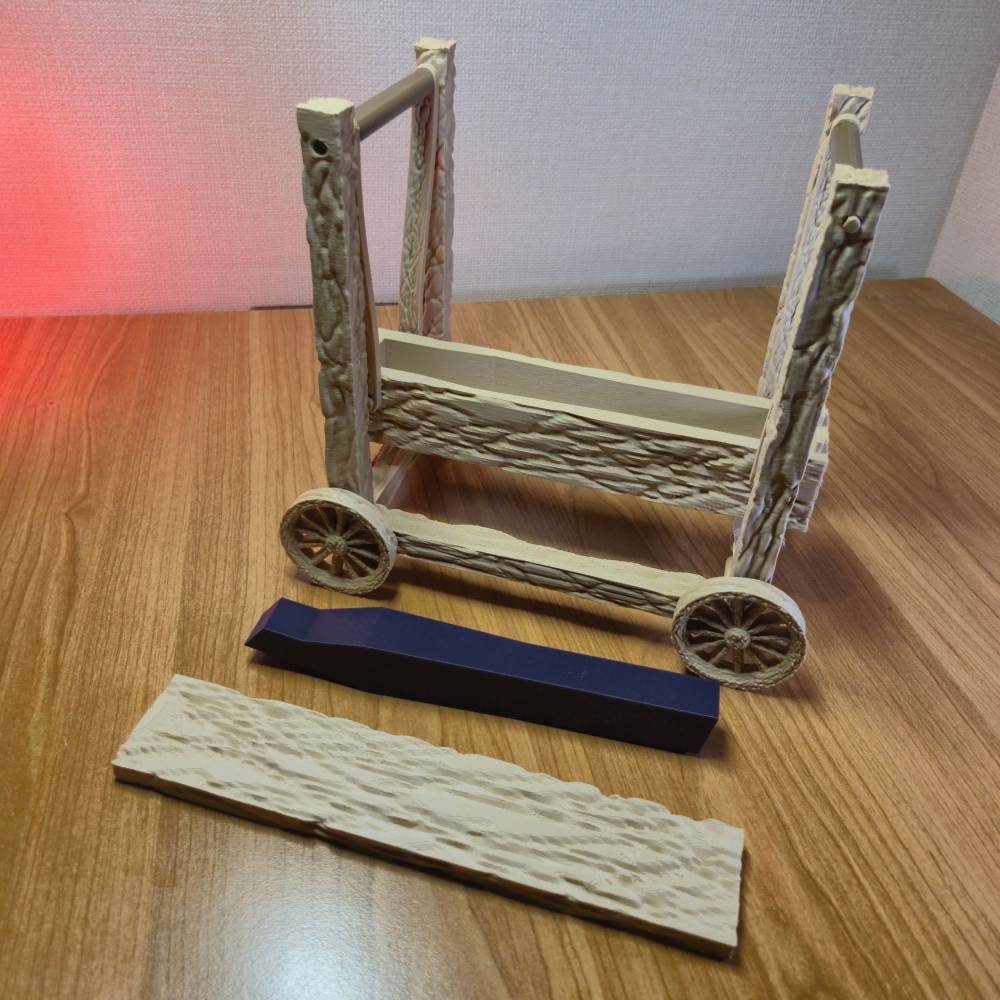
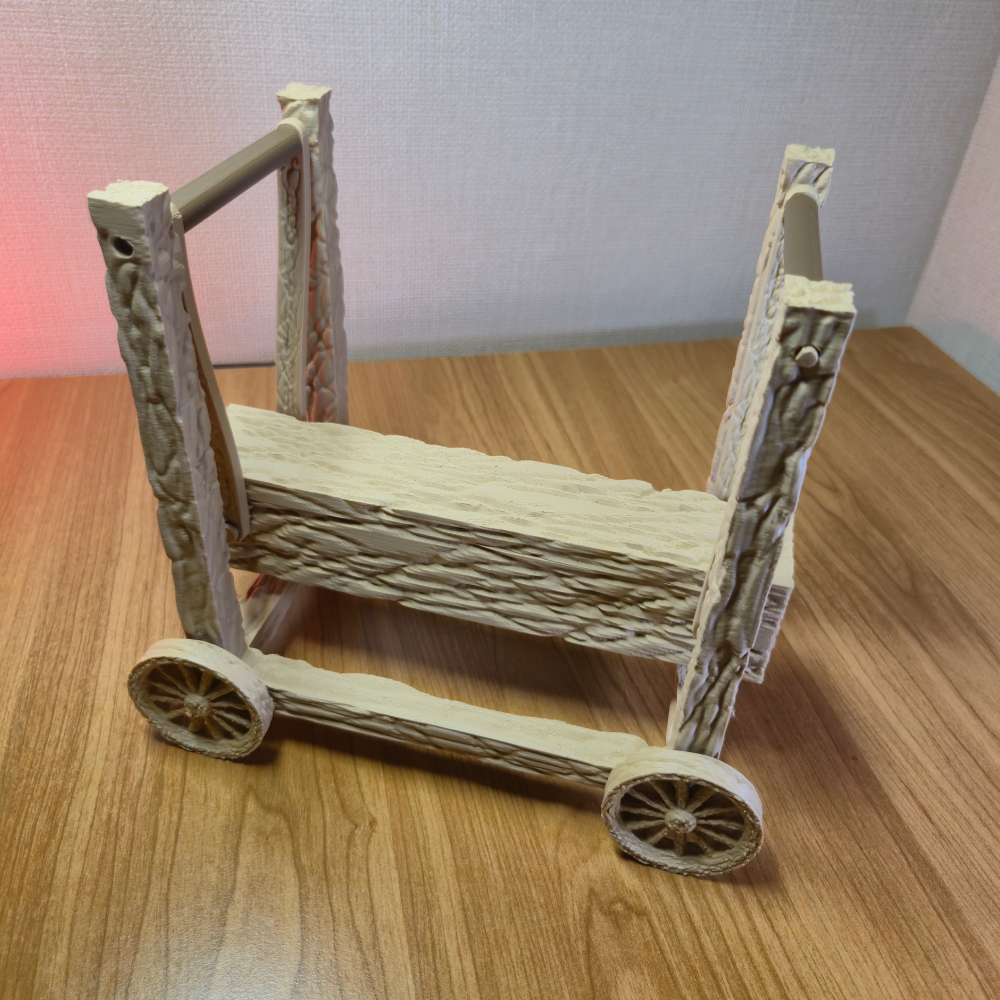
Functional Battering Ram assembly kit for Philips OneBlade
Obliczymy ostateczną cenę na podstawie wybranego pliku. Sprawdzisz ją i zaakceptujesz przed płatnością.
Zapisane na tym urządzeniu.
Informacje o modelu
- Źródło
- Printables
- Kategoria
- Vehicles & Machines
- Licencja
- Standard Digital File License
Step into medieval times with this fully functional 3D-printed battering ram!
This design is inspired by classic siege engines and brings them to life with moving parts and playful details. The wheels actually spin, the main battering ram beam swings back and forth, and the whole model is built to look great on a desk, shelf, or workbench.
But this battering ram isn’t just for show. It’s designed as a practical storage solution too — with a clever twist. The model includes two interchangeable versions of the mega beam bottom:
Philips OneBlade version – the top section of the mega beam can be removed and used to neatly store a Philips OneBlade.
Universal battery holder version – if you don’t own a Philips OneBlade, the alternative mega beam bottom turns the battering ram into a compact battery dispenser / holder instead.
This way, the model is useful no matter what you have at home — and you can even swap between versions later if your needs change.
Finally, even when it’s not being used for storage, this battering ram stands on its own as a fun, medieval-themed desk toy and display piece. The moving wheels and swinging beam make it satisfying to fidget with, and the detailed design makes it a great conversation starter.
Once you’re ready, the assembly instructions below will guide you step by step through putting your siege engine together.
Assembly Guide:
Here’s the list of all the parts and quantities that you will need to assemble this design:
“Medieval_battering_ram_Philips_OneBlade_holder_base_part” - 1x
“Medieval_battering_ram_Philips_OneBlade_holder_Swing_beam” - 4x
“Medieval_battering_ram_Philips_OneBlade_holder_Top_beam_connector” - 2x
“Medieval_battering_ram_Philips_OneBlade_top_bar_middle_add_on” - 2x
“Medieval_battering_ram_Philips_OneBlade_Wheel” - 4x
“Medieval_battering_ram_Philips_OneBlade_Wheel_connector” - 2x
“Medieval_battering_ram_Philips_OneBlade_holder_Mega_beam_and_swinf_connector” - 4x
“Medieval_battering_ram_Philips_OneBlade_holder_Mega_beam_bottom_part” - 1x
“Medieval_battering_ram_Philips_OneBlade_holder_Mega_beam_top_part” - 1x
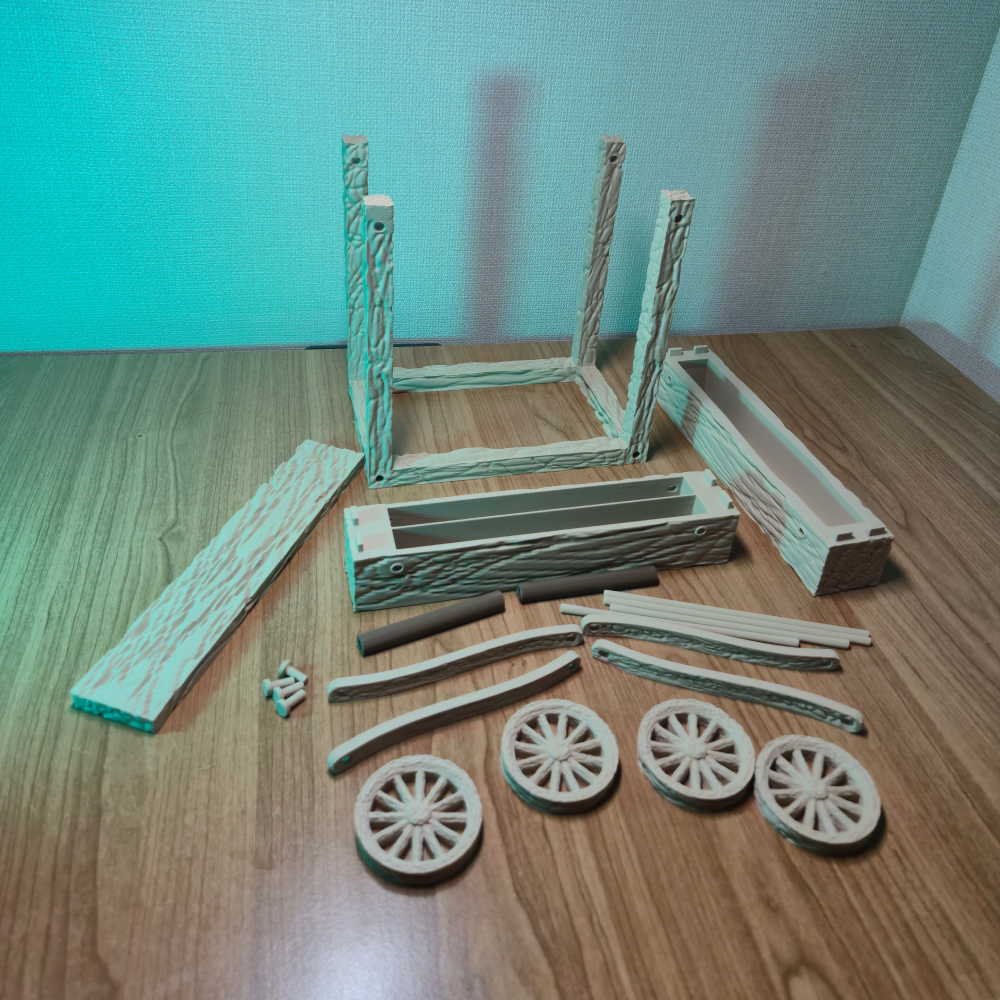
First the first step of assembly you will need the following pieces:
“Medieval_battering_ram_Philips_OneBlade_holder_base_part” - 1x
“Medieval_battering_ram_Philips_OneBlade_holder_Swing_beam” - 2x
“Medieval_battering_ram_Philips_OneBlade_holder_Top_beam_connector” - 1x
“Medieval_battering_ram_Philips_OneBlade_top_bar_middle_add_on” - 1x
These pieces will be used to assemble one side of the swing mechanism
Top beam connector might look identical to wheel connector, but if you place them next to each other, you will see that the top beam piece is shorter - that’s the one you need for this part
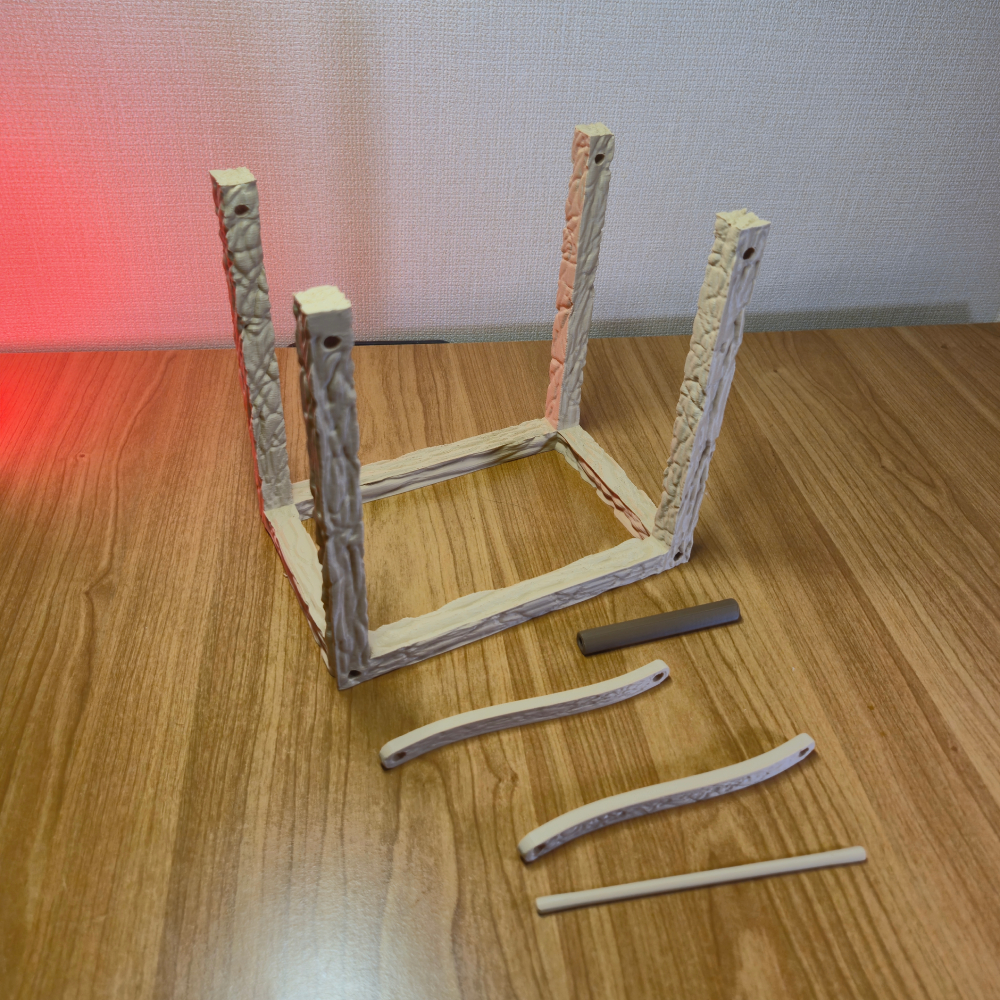
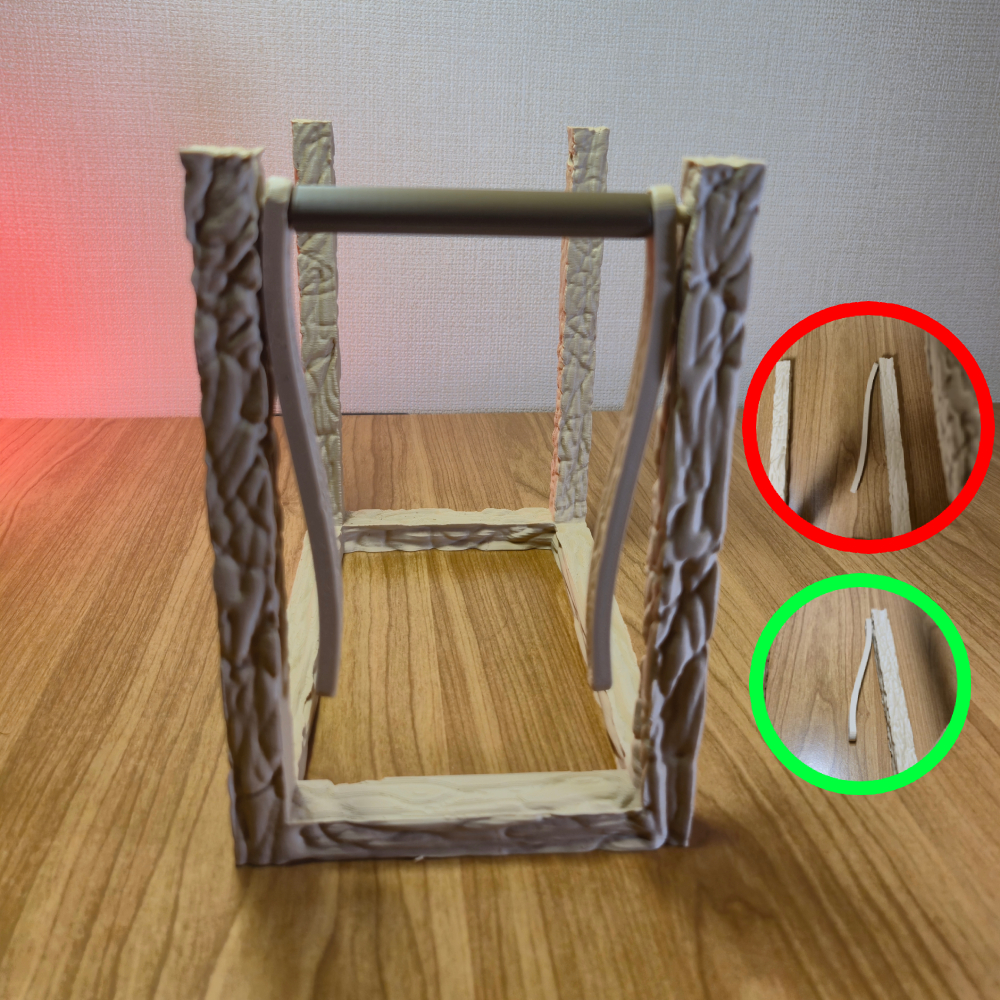
When assembling the swing part, you have to take the top bar and push it through one side of the top holes on the base part, while you push it through, add all 3 necessary pieces in the middle before pushing the top par through the opposing hole of the base. It is crucial that you make sure that the swing beams are oriented correctly in regards to sides. In the image bellow I have circled with green the correct orientation and also shown the incorrect version outlined with the red circle.
For the next part you will need to take other set of these pieces:
“Medieval_battering_ram_Philips_OneBlade_holder_Swing_beam” - 2x
“Medieval_battering_ram_Philips_OneBlade_holder_Top_beam_connector” - 1x
“Medieval_battering_ram_Philips_OneBlade_top_bar_middle_add_on” - 1x
And do the same steps you did in previous step
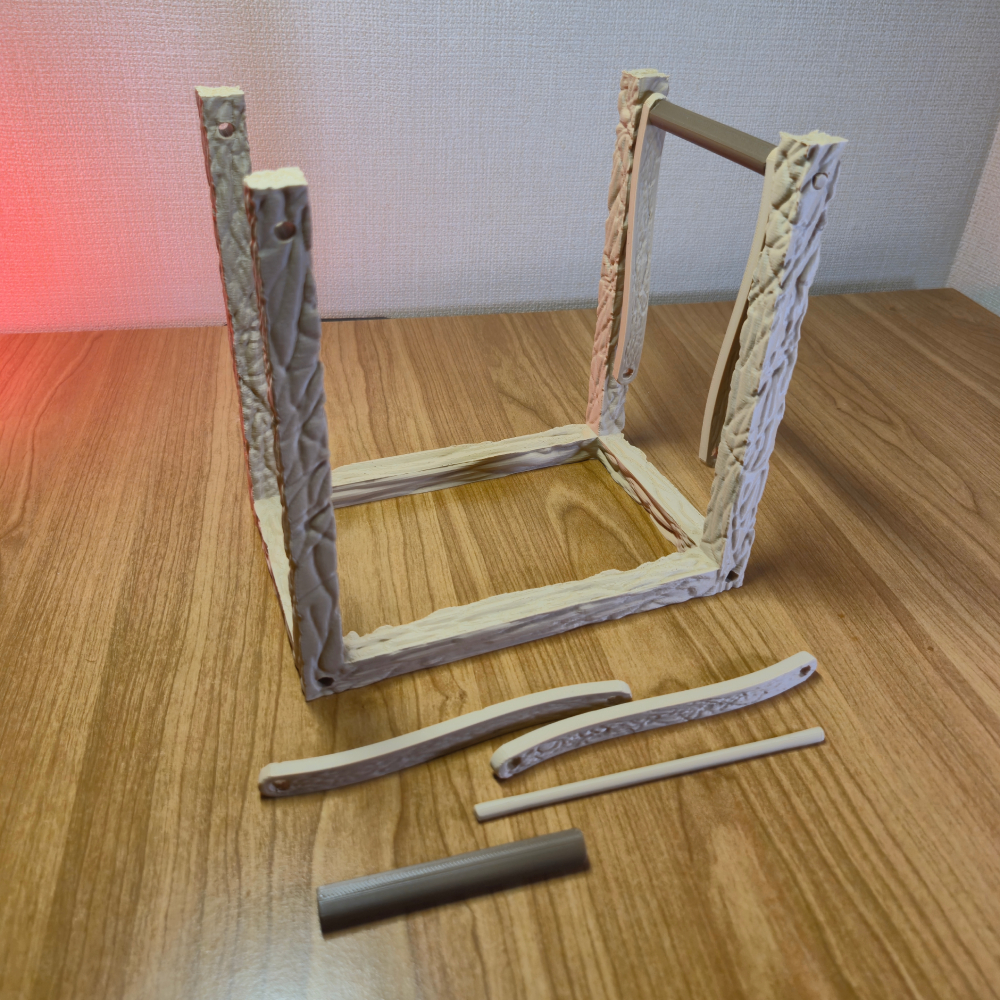
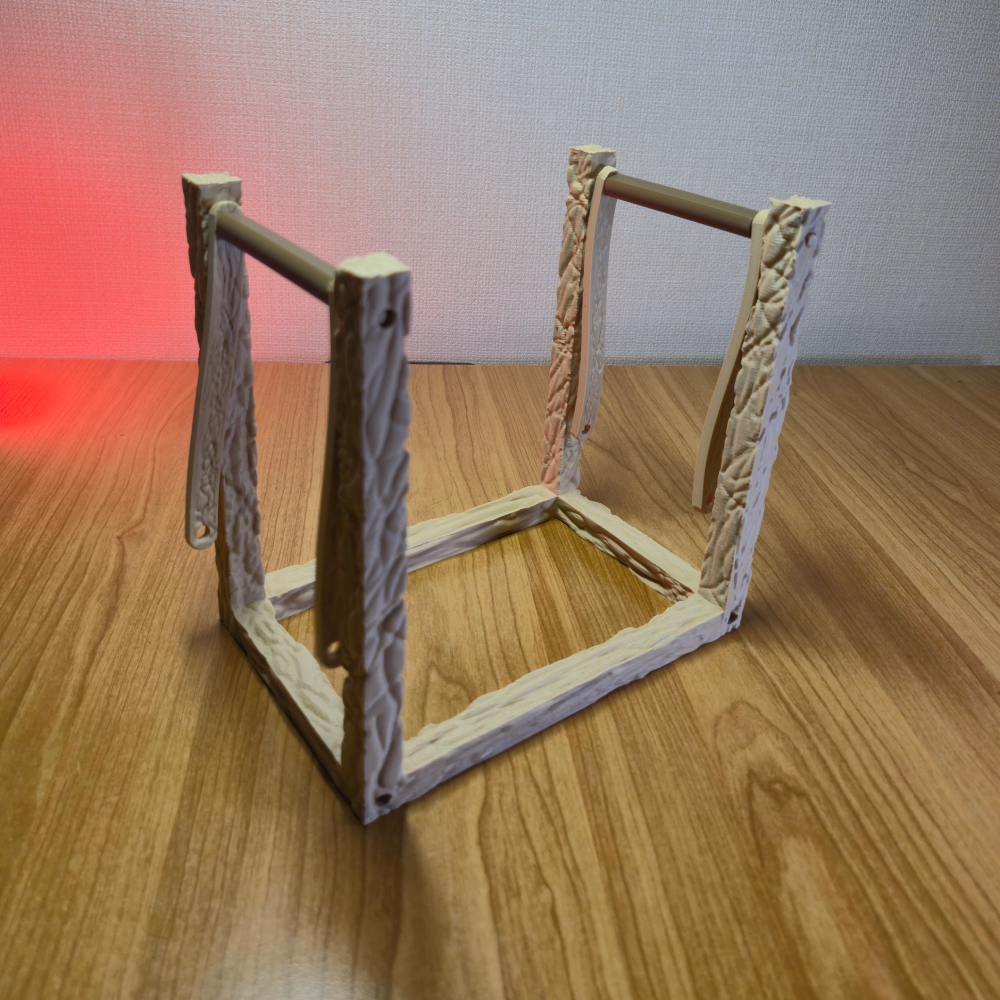
Once you have assembled the swing part, let’s move on to the wheels! For this next step you will need to take the following parts:
“Medieval_battering_ram_Philips_OneBlade_Wheel” - 2x
“Medieval_battering_ram_Philips_OneBlade_Wheel_connector” - 1x
This connector piece might look similar to top beam used previously, but if you put them next to each other, you will see that the wheel connector piece is longer.
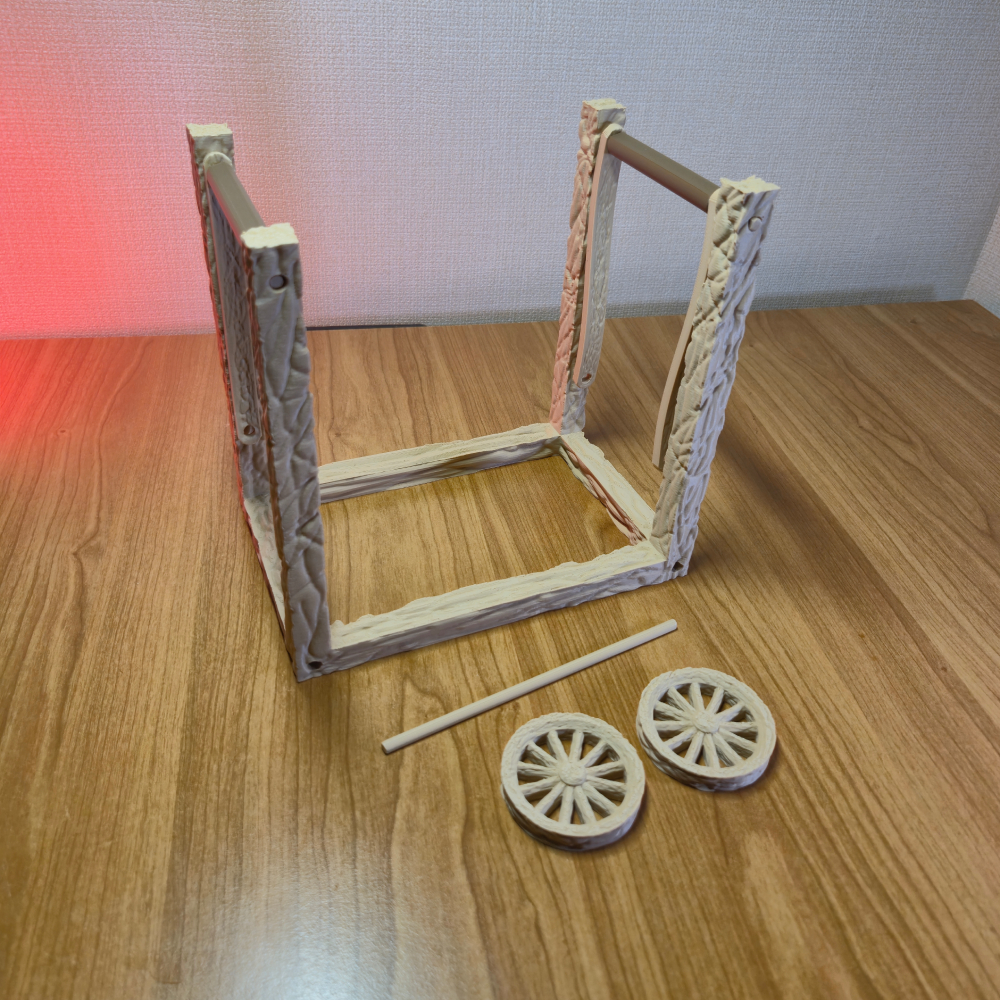
Push the connector piece in either of the wheels, then push the other side of the connector through the hole on the bottom part of the base piece. And finally push the other wheel on the “empty” end of the connector piece.
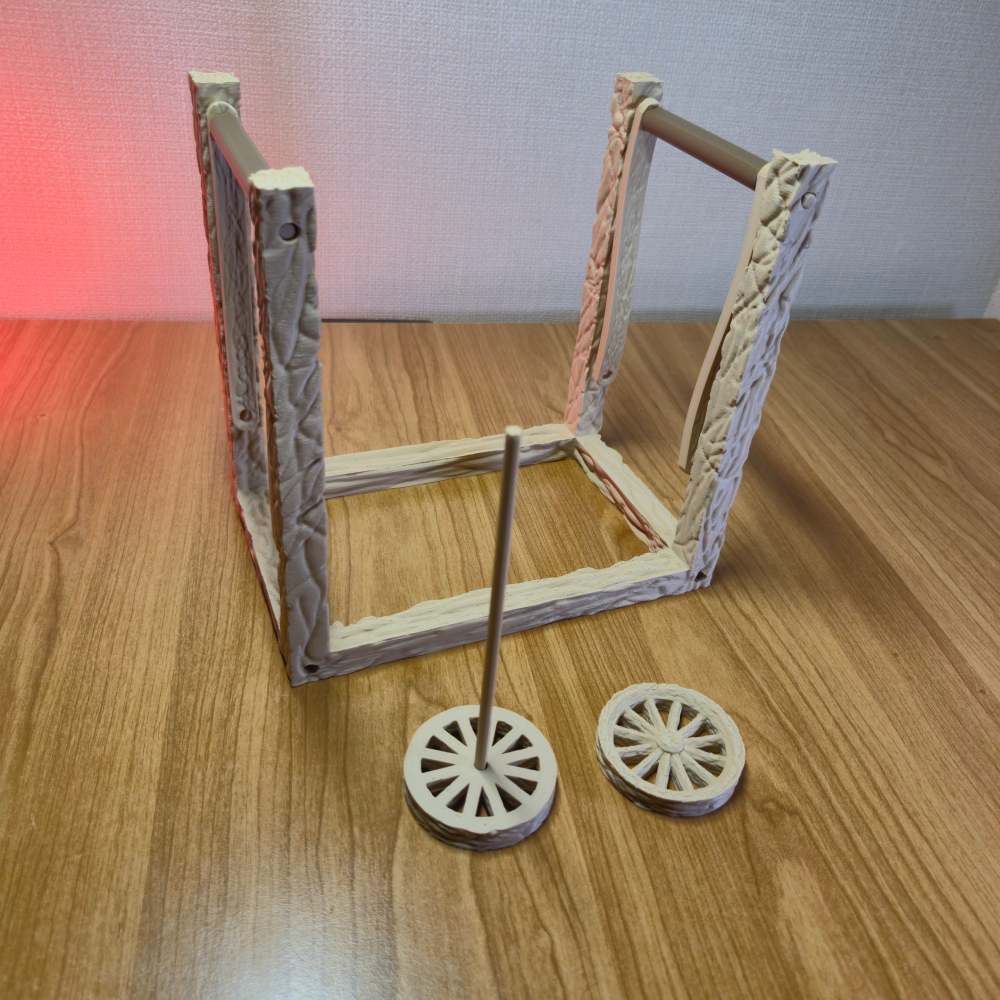
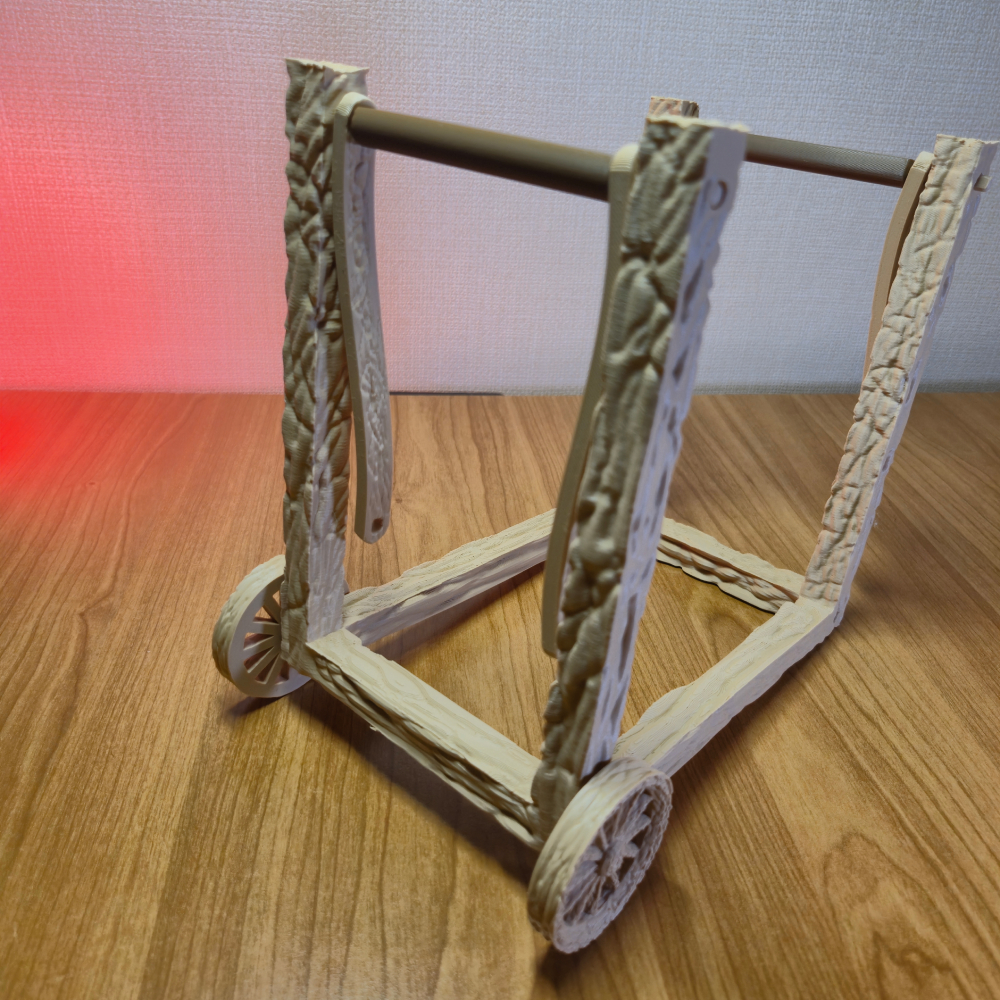
Now do the same thing for the remaining wheels and we are closing in to the finish line!
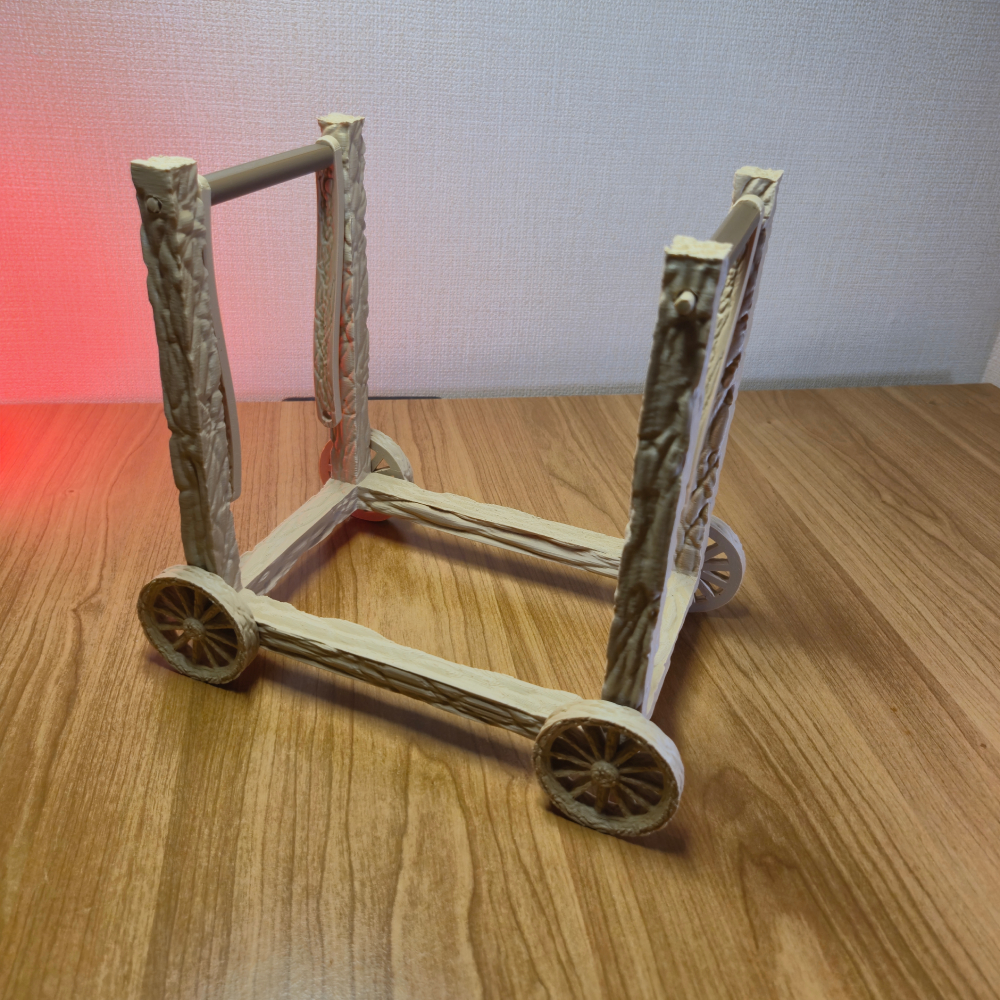
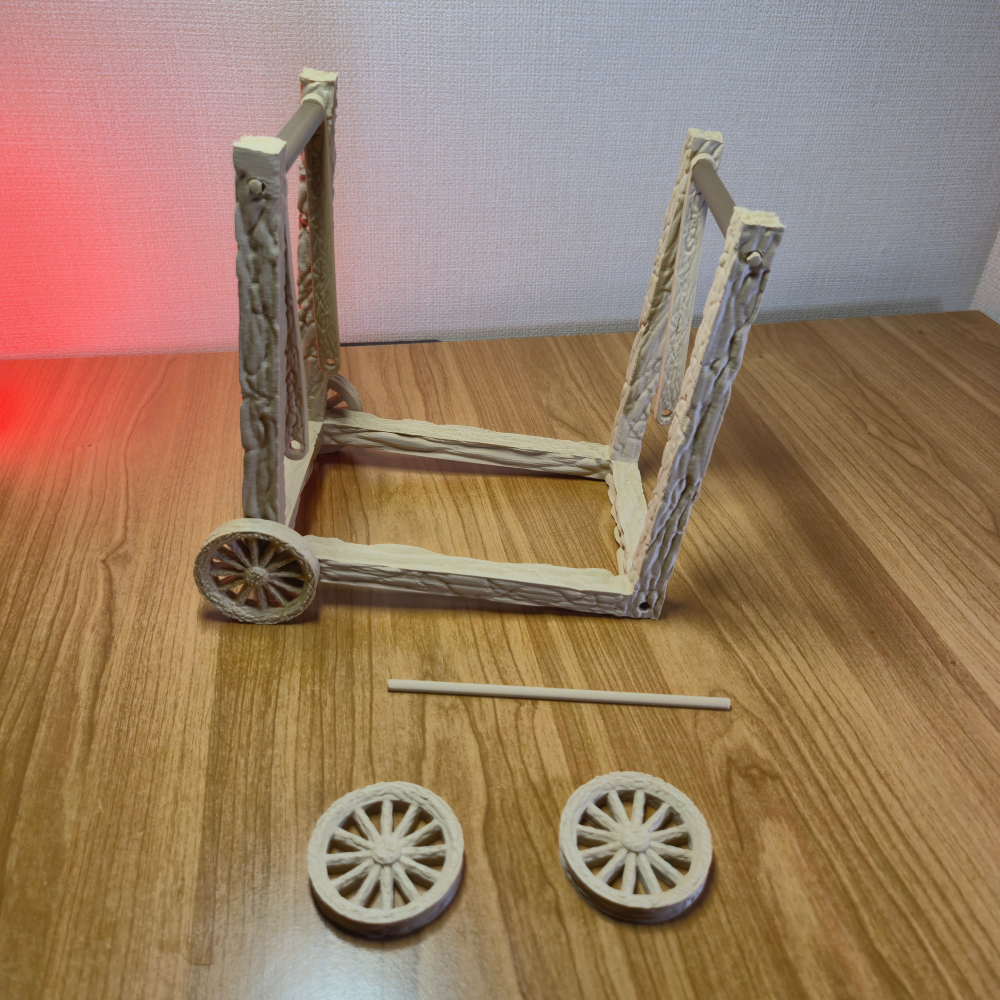
For the final part you now have a choice. If you are using building the Philips OneBlade version, you will need the following pieces:
“Medieval_battering_ram_Philips_OneBlade_holder_Mega_beam_and_swinf_connector” - 4x
“Medieval_battering_ram_Philips_OneBlade_holder_Mega_beam_bottom_part” - 1x
“Medieval_battering_ram_Philips_OneBlade_holder_Mega_beam_top_part” - 1x
And everything you built so far.
But if you want to build the battery dispenser version, you will have to switch “Medieval_battering_ram_Philips_OneBlade_holder_Mega_beam_bottom_part” with “Medieval_battering_ram_baterry_mega_beam”
Either way the remaining steps are the same.
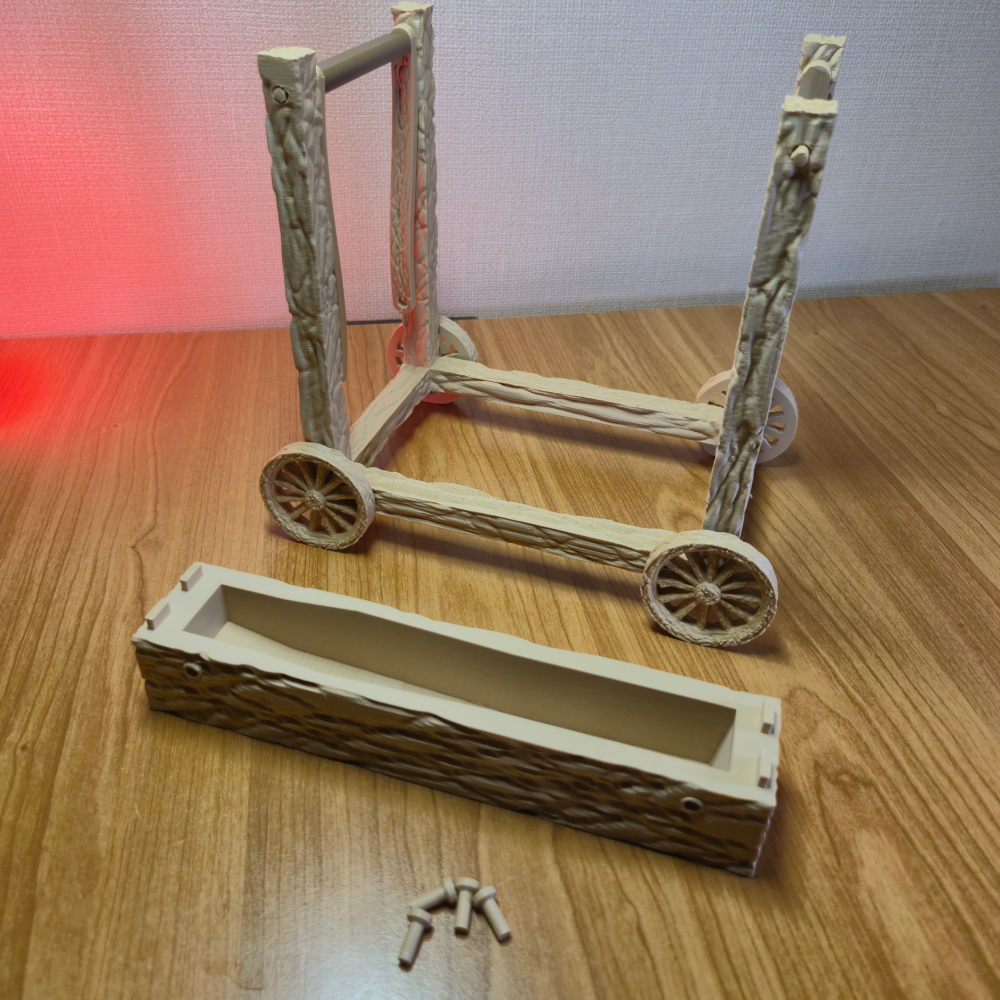
So now all you have to do is take the mega beam bottom of your choice and connect it to the 4 swing beams one by one. Once you are done with that, use the mega beam top part to close the storage solution and you are done with the design. I hope you enjoy it!