Chamber insulation for Qidi Q2 printer
Obliczymy ostateczną cenę na podstawie wybranego pliku. Sprawdzisz ją i zaakceptujesz przed płatnością.
Zapisane na tym urządzeniu.
Parts and instructions for wrapping printer in a foam sheet for heat insulation.
- Ocena
- 0 / 5
- Polubienia
- 7
- Pobrania
- 12
- Wydruki
- 0
- Wyświetlenia
- 724
- Oceny
- 0
Aktualizacja u źródła:
Informacje o modelu
- Źródło
- Printables
- Kategoria
- Accessories
- Licencja
- Creative Commons — Attribution — Share Alike
Background
!!!Important note!!! I have not tested the insulation with the printer's spool holder installed. Not sure if they are compatible.
I occasionally print PC and PA filaments at 60 °C chamber temperature on my Qidi Q2. The chamber heater has to work hard to maintain high chamber temperatures, which is quite wasteful over long prints. I therefore decided to install some extra heat insulation around the printer. With the insulation installed and printing PC with 110 °C bed temperature, the chamber heater is only turned on intermittently on low effect to maintain a 60 °C chamber temperature. In addition to saving energy, the insulation should reduce temperature gradients in the print chamber, but I have not investigated if it makes any substantial difference. The insulation is quick to install and remove thanks to the hook and catch straps. The handle on the front door can be replaced with a low profile version utilizing the "Handle knob" model, a 150 mm long piece of webbing, and the original screws.
The insulation consists of an EVA foam sleeping mat that is secured using webbing straps in combination with printed catches, hooks and strap locks. The strap lock is a copy of this design by HD_Creator. The other components are designed by me.
Onshape CAD project: https://cad.onshape.com/documents/053be6e260977aeea1e4f7fe/w/5c16fd5958b3f973de47c8ec/e/ba97a705f80ceedd8732c994
Bill of materials
1x EVA foam sleeping mat. 180x50x0.8 cm. A 120 cm long piece is wrapped around the printer. 40 cm extra length can be used as lid insulation. 0.5 and 1 cm thick mats should also work with the provided models, but I have only tested 0.8 cm. I got this mat for ~6 €.
1.5 m of 20 mm (3/4 inch) webbing strap. I bought 2 m for ~3 € in a sewing supplies store.
20x short self tapping screws (specifically DIN 7981 2.9x6.5 mm). The catch model could be modified to use other kinds screws.
Printed parts:
4x Catch (Front and Back pieces)
4x Strap lock
2x Hook
1x Handle knob (optional)
Printing instructions
Print parts in PETG or some other filament with decent temperature resistance. No supports required. Print "Strap lock" and "Hook" with 100% infill.
Assembly Instructions
Cut a 120x50 cm sheet from the mat.
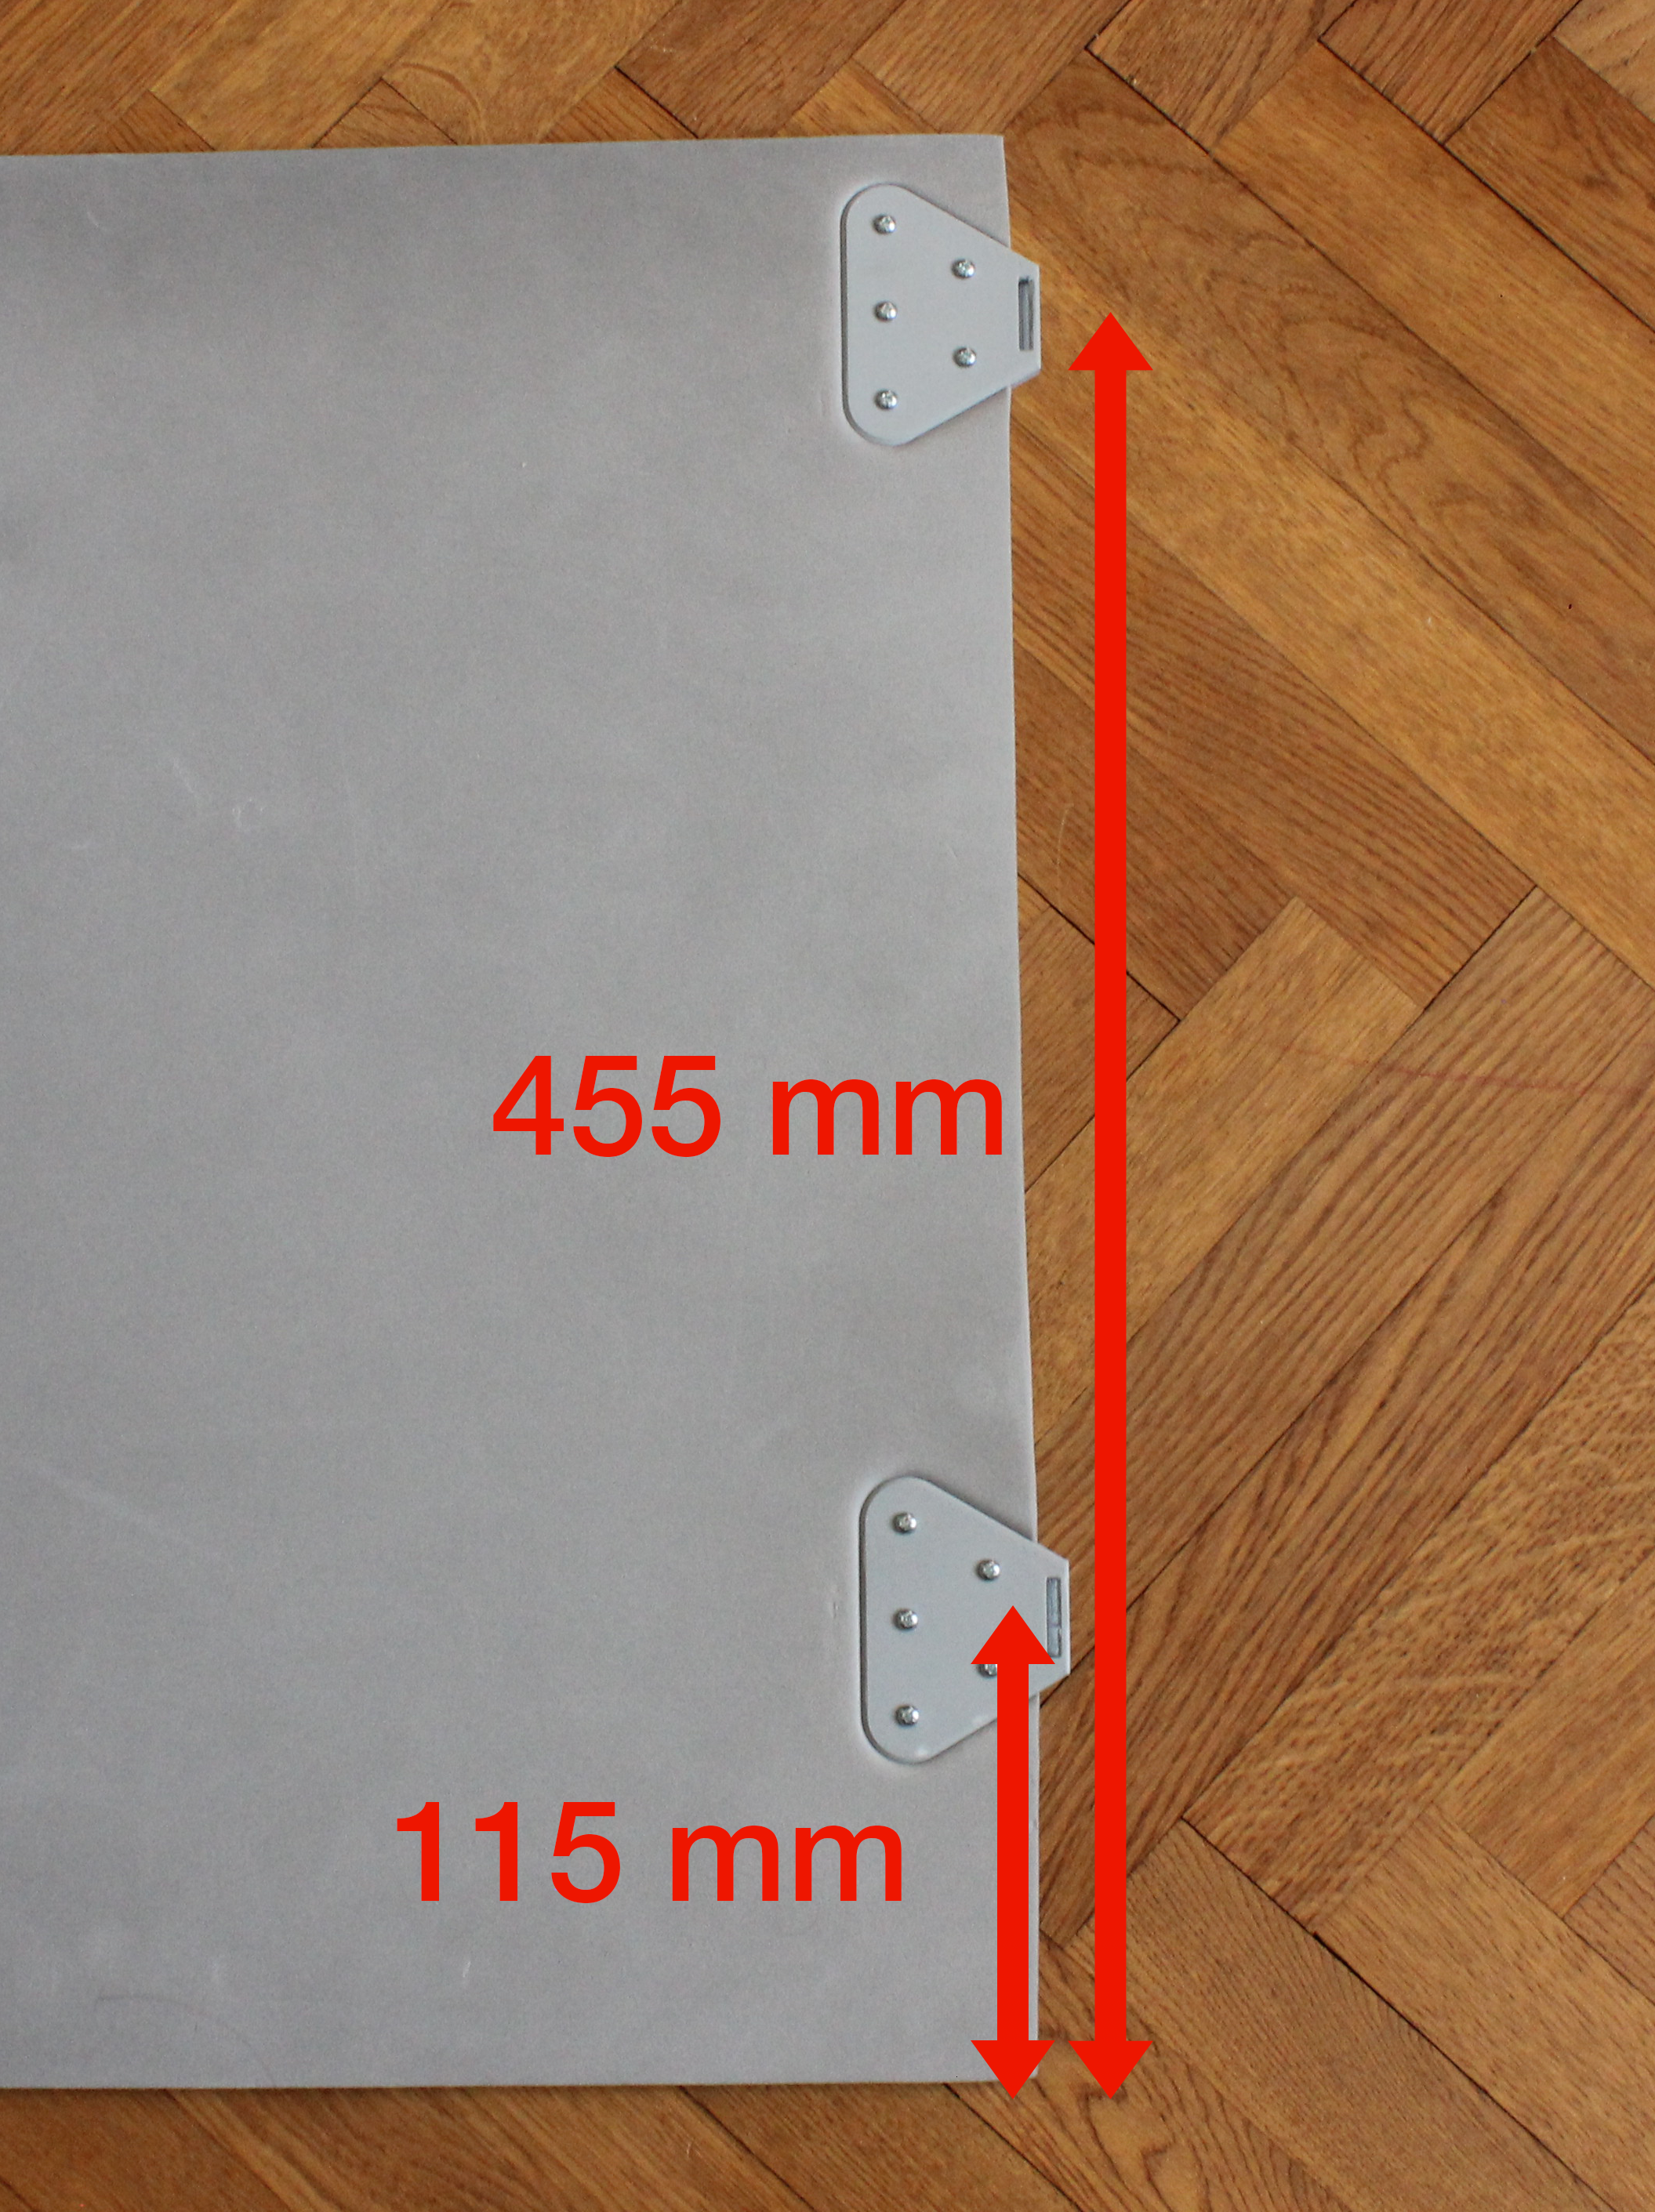
Place a "Catch - front" piece along the right edge of the sheet with its center 115 mm from the bottom edge and mark the hole positions. Do the same with the center of the catch 455 mm from the bottom edge and then repeat for the left edge of the sheet. (See image below)
Pierce holes in the sheet using a screwdriver and enlarge them to fit the pegs in the "Catch - back" piece.
Install the catches in the sheet by screwing them together through the holes in the sheet.
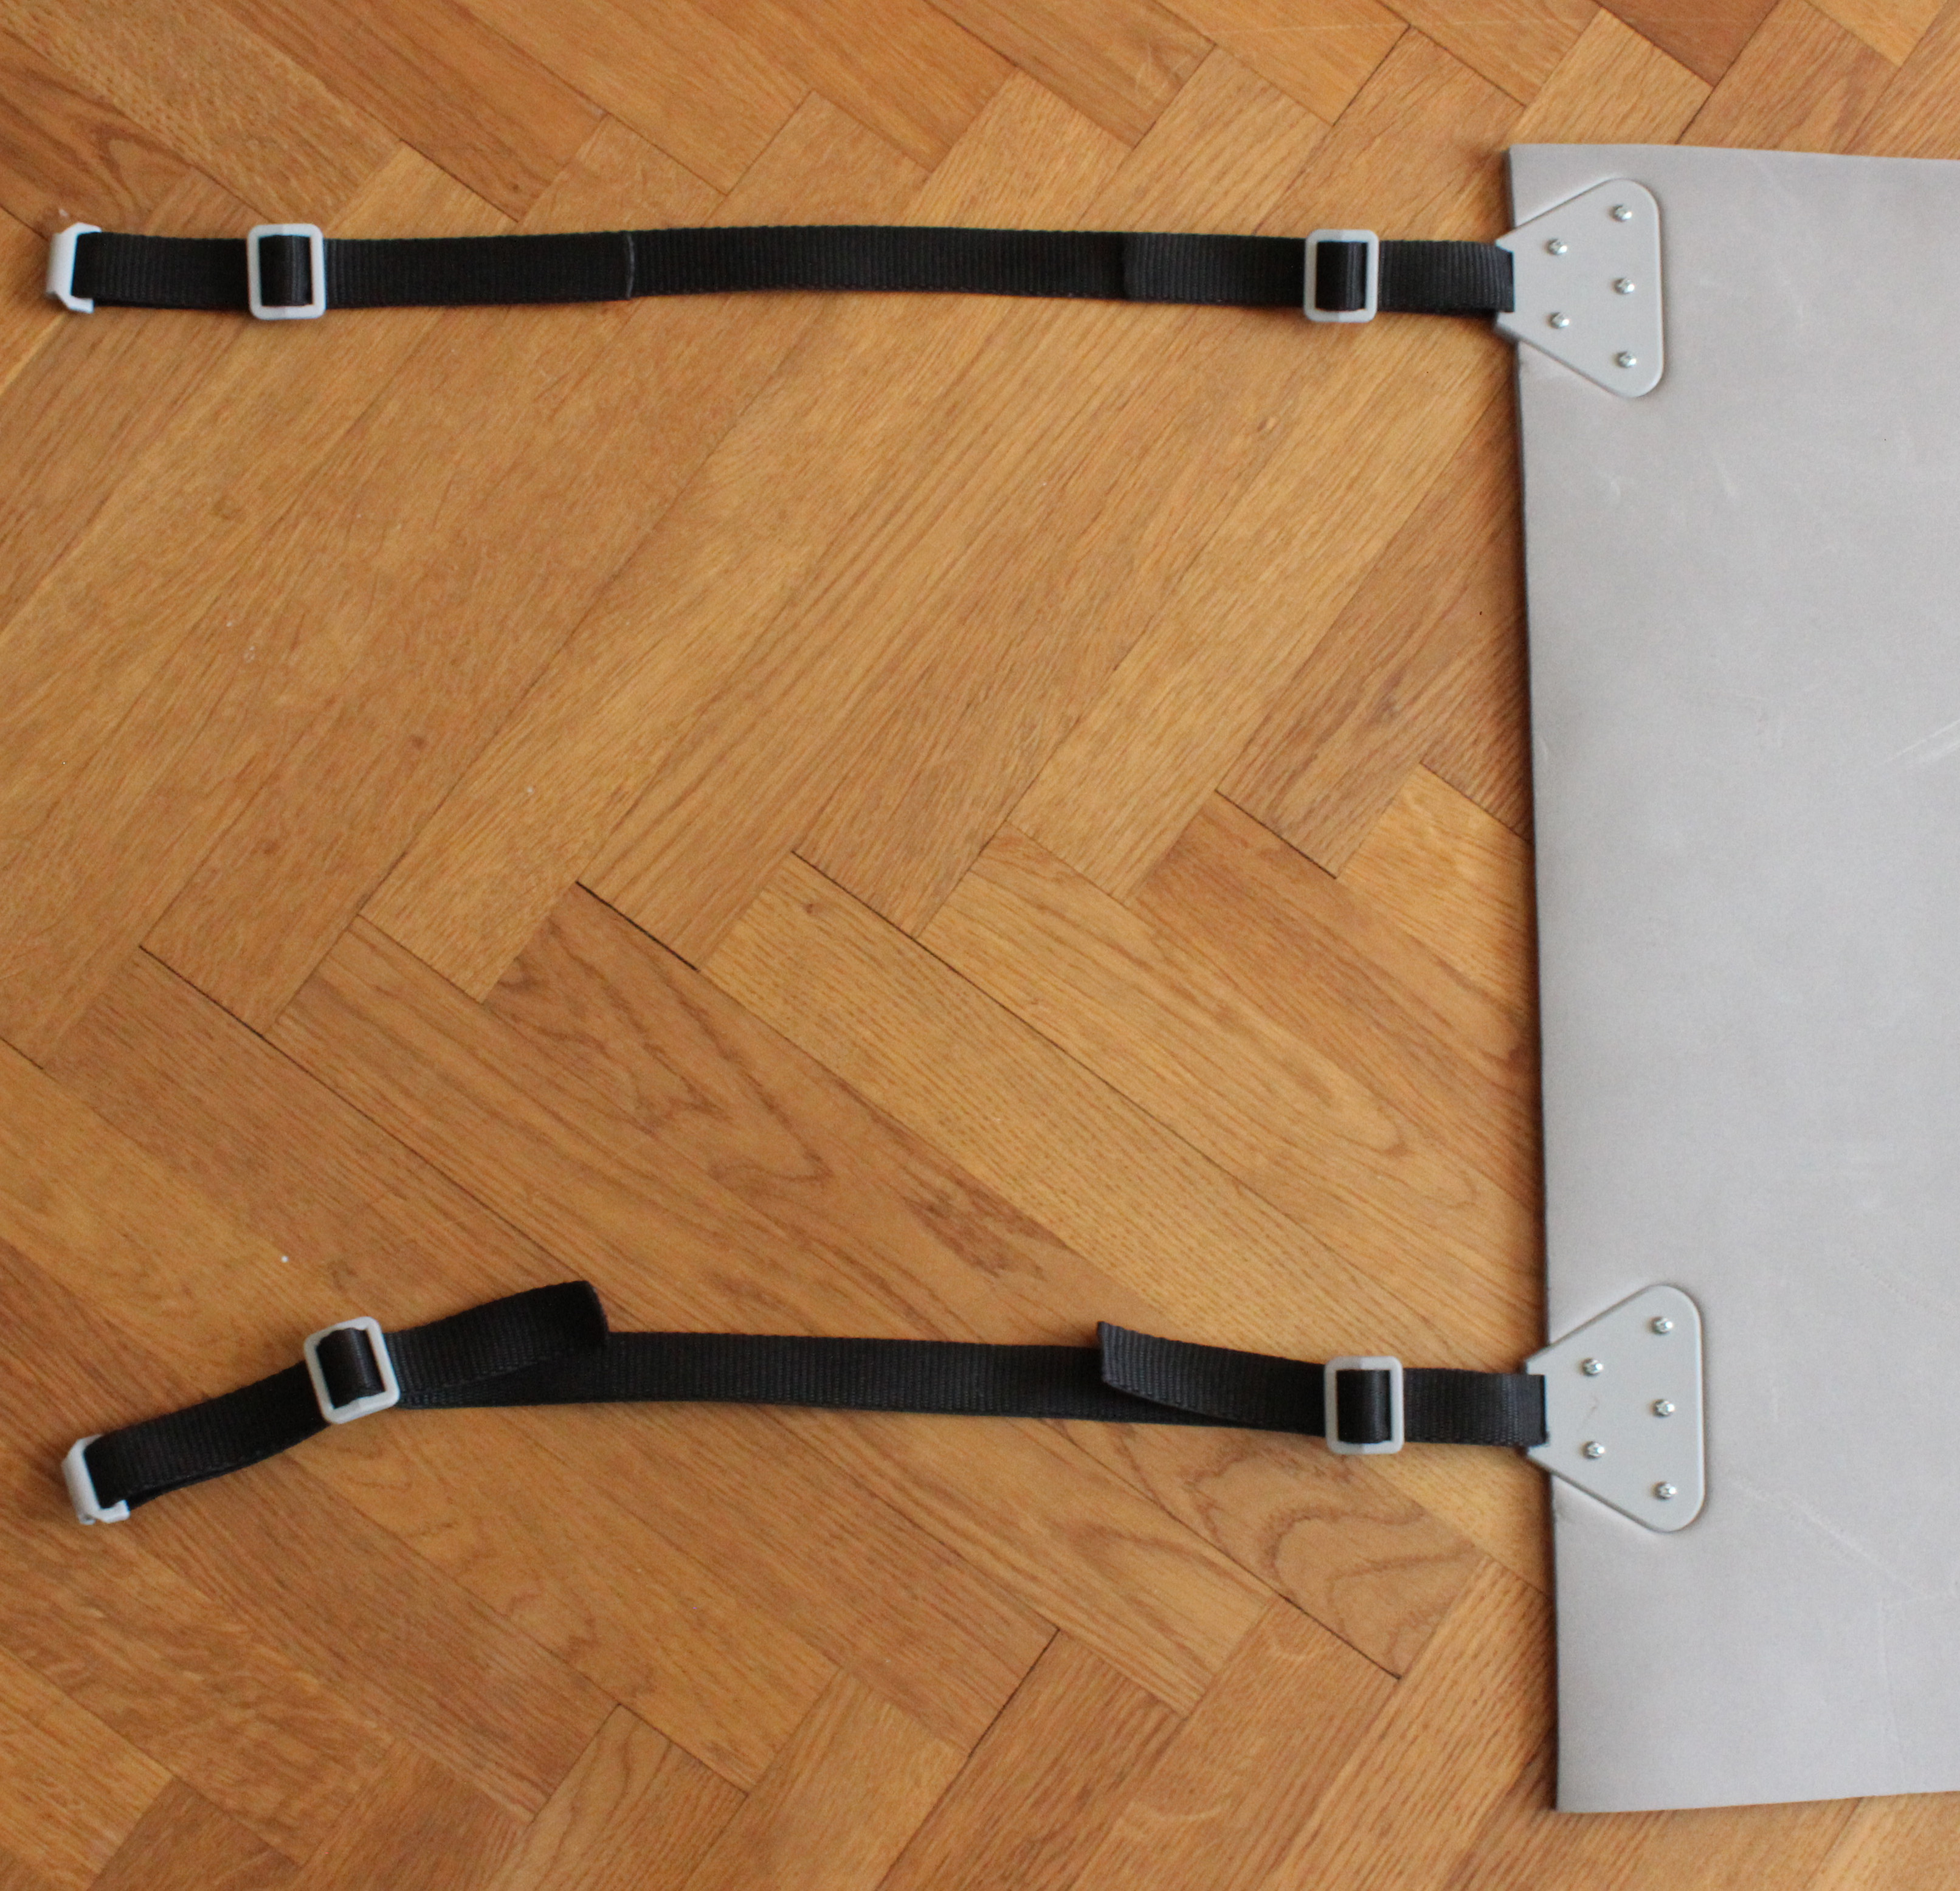
Cut two 65 cm lengths of webbing and melt the ends to prevent fraying. Loop one end of each around the catch and the other around the hook as shown below.
Adjust the strap lengths, install the insulation on your printer, and check that none of the vents in the back of the printer are covered by the straps.
Cut out a section of the sheet to make space for the printer's screen.