
MRC Laptop Stand
Obliczymy ostateczną cenę na podstawie wybranego pliku. Sprawdzisz ją i zaakceptujesz przed płatnością.
Zapisane na tym urządzeniu.
This adjustable laptop stand is 3D-printed with a modular design that combines sturdy support and ergonomic angle adjust
- Ocena
- 0 / 5
- Polubienia
- 13
- Pobrania
- 36
- Wydruki
- 0
- Wyświetlenia
- 160
- Oceny
- 0
Aktualizacja u źródła:
Informacje o modelu
- Źródło
- Printables
- Kategoria
- Accessories
- Licencja
- Creative Commons — Attribution
MRC Laptop Stand
1. Product Overview
This adjustable laptop stand is 3D-printed with a modular design that combines sturdy support and ergonomic angle adjustment. Whether for office work, studying, or entertainment, it effectively raises the height of your notebook or tablet to improve viewing angle, relieve neck and shoulder strain, and enhance bottom airflow and heat dissipation.
2. Print Settings
Filament: PLA or PETG
Layer Height: 0.2 mm
Infill: 10 – 15 %
3. Hardware List
No. Part Specification Qty
1 Heat-Set Insert Ø3 mm (inner) × 3 mm (height) × 4 mm (outer) 4
(Heat-Set Insert 3×3×4 mm)
2 M3 Cross-Head Screw Ø3 mm × 12 mm 4
4. Assembly Steps
Insert Installation
Place the printed part on a stable surface. Using a heat gun or soldering iron, slowly press the heat-set inserts (3×3×4 mm) into the pre-designed cavities until flush with the surface.
Support Arm Attachment
Align the tilt arm with the slot, insert the pin, and verify smooth movement.
Screw Fixing
Pass the M3 × 12 mm screws through the base of the support arm into the heat-set inserts. Tighten to firm but avoid over-torquing to prevent damage.
Function Check
Adjust the arm to various angles and ensure it locks securely with no wobble before placing your notebook or tablet on it.
Wish you smooth printing and enjoyable use!
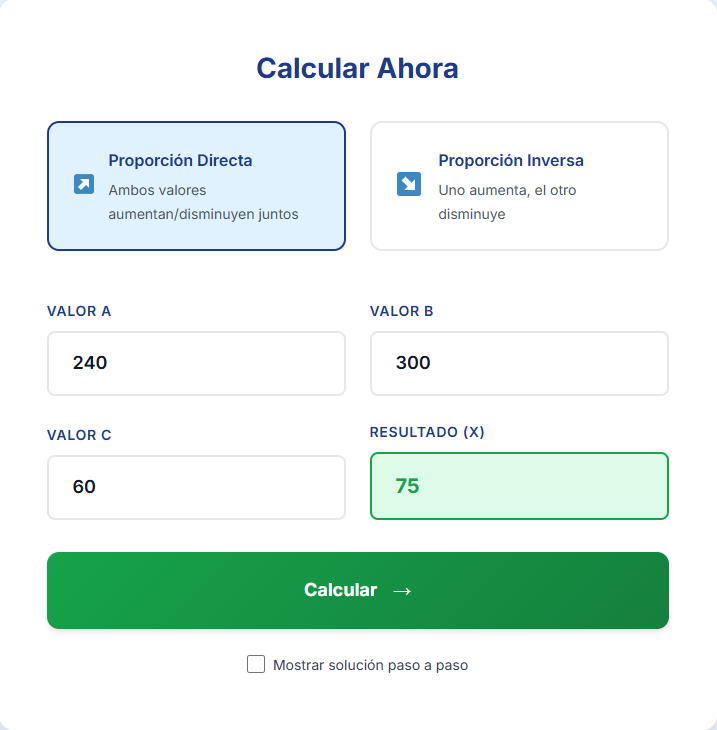
The design can also be scaled to fit different device sizes. If you need to resize the model, you can use a Rule of Three calculator to proportionally calculate the required dimensions while maintaining the correct design ratios.
How to calculate it
Measure the original dimension of the model (for example, the width of the stand).
Decide the new dimension you want.
Use the Rule of Three formula to calculate the new size for other parts.
Formula
New Dimension = (Desired Size × Original Related Dimension) ÷ Original Size
Example:
Original stand width = 240 mm
Desired stand width = 300 mm
Original height = 60 mm
Calculation:
(300 × 60) ÷ 240 = 75 mm
So the new height should be 75 mm to keep the stand proportional.
By applying this method to any dimension, you can safely scale the model while keeping the correct proportions and stability.