
Masters for Penrose Voronoi suncatcher using silicone-molded resin
Obliczymy ostateczną cenę na podstawie wybranego pliku. Sprawdzisz ją i zaakceptujesz przed płatnością.
Zapisane na tym urządzeniu.
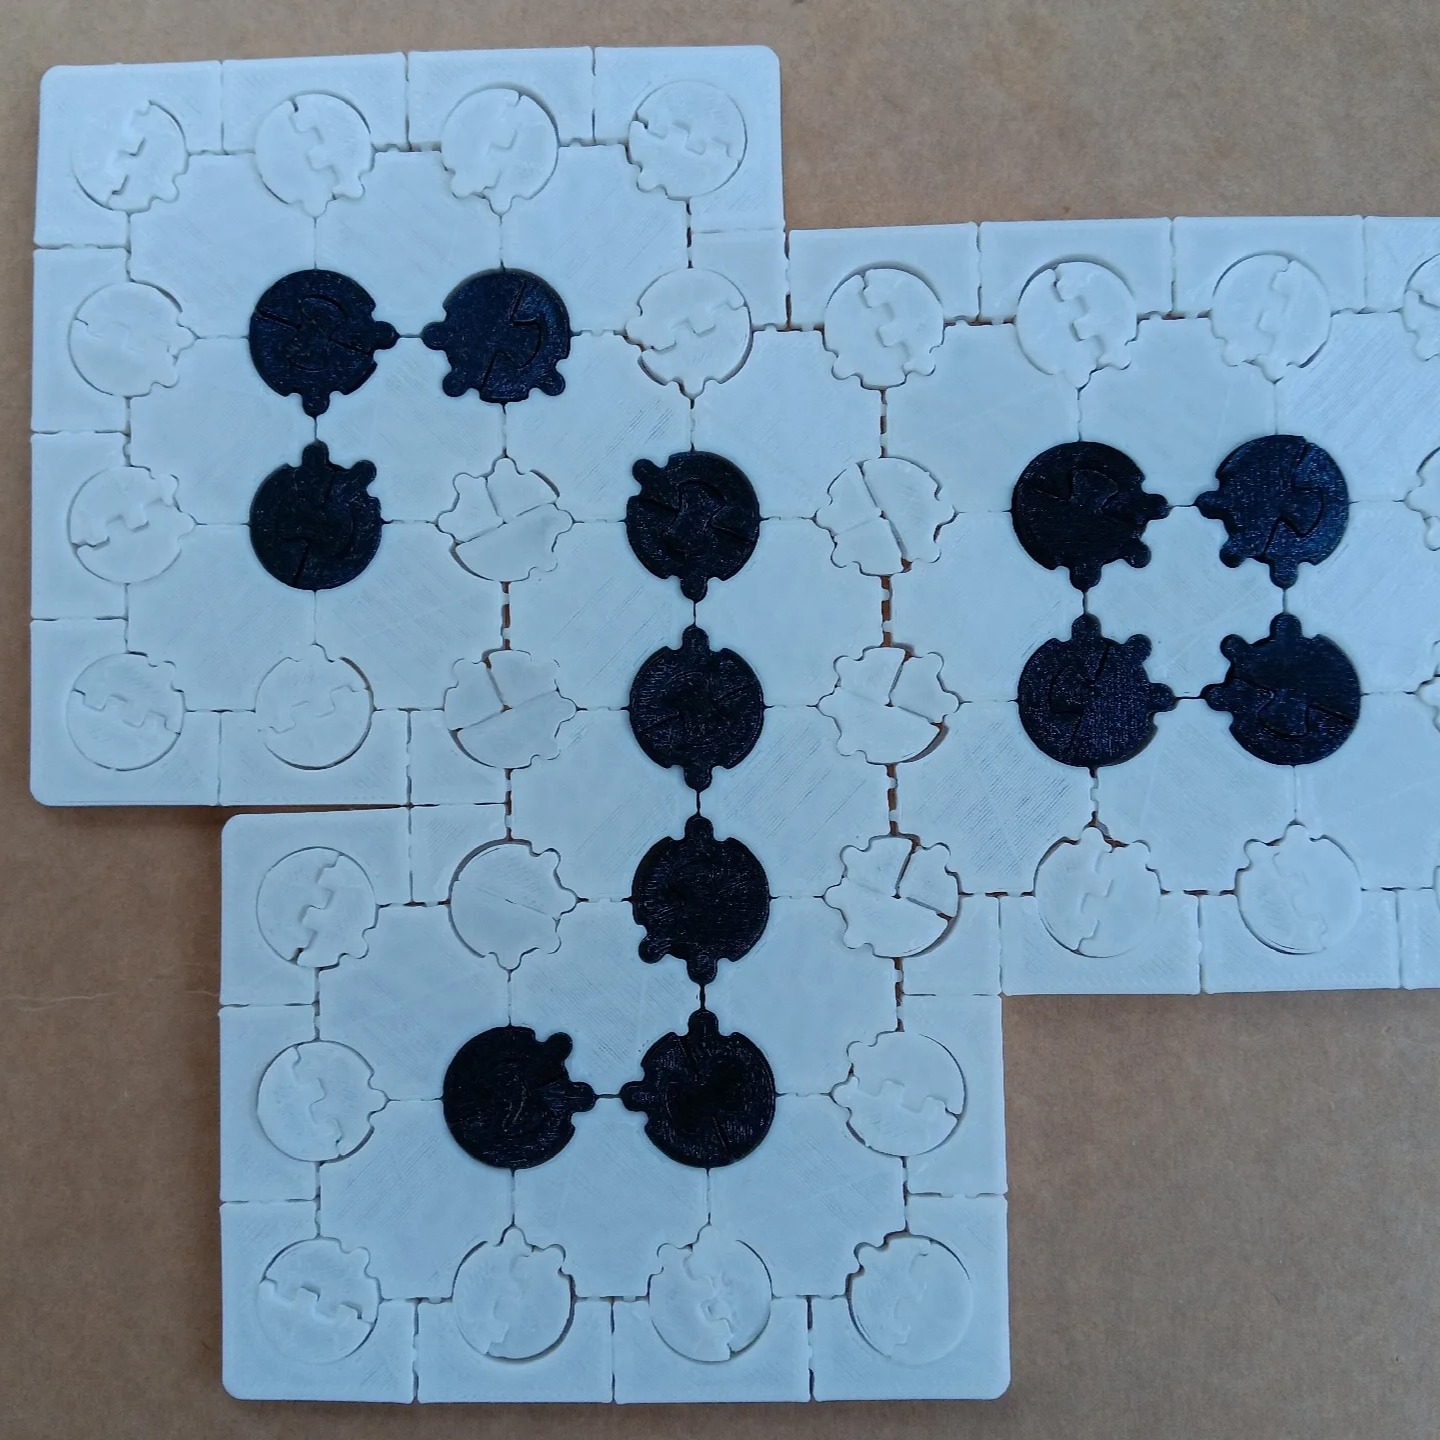
Models for filling with silicone to make molds for the Penrose Voronoi suncatcher shown in the cover photo.
- Ocena
- 0 / 5
- Polubienia
- 2
- Pobrania
- 5
- Wydruki
- 0
- Wyświetlenia
- 64
- Oceny
- 0
Aktualizacja u źródła:
Informacje o modelu
- Źródło
- Printables
- Kategoria
- Other Art & Designs
- Licencja
- Creative Commons — Attribution — Share Alike
This is like my triskelion in that the 3D print is not the final result but the first step in the process. I have streamlined this into the easiest resin project I could come up with. The most complex part, assembling the tesserae, is done dry with cured pieces before pouring more resin.
There are many variations that I carried out unintentionally on the first couple of suncatchers, which came out chunky and look handcrafted. Yours will look more precise if you follow these steps. You can experiment with other looks if you choose.
The design is one I have used in other printables. It's a tessellation based on the Voronoi diagram of a Penrose rhomb tiling. Without going into too much explanation, here is a continuation of the suncatcher pattern over a larger patch, but my goal here is primarily decorative rather than mathematical.

Supplies (other than 3D printer)
These are shown in a photo and are easy to find online or in a craft store like Michael's.
Platinum cure silicone rubber
Epoxy resin
Resin dyes in various colors.
Steps
First, print the three 3D mold masters at the given scale. I don't recommend changing the size without redesigning the fittings, and these already take time and several meters each of filament to print.
Fill each master with silicone to the top, making sure you fill above the shapes. The top of the fill is the bottom of the mold.
Let the molds cure (about 6 hours depending on the silicone) and remove it carefully. It may help to go around the edge with a thin screwdriver or the tip of a nail file. Silicone is strong and won't tear if you're gentle.
Optional: Pour a small amount of silicone only in the tesserae molds, slosh it around, and pour it out. This will coat the sides and pool at the bottom to smooth of the 3D print texture. Be careful because it will reduce the size and change the fit of the piece. It's important that you cure it again before using (another 6 hours).
Make the tesserae:
Prepare epoxy resin for the tesserae. Dye it in various colors. Estimate how much you need for each of the 56 pieces but each is less than 0.5ml (i.e. less than 1 cm² in area and 5mm depth).
I recommend making five sets of matching colors for each shape aside from the center pentagon, but that's up to you. They are arranged in rows of 5.
Fill each mold with colored resin carefully with a dropper or small cup such as a 30ml used for medicine.
Let the tesserae cure completely (about 12 hours or according to your resin instructions).
Assemble the suncatcher:
Place the tesserae in the assembly mold. These will fit snugly and hold in position, but pull out easily. Note that the flattened hexagons are not rotationally symmetric and the short side must be placed correctly.
Prepare epoxy resin for the top coating.
Pour clear resin carefully over the assembly so it just meets the rim of the assembly mold. The tesserae will not float but may be pushed up by resin entering the air gap below. If that happens, push it down gently with a popsicle stick or toothpick. Try not to tamper too much. You should expect them to hold.
Alternative: If you want a faceted top, you can pour thicker tesserae or less clear resin. You'll need to experiment to get the look you want.
Let the clear resin cure completely (about 12 hours) and remove the suncatcher from the mold. It is now complete with a clear coated top and a bottom of embedded colored tesserae.
Optional: You may also put a clear coat on the bottom to smooth it out and hide the 3D print texture. Take care not to let resin pool around the bottom.
Tip: The middle of the assembly mold may buckle up after filling with tesserae. To keep it flat, you can apply a light layer of petroleum jelly to the bottom of the printed master, and place the silicone on top of it. This is enough to hold it flat. It's not necessary, but may improve the result.
I have included a number of photos of the process including silicon and resin casting, as well as two previous suncatchers that I made in a slightly different way. I made the one in the cover photo with the above steps and did not coat the bottom.