
Modified Buddy3D lid with improved camera angle
Obliczymy ostateczną cenę na podstawie wybranego pliku. Sprawdzisz ją i zaakceptujesz przed płatnością.
Zapisane na tym urządzeniu.

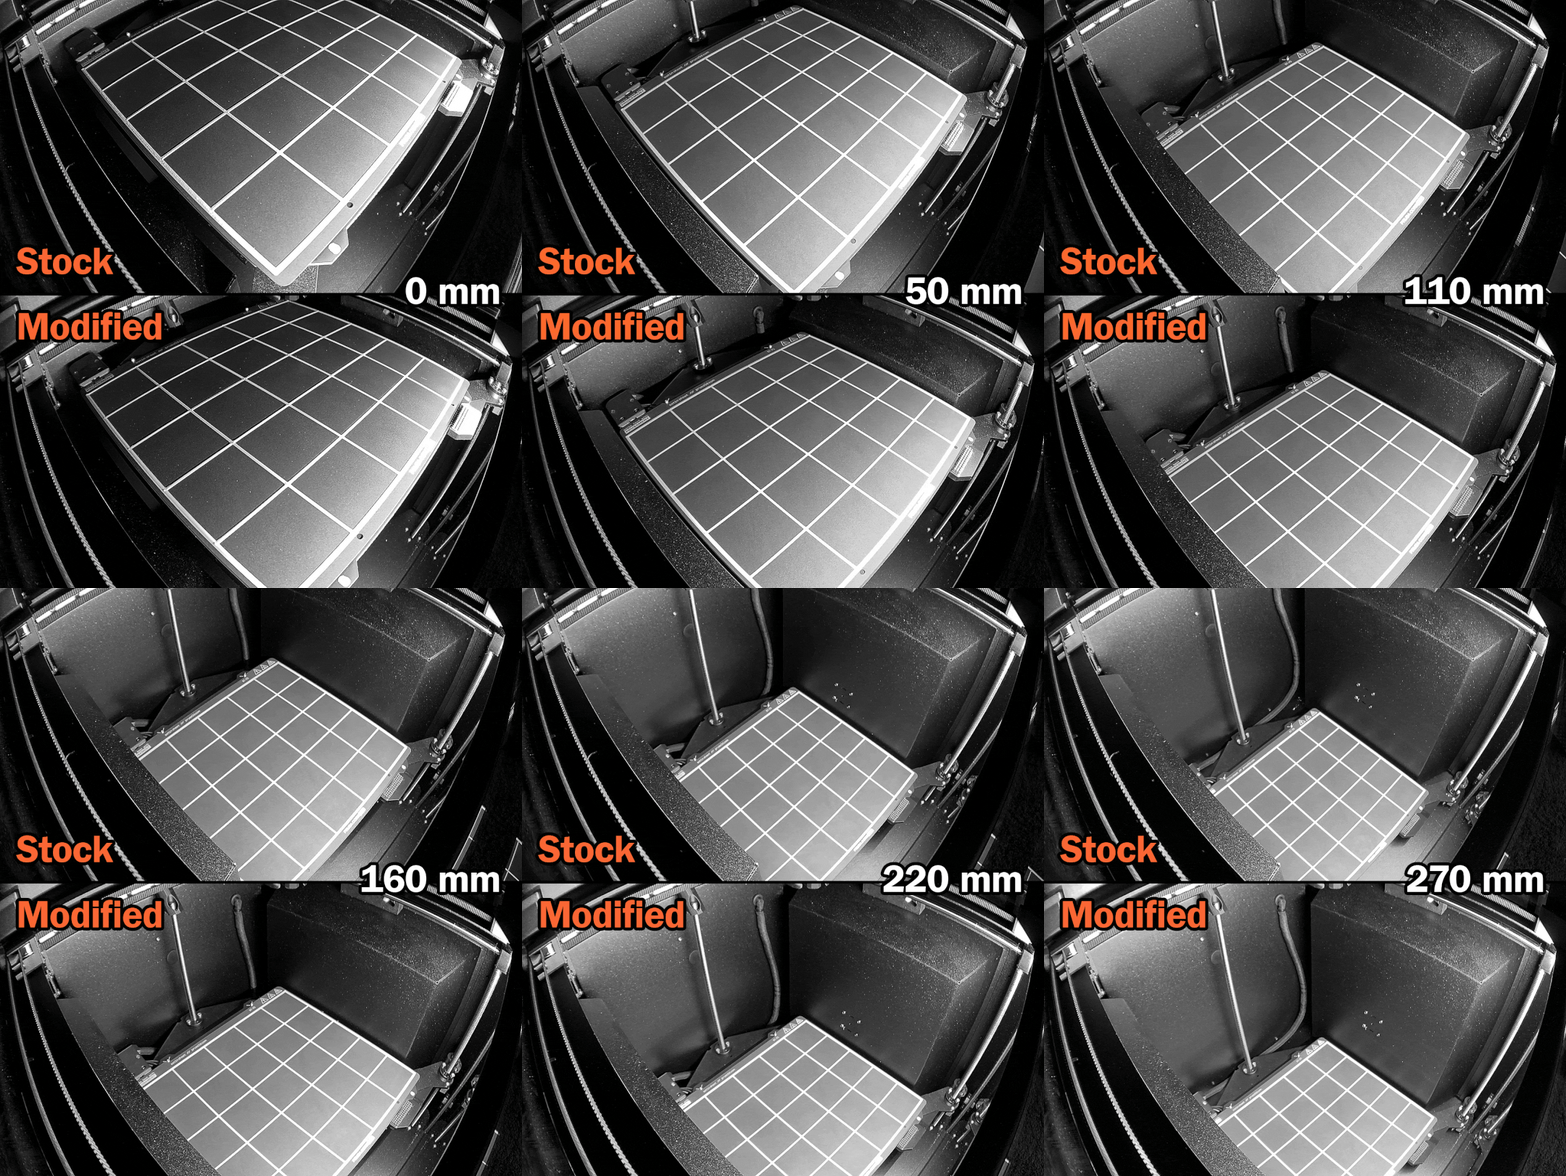
A modified lid for the Buddy3D camera to improve the angle for better view of the bed at z=0. Uses 8 mm magnets.
- Ocena
- 0 / 5
- Polubienia
- 15
- Pobrania
- 40
- Wydruki
- 0
- Wyświetlenia
- 397
- Oceny
- 0
Aktualizacja u źródła:
Informacje o modelu
- Źródło
- Printables
- Kategoria
- Prusa Parts & Upgrades
- Licencja
- GNU General Public License v2.0
The stock Buddy3D camera for the CORE One has an angle that cuts off part of the print bed at z=0, but has a better view of the build area at higher z levels. I prefer the opposite, since most of the parts I print are not very tall. So I made this modified lid model to adjust the camera angle to fully cover the entire print bed at z=0.
Print details:
It's highly recommended to print with heat-resistant material if you use the heated chamber. Otherwise PLA should work. Print flat on the bed, no supports needed.
Hardware required:
8×2 or 8×1.6 mm magnets (4×)
Installation:
Disconnect the USB-C cable and remove the camera from the printer.
Remove the two M2 screws on the back and remove the original lid. No need to remove the original rectangle magnets.
Insert the four 8×2 or 8×1.6 mm magnets in the slots. They should be press-fit, but use a drop of CA glue if they are loose.
Install the new lid and tighten the M2 screws.
Place the camera in the same position as before and connect the USB-C cable.