
Modular Penrose cobblestone system for silicone molds and other applications
Obliczymy ostateczną cenę na podstawie wybranego pliku. Sprawdzisz ją i zaakceptujesz przed płatnością.
Zapisane na tym urządzeniu.
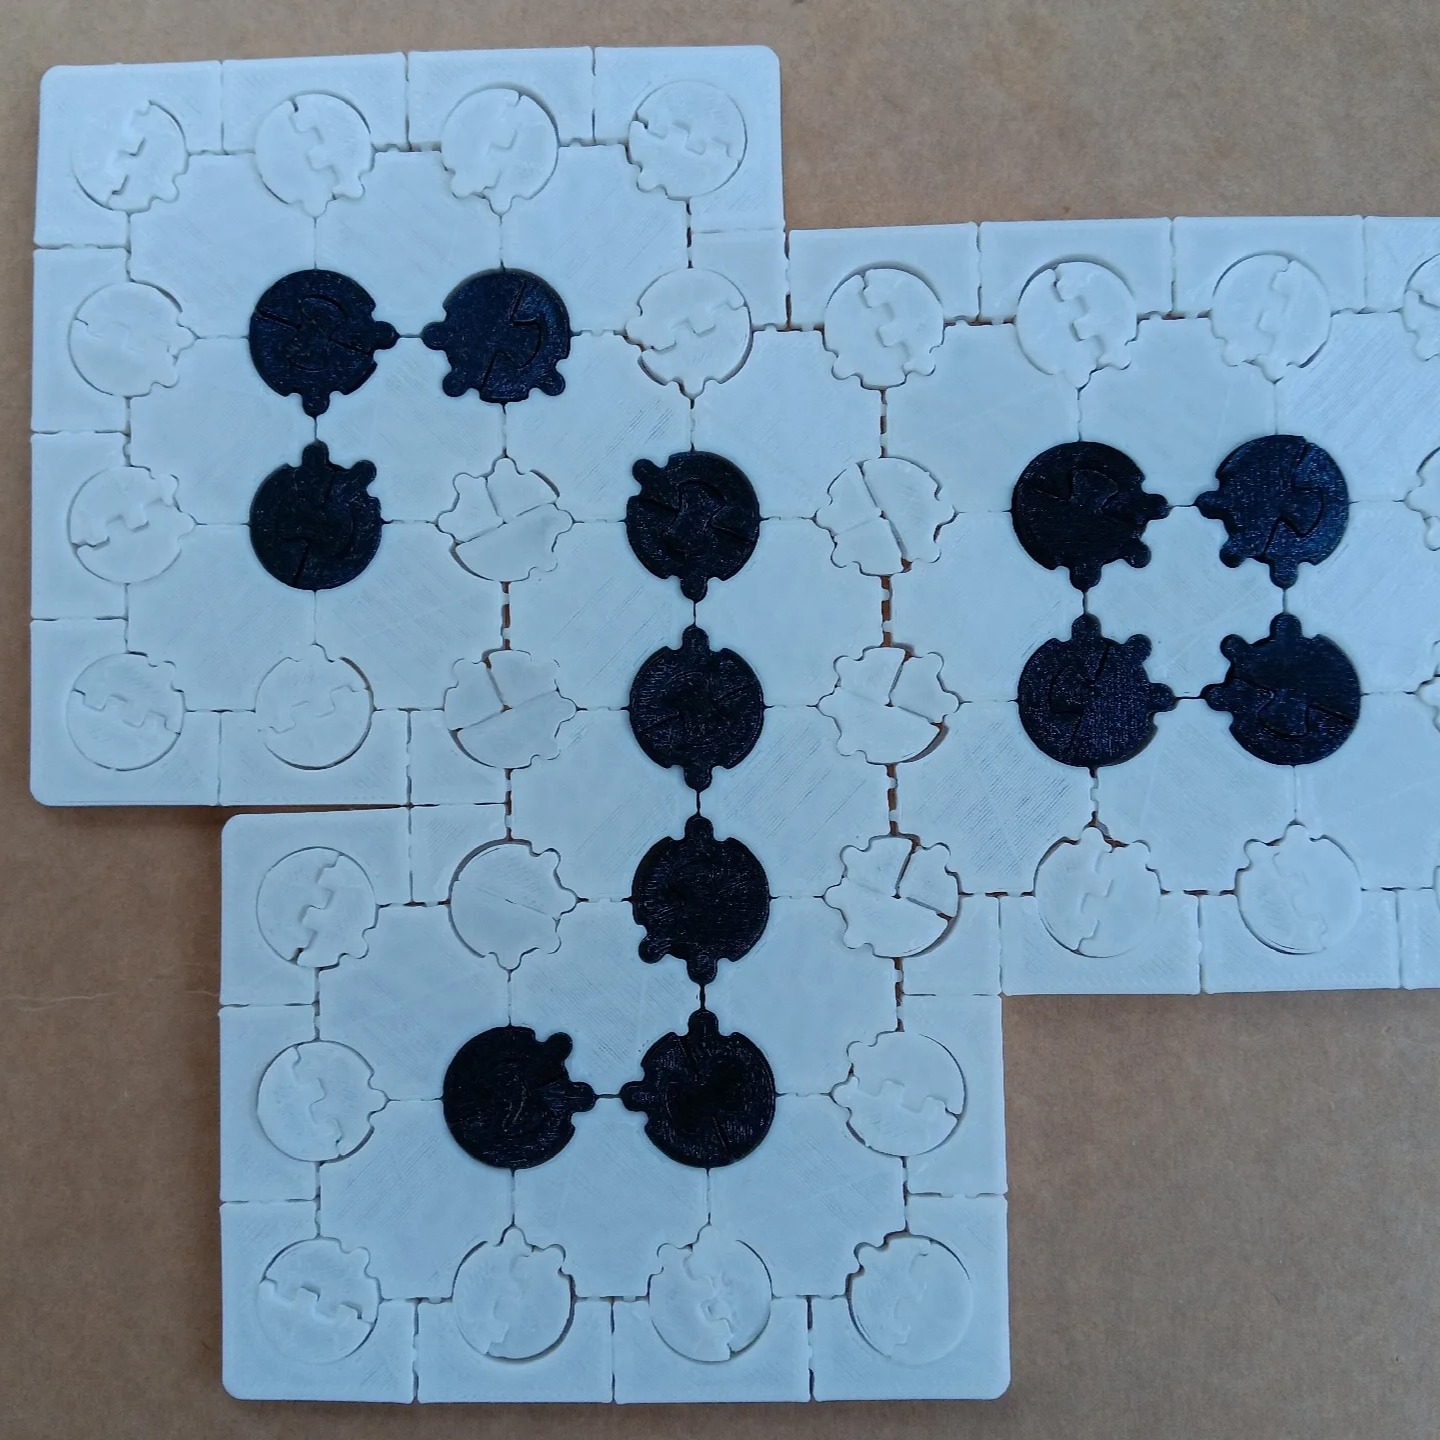
A set of tiles that fit together like a jigsaw puzzle into frames that can be filled with silicone to make resin molds.
- Ocena
- 0 / 5
- Polubienia
- 1
- Pobrania
- 2
- Wydruki
- 0
- Wyświetlenia
- 57
- Oceny
- 0
Aktualizacja u źródła:
Informacje o modelu
- Źródło
- Printables
- Kategoria
- Math
- Licencja
- Creative Commons — Attribution — Share Alike
Note: I have put the original models up on Tinkercad where they can be edited.
Overview
This is a more ambitious follow-up to my Penrose Voronoi suncatcher. Instead of providing just one design, it is a set of pieces that fit together like a jigsaw puzzle, including surrounding walls so it can be filled with silicone. As a result, it's leaky, and I'll say more about that below. First a general explanation. A Penrose rhomb tiling is one of an infinite set of aperiodic planar tessellations by fat and skinny rhombuses. Using their vertices as points in a planar point set, you can construct a Voronoi diagram like the one below, giving a layout like a stone patio.

The Voronoi cells have a more natural look in my opinion, and don't scream math or geometry the way the Penrose tiling does.
The tiles
While the individual cells can be assembled (see this Printable), they can also be assigned in clusters to larger tiles for ease of assembly. This can go on indefinitely because Penrose tilings are defined in terms of inflation/deflation rules. I chose this kite and dart shape as the base tiles. (Penrose tilings can be switched between rhombs and kite/darts using a local transformation.) This picture will help you see how to fit the tiles together.

When the tiles are placed like this, the adjacent corners will leave gaps shaped like regular pentagons. There's no way to assign a pentagon to a single tile and preserve the five-fold symmetric corners. instead these are given as separate one-cell pieces.
The aim of all this is to provide a frame for pouring silicone molds, so there are pieces that fit around the whole design as walls and match up with either long sides of the kite and dart or two successive short sides on the same tile. There are flat pieces for extending any assembly out to where you can build walls.
How to use with silicone
Start with these supplies or similar, which should be easy to find online or at a craft store. Two-part silicone rubber, two-part epoxy resin, optionally resin dye of different colors.

It is not hard to print a single frame to fill with silicone, but piecewise frames present their own challenge. They are always going to leak, though this is self-limiting with enough silicone. There may also be ribbons in the mold where the silicone entered an unintended gap.
I dealt with the ribbon problem by adding a lip around the top of the tiles to constrain the silicone. Even if it leaks through, the ribbon will usually be left inside the crack, and any remaining can be peeled off with some care at the perforation.
There are two ways I came up with to deal with both problems. Either
Seal the mold first with a washable material like Elmer's school glue.
Use the silicone itself as a seal.
You can experiment, but the second approach worked well and I used it for this example.

If you pour all the silicone in at once, you will get a large spill and waste some silicone, but the mold will still work. You may also get ribbons between the tiles that need to be trimmed.
Alternatively, if you first pour a small amount of silicone, you can coat the frame. Either brush it on or simply tip the frame using gravity. Make sure some settles in the gaps between tiles and also fills the gaps between walls. You are not really going for a perfect seal, just enough of a dam to limit the spill.
Let the coated frame cure for a few hours. As soon as it's tacky, it is ready. Now pour the rest of the silicone. As the picture shows, you may have some spills, but most of the silicone will be used in the mold.
Applications
When done, you can use the mold to make a colorful suncatcher as shown below. Note that this was an earlier attempt and uses a different set of walls. I have provided frames for molding colored tesserae. After assembling, pour clear resin to hold them together.

Alternatively, you can make a clear cast. I smoothed out this one by applying a second coating of silicone in the mold and curing again.

Here's how it looks in the window.

Here's a final example that I made after adding texture, color, and additional resin/eggshell mixture to simulate mortar.
