
ExoGuitar - Bridge - Rocker
Obliczymy ostateczną cenę na podstawie wybranego pliku. Sprawdzisz ją i zaakceptujesz przed płatnością.
Zapisane na tym urządzeniu.

3D printed guitar part — full catalog, build planner, and assembly guides at https://exoguitar.com
- Ocena
- 0 / 5
- Polubienia
- 1
- Pobrania
- 6
- Wydruki
- 1
- Wyświetlenia
- 37
- Oceny
- 0
Aktualizacja u źródła:
Informacje o modelu
- Źródło
- Printables
- Kategoria
- Music
- Licencja
- Creative Commons — Attribution — Noncommercial — Share Alike
Part of the ExoGuitar project — full catalog, build planner, and assembly guides at https://exoguitar.com
Plan Your Build & Get Hardware
ExoGuitar can be confusing! Head over to our build planner to plan your entire build - it'll walk you through every available part and handle compatibility along the way, and it covers all ExoGuitar parts. It's also the best way to get hardware, since it lets you buy everything for a full build in one go, not just this part.
You can find this specific part, ExoGuitar - Bridge - Rocker, on our site.
Required Part: String Adjustment Assembly
String Adjustment Assembly is required to build this part. Build it first — its steps are below and its hardware is included in the list at the end. Full details, photos and files: https://exoguitar.com/part/bridge/string-adjustment-assembly/108662c3-9a42-5360-ae60-b451b80b0c04
💡 Tip: Print on a smooth plate, or sand down the textured side until it is smooth on each piece. The difference in height will make a large fitment difference.
Step 1: Insert 3mm Sleeve Bearing

Step 2: Assemble Adjustment Screw

Step 3: Finish Assembly
Using 3x BT3x8 (it MUST be BT3x8 and not M3x8), attach the sides to each other

ExoGuitar - Bridge - Rocker
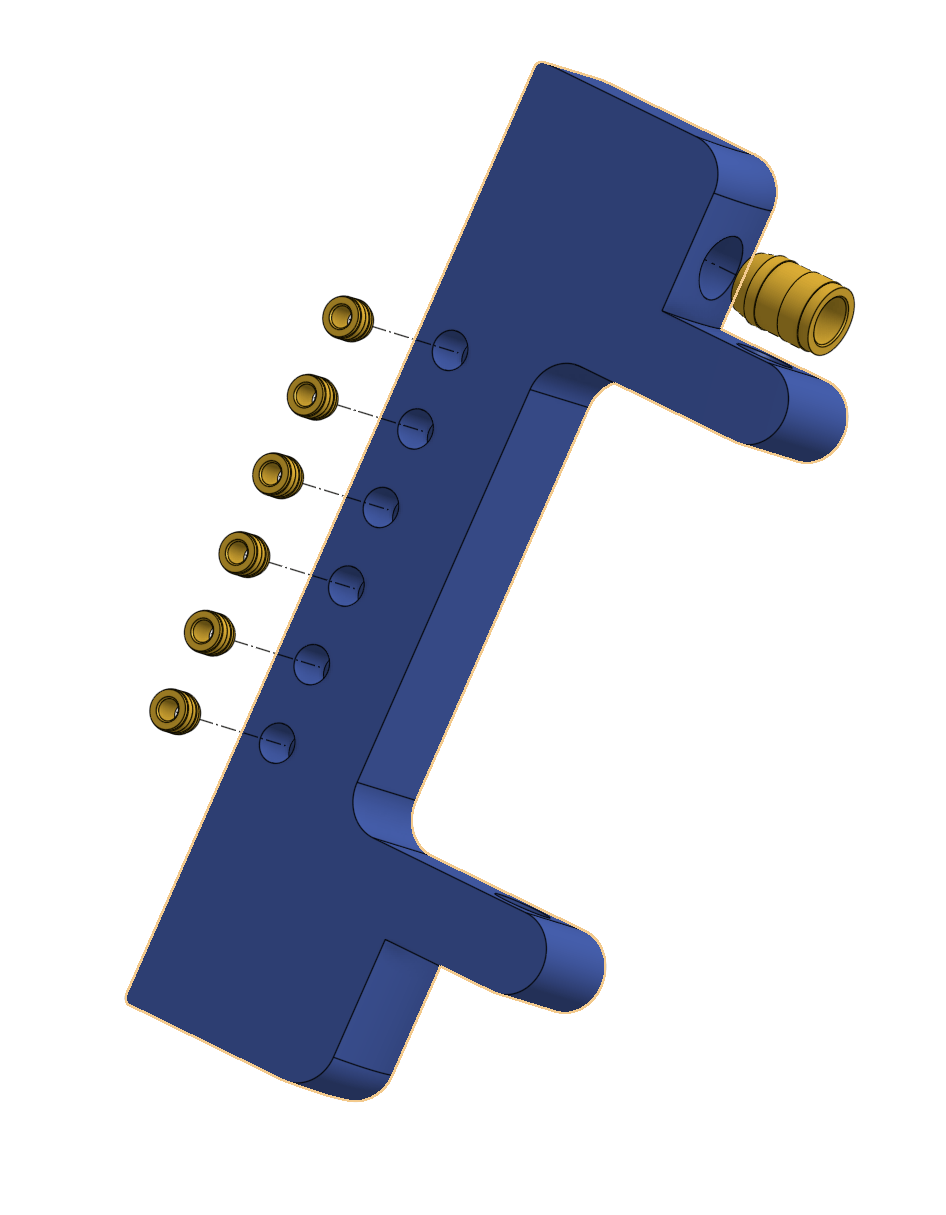
Step 0: Install Heat Set Inserts
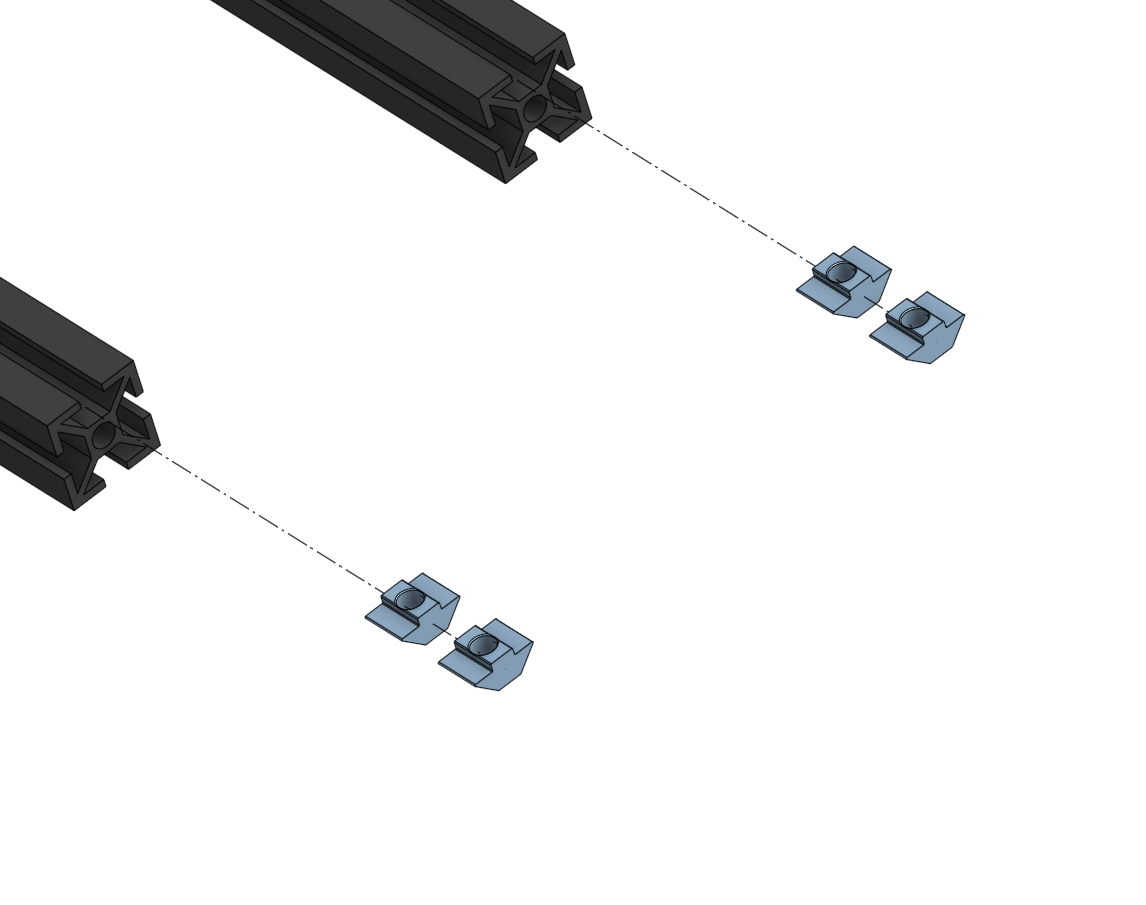
Step 1: Insert M5 Slide In Nuts
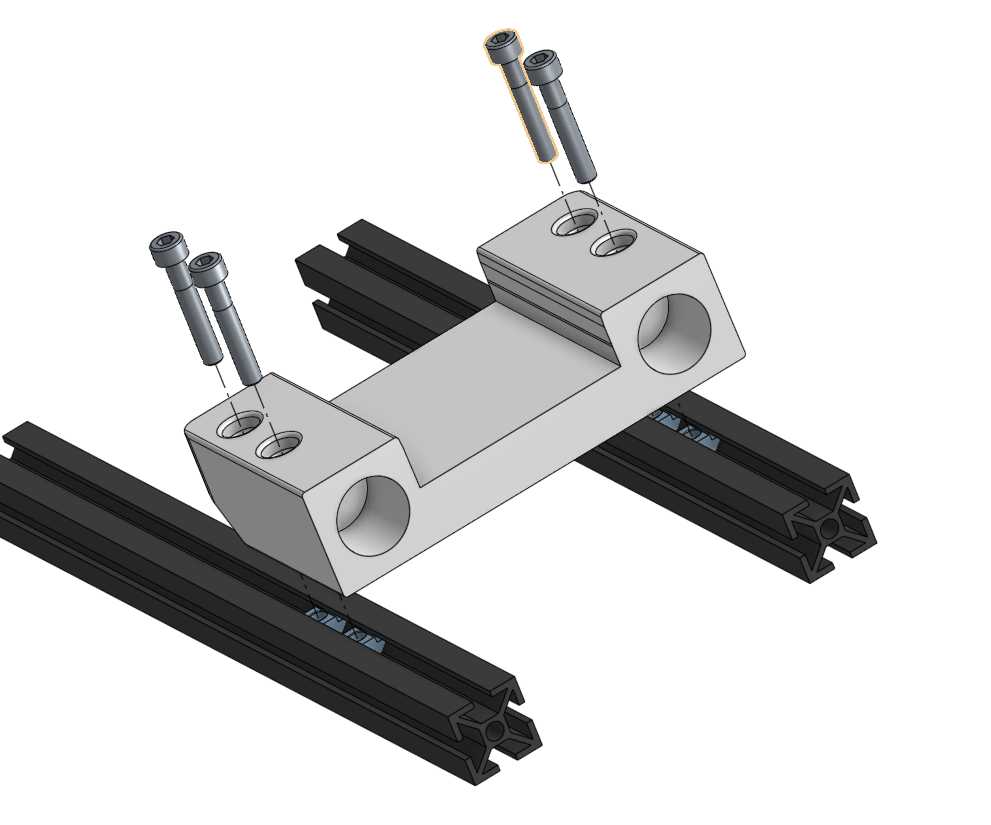
Step 2: Attach Base
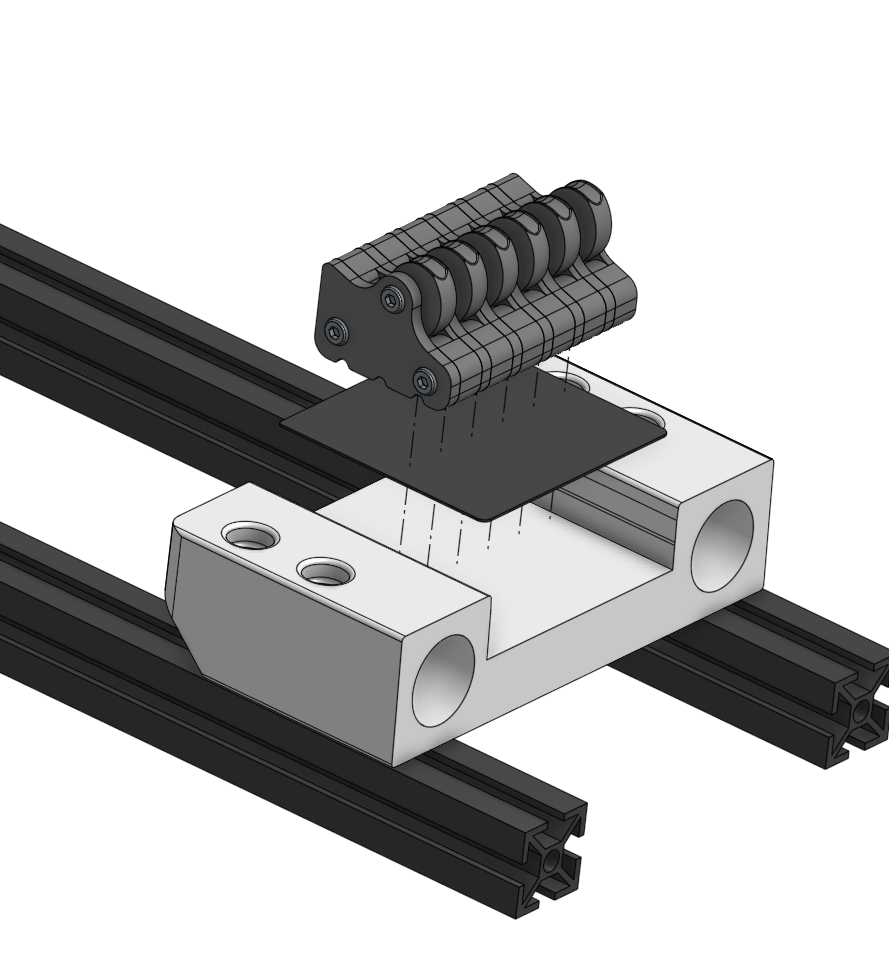
Step 3: Insert Sandpaper and String Adjustment Assemblies
Using the same sandpaper you need to sand your frets, cut out a piece that matches the inside profile of the base and stick it in.
Info: Want a cooler color? Pick up some Grip Tape for skateboards instead! They've got a ton of cool colors and patterns online!
Step 4: Insert Springs
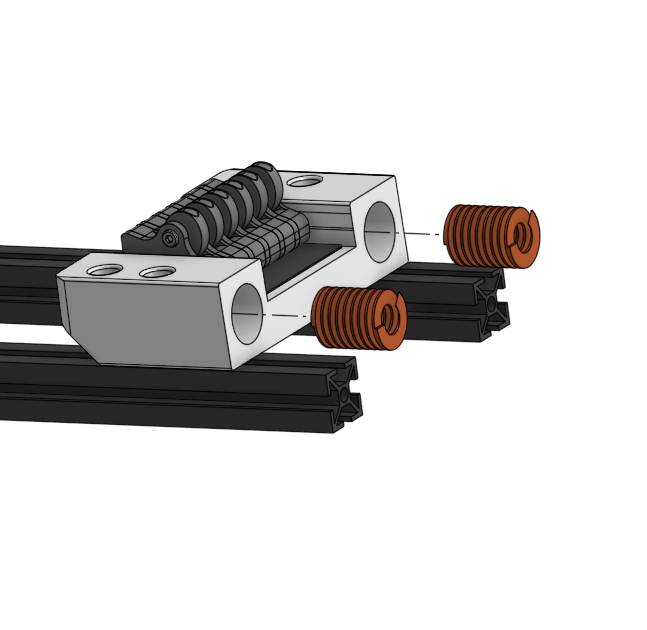
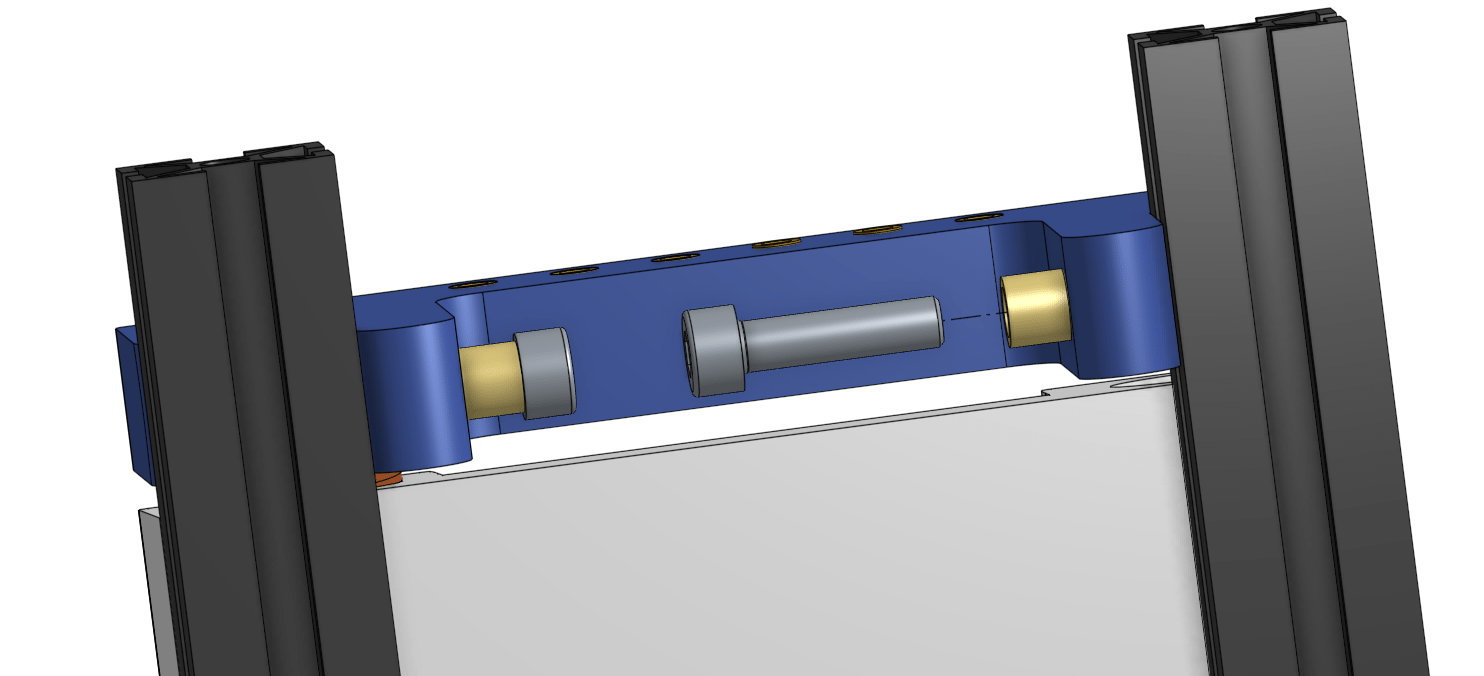
Step 5: Install Rocker
Step 5a: Place Rocker Panel
This should be pressed up flat against the springs without depressing them at rest.
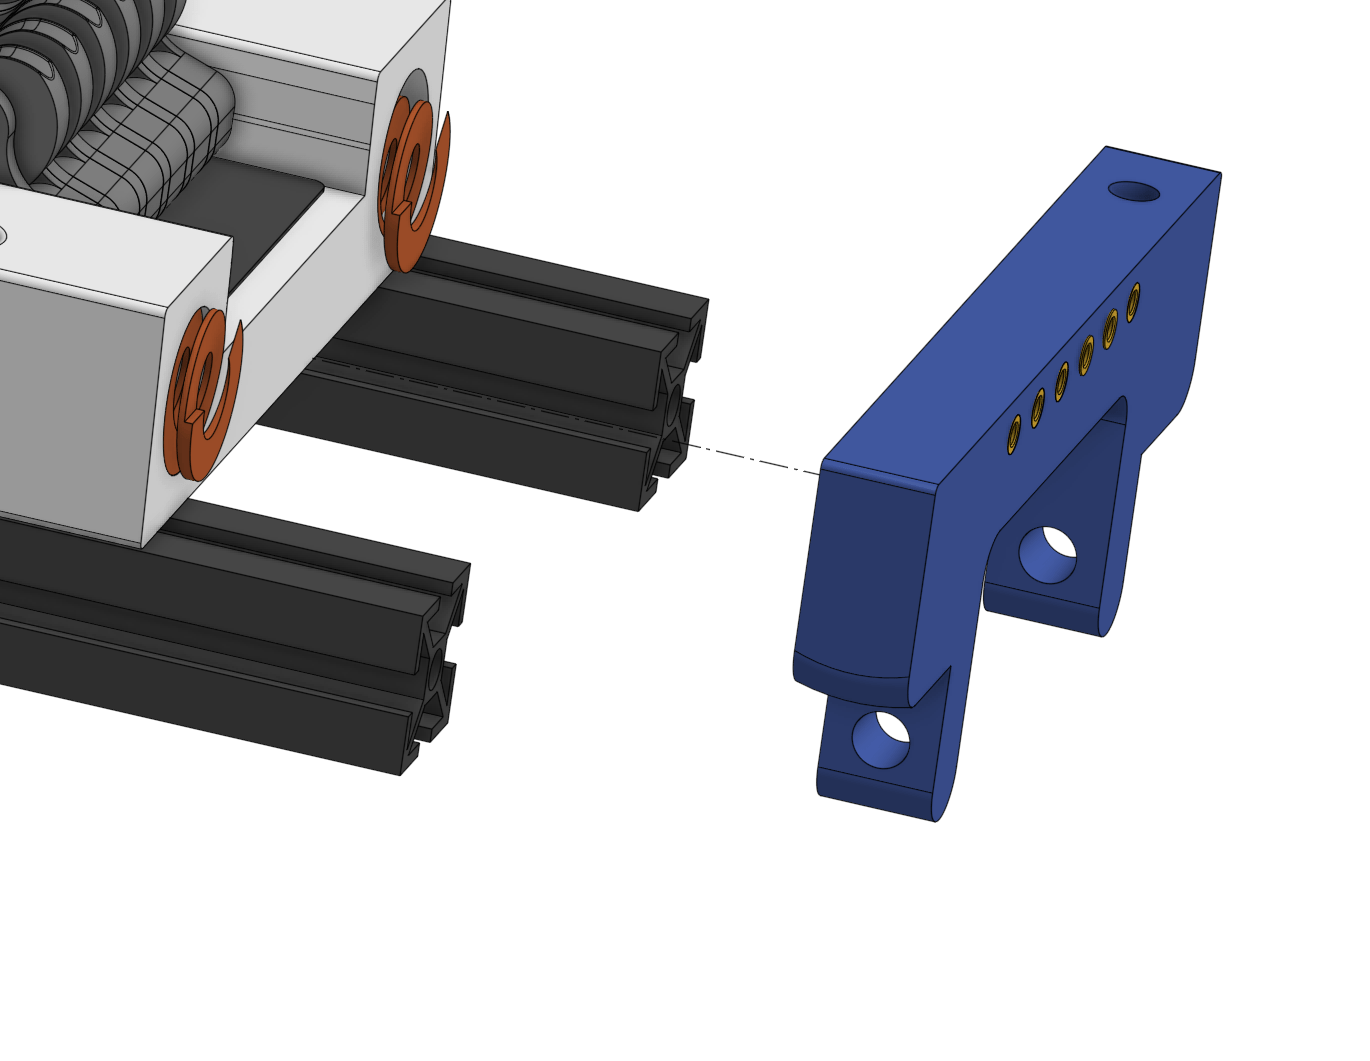
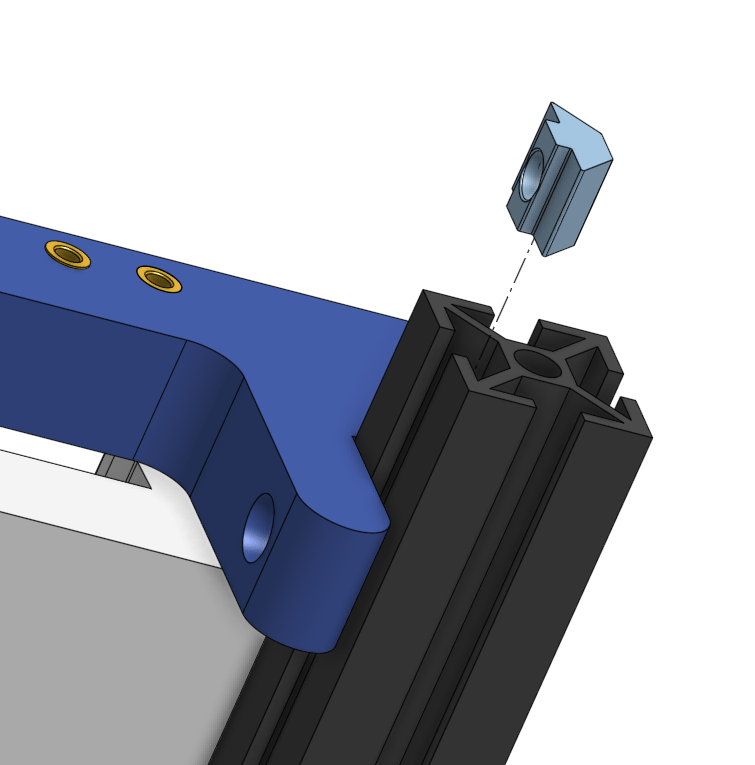
Step 5b: Insert M5 slide in nut
For both sides, insert a M5 Slide in nut facing inwards
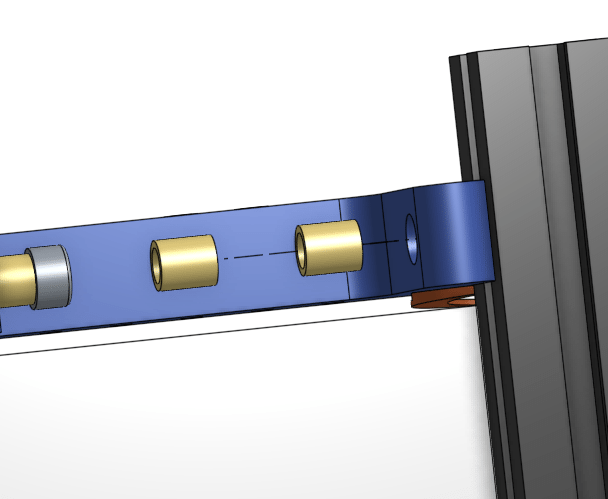
Step 5c: Insert Sleeve Bearings
For both sides, insert 2 5mm ID sleeve bearings. Yes it is supposed to stick out.
Step 5d: Insert Screws
For both sides, insert a M5x20 screw through the sleeve bearings and into the M5 Slide In Nuts you added earlier.
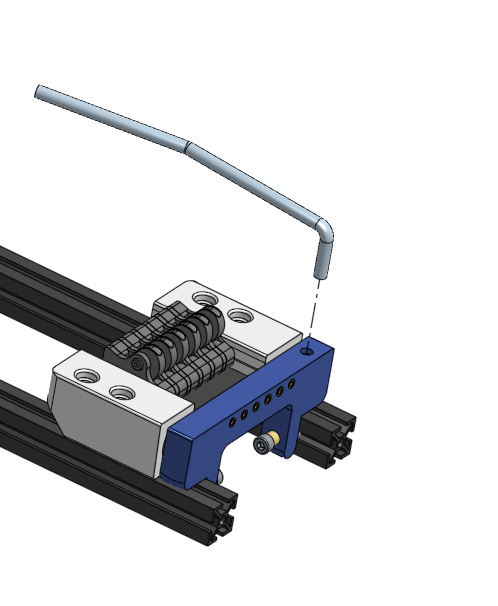
Step 6: Install Whammy Bar
Hardware
DIY Kit
You can order a DIY kit for your entire build from our build planner, the estimate for this part's kit is $26.22 plus shipping.
Self Source
If you want to order the parts yourself, here's a list. Estimated cost: $115.60.
- 4x Screw - Socket Head - M5x30
- 2x Spring - Die - 20x25mm
- 2x Screw - Socket Head - M5x20
- 4x Sleeve Bearing - 5x7x8mm
- 6x Nut - Slide In - M5
- 1x Sandpaper Tape - 2-3/4in - 400 Grit
- 1x Whammy Bar - Guitar
- 1x Grip Tape
- 6x Nut - Square - M3
- 6x Screw - Grub - M3x20
- 18x Screw - Bambu - BT3x8
- 6x Sleeve Bearing - 3x6x5mm
- 12x Screw - Self Tapping - M3x8
- 6x Screw - Button Head - M3x8