
ExoGuitar - Wing Sets - Surfer
Obliczymy ostateczną cenę na podstawie wybranego pliku. Sprawdzisz ją i zaakceptujesz przed płatnością.
Zapisane na tym urządzeniu.

3D printed guitar part — full catalog, build planner, and assembly guides at https://exoguitar.com
- Ocena
- 0 / 5
- Polubienia
- 3
- Pobrania
- 5
- Wydruki
- 0
- Wyświetlenia
- 49
- Oceny
- 0
Aktualizacja u źródła:
Informacje o modelu
- Źródło
- Printables
- Kategoria
- Music
- Licencja
- Creative Commons — Attribution — Noncommercial — Share Alike
Part of the ExoGuitar project — full catalog, build planner, and assembly guides at https://exoguitar.com
Plan Your Build & Get Hardware
ExoGuitar can be confusing! Head over to our build planner to plan your entire build - it'll walk you through every available part and handle compatibility along the way, and it covers all ExoGuitar parts. It's also the best way to get hardware, since it lets you buy everything for a full build in one go, not just this part.
You can find this specific part, ExoGuitar - Wing Sets - Surfer, on our site.
Step 1: Press heat-set inserts (bottom)
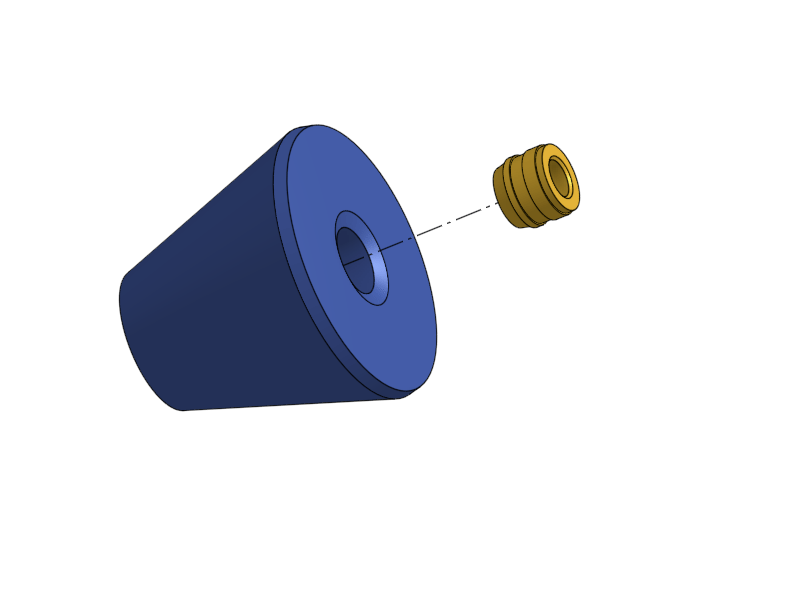
Press the two flanged M3 heat-set inserts from the shared Wing Sets BOM (4.8 mm OD × 4.6 mm long) into the bottom shell as shown. Complete any additional M3 insert pockets called out in the CAD using the standard inserts from the same shared BOM before moving on.
Step 2: Assemble the bottom with BT3 screws
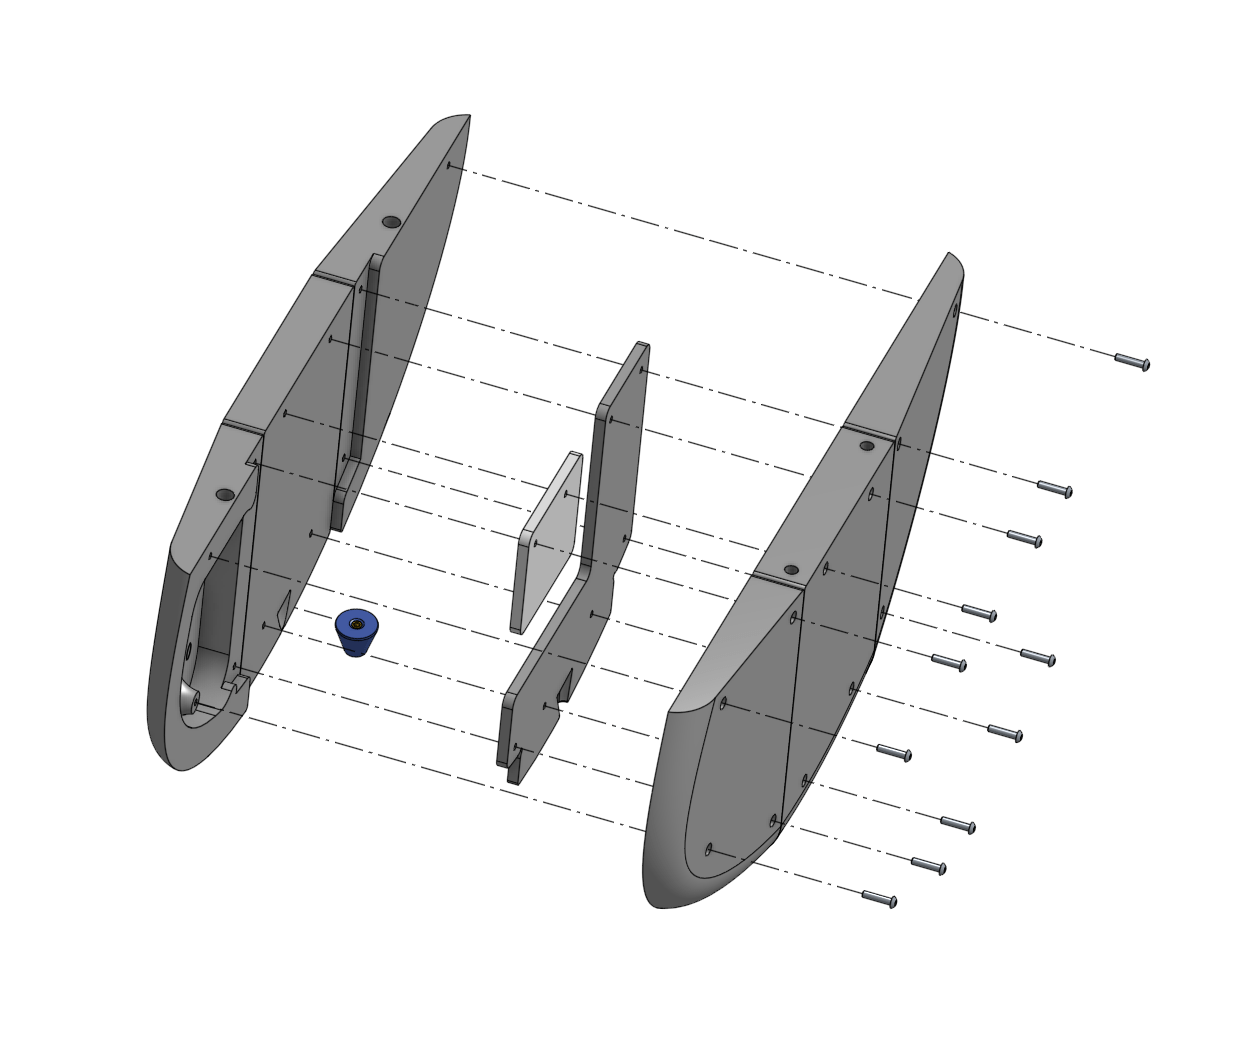
Join the bottom sections using eleven BT3×14 self-tapping screws (see this part’s exoguitar_wing-sets_surfer__bom.txt). Drive them straight; if resistance spikes, back out, clear plastic swarf, and retry so you don’t strip the holes.
Step 3: Attach the sides with M8 rods and glue
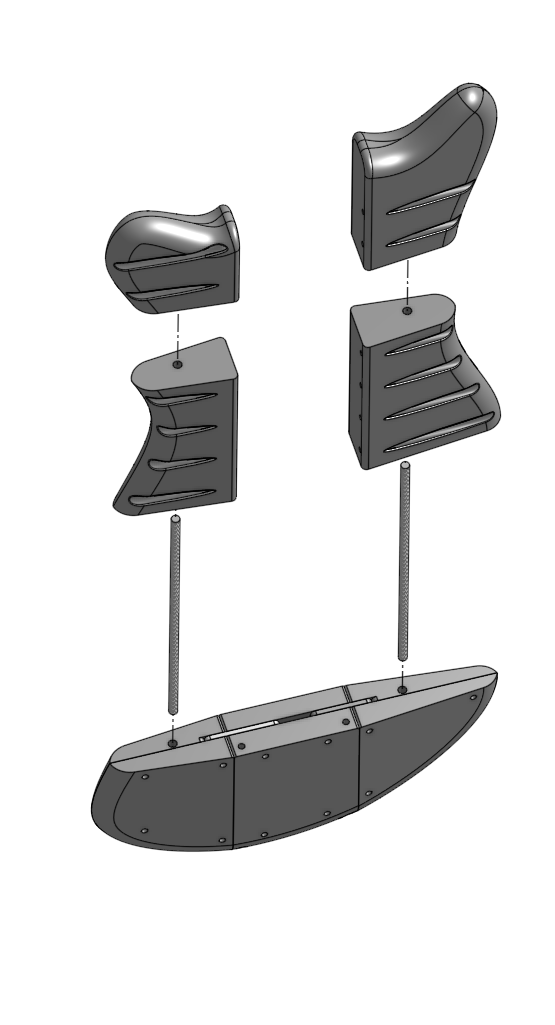
Run two M8×300 mm threaded rods through the side shells to pull everything square against the bottom assembly. Apply a thin bead of CA adhesive in the mating seams where shown, bring the halves together, and use the rods to gently clamp while the glue sets. Remove the rods after cure if your build no longer needs them for alignment.
Step 4: Tap both ends of each 2020 segment
Tap both ends of each aluminum 2020 segment (350 mm left, 300 mm right—see Description.md) for M6, square to the faces, deep enough that the threads fully engage the upcoming M6×16 button-head screws. Deburr the holes and chase threads if chips bind the tap before you mount anything.
Step 5: Mount 2020 extrusion and join the wings
Step 5a: Screw the 2020 rails to the printed cores
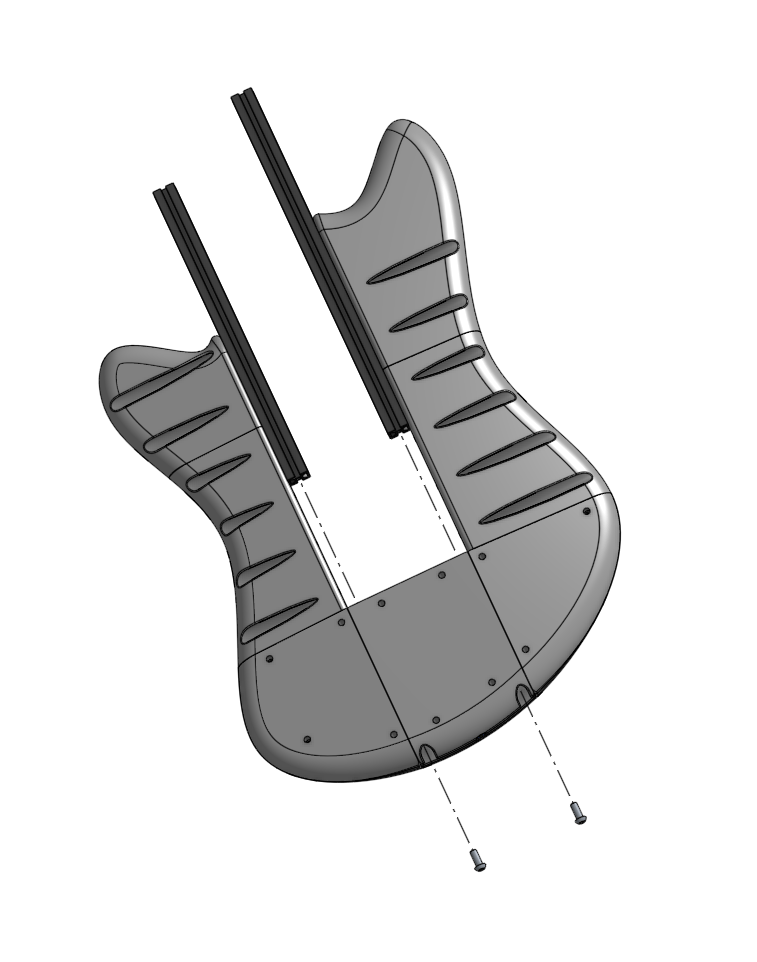
Fasten the 2020 segments to the printed wing cores with two M6×16 button-head screws as shown (one per stack)—they thread into the M6 taps at the rail ends.
Step 5b: Load M5 slide-in nuts
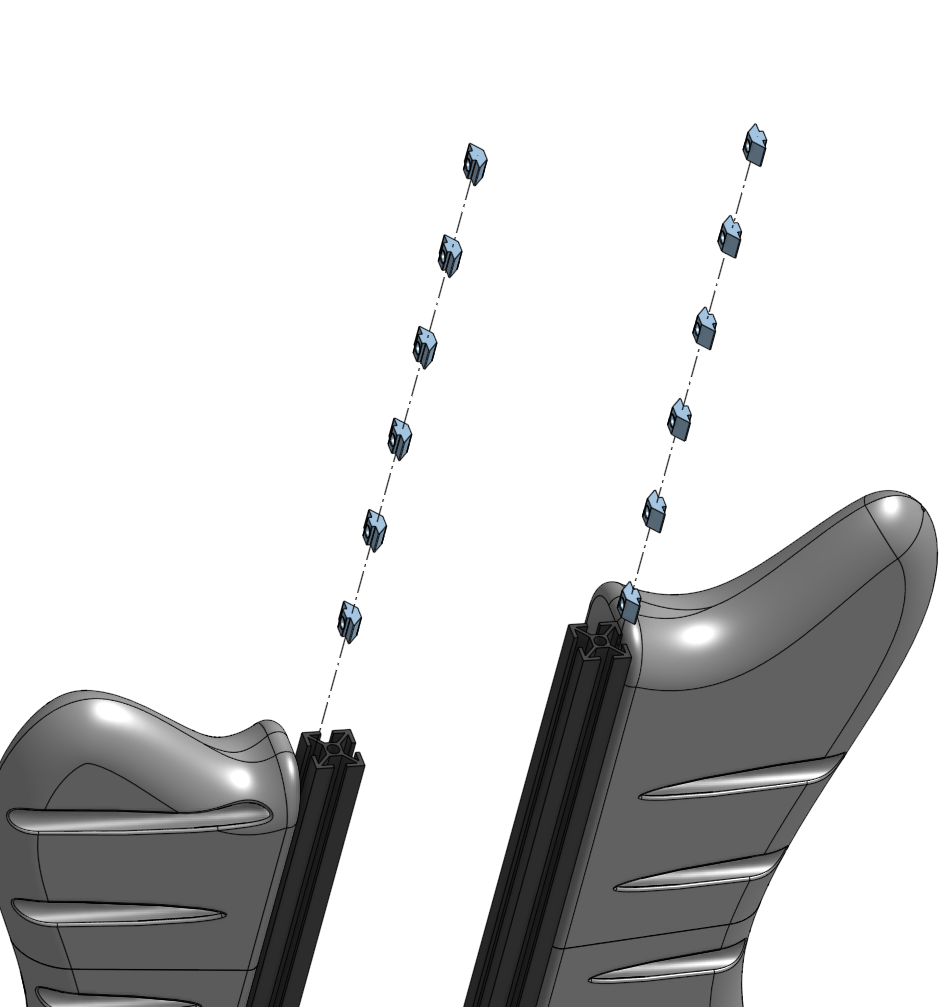
Drop twelve M5 slide-in nuts into the 2020 slots so they line up with the wing-to-extrusion screw holes (hardware from the shared Wing Sets BOM).
Step 5c: Bolt the wings to the 2020
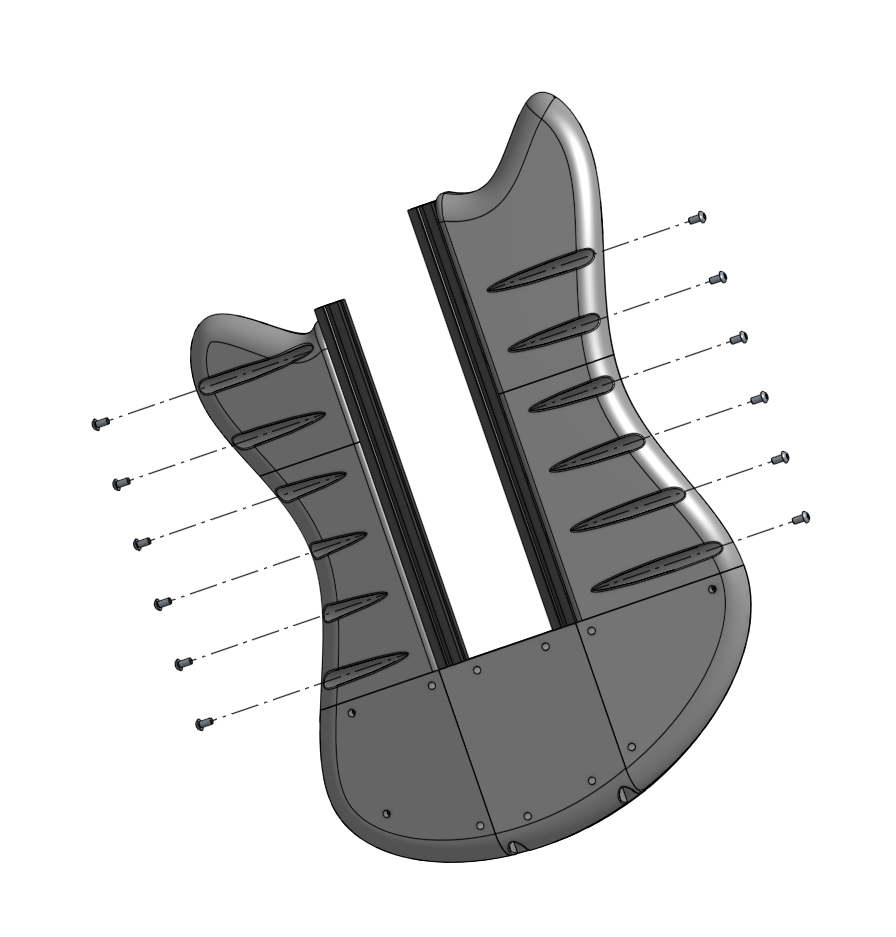
Install twelve M5×10 button-head screws through the printed wings into those slide-in nuts, tightening evenly so the rails seat fully (hardware from the shared Wing Sets BOM).
Hardware
DIY Kit
You can order a DIY kit for your entire build from our build planner, the estimate for this part's kit is $30.52 plus shipping.
Self Source
If you want to order the parts yourself, here's a list. Estimated cost: $109.28.
- 12x Screw - Button Head - M5x10
- 12x Nut - Slide In - M5
- 1x 2020 Aluminum Extrusion - 350mm
- 1x 2020 Aluminum Extrusion - 300mm
- 11x Screw - Bambu - BT3x14
- 2x Threaded Rod - M8 - 300mm
- 2x Screw - Button Head - M6x16
- 1x CA Adhesive - Thin
- 1x Heat Set Insert - M3 - 5mm OD - 4mm L
- 1x Screw - Flat Head - M3x20
- 1x Screw - Bambu - BT3x20
- 2x Strap Buttons
- 1x Jack - Output - Mono 1/4in