
Picamera Photography Rig for a 120 LED Diffused Dome Light for Macro and Reflective Objects
Obliczymy ostateczną cenę na podstawie wybranego pliku. Sprawdzisz ją i zaakceptujesz przed płatnością.
Zapisane na tym urządzeniu.
A Picamera rig for a 120 LED adjustable diffused dome light for shooting either macro or reflective objects
- Ocena
- 0 / 5
- Polubienia
- 5
- Pobrania
- 15
- Wydruki
- 0
- Wyświetlenia
- 895
- Oceny
- 0
Aktualizacja u źródła:
Informacje o modelu
- Źródło
- Printables
- Kategoria
- Photo & Video
- Licencja
- Creative Commons — Attribution — Noncommercial — Share Alike
I needed a way for a Picamera to take pictures of highly reflective surfaces. Conventional lighting created too much glare, so I went with a different solution; a microscope light.
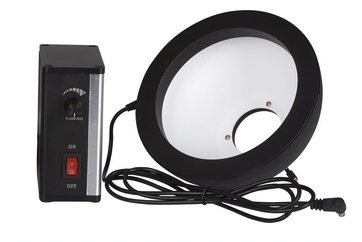
This item is available at this link: https://www.microscope.com/120-led-diffused-dome-ring-light-esd-safe.html
The microscope light allows very precise adjustments to brightness and the LEDs are distributed behind the white diffuser material on the light's interior. This creates a very soft, white light that works well for reflective surfaces. However, I needed a way to marry the Picamera with the light and lift the light above the photographic subject.
Here is a fully assembled version (FYI, this rig was originally built to roll and capture dice rolls for some statistical testing, so the version pictured has a solenoid mount in the center I removed from the included .stl since I assume most people would prefer a flat surface)

Assembly is straightforward;
- Connect the ribbon cable to the Picamera.
- Mount your Picamera to the “'Picamera Mount” disk with a couple of nylon screws and nuts. The mount assembly then fits into the microscope mount at the top of the light. Tighten the screws to hold it all in place.
- Insert the microscope light into the “Dome Light Connector” I split this part out of the models in case someone needed a way to raise or lower the height. You can print different heights of connectors to raise or lower the light without printing the microscope light base again for different applications.
- Place the "Dome Light Connector" with the camera and light into the base with legs.
- The “X” shaped “Support Base” that holds all the legs in place is optional. I needed it as a solenoid was bouncing the entire unit and it was the only way to keep it stable. If you are just photgraphing stationary items, you may not need it.