
Mostly 3D-printed Ultimate Modular Camera & Cellphone Stabilizer System - mounted to standard painting rods
Obliczymy ostateczną cenę na podstawie wybranego pliku. Sprawdzisz ją i zaakceptujesz przed płatnością.
Zapisane na tym urządzeniu.

I present you my mostly 3d printed camera & cellphone stabilizer system, or in short: M3UMCCSS
- Ocena
- 0 / 5
- Polubienia
- 145
- Pobrania
- 280
- Wydruki
- 0
- Wyświetlenia
- 5331
- Oceny
- 0
Aktualizacja u źródła:
Informacje o modelu
- Źródło
- Printables
- Kategoria
- Tools
- Licencja
- Creative Commons — Attribution — Noncommercial
Mostly 3D-printed Ultimate Modular Camera & Cellphone Stabilizer System
mounted to standard sized painting poles - PET bottle as counterweight
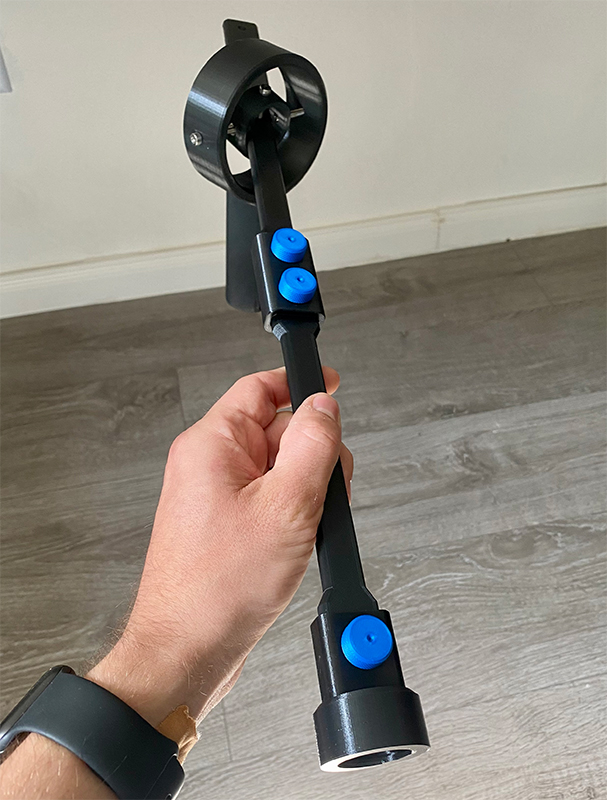
This is my mostly 3d printed stabilizer system. You can use it with cameras or cellphone (landscape and sideways). You can use a PET bottle as counterweight (its advised to fill the bottle all the way to the top). Note that the system won‘t stabilize movements in the Z direction (up and down movements).
There is only few additional hardware needed:
- 2x M4x30 screw
- 2x M4x18 screw
- 2x M4 nut
- 1x rubber band
- ¼ in to ¼ in male adapter like this (only needed for camera mount)

If you don't need the pole mount and use the additional handle instead, you need two more M4x18 screws instead of the M4x30 screws.
You can connect the whole thing to standard sized painting poles like this one, just push it on so it will hold up.
Assembly:
- Press in the two M4 nuts to the inner ring.
- Take the main axis and connect the inner ring to it. Use the 3d printed threads. Make sure that the parts can move freely after tightening.
- Take the Paintpole Adapter Ring (or additionaly the handle) and mount it to the inner ring using the two M30 screws. Tighten firmly and make sure that the parts can move freely.
- Screw the PET Bottle Mount to your bottle.
- Use the extending rod and connector and mount it to the main axis. Connect it with the blue pins. If you are using lower weighted cameras like a GoPro, you may not need the extender at all. May also play around with different weighted PET bottles to balance everything just right for your setup (always fill the bottle all the way to the top though!)

Assembly Cellphone Mount:
- Take the Cover and Baseplate Cellphone Mount and use the 3d-printed sunk screw to mount them together.
- Slide in the ‘Slider Cellphone Mount’ and use the 3D-printed screw to put them together using a printed screw.
- Apply the rubber band to the mounting points (use can use one of the two left mounting poinst depending on your desired tension).
- Mount it into the cavity on the main axis top (either sideways or straight for landscape or sideways mode). Connect it using two (or one in sideways mode) screws.

Assembly Camera Mount:
- Screw in the ¼ to ¼ male adapter to the Camera Mount.
- Mount the Camera Mount to the main axis using a 3D printed screw.
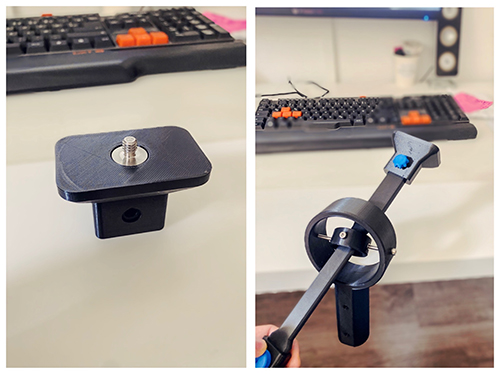
I tested everything successfully with PLA, I would advise PETG or stronger materials though.
I will keep on working on this project so stay tuned for updates.
Here's a video of the thing in action and here you will find the stabilized shot.
Here's also a longer stabilized shot (note that I moved around there a bit, the up and down movements are my footsteps).
Happy printing!
NK