
HeliCube
Obliczymy ostateczną cenę na podstawie wybranego pliku. Sprawdzisz ją i zaakceptujesz przed płatnością.
Zapisane na tym urządzeniu.

A mechanical art/sculpture/fidget cube made of 16 helical gears
- Ocena
- 0 / 5
- Polubienia
- 173
- Pobrania
- 252
- Wydruki
- 0
- Wyświetlenia
- 3072
- Oceny
- 0
Aktualizacja u źródła:
Informacje o modelu
- Źródło
- Printables
- Kategoria
- Sculptures
- Licencja
- Creative Commons — Attribution — Share Alike
Introduction to HeliCube; geared cube made of helical gears!
I've always loved how 45° helical gears locked together perpendicularly. So I made a cube out of them. There are 16 gears and they are all connected, so when you spin one of them, they all start rotating!
Apart from printed pieces I used 5mm rods that I had laying around to hold everything together as well as some cyanoacrylate glue.
Sorry that there will be no photos of assembly, but I glued everything together before thinking about making a tutorial :/
Please note that for me everything apart base was modelled and printed for tight fit, if you have to use glue feel free to. Just be careful not to glue the gears!
If you don't want to play with cutting 5mm rods you can of course print them:
- 12x 34mm
- 2x 26mm
- 1x 58mm
Their length isn't that important, but make sure that they are 5mm in diameter.
So! Assembly:
- Prepare 5mm rods for edge gears (12 x 34mm)
Note that the length of rods can be smaller, I cut mine quite imprecisely (30-36mm) - Get pairs of corners and one gear and make four of these:

Make sure that every gear can freely move! - Now stick two rods into one part you just made and slide the other with two more gears to get this:

- Repeat step 3. to get second half of the cube
- Stick four rods into the “bottom” half of the cube and insert four gears onto their shafts:

- Before putting on “top” half insert mainbody (it should just lie in there):

- Insert “top” half of the cube:

- Now you'll have to mount four central gears. To accomplish that you'll need one 58mm rod and two 26mm rods. Insert rods into the mainbody's holes, and then gears accordingly. Use endcaps to prevent gears from sliding from their shafts.
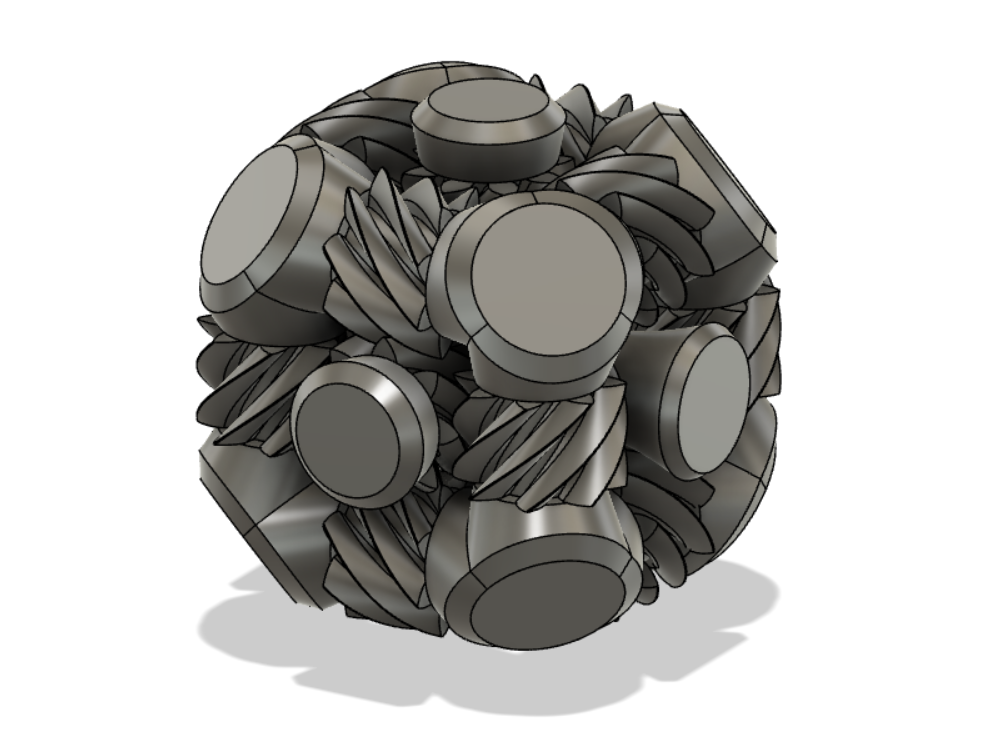
- You now might think that the cube is done, but you have one piece left, and the cube feels shakey. That's because there is nothing holding mainbody and corners together! This problem can be resolved by stylish base that is glued to one corner, two endcaps and one end of mainbody. This solution makes HeliCube very sturdy and allows for nice display.


It looks kind of like a lightbulb in my opinion and can make a beautiful Christmas Tree ornament if hanged upside down.
Initially movement of the gears may be hard, as the printer lines are perpendicular to each other and can block one another, but after some use the rotation is very smooth and calming.
As for the print settings I use: 0.6mm nozzle, 0.2mm layer height, 3 perimeters, 15% infill and no supports for this one. I printed gears in raft as it helps keep the teeth down on initial layers.
That would be all folks! Should you have any questions, I would be happy to answer them in the comments. Upload your makes, comment your thoughts, maybe remix it into something even better, and most importantly HAVE FUN!!!
DISCLAIMER: If this concept was already published somewhere, I am unaware of it. I do not own this concept.