
AUTOMATIC TRANSMISSION, DOUBLE PLANETARY GEARSET, RAVIGNEAUX
Obliczymy ostateczną cenę na podstawie wybranego pliku. Sprawdzisz ją i zaakceptujesz przed płatnością.
Zapisane na tym urządzeniu.
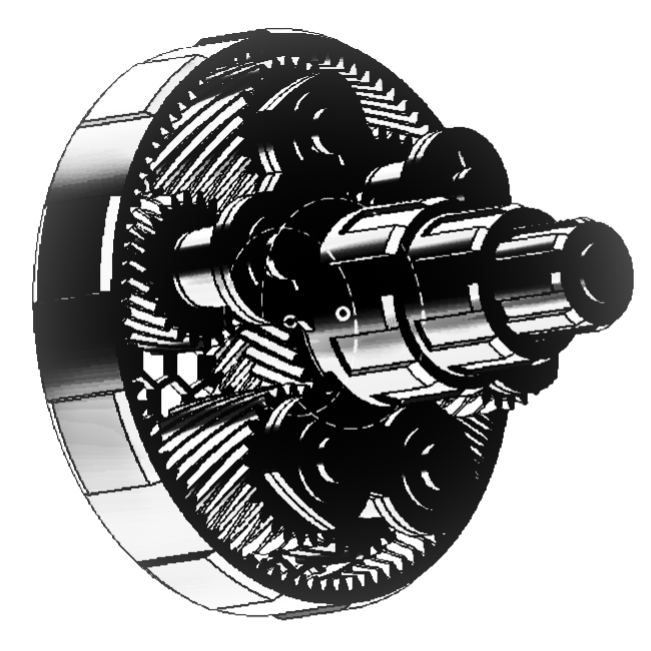
I want to implement automatic transmission on my own RC car, so I created this gearset
- Ocena
- 5 / 5
- Polubienia
- 59
- Pobrania
- 254
- Wydruki
- 3
- Wyświetlenia
- 2733
- Oceny
- 2
Aktualizacja u źródła:
Informacje o modelu
- Źródło
- Printables
- Kategoria
- Mechanical Parts
- Licencja
- Creative Commons — Attribution — Noncommercial
3D MODEL DESCRIPTION
I want to implement automatic transmission on my own RC car, so I created this gearset, just better visuallization and learn how it's work.
I included f3d project file, It's not good organising, I've just started Fusion360 for a couple of months, so there is a lot to learn.
Why I design that use the layer height at 0.16, longer time printing? I just want to test if it could work for real project - my RC car, need to transfer torque effectively, so I try to make it low clearance. There still room for improvements, I will continue update more.
Output: Ring
Ratio:
- Neutral: drive any shaft without lock
- 1st (2.84): drive Small Sun - lock Planet Carrier
- 2nd (1.55): drive Small Sun - lock Large Sun
- 3rd (1.00): drive any two of (small sun, large sun, planet carrier) or directly to the ring
- 4th (0.70): drive Planet Carrier - lock Large Sun
- Reverse (-2.32): Drive Large Sun - lock Planet carrier
Assembling video: link
Print:
1. Clip x 7 ( 4 still alright- 3 on planet carrier and 1 on shaft)
2. Small Washer x 14
3. Planetary_3 x 3
4. Long pinion x 3
5. Short pinion x 3
6. Other files x 1
3D PRINTING SETTINGS
Printer: Creality Ender 2 Pro
Filament: Esun PLA+ glossy black
Layer Height: 0.12 - 0.16 (I use 0.16)
Bed temp: 70 degree ( I use on initial (first) layer only)
Print temp: 215 degree
Cooling fan: No
Print speed: 50mm/s
Supports: No - just put the flat face to bottom
Printing time: about 19hrs
Just the config that I use, you may change if needed.
Note
Please calibrate your printer to prevent "elephant foot" - the first layer got expanding, may cause difficulty in part assembling and it's movement. I calibrate by just using notebook paper and make sure the nozzle barely touched the paper, no compress force on it.
I used 70 degree heated bed to make sure first layer stick well to the bed. Be careful, if the nozzle to high then the print will be messy.
This print need precision, so I use 0.16 layer height, you could try higher value but I'm not sure that parts will fit together as I expect