
E3D-Buggy Mini 4WD
Obliczymy ostateczną cenę na podstawie wybranego pliku. Sprawdzisz ją i zaakceptujesz przed płatnością.
Zapisane na tym urządzeniu.

Fantastic E3d-Buggy Mini4WD version with led lights
- Ocena
- 0 / 5
- Polubienia
- 19
- Pobrania
- 36
- Wydruki
- 0
- Wyświetlenia
- 695
- Oceny
- 0
Aktualizacja u źródła:
Informacje o modelu
- Źródło
- Printables
- Kategoria
- Vehicles
- Licencja
- Creative Commons — Attribution — Noncommercial
Fantastic E3d-Buggy Mini4WD version with led lights
Here's how to transform the fantastic E3D-buggy into a Mini4WD using the components of a mini 4wd. There are 2 different models, one with a rear rack and one without, both are designed for the insertion of led diodes if desired.
PRINTING INSTRUCTIONS:
- MATERIAL: PLA AND FOR THE LIGHT COVERS, A TRANSPARENT PLA IS BETTER
- LAYER HEIGHT: 0,2
- INFILL: 10%
- SUPPORT: YES
I RECOMMEND MANUAL SUPPORTS ONLY IN THE POINTS SHOWN IN THE PHOTOS, BECAUSE IT IS A STRESS TEST THE BRIDGES DO NOT NEED TO BE SUPPORTED
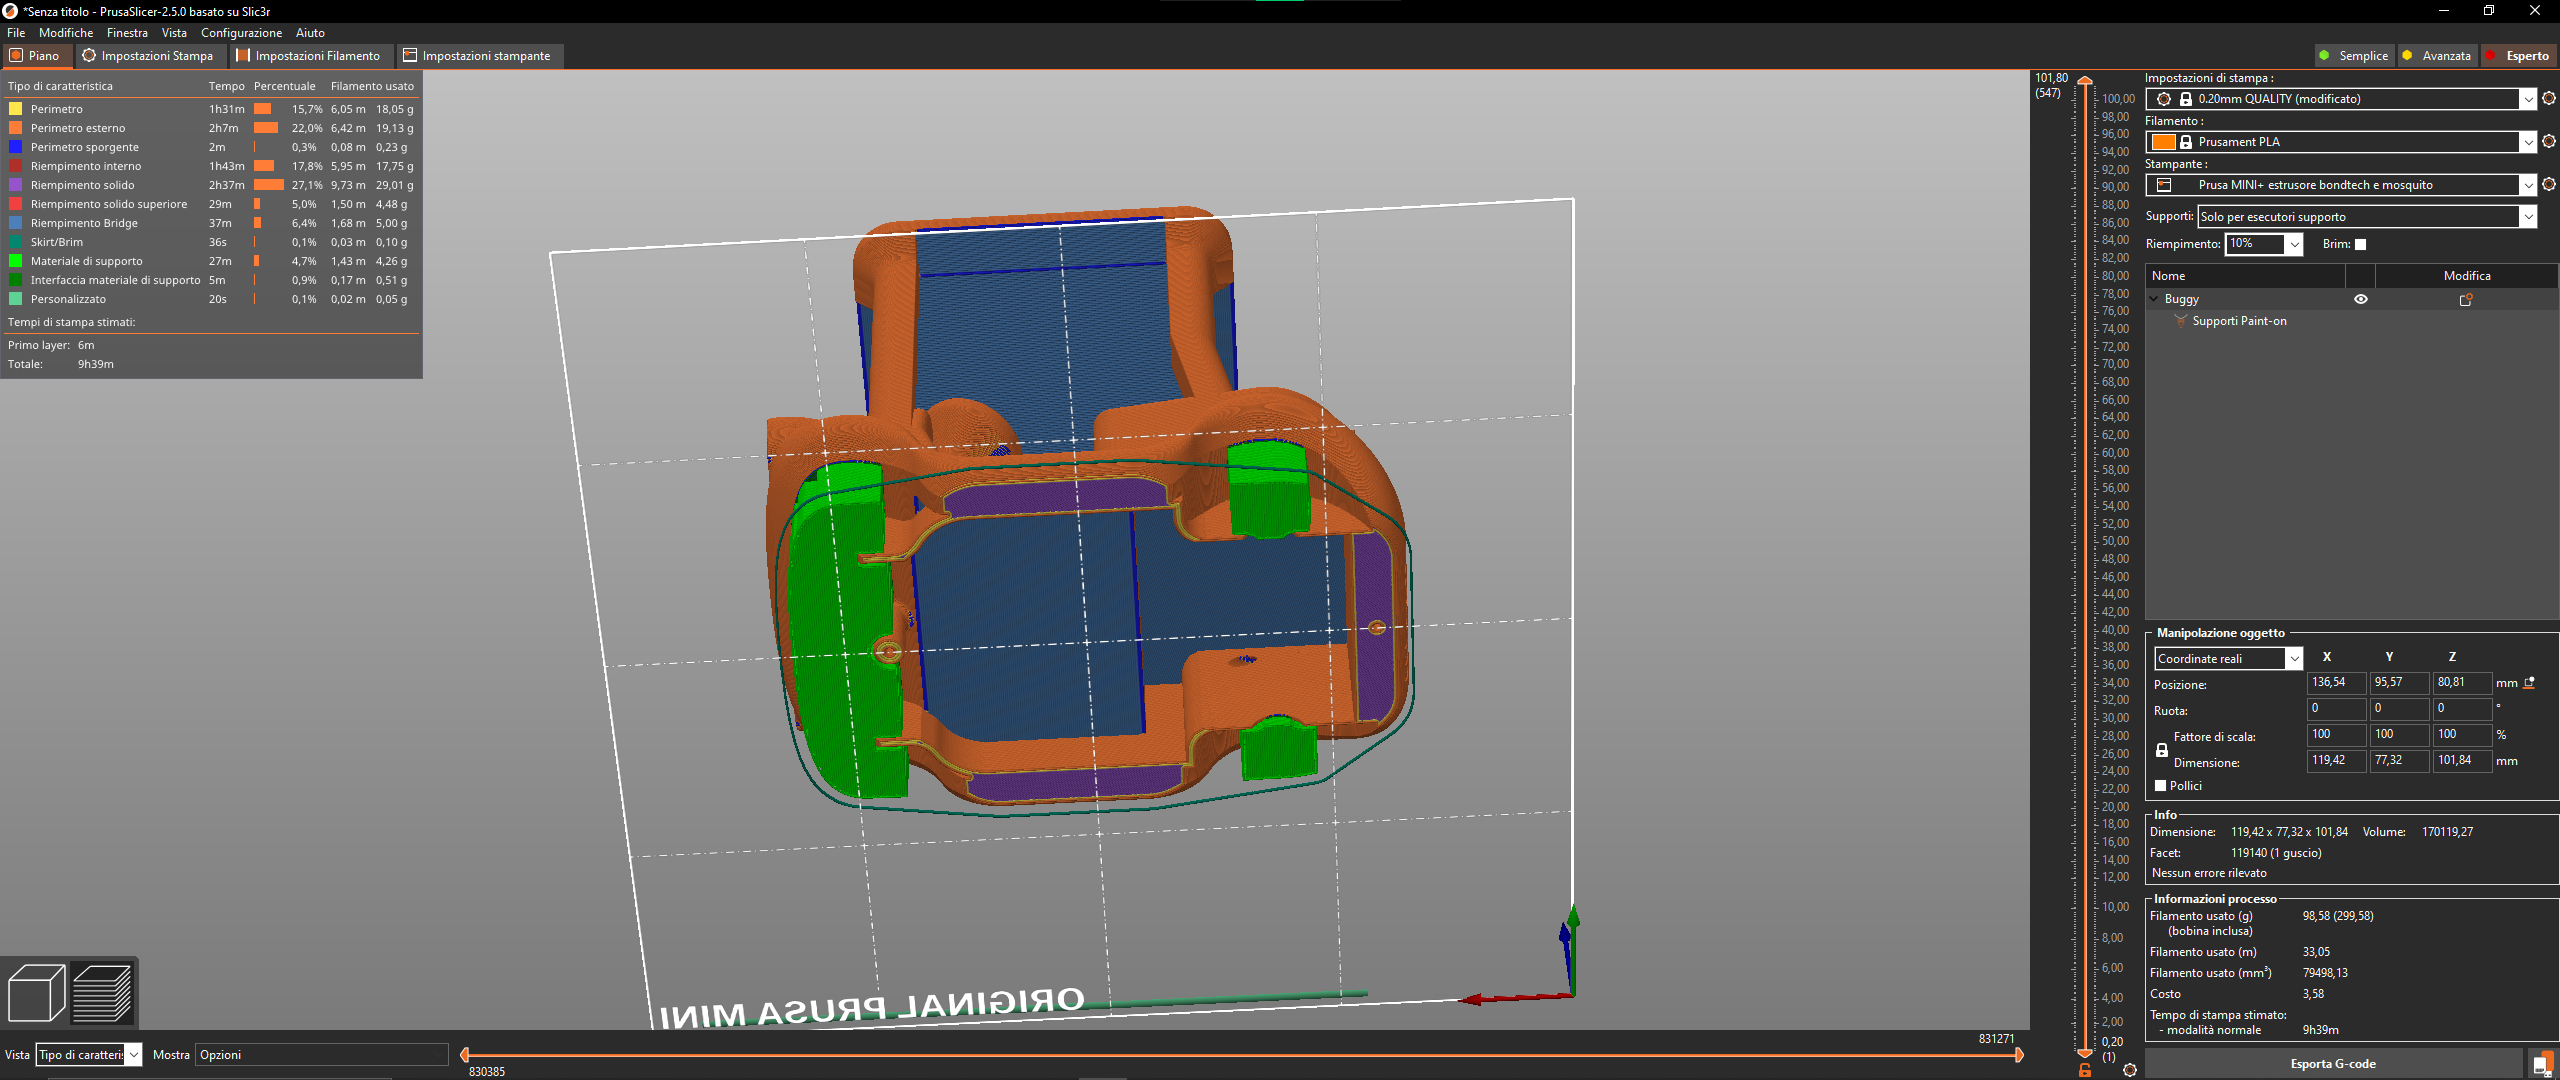
THE SUPPORTS MUST BE PUT ONLY IN THE E3D BUGGY, IN THE CHASSIS AND THE ENGINE SUPPORT IS NOT NEEDED
PRINT THE REST OF THE COMPONENTS POSITIONED AS IN THE PHOTO


REQUIRED COMPONENTS:
If you already own a mini 4wd you will only need a few components, otherwise you will need to buy one for yourself

- Slide switch : https://amzn.eu/d/fBQIOYc

- AAA battery holder : https://amzn.eu/d/3nkG9FD

- 3V led diode ( optional )

- 0.5mm enamelled copper wire for led ( optional ) : https://amzn.eu/d/dWc3kdH

- 6 screws 2x6 and 1 x 2x8 screw

Components to be taken from a mini4wd :
- 2 wheel axles

- gears and pivot

- wheel axle washers

- motor

ASSEMBLY INSTRUCTIONS:
We prepare the engine mount

take the larger engine mount and gear pin
insert the pin with the help of pliers in the engine support, the pin must be inserted all the way down
take the 2x8 screw and the joint pin and screw it to the motor mount


now let's take the engine and the second engine mount

insert the motor in the hole prepared in the first motor support then insert the second support in the rear part of the motor (the motor contacts must be facing upwards) and finally fix everything with a 2x6 screw
we insert the gear into the pin as shown
in the photo.

Let's move on to the chassis: let's take the chassis and the wheel axle washers

fit the plastic washers into the


appropriate holes on the frame
insert the bushings in the rear axle


place the largest gear in the rear right part of the
frame (pay attention to position it as in the photo)

place the 4x4 transmission gear on the left side of the frame as shown in the photo

take the motor with the support and fit it in its seat, making sure that the gears do not move

insert the rear axle making sure that the 2 gears remain in their position and placing the 2 bushings one on each side so that they fit into the 2 washers


Fix it to the frame with the 3 2x6 screws

Now let's move on to the front axle

position the second drive gear as shown

repeat the same procedure for the rear axle


take the transmission axis and insert it as indicated in the image, blocking it with the appropriate blocks that you have printed


Lock trasmission bar

snap the two blocks into their pins


LET'S GO TO THE ELECTRICAL PART

TAKE THE BATTERY HOLDER AND POSITION IT SO THAT IT FITS INTO THE PINS PRESENT ON THE BOTTOM OF THE CHASSIS, THEN HEAT THE TIP OF A SCREWDRIVER OR A SCREW AND SQUEEZE THE TWO PINS TO DISSOLVE THEM TO LOCK THE BATTERY HOLDER


MOMENTARILY PLACE THE SWITCH IN ITS PLACE AND CUT THE POSITIVE (RED) CABLE, IT WILL BE SOLDERED INTO THE CENTRAL PIN OF THE SWITCH. WITH THE REMAINING CABLE JUST CUT, WELD IT INTO ONE OF THE 2 REMAINING PINS AND THE OTHER END MUST BE WELDED TO THE ENGINE PIN (TEST BEFORE WELDING THE CABLES TO THE ENGINE SO IT RUNS IN THE RIGHT DIRECTION). RUN THE BLACK LEAD UNDER THE ENGINE AND THEN SOLDER THAT TOO.

REPEAT THE SAME PROCEDURE TO FIX THE SWITCH TO THE FRAME
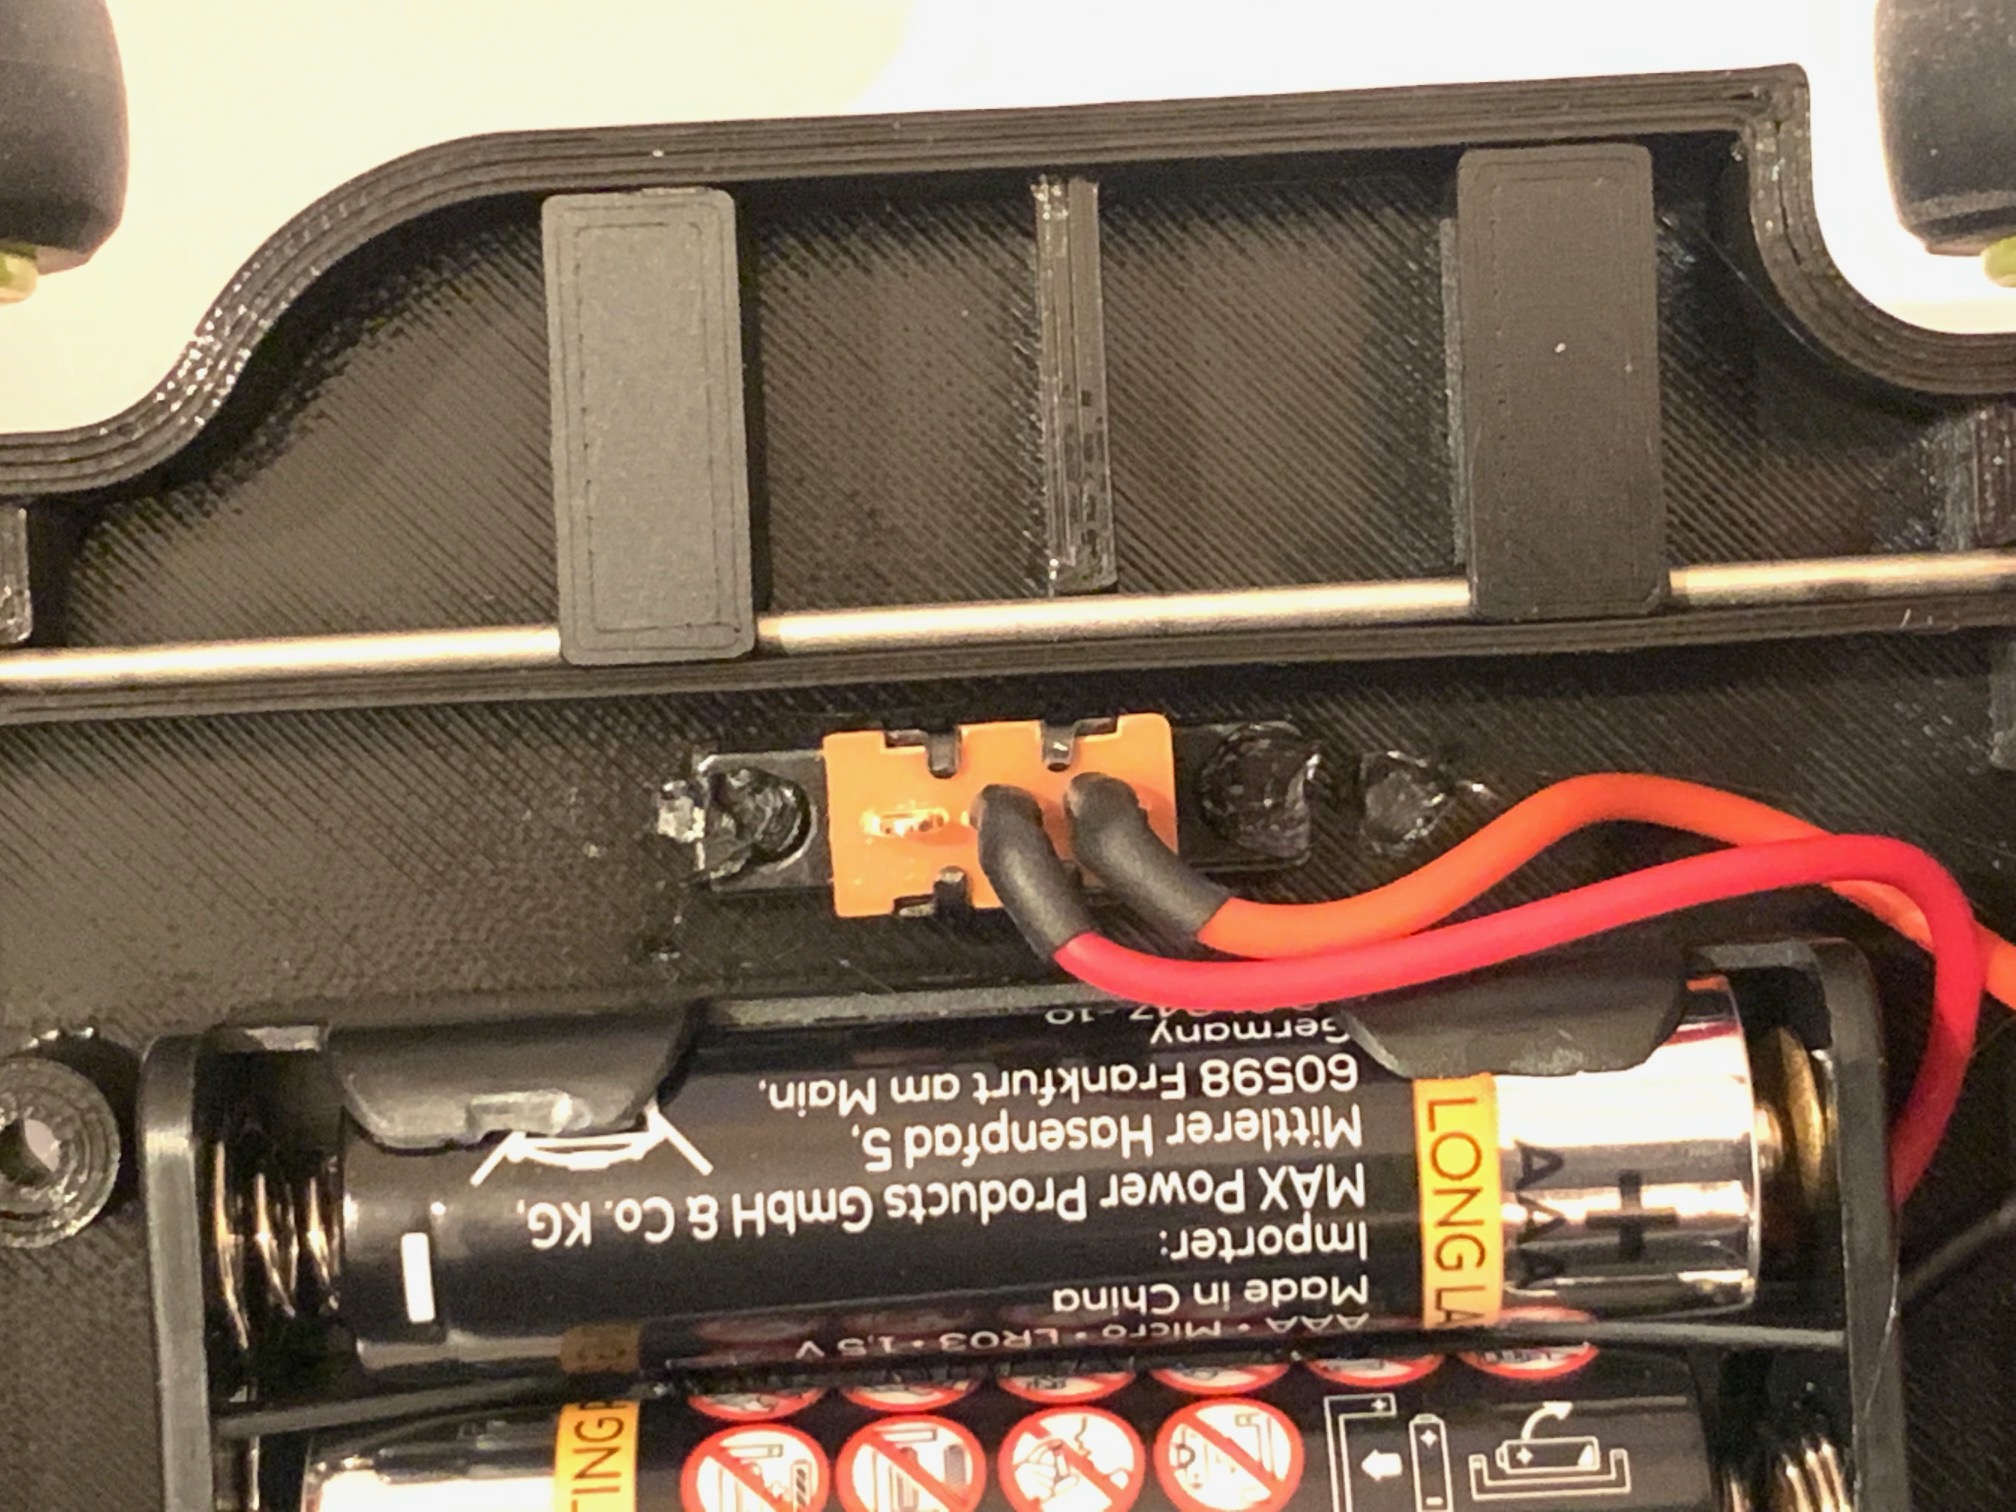
NOW WITH THE REMAINING SCREWS FIX THE CHASSIS TO THE BUGGY


I RECOMMEND THE LED LIGHTING PART TO THOSE WHO ARE MORE EXPERTS
AT THE END IT'S TIME TO START RUNNING AFTER YOUR BUGGY AND TO HAVE FUN WITH FRIENDS IN ACCELLER RACES.
ENJOY CHANGING THE VARIOUS ENGINES WITH MORE POWERFUL OTHERS AND CREATING ALL THE MODELS OF RIMS AND WHEELS YOU WANT, ACCESSORIES ETC.. HAPPY PRINTING

