
Gaggiuino Optocoupler Case
Obliczymy ostateczną cenę na podstawie wybranego pliku. Sprawdzisz ją i zaakceptujesz przed płatnością.
Zapisane na tym urządzeniu.

Small case for the optocoupler used in the Arduino Nano build of the Gaggiuino project.
- Ocena
- 5 / 5
- Polubienia
- 40
- Pobrania
- 355
- Wydruki
- 2
- Wyświetlenia
- 3813
- Oceny
- 1
Aktualizacja u źródła:
Informacje o modelu
- Źródło
- Printables
- Kategoria
- Kitchen
- Licencja
- Creative Commons — Attribution — Noncommercial — Share Alike
This purpose of this optocoupler case is to provide an easy upgrade path for those who want to start with the Arduino Gaggiuino build in a Gaggia Classic and then upgrade to the STM32 Blackpill.
Print this case for use with an Arduino Nano build in the Gaggiuino STM32 Internal Component Housing.
Parts:
Recommended Print Settings:
PETG, 0.2 layer height, 2-3 wall lines, 235 C nozzle, 80 C bed, 80 degree support overhang angle (see image recommended supports). Infill 20% is fine, use gyroid pattern to avoid getting your nozzle dirty. No need to use adaptive layers.
Optocoupler Installation:
To insert the optocoupler, slide onto the rails from the end. You may need to lift as you insert the optocoupler depending on how high the solder tails are. 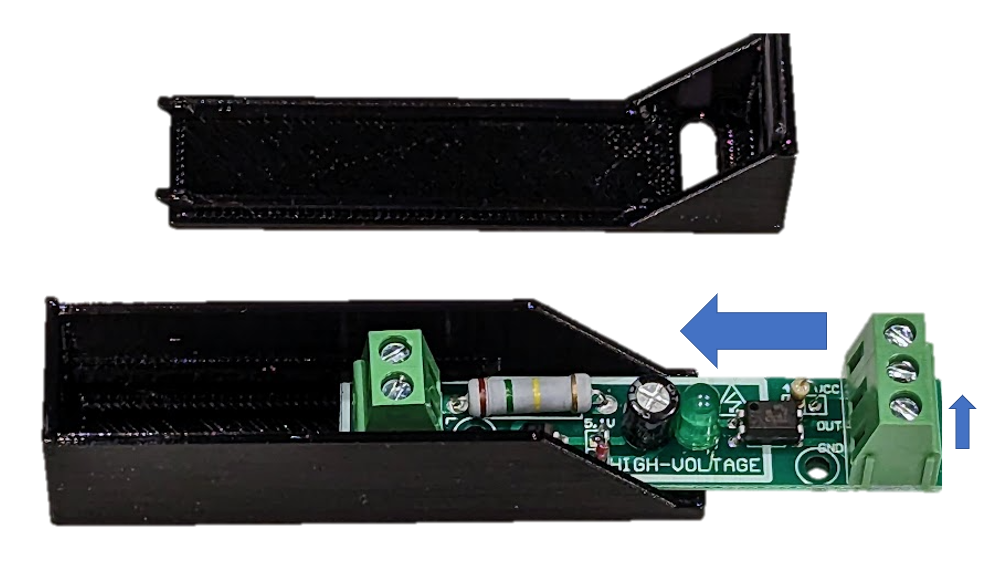
Order of operations matters:
- Connect the high voltage lines
- close the top cover
- then connect the low voltage lines using the screwdriver access through the top cover.
Quick Note:
This design is ready to jump off of a 3D printer and into your espresso machine (with a bit of help from you). If this is your first exposure to Printables I'd like to encourage you to make an account, like & download the Gaggiuino models to increase the project's visibility, and check out the great Printables community!